I’m always on the lookout for fun holiday projects in keeping with the Thrive Philosophy:
No money. No shopping. No problem.
And just in time for Halloween, check out these frightfully cute lanterns!
Perfect for adding some whimsy to your mantel, piano or shelf …
… and rocking out a mitten tree until the snow starts to fall …
… and especially for keeping your little monsters safe and easy to spot on Halloween night!
Ready to make your own?
(and a battery-operated tea light that I forgot to include)
As always, I hope you’ll
Rock What Ya Got
andadapt the materials I used to make what you have on hand work. With a little creativity, you’ll probably be able to make this project without a run to the store.
Cut a small piece of sticky back Velcro (mine is 1/2” wide) and attach one side to the inside of the jar and the other to a battery operated tea light. Set tea light aside.
Apply a thin coat of Mod Podge (or a mix of half water, half white school glue) starting at any left over seam from the label.
Trim craft tissue to the same width of the jar plus an extra 1/2” inch. Line top of tissue up with the top of the jar and very gently press into place, working from the center out. Careful—tissue will tear very easily.
Work around the jar one small area at a time, thoroughly covering the entire jar surface, and overlap tissue along back seam by a 1/4 – 1/2” inch, trimming if necessary.
Don’t worry if there’s a slight gap along the back (like in the pumpkin above) or a few tears. Just cover any gaps with more Mod Podge …
… place a small tissue patch over top …
… and cover with a thin coat of Mod Podge. Easy peasy.
Cover the entire top of the tissue with a good coat of the glue as well to make sure all the tissue is good and stuck.
To finish, cut a small circle of tissue slightly smaller than the bottom of the jar, coat bottom of jar with glue, place circle down, smooth in place …
… and finish bottom with a coat of glue as well. Let these dry upside down for an hour or so—until completely dry to the touch.
While the kiddos are waiting for their lanterns to dry …
… and waiting …
It’s time to work on the lids! Mark your handle holes …
… and drill through with a drill bit large enough for your handle. (I used a 7/16” bit for the lids with pipe cleaner handles and 9/16” for the lids with glow sticks).
Trim away any rough plastic on the holes with a craft knife …
… and paint lids whatever color you’d like. I had black paint so I used black. White for the ghost and orange for the pumpkin would have been cute, too.
After the lids and jars are dry, turn the kids loose!
You could use craft paint, vinyl face shapes from a Cricut or Silhouette machine or plain ‘ol Sharpies like we did.
And the best part is the fun faces that appear … like the “Scribble Monster” and the “Vampire Guy With A Bloody Nose and Furry Teeth.”
And your kiddos will be so proud of themselves for making something so totally awesome.
To attach the handle, thread your ribbon/pipe cleaner/glow stick through the holes and tie, glue or attach the ends for form a loop.
Then pop your tea light into the jar …
… screw the lid on and, voila!
Houston, we have Halloween Lanterns!
These fun lanterns are sure to bring out the spooky and the silly in your little goblins:
Whether you are thinking back to your childhood or are simply reflecting on the latest holiday season, there is no denying that Christmas lights can produce some truly magical effects. In addition to being a great way to bring friends, families, and communities together, these lights draw on our natural attraction to intense illuminations and create an aesthetic experience that is almost impossible to replicate in any other setting.
Unsurprisingly, countless parks, zoos, municipalities, and businesses spend more than $6 billion on lights per year, according to some recent estimates. By 2024, this market is expected to experience about 20 percent more growth and will reach an impressive $7.6 billion in annual sales.
Clearly, commercial Christmas lights are a very big deal. If you are someone who is planning on purchasing a significant amount of lights before the next holiday season arrives, you will certainly benefit from trying to reduce the cost of commercial lights to the greatest extent you possibly can.
Fortunately, there are quite a few things that seemingly any organization can do to effectively lower the total amount they are spending on commercial LED Christmas lights and other important holiday decorations. In this article, we will discuss eight time-tested strategies that have helped organizations of all varieties reduce their annual costs. By taking the time to be cost-effective with your major illuminating purchases, you can purchase even a greater quantity of lights without needing to break the bank.
1. Invest in LED Christmas Lights
When determining which Christmas lights will be best for your bottom line, it is important to take a holistic approach and account for every cost involved. If you simply purchase the cheapest set of lights you can find, you’ll likely end up purchasing lights that break or go out in a very short amount of time. Once this happens, you’ll need to end up purchasing new lights and your entire savings will have been for naught.
Though they will cost a bit more upfront, LED Christmas Lights are overwhelmingly the most cost-effective option for people who plan on creating long-term holiday displays. These lights can be up to 80 percent more energy-efficient, which can really begin to add up, especially when you are working with millions of lights at once. Furthermore, these lights have a bulb life that is five times longer than traditional incandescent lights, meaning they will not need to be replaced nearly as often.
2. Buy in Bulk
As you will find when making most purchases, buying Christmas lights in bulk is one of the easiest ways to reduce the amount you are paying on a “per bulb” basis. Rather than buying a few thousand lights here and a few thousand lights there, take the time to calculate how many lights you are likely to need and make your purchase all at once. If you are unsure how many lights you think you’ll need for your display, consult your supplier prior to purchasing.
3. Purchase Backup Bulbs
Once you have a comprehensive understanding of how many bulbs you’ll need for your display, consider purchasing an adequate “backup” supply of bulbs and cords as well. When operating at higher volumes, the probability of a bulb—or even an entire string of lights–breaking will increase. As a good rule of thumb, you should purchase about 2 percent more bulbs than you actually need. However, this can vary, depending on the dynamics of your specific display.
4. Purchase Christmas Lights During the Offseason
As you might expect, most major commercial Christmas light suppliers experience an increased volume of sales towards the end of the year. In order to offset their uneven cash flows, many of these companies will offer dramatic discounts during other seasons.
Purchasing Christmas lights many months before December can help you save 20 percent on your total purchase, or even more. Additionally, the “offseason” is a great time to purchase lights for other holidays, such as the Fourth of July or Halloween. After all, the magic of these lights can last throughout the entire year.
5. Use an Online Commercial Christmas Light Supplier
Generally speaking, online commercial light suppliers will be more affordable than the lighting specialists operating out of a brick and mortar storefront. These suppliers will usually keep their lights in a centralized warehouse, effectively reducing their total overhead costs and passing the savings on to you. While you may want to explore multiple options before making any final purchases, beginning your search online will usually be your best bet.
6. Create Specialty Displays by Hand
With the so-called “LED Revolution”, the variety of seasonal decorations available has considerably expanded. LED silhouettes and character displays, for example, have become especially popular. If you are looking to save some money, you may want to consider creating these displays by hand, rather than purchasing them pre-constructed. As long as you are willing to put in the time and effort required to make them look professional, viewers are unlikely to notice.
7. Take Actions to Extend the Life of Each Bulb
To reduce the amount you are spending on Christmas lights each year, you should proactively try to extend the life of each bulb to the greatest extent you possibly can. This can be done by always making sure the bulbs are turned off at night, minimizing exposure to extreme weather conditions, and—in some cases—lowering the wattage being used to illuminate each bulb.
8. Look for Special Discounts
Lastly, the best way to save on Christmas lights is to be an active shopper that is consistently looking for discounts. If a company has a surplus supply of a specific string of lights, for example, they will very likely offer temporary discounts until the apparent surplus is eliminated. To remain up to date on the best deals for Christmas lights, consider subscribing to your favorite supplier’s newsletter.
Conclusion
Christmas lights are undeniably fun but, if you’re not careful, the costs of creating a truly impressive commercial display can really begin to add up. Fortunately, saving on Christmas lights is likely much easier than you might think. With these strategies in mind, you can lower your total bill without needing to sacrifice the overall quality of your display.
Who remembers going to their local sweet shop, picking up a little white paper bag and filling it with delicious penny sweets? I certainly do! It was the highlight of my day!
Here is just ten of my childhood favorites, which I’m happy to say you can buy online from retailers like A Quarter Of.
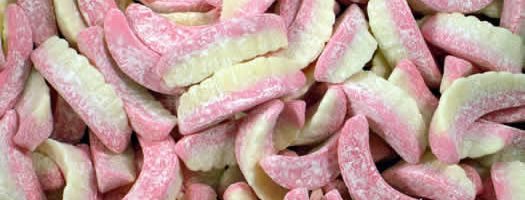
1. Barratts Shrimps
Just looking at these deliciously sweet, pink shrimps takes me back to the mid-1970s. They were soft, sugary and well… delicious!
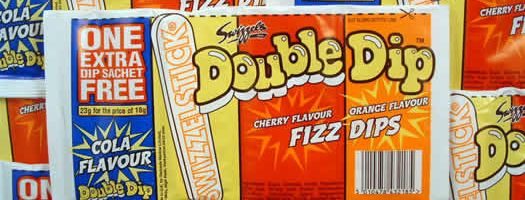
2. Double Dips
I remember these Double-Dips fondly; walking home from school, dipping away! These days, you can even get cherry, orange and cola flavor fizz dips.
3. Parma Violets
I can actually taste and smell these Parma Violets just by looking at this picture.
4. Anglo Bubbly
What a classic! So many of us kids thought we were cool and grown up if we were allowed a Bubbly!
5. Milk Teeth
Admit it… did you also pretend you had a pair of false teeth every time you bought these old fashioned milk teeth? I can taste them now, they had a very light coating of sugar on the outside too. Scrumptious!
6. Barratt’s Fruit Salad Chew Bars
Does your mouth just ooze saliva when you think back to how great these fruit salad bars tasted? They were raspberry and pineapple flavored, and when you were a small child, they looked massive!
7. Mr. Tabs Mini Candy Bricks
Mr. Tabs Mini Candy Bricks looked like mini colorful bricks that were packed with delicious fruity flavors and wrapped in a delicate little wrapper.
8. Candy Watches
Who remembers nibbling these candy watches? They came on a little piece of white elastic which you placed on your wrist whilst so you could eat and play at the same time! If I recall correctly, they also made a candy necklace.
9. Matlows Refreshers Chew
These classic chews will certainly bring memories flooding back. The chew was yellow in color and right in the center you’d find a wonderful fizz. I remember these tasty chews being a wonderful lemony flavor.
10. Flying Saucers
How could I not include sherbet flying saucers? These were a must when you were a young child, they came in various colors and consisted of fruit flavor sherbet in a wafer shell. No visit to the sweet shop was complete unless you had a couple of these.
Well, there you have it, ten wonderful, sugary, fizzing and tasty sweets to bring back your childhood memories.
I’m pleased to say that all of the above can now still be bought online from this amazing online shop called ‘A Quarter Of‘. Believe me, you’ll certainly be amazed by the huge collection they have and the best thing of all is that they are still so cheap to buy.
Now is the time to start watching for those inviting, organic accessories for your fall decor: corn stalks, grape vines, wheat bundles, and changing leaves.
So how do you get those things for zero out of pocket if it’s not growing in your own yard?
Gleaning.
Do you know what it is? Have you ever done it?
Gleaning is basically collecting left over materials that the owner doesn’t want or need. For fall that means lots of opportunities to score left over wheat, corn stalks, grape vine, etc. after the main crop has been harvested.
If you’ve never tried it, you need to!
But before you start tromping through fields with scissors in hands, consider the following:
1. First and foremost, always always always ask before you take anything. Gleaning without permission is the love child of stealing and trespassing. Knock on the door or call the property owner and make sure it’s okay to glean.
2. If you don’t know who the owner is or how to get a hold of them, call the city or county recorder’s office and get the owner’s contact information.
3. Make sure you have an exact (or very close) address when you stop by or call a city/county clerk. The more information you provide, the quicker and easier it will be for them to help you.
BAD: “I’m looking for the property owner of that big field over by the freeway.”
GOOD: “I’m looking for the property owner of the field on the northeast corner of John Street and 80th Avenue.”
4. When you go to glean, be quick, be respectful, stay out of their way, bring your own equipment (scissors, garbage bags, etc.) and don’t ask for special accommodations. Remember: they’re doing you a favor.
5. Send a thank you note to anyone who helped you: the city clerk, the property owner, whatever. It only takes a few minutes and will make it much more likely that you’ll be welcomed back next year.
What and Where To Glean
My all-time fav:
1. WHEAT
Remember this project from the THRIVE archives?
I made this project using gleaned wheat from my neighbor’s garden after she picked what she wanted. This would have run $20+ at a craft store after the coupon discount.
This year my neighbor didn’t plant wheat so I called the city recorder of the town where I saw a huge field that had just been harvested.
Turns out the city owns that field and they gave me permission right then. Score!
That tiny row of left over wheat right along the dirt patch yielded a bucketful. For wheat, oats or any other cereal grain, put the cut stems in a bucket—using a garbage bag for collection makes a huge mess and often breaks the stems.
2. CORN STALKS
I use them every year on my front door and will this year, too (even though I’m planning some fun, big changes).
Talk to your to friends and neighbors with garden patches now about gleaning their left over stalks. Commercially harvested fields may now have a lot of stalks left over, but small patches that are harvested by hand are great places to look. Bring twine and hedge clippers to lop through and bundle your stalks. Green stalks will need a few weeks to dry completely and acquire that wonderful parchment color.
3. GRAPE VINE
Love, love, love.
But those shapes can get pricey, even with the wonderful 40% off coupons. Making your own shapes is easier than you may think so look around. Ask neighbors, friends, etc. if you can help trim back vines when their grapes have been harvested. They get some help and you get the raw materials to make wreaths, swags, frames, pumpkins, whatever. Win, win.
4. LEAVES
They’re pretty much everywhere which makes this easy. Picking up leaves at a park or along a public walk way is usually no big deal. If you’re worried, it never hurts to call the local city public works department and double check. If you see great leaves on private property, again–always ask before collecting! I’ve seen great leaves on lawns while I’m out running errands, pulled over and gone and knocked on doors before.
My favorite way to use leaves is to string them together on twine or fishing line for a simple, pretty bunting.
I usually store leaves in between the pages of large books while they dry out. The flattened, leathery leaves are easier to use for projects than the more brittle, curled shape you usually get with regular air drying.
Sure, you could go guy these at the grocery store, but you can also just save those husks after your next bbq. Trim off the thick, curved bottom end and press the individual husks in between book pages (just like leaves) so they dry smooth and flat. Husks are so under appreciated and versatile. Seriously, make sure you save some.
So go put some scissors, gloves and a bucket in your car and try your hand at gleaning!
Halloween costumes and decorations were packed up this morning in gleeful anticipation of Thanksgiving. I hate the blitz to Christmas and the rush to throw red and green up too soon. Because there are so, so many things to be thankful for. And I know that for me, the more time I spend focusing on my blessings and the spirit of Thanksgiving, the more likely I am to remember the true spirit of Christmas.
So … first up on the Thanksgiving decorating agenda?
I made this little beauty with the last of my gleaned wheat and some scrap chocolate satin.
The frame was a double thickness of cardboard wrapped in scrap fabric, just like I did for my wheat and burlap wreaths.
Two tones of wheat were hot glued in a chevron pattern to give this little frame some fun pattern and texture.
The edges on the outside …
… and inside of the frame were covered with a double layer of wheat.
I was going to print off a quote or picture on scrapbook paper and tape it to the back (which would look great), but I decided to leave it open and tie a simple ribbon bow from scraps.
And don’t worry if you don’t have any gleaned wheat laying around. Any dried flowers, seed pods, weeds or even wheat from the craft store would work. You could also get a similar look by skipping organics all together and using two tones of burlap or muslin. Hey, rock what ya got, right?
A quick bow and a cheapie thumb tack later … welcome Thanksgiving.
This little half wall next to my computer is the perfect spot for this holiday frame .
Tomorrow I’ll show you what I put beneath the frame to finish off the wall.
Until tomorrow … (Edited to add)
Here’s the link to the Thanksgiving subway art I added below the frame HERE:
Today my kids will don their homemade costumes, upcycled treat bags and eat their body weight in Halloween candy.
Tomorrow I will box up those costumes, recycle their treat bags and confiscate their candy in the hopes of some slower, healthier consumption.
The day after that I officially kick into Thanksgiving and Christmas mode.
First thing on the agenda: ordering Christmas cards.
Why?
With all of texting, emailing, Skyping, Facebooking and calling, personal mail has almost disappeared.
And I miss that so much.
I miss the anticipation of bright envelopes and Christmas stickers in my mailbox … the happy sight of all those cards taped to my pantry door … the nostalgic part of me that won’t let me take down the pictures of the people I love most until well into January.
And it’s going away.
Every year there are less cards in the mail box, less cards up on that pantry door and less excitement about seasons greetings when I know it’s probably going to be just a quick “Merry Christmas Friend #215” on my Facebook wall.
That first Christmas after the Layoff Fairy found us, I insisted on sending out Christmas cards. I only dared send out a handful … but I sent them. And I was so grateful for all the ones that landed on my doorstep—cards that said not only Merry Christmas, but we love you … we’re so sorry that you’re going through this … we’re thinking and praying for your family … in ways that no digital greeting could possible convey. And I kept everyone one of those cards to remind me just how blessed my family has been.
There’s another reason I love the whole ritual of sending out Christmas cards and it’s purely selfish I suppose. For all of the busy, all of the budgeting and all of the blur of the holiday rush, I appreciate more than ever the chance to stop … pause … relish the magic of the season … think of each of the wonderful people on my greeting card lists … take a minute to hand-write a little note on the bottom of their card … address their envelope with red and green markers … and affix just the right holiday stamp to say:
I love you.
I’m thinking of you.
You’re worth two minutes and .44 cents of my time.
That’s why I’m so excited to partner with Shutterfly again this year to help make this tradition more affordable for us all.
I’ve ordered from Shutterfly several times and am always impressed with the results. Some of you who have been with THRIVE since the beginning will remember last year when I wrote about our terrible luck getting traditional Christmas cards—a fact that I’ve come to embrace and even look forward to. Last year I hauled my Dirty Half Dozen down to the isles of Walmart to take our annual Walmart Walk of Shame holiday cards … then picked out and customized the heck out of my favorite Shutterfly design … and squealed out loud when my box showed up a few short days later.
I adore orange. This box made me soooo happy.
And the cards?
Pure delicious awesomeness.
I LOVED my cards from Shutterfly and the chance to use their great discount code to order enough cards for everyone on my list while keeping my budget right where it needed to be. These cards captured my family’s spirit and energy in a completely professional , completely unique, yet completely this-is-so-cool-that-I-can-create-the-perfect-Merry-Christmas-From-Produce-card sort of way.
And the designs this year?
Be still my beating heart. How ‘bout these?
Or maybe the coolest snow globe ever … or a precious declaration of faith.
This Alleluia card slays me. I’d pick this one hands-down if we had a newborn in our house. But since we’re done, I’m crushing on this gorgeous monogram / collage number.
Or course then I’m in love with all things plaid right now, too.
And these tea length cards? I’m dying here. Tree collages? Snowman smiles? Double-dog dares?
This never gets old and is always appreciated. I love being able to personalize our calendar with pictures and special occasions to make it easy to remember all those dates.
So …
I’m marching down to Walmart this week with the Dirty Half Dozen to snap our annual Walk of Shame pictures to share with friends and family. I’m trying to decide between 1) Merry Christmas from Small Appliances, or 2) Merry Christmas From Paper Goods: wishing you all a spare square.
(I apologize to the non-Seinfeld groupies out there who have no idea why I’m giggling right now).
And I’m looking forward to that bright orange box showing up on my door step … and curling up late one night with hot cider and White Christmas on DVD …
… and addressing those funky cards while the lights glow from across the street and across the room …
… and quietly remembering how magical and wonderful this time of year really is.
Want to join me? How does FREE sound?
I get to giveaway a set of 25 free Christmas cards to 3 lucky THRIVE readers!
AND … to make the deal even better:
All you bloggers out there can have a chance to get 25 free cards by registering here: http://goo.gl/DDw7Q
To win, just leave a comment about my Walk of Shame pictures and which random Walmart isle I should capture the magic.
That’s it.
I’ll draw the winners Wednesday, November 2nd at 10 pm Mountain time.
Happy sliding into the holidays, everyone! Be back tomorrow with the first of several Thanksgiving projects!
** I received free Shutterfly Christmas cards in exchange for writing this post and couldn’t be happier. But free isn’t worth it if it’s crap, so my recommendation is based on my past, very awesome experiences with Shutterfly and my excitement to hook my amazing readers up with the same bit of holiday loot.
Thanks everyone for your patience this week while we got everything transferred over to the new system.(Thanks Jon & Eric!) It’s soooo nice to be blogging on a computer that isn’t 8 years old. Now back to the regularly scheduled programming. 🙂
***
I believe the children are the future. Teach them well and let them lead the way …
When you find a girl with mad crafting skills, hand over the glue gun and get out of her way.
Check out this hat!
I so wish I could claim credit for this awesome number, but the round of applause goes to this talented, 13-year-old rock star, Miss{K}.
Isn’t she sweet? I’m lucky enough to be neighbors with Miss{K} and her amazing mama Miss{A}.
When Miss{A} showed me these pictures, my jaw dropped. Seriously people … Miss{K} is 13 and she just “threw these together.” I asked Miss{A} if I could share the incredible hats that Miss{K} put together for a local Halloween craft festival they went to over the weekend.
I love this project since it can double as decor and a great costume. I’m not big into dressing up for Halloween any more, but I’d totally wear this all month if I had one. Seriously … if you see me at the grocery store you’ve been warned. The other thing I love is that you could easily adapt these hats toRock-What-Ya-Got and make your own version using items you already have on hand.
Multi-Colored Tulle Hat
Miss {K} loosely wrapped orange, purple and green tulle around the brim and hot glued it in place. The tulle “flower” was made by tying regular bows out of the same colors of tulle and hot gluing them in place. Two rosettes were made from the 1”satin ribbon and tucked in beside the bows, a little scrap of black tulle stands in for a leaf, and a glitter spider adds the final touch.
Black Widow Hat
Same fun look with black and red glitter tulle using a braided band of tulle around the brim.
Purple Potion Hat
Miss{K} glued the tulle in bunches around the brim, added a tulle bow and a finishing black glitter spider.
I totally want all three. For me.
*Swoon*
Hopefully Miss{K}’s awesome hats will inspire you to make your version using items from around your house, Rock-What-Ya-Got-style. (Or even from the store, tulle and ribbon are pretty cheap). I’m so planning on making one of these for me and my girls using what we have on hand: scrap t-shirts and ribbon in the same colors.
If you make one, send me an email or post it on Thrive’s facebook page—I’d love to see it!
Thanks again Miss{K} and Miss{A} for sharing your wicked-awesome hats!
These are my daughter’s church shoes.She’s going through a glitter phase right now. A biiiggg, happy glitter phase.
She’s got a red Wizard of Oz pair that look just as bad. Time to send those shoes over the rainbow straight to the trash, right?
Wait! Don’t toss those!
With a little spray paint love, those shoes may just have a few heel clicks left in them.
Enter Krylon Glitter Blast spray paint. Or as I like to call it, the Oh-My-Heck-This-Stuff-Is-Expensive-And-Better-Work-Miracles spray paint.
(And no this isn’t a sponsored post. Bummer.)
I’ve seen the buzz all over blogland about this stuff and wondered if there was anyway it could save my girl’s shoes.
I had serious reservations about buying a can since you guys know that spending money on crafts this year is a no-no in my house. But I totally struck out at all FOUR of the thrift stores in my area … and I was staring down at least $12 for another cheapy Walmart pair with the same glitter ratio … so spending $6 after coupon {cough, choke} on a can of magic glitter might be the smart way to go after all.
So I did. And it worked!
A little painters tape around the inside and ribbons …
… and a few squirts of paint over the whole thing …
… and a little black sharpie action on the vinyl bows …
… and voila!
Rainbows appear, bird sing, shoes saved. I don’t think we’re in Kansas anymore, Toto.
Even though this paint is a little touchy to use, it still worked great. I loved how the shoes turned out and am so glad I gave it a try.
I only bought one can to start since it was so pricey, but I can’t wait to grab a can of the red and get those Dorothy shoes back to their yellow-brick-road best. And I love that I still have lots of paint left and can touch up her shoes whenever I need to.
And for those of you without glitter shoes, this technique will work for any pair of shoes.
That means you can rock cheap shoe refashions for everyday use, Halloween costumes, or even school dances.
Here’s a few Man-Behind-The-Curtain tips to save you a few headaches:
1. Use a coupon. {Oh good heavens use a coupon.} My can was $6 after the coupon and is only half the size of a regular can of spray paint.
2. Use short bursts. Long sprays will clog your nozzle in two seconds flat.
3. Watch the pressure. This stuff has a nasty habit of getting too much pressure built up and oozing glitter paint out the top. To stop that from happening, pull up lightly on the spray button whenever you hear a hissing noise. This seems to release the pressure kind of like the valve on a pressure cooker. My friend warned me about the oozing problem and recommended the pulling-up-on-the-cap trick. Worked great.
4. Use two light coats for the best coverage. As I’ve gone back through these pics I’ve liked the coverage, but think the toe area could use a touch more paint. I’m going to give them a quick recoat this afternoon.
5. Be sure to use the clear coat sealant. The paint will wear off very quickly without it.
It dropped another five degrees today which means another chance to use around-the-house items to add some fall lovin’ to our newly painted upstairs (more on that later this week.)
The end result was three, texture-licious frames in yummy fall colors straight from the pantry and recycling bin.
Want to make your own?
To make these frames you’ll need:
(Edited to add: I’ve gotten a few emails about lentils. You can find them next to the rice or in the bulk food section of your grocery store. They run $0.60 – $1.25 / lb.)
As always I hope you’ll rock what ya got and make this look work for you without a trip to the store.
I made simple, three-layer frames from {unused} pizza boxes and wood glue …
… and covered the raw edges with paper scraps for a nice, clean edge.
Frames got a quick coat of paint in the closest color I had to my lentils using my nicest fountain drink palette and a foam brush …
… just to make sure none of that cardboard showed through.
Craft wire was wrapped around the frames to make a simple hanging loop for the back.
Frames were propped up on some cans and a thick coat of white school glue was applied with a cheapie foam brush. More is more here, people. Don’t skimp. Lentils were gently poured on in a thick layer and pressed carefully in place. Do NOT shake off the extra until the glue has dried several hours.
The sides of the frame were covered the same way after the top had thoroughly dried. Pictures and mats were taped in place. Easy. Quick. Done.
Love the texture, but not the color?
No biggie.
I loved—LOVED—the orange lentil frame, but hated it with my living room wall color. Boo. {Maybe I’ll have to make another one for Halloween.}
So I just painted over it. A little copper craft paint and the problem was solved.
Much better match up against those grey walls.
Love.
A few THRIVE tips to save you some headaches:
1. If you’re painting your lentil frame, spray paint is easiest. But if craft paint is all you got, thin it down to make it flow like a glaze. I went with 3 parts paint, 1 part water, 1 part white glue and it worked great.
2. Don’t touch your frame for several hours while the lentils are drying. Don’t shake off the extra. Don’t move it. Leave the dang thing alone. Seriously. If you move or shake off the extra too soon, you’ll get a really thin, spotty layer. See?
3. If you skimped on the glue and/or ignored tip #2 — don’t worry. Mix 2 parts glue + 1 part water and pour it over your frame, spreading gently with a foam brush. Then recoat with a thick coat of lentils and let it dry over night before shaking off the excess.
One more day of high temps and I swear I’m gonna melt.
It’s supposed to be Fall!
Even though there’s still warm/mild temperatures for most of us, now is the time to start watching for those inviting, organic accessories for your fall decor: corn stalks, grape vines, wheat bundles, and changing leaves.
So how do you get those things for zero out of pocket if it’s not growing in your own yard?
Gleaning.
Do you know what it is? Have you ever done it?
Gleaning is basically collecting left over materials that the owner doesn’t want or need. For fall that means lots of opportunities to score left over wheat, corn stalks, grape vine, etc. after the main crop has been harvested.
If you’ve never tried it, you need to!
But before you start tromping through fields with scissors in hands, consider the following:
1. First and foremost, always always always ask before you take anything. Gleaning without permission is the love child of stealing and trespassing. Knock on the door or call the property owner and make sure it’s okay to glean.
2. If you don’t know who the owner is or how to get a hold of them, call the city or county recorder’s office and get the owner’s contact information.
3. Make sure you have an exact (or very close) address when you stop by or call a city/county clerk. The more information you provide, the quicker and easier it will be for them to help you.
BAD: “I’m looking for the property owner of that big field over by the freeway.”
GOOD: “I’m looking for the property owner of the field on the northeast corner of John Street and 80th Avenue.”
4. When you go to glean, be quick, be respectful, stay out of their way, bring your own equipment (scissors, garbage bags, etc.) and don’t ask for special accommodations. Remember: they’re doing you a favor.
5. Send a thank you note to anyone who helped you: the city clerk, the property owner, whatever. It only takes a few minutes and will make it much more likely that you’ll be welcomed back next year.
What and Where To Glean
My all-time fav:
1. WHEAT
Remember this project from the THRIVE archives?
I made this project using gleaned wheat from my neighbor’s garden after she picked what she wanted. This would have run $20+ at a craft store after the coupon discount.
This year my neighbor didn’t plant wheat so I called the city recorder of the town where I saw a huge field that had just been harvested.
Turns out the city owns that field and they gave me permission right then. Score!
That tiny row of left over wheat right along the dirt patch yielded a bucketful. For wheat, oats or any other cereal grain, put the cut stems in a bucket—using a garbage bag for collection makes a huge mess and often breaks the stems.
2. CORN STALKS
I use them every year on my front door and will this year, too (even though I’m planning some fun, big changes).
Talk to your to friends and neighbors with garden patches now about gleaning their left over stalks. Commercially harvested fields may now have a lot of stalks left over, but small patches that are harvested by hand are great places to look. Bring twine and hedge clippers to lop through and bundle your stalks. Green stalks will need a few weeks to dry completely and acquire that wonderful parchment color.
3. GRAPE VINE
Love, love, love.
But those shapes can get pricey, even with the wonderful 40% off coupons. Making your own shapes is easier than you may think so look around. Ask neighbors, friends, etc. if you can help trim back vines when their grapes have been harvested. They get some help and you get the raw materials to make wreaths, swags, frames, pumpkins, whatever. Win, win.
4. LEAVES
They’re pretty much everywhere which makes this easy. Picking up leaves at a park or along a public walk way is usually no big deal. If you’re worried, it never hurts to call the local city public works department and double check. If you see great leaves on private property, again–always ask before collecting! I’ve seen great leaves on lawns while I’m out running errands, pulled over and gone and knocked on doors before.
My favorite way to use leaves is to string them together on twine or fishing line for a simple, pretty bunting.
I usually store leaves in between the pages of large books while they dry out. The flattened, leathery leaves are easier to use for projects than the more brittle, curled shape you usually get with regular air drying.
Sure, you could go guy these at the grocery store, but you can also just save those husks after your next bbq. Trim off the thick, curved bottom end and press the individual husks in between book pages (just like leaves) so they dry smooth and flat. Husks are so under appreciated and versatile. Seriously, make sure you save some.
So go put some scissors, gloves and a bucket in your car and try your hand at gleaning!