Getting Started with a Silhouette Cameo: A Beginner's Guide
9 min read ·
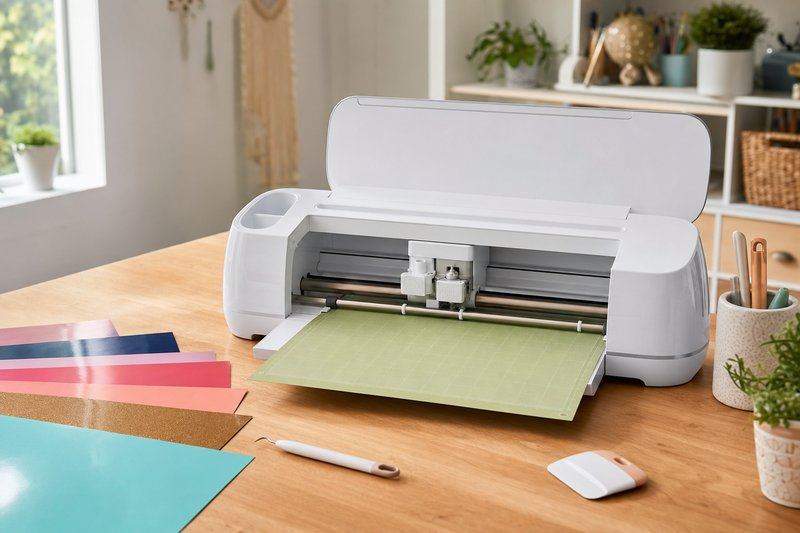
A Silhouette Cameo is a small electronic cutting machine that turns a digital design into a precisely cut shape in vinyl, paper, cardstock, or fabric, using a tiny blade guided by software instead of scissors or a craft knife. For anyone used to cutting shapes by hand, the learning curve is really about the software and material settings, not the machine itself, which is mechanically simple once it’s set up correctly.
What a Silhouette Cameo Actually Does
The machine reads a digital cut file (a shape, a word in a chosen font, or a downloaded design) and moves a small blade along that exact path on a sheet of material taped to a cutting mat. It doesn’t print anything on its own; it only cuts. Because the cut is guided entirely by the software’s path, a Cameo can repeat the exact same intricate shape dozens of times with no variation, which is the main advantage over hand-cutting for anything beyond a single simple shape.
Software Basics for a First Project
Silhouette Studio (the machine’s companion software) is where a design gets built or imported before cutting. The free version covers everything a beginner needs: importing a shape, resizing it, and sending it to the machine. A new project starts by either drawing a basic shape directly in the software, typing text in a chosen font, or importing an SVG file. Once a design is placed and sized on the virtual mat in the software, the “Send to Silhouette” button (or equivalent) transfers the cut job to the machine itself.
First Materials Worth Trying
Adhesive vinyl (the kind used for wall decals, labels, or car decor) is one of the most forgiving first materials, since it’s thin, cuts cleanly at a low blade setting, and mistakes cost very little. Cardstock is another easy starting material for card-making or simple paper crafts. Fabric and thicker materials like leather come with a steeper learning curve around blade depth and cutting speed, so it’s worth building confidence on vinyl or cardstock first before moving to anything thicker.
Your First Project: A Simple Vinyl Decal
- Choose or design a simple, single-color shape in Silhouette Studio, avoiding intricate detail for a first attempt.
- Load a sheet of adhesive vinyl onto the cutting mat, smoothing out any air bubbles so it lies flat.
- Select the correct material setting in the software (most versions have a built-in vinyl preset) and send the job to the machine.
- Once cut, use a weeding tool (a small hook-tipped pick) to peel away the excess vinyl around the design, leaving just the shape.
- Apply transfer tape over the finished design, press it onto the target surface, then peel the transfer tape away, leaving the vinyl shape stuck in place.
The weeding step is the part beginners find most fiddly at first, but it gets faster with a bit of practice and the right tool.

Common Beginner Mistakes
- Wrong blade depth for the material. A blade set too deep for thin vinyl can cut through the backing paper too, while one set too shallow leaves material only partially cut. Most materials have a recommended starting depth in the software presets.
- Skipping a test cut. A small test cut in the corner of a new material sheet, before committing to a full design, catches a wrong blade setting before it ruins the whole sheet.
- Not smoothing out air bubbles under the material. Any bubble or wrinkle under vinyl or cardstock on the mat can throw off the cut path slightly, especially on more detailed designs.
- Reusing an overly worn cutting mat. A mat that’s lost its stickiness lets material shift mid-cut, which throws off the whole design. Mats are a consumable, not a one-time purchase.
Blade and Mat Care
The blade housing can be adjusted for depth using a small dial, and most machines use a similar cartridge-style blade that’s replaced (not sharpened) once it starts producing rough or incomplete cuts. Cutting mats lose stickiness with use and exposure to dust; a gentle rinse with mild soap and water, followed by full drying, restores some tackiness, though a mat used heavily will eventually need replacing outright.
Choosing Accessories as You Go
A basic starter bundle (machine, one blade, one cutting mat, and a small roll of vinyl) is enough to get through a first several projects without buying anything else. As projects get more varied, a rotary blade (for fabric), a stronger-grip mat (for thicker cardstock), and a wider range of specialty vinyl colors are the most common next purchases, added as a specific project actually calls for them.
Understanding Cut Settings in More Detail
Beyond blade depth, the software also controls cut speed and cutting force (sometimes called “thickness” or “passes”), and all three settings interact, none of them working independently. A slower speed generally produces a cleaner cut on detailed designs, since the blade has more time to follow tight curves accurately, while a faster speed is fine for simple shapes where fine detail doesn’t matter as much. Running a design through two lighter passes can produce a cleaner cut on thicker or more fibrous materials, at the cost of a slightly longer cut time, which is a reasonable tradeoff once a specific material proves tricky to cut cleanly in a single pass.
Comparing Cameo Models for a First Purchase
Newer Cameo models generally add a wider cutting width, faster cutting speeds, and sometimes an integrated tool for scoring or embossing alongside the standard blade, but the core cutting function and beginner learning curve stay largely the same across models. For a first machine bought specifically to learn the basics on vinyl and cardstock, an older or base-tier model covers everything described in this guide; the extra width and speed of a higher-tier model matter more once a specific project (like a wide banner or a high-volume batch) actually calls for them.
Project Ideas Beyond a Basic Decal
Once the basic workflow feels comfortable, a Silhouette Cameo opens up a wide range of small projects using the same core skill set. Custom stickers cut from printable vinyl sheets, personalized gift tags cut from cardstock, iron-on shirt designs using heat-transfer vinyl, and stenciled designs cut from stencil-grade plastic all use the same import-size-cut workflow described above, just with a different material preset selected in the software. Card-making in particular is a popular next step, since intricate cut-out shapes (a scalloped edge, a cut-out window, layered paper elements) are far more precise and repeatable than the same effect done with scissors or a craft knife by hand.

Print and Cut: Combining a Regular Printer With the Cameo
For designs that need color, “print and cut” is the standard workflow: a design is printed on a home printer first, then the sheet is loaded into the Cameo, which uses small registration marks printed alongside the design to precisely cut around the printed shape. This is how most printed stickers, labels with color graphics, and multi-color paper crafts actually get made, since the Cameo itself never applies any color. Registration marks need to print clearly and stay uncropped by printer margins, which is usually the first thing to check if a print-and-cut job cuts in the wrong place relative to the printed design.