Easy, Budget-Friendly Pie Tin Crafts the Kids Will Love
8 min read ·
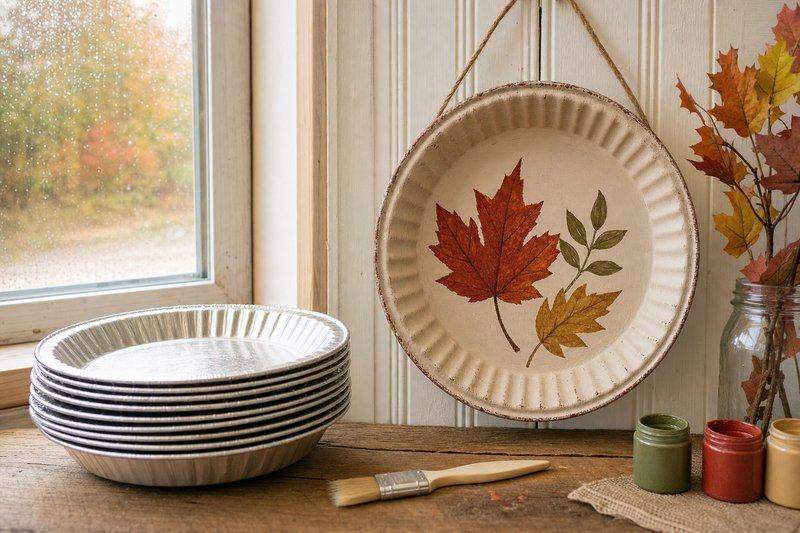
Disposable pie tins are one of those materials that get thrown out by default, which is a shame, because they’re free, already the right shape for a dozen projects, and sturdy enough that kids can handle them without much supervision. This walks through easy pie tin crafts for fall decor, budget-friendly options using things already in a junk drawer, and a few that are specifically built to be kid-friendly.
Prepping Pie Tins Before You Start
Rinse tins well and let them dry completely: any grease residue keeps paint or glue from sticking properly. If a tin has sharp or bent edges from opening a pie box, run a finger along the rim first and fold any sharp spots flat with pliers, especially before handing one to a child. Aluminum tins take spray paint and acrylic paint equally well; just give spray paint a full 24 hours to cure before stacking finished pieces.
Easy Pie Tin Crafts for Fall Decor
- Punched tin lanterns. Flip a tin upside down, sketch a simple pattern (stars, leaves, a moon) in pencil, and punch holes along the lines with a hammer and a nail over a folded towel. Drop in a battery tea light for a soft, dotted glow.
- Painted leaf garland. Cut tins into rough leaf shapes with sturdy scissors, paint in fall colors, punch a hole at the stem end, and string on twine.
- A rustic wreath base. Flatten several tins, cut into petal shapes, and layer them onto a cardboard ring for a metallic, low-cost wreath form that holds its shape better than paper.

Budget-Friendly Pie Tin Crafts Using What You Already Have
The appeal of pie tin crafts is that they rarely need a supply run:
- A tin tambourine. Two tins stapled rim-to-rim with dried beans inside, plus ribbons through a few punched holes, makes a working instrument out of trash and pantry scraps.
- A catch-all tray. One tin, lightly sanded and spray-painted, works as a small entryway tray for keys and loose change: no additional materials needed beyond paint already on hand.
- Seed-starting trays. Small holes punched in the bottom turn a tin into free drainage-ready planting trays for windowsill seedlings.
Pie Tin Crafts Kids Can Help With
- Sun catchers. Cut the center out of a tin to leave just the rim, then have kids glue tissue-paper squares across the open circle for a stained-glass effect that catches window light.
- Shaker instruments. Fill one tin with dried rice or beans, cover with a second tin rim-to-rim, and tape or staple the edge shut: a five-minute project with a real payoff.
- Pie tin bird feeders. Punch three evenly spaced holes near the rim, thread yarn through each, gather the ends, and fill with birdseed: simple enough for a child to fully assemble with light adult help on the punching step.

Sealing and Finishing Pie Tin Crafts
A finished pie tin craft benefits from one more step most people skip: a clear sealant coat over the paint. A light spray of clear acrylic sealant protects the painted surface from scratching and helps it hold up to occasional handling, which matters most for anything kids will pick up repeatedly, like a shaker or a catch-all tray. For punched-hole designs like lanterns or sun catchers, sealant isn’t strictly necessary since there’s less painted surface to protect, but it’s still worth a light coat if the piece will spend time outdoors, since aluminum on its own resists rust well but painted surfaces can still chip with repeated weather exposure.
Storing Finished Pie Tin Crafts Between Seasons
Flat pieces, like the sun catchers or the rustic wreath petals, store easily stacked with a sheet of paper towel between each one to keep painted surfaces from scratching against each other. Anything with a punched pattern, such as the lanterns, nests less cleanly and is better stored upright in a box, so the punched edges don’t bend under the weight of other items stacked on top. Labeling a storage box by season (fall lanterns, holiday ornaments) makes it much faster to find the right pieces again next year instead of digging through one large mixed bin.
A Few Tips for Prepping Old Pie Tins
Save tins over a few weeks and the dozen collects itself: most households go through several a season without noticing. Store rinsed, dried tins nested together in a drawer or bin so they’re ready whenever a project comes up. If a tin is bent from shipping or storage, it flattens easily by hand or under a heavy book overnight, and a slightly imperfect flatten still works fine for anything that gets punched, cut, or painted over.
Choosing the Right Pie Tin for Each Project
Not all pie tins are built the same, and matching tin thickness to the project makes a real difference in how the finished craft holds up. The thinnest disposable tins, the kind that flex and dent if you press a finger into them, are easiest for kids to cut with scissors and take a punched pattern well since the metal gives easily under a nail. Heavier-gauge tins, the kind that hold their shape even when empty and feel sturdier in hand, are the better choice for anything that needs to keep a rigid form afterward, like a catch-all tray or a bird feeder that will hang outside and take some wind. If a recipe box or bakery pie came in an unusually flimsy tin, it is often still fine for flat projects like sun catchers or garland leaves, where the tin gets glued or bent flat anyway and never has to hold its own shape.
Common Pie Tin Crafting Mistakes and How to Fix Them
A few problems come up often enough to be worth calling out ahead of time. Paint that beads up or peels off in sheets almost always means the tin wasn’t fully dry or still had a light film of grease on it; a quick wipe with rubbing alcohol before painting solves this even after a rinse hasn’t. Torn or ragged punched holes usually mean the nail was pushed straight down; letting the hammer do the work in small taps, with no forcing the nail through in one push, keeps holes clean and round. If a cut edge feels sharp after trimming a tin into a leaf or petal shape, running a strip of clear tape along the cut edge before handing it to a child adds a cheap safety buffer without changing the look of the finished piece. And if a stapled or glued seam pops open on a shaker or tambourine, a small dot of hot glue at the stress point beats more staples, since it flexes slightly under the stress that would punch another hole in already-thin metal.
Pie Tin Craft Ideas for Other Holidays and Seasons
Pie tin crafts aren’t limited to fall projects. The same punched-lantern technique that works for autumn stars and leaves works just as well with a heart pattern for Valentine’s Day, a shamrock for March, or a simple star-and-stripe motif for a summer holiday. Painted ornaments follow the same logic: a tin cut into a circle or simple shape, painted, and finished with a ribbon loop through a single punched hole makes an inexpensive Christmas ornament that holds up better than paper versions stored year after year. For a spring or Easter version, pastel spray paint over a punched or scalloped-edge tin gives the same soft, dotted light effect as a fall lantern but in a completely different color palette. Because the base technique barely changes from one season to the next, learning it once for fall crafts means every other holiday version is really just a change of pattern and paint color. No new skill is involved.