Easy, Budget DIY Cabinet Frame Trim for a Farmhouse Look
8 min read ·
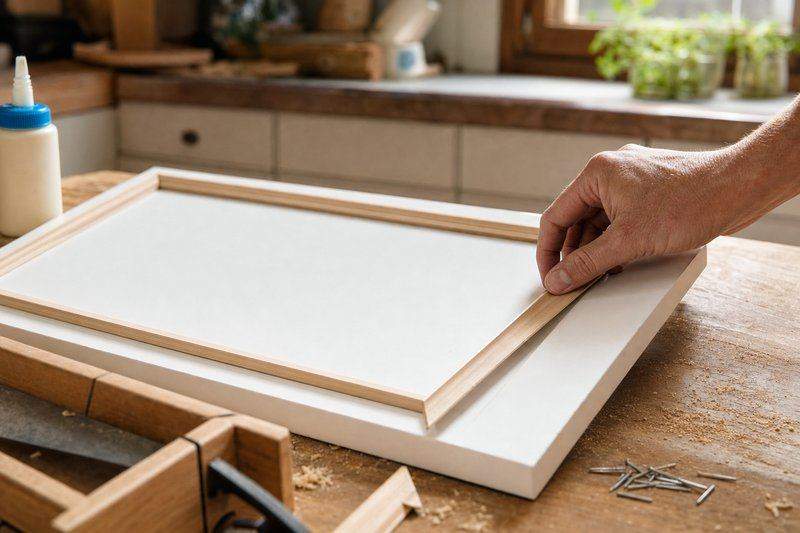
Plain, flat cabinet doors are one of the fastest things to update without replacing anything, because the fix is really just adding a frame of thin trim to the door face. The door itself never gets swapped. This walks through an easy, budget DIY cabinet frame project, the tools it actually needs, and how to get a farmhouse-style look without a full kitchen remodel.
What You’ll Need for a DIY Cabinet Frame
- Thin trim or lattice molding (available pre-cut at most hardware stores, usually under a few dollars per length)
- A miter box or miter saw for angled corner cuts
- Wood glue and small finish nails, or a brad nailer if you have one
- Wood filler for nail holes
- Sandpaper, primer, and paint or stain to match the existing cabinets
None of this requires specialty tools. A miter box (a manual guide for cutting angles) is the one item worth having if you don’t already, and it’s inexpensive.
Easy DIY Cabinet Frame Trim, Step by Step
- Measure each cabinet door’s face and mark where the inset frame will sit, usually leaving an even border of a few inches around the edge.
- Cut trim pieces to length with 45-degree angled corners using a miter box, dry-fitting each piece against the door before gluing anything.
- Glue trim pieces in place along the marked lines, then reinforce with a few small finish nails once the glue has begun to set.
- Fill nail holes with wood filler, let it dry fully, then sand smooth so the frame reads as one continuous piece.
- Prime and paint (or stain) the whole door face, including the new trim, so everything matches in one finish.

Budget Tools and Materials for a DIY Cabinet Frame
The materials cost for this project is usually the smallest part of any kitchen update: a single cabinet door’s trim typically costs only a few dollars in molding. If you don’t own a miter saw, most hardware stores will make angled cuts for you at the counter if you bring exact measurements, which avoids needing to buy a cutting tool at all for a one-time project.
How Many Doors to Do at Once
Doing one test door before committing to the whole kitchen is worth the extra planning time. It confirms the trim width, paint color, and hardware pairing actually look the way you pictured before you’ve bought materials for a dozen doors. Once a test door looks right, buying trim in bulk for the rest of the kitchen is usually cheaper per foot than buying it door by door, and doing all the doors in one paint session keeps the finish consistent across the whole kitchen, with no slight color variation between batches painted weeks apart.
Getting a Farmhouse Look Without a Full Remodel
The farmhouse cabinet look mostly comes from three things: a simple, shallow frame profile (nothing ornate), a matte or slightly worn-looking paint finish, and hardware swapped to a simpler black or bronze pull. Adding the trim frame handles the biggest visual change; swapping just the cabinet hardware afterward finishes the look without touching the boxes or doors themselves at all.

Common Mistakes to Avoid on a DIY Cabinet Frame
- Skipping the dry-fit. Gluing trim before test-fitting the whole frame on the door means small measurement errors compound at each corner.
- Using nails that are too long. A too-long finish nail can punch through a hollow-core cabinet door; check door thickness before choosing nail length.
- Painting before the glue and filler fully cure. Painting too early traps moisture under the finish and shows up later as a dull, uneven patch.
- Uneven trim spacing across multiple doors. Measure and mark every door the same way before cutting any trim, so the whole set of cabinets reads as consistent once finished.
Choosing Trim Profile and Width
A flatter, simpler trim profile reads as more farmhouse or shaker-style, while a slightly more ornate molding with a raised bead can lean traditional instead. Width matters as much as shape: a trim frame set too close to the door’s edge looks thin and afterthought-like, while one set too far in can make the door look smaller than it is. A border of roughly two to three inches from the door edge is a reasonable default for most standard cabinet sizes, adjusted narrower on smaller doors so the frame doesn’t overwhelm the panel.
Trim Material Options for a DIY Cabinet Frame
Most hardware stores sell three realistic options for this project, and each has a different budget and durability tradeoff. Pine or poplar lattice molding is the cheapest and easiest to find, takes paint well, but dents a little more easily than denser woods if a cabinet door sees heavy daily use. MDF (medium-density fiberboard) trim costs slightly more but has a smoother factory-primed surface that needs less sanding before paint, making it a good budget DIY cabinet frame choice for anyone who wants a cleaner finish with less prep work. PVC or composite trim costs the most of the three but shrugs off kitchen humidity and steam better than either wood option, which matters more directly over a stove or sink than on cabinets further from moisture. For a first DIY cabinet frame project, pine or poplar is the easiest and cheapest starting point; PVC is worth the upgrade only if the kitchen already has visible humidity issues on existing trim.
Working Around Handles, Hinges, and Existing Hardware
Cabinet doors with visible hinges (as opposed to hidden European-style hinges tucked inside the cabinet box) need a small adjustment: measure the hinge plate’s footprint before marking the trim layout, since a frame that overlaps a hinge plate will need to be notched or the hinge relocated, both of which add real time to what’s otherwise a simple project. Handles and pulls are less of an issue since they usually sit inside the trim frame’s open center, but it’s worth holding the actual hardware against a test door before committing to a border width, since a frame set too close to a handle can make the door look crowded once everything is reassembled. Doors with existing hidden hinges are the easiest case: the trim sits entirely on the visible face and never touches the hardware at all.
Maintaining a DIY Cabinet Frame Over Time
A trim frame added to a cabinet door is exposed to the same daily wear as the rest of the kitchen, so a few small habits keep it looking finished for years and not just a few months. Wipe spills promptly, since moisture sitting in the corner seams is where a trim frame first shows separation or paint lifting. A fresh coat of paint on just the trim (not the whole door) every few years covers most wear without redoing the entire project, since the trim itself rarely needs replacing, only refinishing. If a corner seam does open up slightly over time, a small bead of paintable caulk and a touch-up coat of paint fixes it in under fifteen minutes, far less work than the original install.