Easy, Budget-Friendly DIY Wreath Ideas for Every Season
13 min read ·
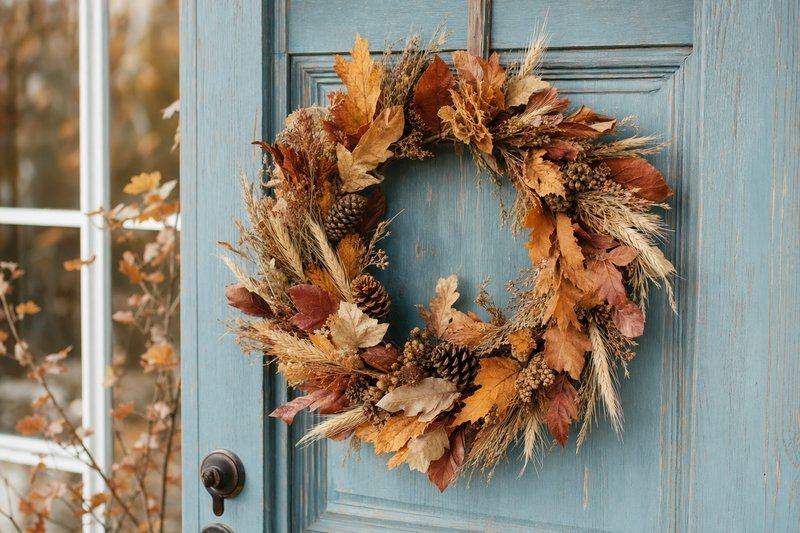
A wreath is one of the most forgiving DIY projects there is. There’s no wrong side, no seam that has to line up, and a lopsided cluster of leaves just reads as “natural” instead of “mistake.” That forgiveness is exactly what makes wreath-making such a good entry point into seasonal crafting: the easy DIY wreath ideas below start with one basic technique, then repeat it with different materials for every season, so the skill you build on the first one carries straight through the rest of the year.
What You Need for Easy DIY Wreath Ideas
Every wreath on this list starts from the same short materials list, which is a big part of what keeps these budget-friendly:
- A wreath base: wire, grapevine, foam, or straw, whichever is cheapest or already on hand
- A hot glue gun and a few extra glue sticks
- Floral wire or a roll of thin craft wire
- Wire cutters or sturdy scissors
- Ribbon for a bow or a hanging loop
- Whatever seasonal filler material the specific design calls for
None of this needs a specialty craft-store trip beyond the base itself, and even that shows up secondhand or on clearance more often than not. A single roll of floral wire and one bag of hot glue sticks is usually enough for two or three wreaths, which is where a lot of the budget-friendly part of these DIY wreath ideas actually comes from: buying in that small bulk. One kit per wreath costs far more.
Choosing the Right Wreath Base
The base changes how a wreath behaves more than almost anything else:
- Wire wreath forms are the lightest and cheapest option, and the easiest to wire small bundles of material onto in sections. Best for anything with a lot of small pieces, like greenery clippings or dried flowers.
- Grapevine wreaths already look finished on their own, so they’re forgiving for a first attempt: even a sparsely decorated grapevine base reads as intentional and rustic.
- Foam wreath forms hold pins and floral picks directly, which makes them the easiest option for anything you’re pinning in place of gluing or wiring, like fabric strips or paper flowers.
- Straw wreaths work like foam but hold a pin more securely for anything heavier, and they’re a common choice under a full moss or floral covering.
If this is a first wreath, grapevine or a basic wire form is the more forgiving starting point. Foam and straw both work well once a project calls for pinning material in place of gluing or wiring it.
Budget-Friendly DIY Wreath Ideas Using What’s Already On Hand
Before buying anything seasonal, it’s worth checking what’s already around the house, because a surprising number of budget-friendly DIY wreath ideas come from materials that would otherwise be thrown out:
- Cardboard, cut into a ring and covered in twine or fabric scraps, makes a free wreath base
- Old book pages, folded into small cones or rosettes, cover a wire form completely for the cost of nothing
- Fabric scraps, torn into strips and tied directly onto a wire form, make a full, textured wreath with zero glue
- Twine or jute wrapped repeatedly around any base gives a clean, neutral look that works as a backdrop for almost any seasonal add-on later
- Ribbon and fabric remnants left over from other projects are usually enough for a bow, which is often the only “extra” purchase a wreath needs
Starting with one of these no-cost bases means the only real spending on any seasonal wreath below is whatever filler material that season calls for, and even that often comes from a yard, a pantry, or a leftover holiday box.
Seasonal DIY Wreath Ideas for Spring
Spring wreaths lean toward paper and fabric flowers over fresh ones, since fresh blooms wilt within a day or two on a front door. A simple approach: cut circles of coffee filters or tissue paper, gather each one at the center with a twist of wire, and fluff the layers out into a loose flower shape. Wire a cluster of these directly onto a wire or foam base in a loose, uneven pattern (real flowers never grow in a perfectly even row either), then finish with a pastel ribbon bow at the bottom or off to one side.
Faux greenery stems, cut apart and wired in individually, fill in any gaps between flowers and give the whole wreath more depth than flowers alone.
Seasonal DIY Wreath Ideas for Summer
Summer wreaths hold up better with materials that don’t fade or wilt in heat and direct sun. Raffia, wound around a base the same way as twine, gives a beachy, woven texture on its own. Dried citrus slices (baked at a low oven temperature for a few hours until leathery, not fresh) add color without the rot risk of anything fresh, and small dried starfish or shell pieces work well wired in alongside them for a coastal look. A wide grosgrain ribbon in a bright color, tied into a simple bow, is usually all the finishing a summer wreath needs.
Seasonal DIY Wreath Ideas for Fall
Fall is the easiest season to source materials for directly outside: dried leaves, small pinecones, acorns, and wheat stems all show up for free in a yard or on a walk. Wire small bundles of dried leaves or wheat directly onto a wire base, working in one direction around the ring so everything overlaps like shingles and nothing points in every direction at once. Mini pumpkins or gourds are heavier, so they usually work better hot-glued onto a sturdier foam or straw base than wired onto wire. A plaid or burlap ribbon bow finishes the look without needing anything else added.

Seasonal DIY Wreath Ideas for Winter
Winter wreaths lean on evergreen clippings, which hold their color and shape far longer than any other seasonal material on this list. Wire small clippings in overlapping bundles the same way as fall leaves, working around the ring in one direction. Pinecones, small ornaments, and berry picks (real or faux) wire or hot-glue in on top once the greenery base is filled in. A red or plaid ribbon bow is the traditional finish, though a plain cream or gold ribbon works just as well for a quieter look.
Attaching Materials Without a Mess
Three attachment methods cover almost every wreath idea above, and picking the right one for the material makes a real difference in how neat the finished wreath looks:
- Floral wire is best for anything with a stem: greenery, dried flowers, wheat bundles. Wrap the wire around both the stem and the wreath base together, twist it tight on the back, and trim the ends.
- Hot glue works fastest for anything flat or without a stem, like pinecones, dried citrus slices, or paper flowers. Apply a small dab, hold for a few seconds, and move on.
- Floral pins are the cleanest option on foam or straw bases, since the pin disappears straight into the material with no visible wire or glue at all.
Mixing all three on one wreath is normal. A fall wreath, for example, might use wire for the leaf bundles, hot glue for the pinecones, and a pin to hold the ribbon in place.

Hanging Your Finished Wreath
An over-the-door wreath hanger is the simplest option and needs no hardware installed in the door itself. A ribbon loop, tied through the top of the wreath and looped over a nail or hook, works just as well and lets the ribbon color become part of the design, not a hidden hanging mechanism. For a heavier wreath, like one covered in pinecones or a foam base, a wire loop twisted directly into the back of the base holds more weight than ribbon alone.
How Long Do DIY Wreaths Last
Fresh evergreen wreaths typically hold their color and needles for four to six weeks indoors, longer outdoors in cold weather. Dried-material wreaths (leaves, wheat, dried flowers) last a full season or more if kept out of direct rain, and can often be stored and reused the following year with a light dusting. Faux greenery and paper or fabric wreaths last indefinitely with basic care, which makes them the better choice for anything meant to be stored and brought back out year after year, with no rebuild each season.
Common Wreath-Making Mistakes to Avoid
A few small missteps account for most first-attempt wreaths that come out looking thinner or messier than intended:
- Spacing bundles too far apart. A wire wreath covered in isolated sprigs with gaps between them reads as sparse no matter how nice each individual bundle looks. Overlapping bundles, the same way roof shingles overlap, is what actually reads as “full.”
- Working in mixed directions. If half the bundles point clockwise and half point counterclockwise, the wreath looks disorganized even with plenty of material. Committing to one direction all the way around fixes this instantly.
- Using too much glue at once. A thick blob of hot glue takes longer to set and is more likely to squeeze out around the edges of whatever it’s holding. Thin, targeted dabs hold just as well and dry cleaner.
- Skipping a trial layout. Loosely arranging the main elements (bows, focal accents, larger pieces) on a flat table before attaching anything permanently makes it much easier to catch an unbalanced design early, while it’s still easy to move things around.
Adding a Personal Touch: Monogram and Name Wreaths
A single letter or short name, cut from wood, cardboard, or thick felt, makes a easy focal point for almost any base wreath in this list. Attach the letter directly to the front of the wreath, either centered or slightly off to one side, using the same hot glue or floral wire technique used for everything else. A monogram wreath works especially well as a housewarming or wedding gift, since it can be personalized to whoever’s receiving it without changing the underlying technique at all. If cutting a letter shape isn’t practical, a small chalkboard tag or wood slice with a name written on it, wired into the wreath near the bow, gives a similar personalized effect with far less cutting involved.
Working With Kids on Wreath-Making
Several parts of a wreath project are genuinely kid-friendly, even for a fairly young child. Choosing which dried leaves or flowers go where, handing pieces to an adult who’s doing the actual wiring, and tying a simple bow are all tasks a child can take on without needing scissors or a hot glue gun themselves. For a slightly older child, a twine-wrapped base is simple and safe enough to complete almost entirely on their own, since it needs nothing sharper than scissors to trim the end. Framing the project as “your part” and “the grown-up part” from the start tends to keep a shared wreath project fun and not frustrating for everyone involved.