(Originally shared as a guest post on Ucreate Kids here.) Holy cow … Halloween is just around the corner. That means me and my six kiddos have been on the look out for everyday items to repurpose for Halloween. This weekend we hit the mother load … in the produce isle. Turns out with some paint and glue, you can turn an apple tray into something frightfully fun.
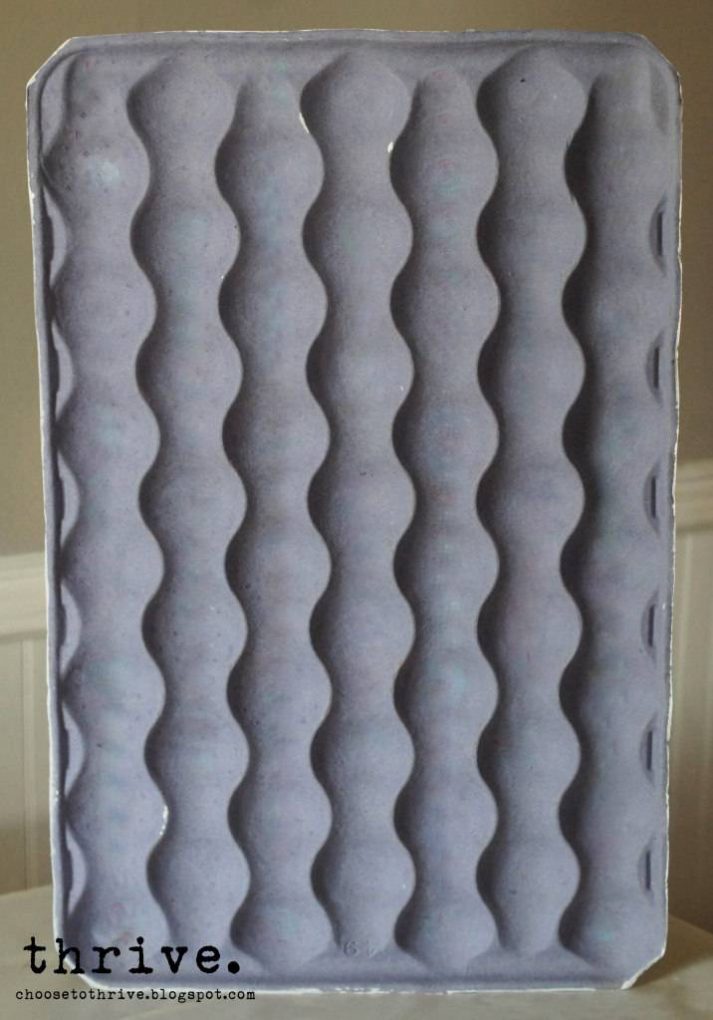
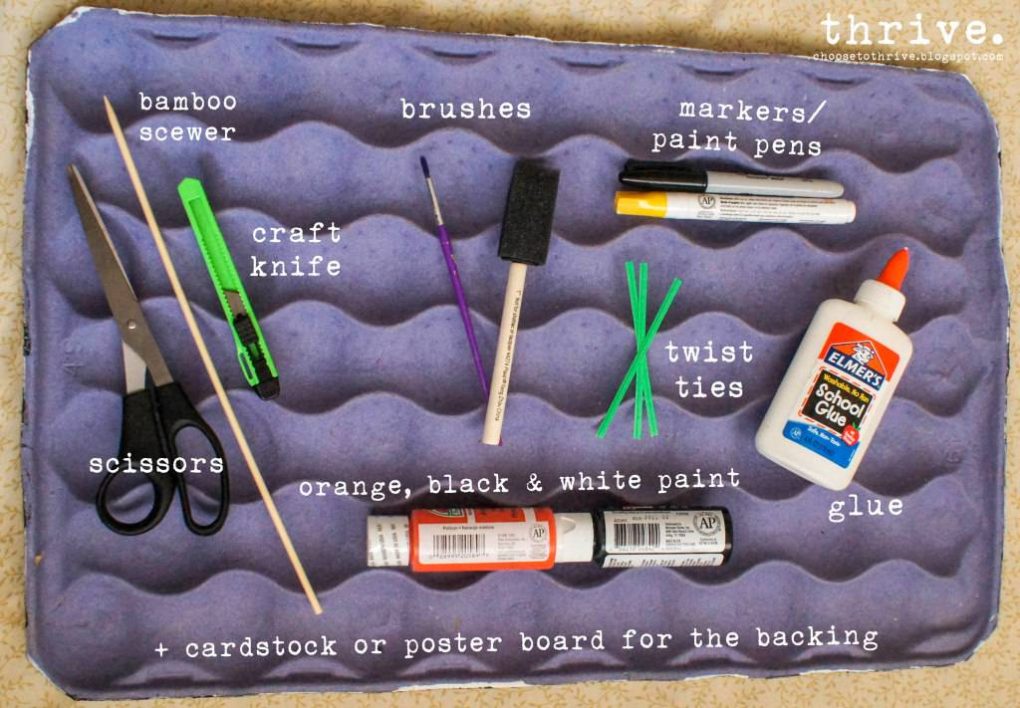
Frightfully fun for flat-out free! You can use this at home or in a classroom as just a calendar or filled with little treats to open each day. Want to make one with your kids, too? For this project you’ll need a cardboard apple tray from the produce section +
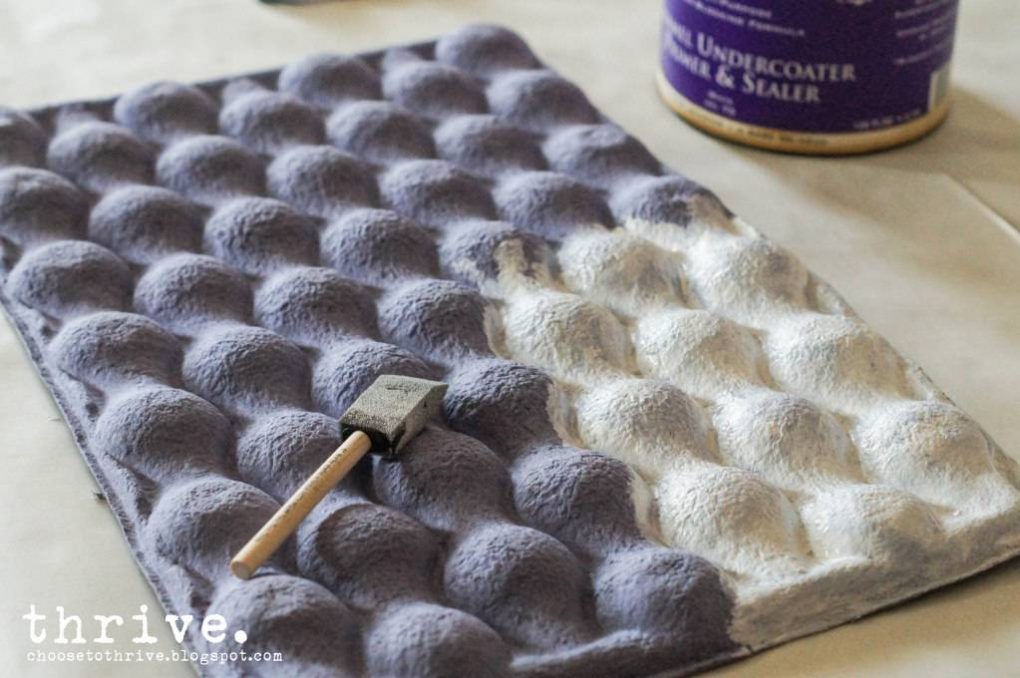
(Produce trays are usually free from your grocery store – just ask the produce guy to grab you one.) As always I hope you’ll rock-what-ya-got and adapt this project to whatever supplies you have on hand so that you can make this for free or dirt cheap. Prime the tray with a cheapy sponge brush and whatever white paint you have on hand: craft paint, house paint, plain ‘ol primer. Just skip the spray paint – the paper tray is crazy porous and sucks it all up.
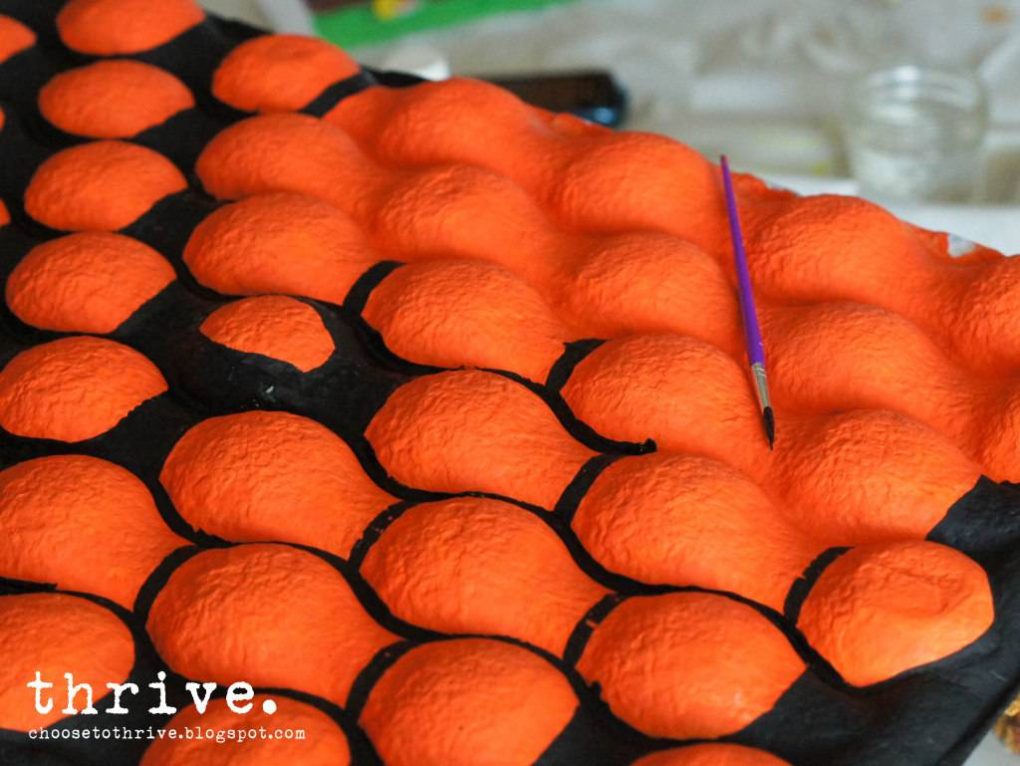
Add a coat of orange paint …
… and then carefully paint the edges and creases black with a small paint brush.
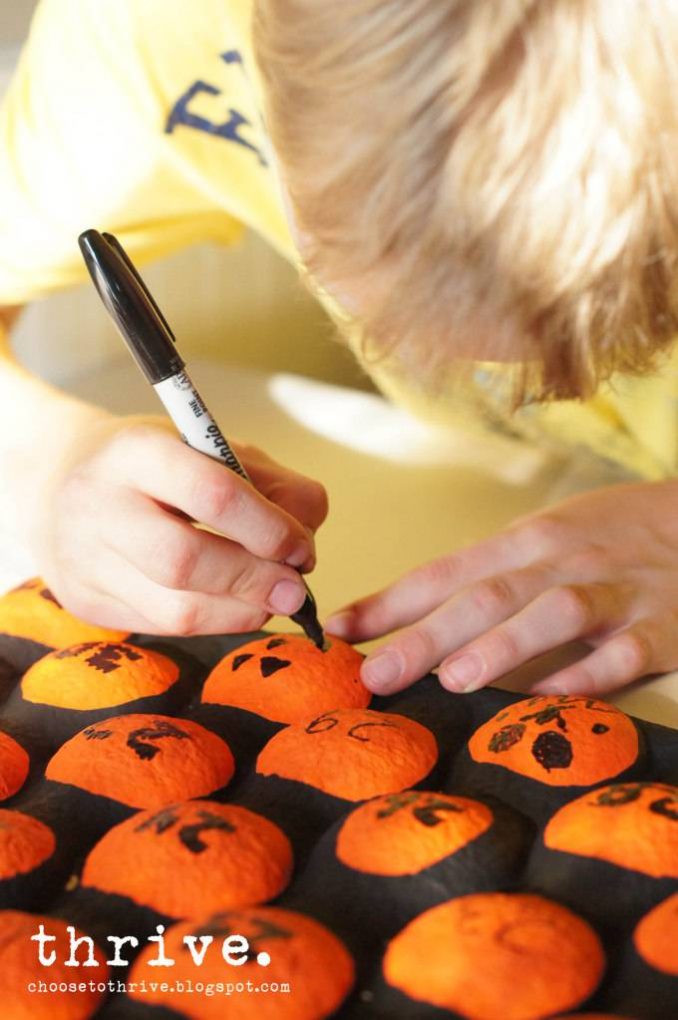
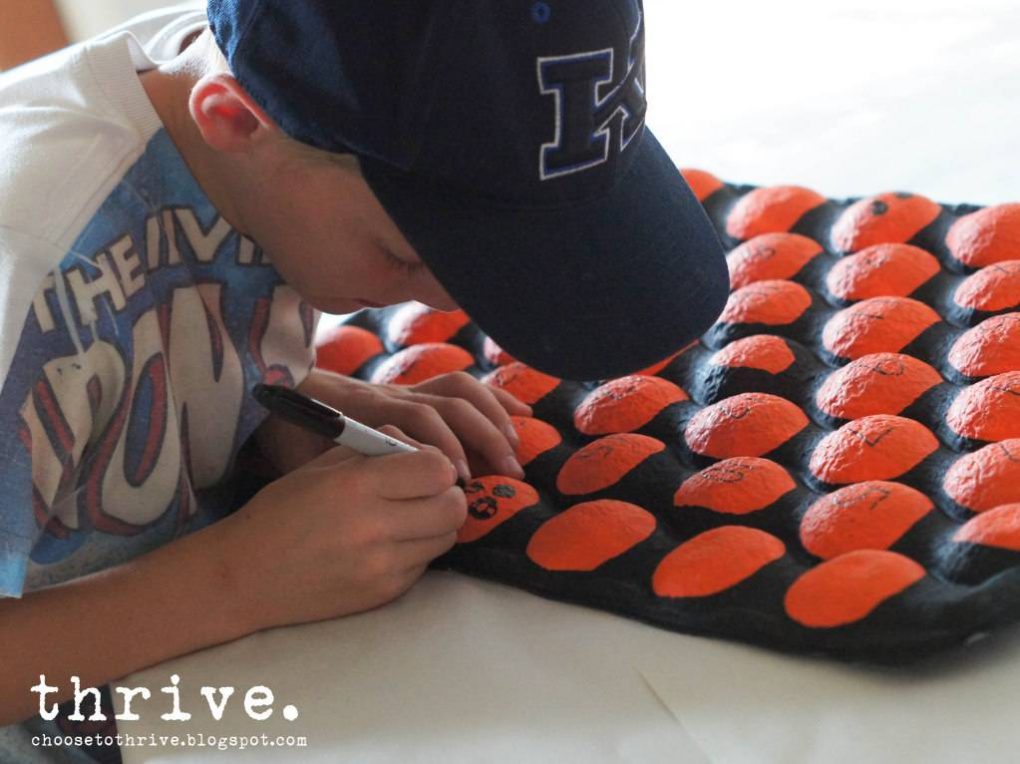
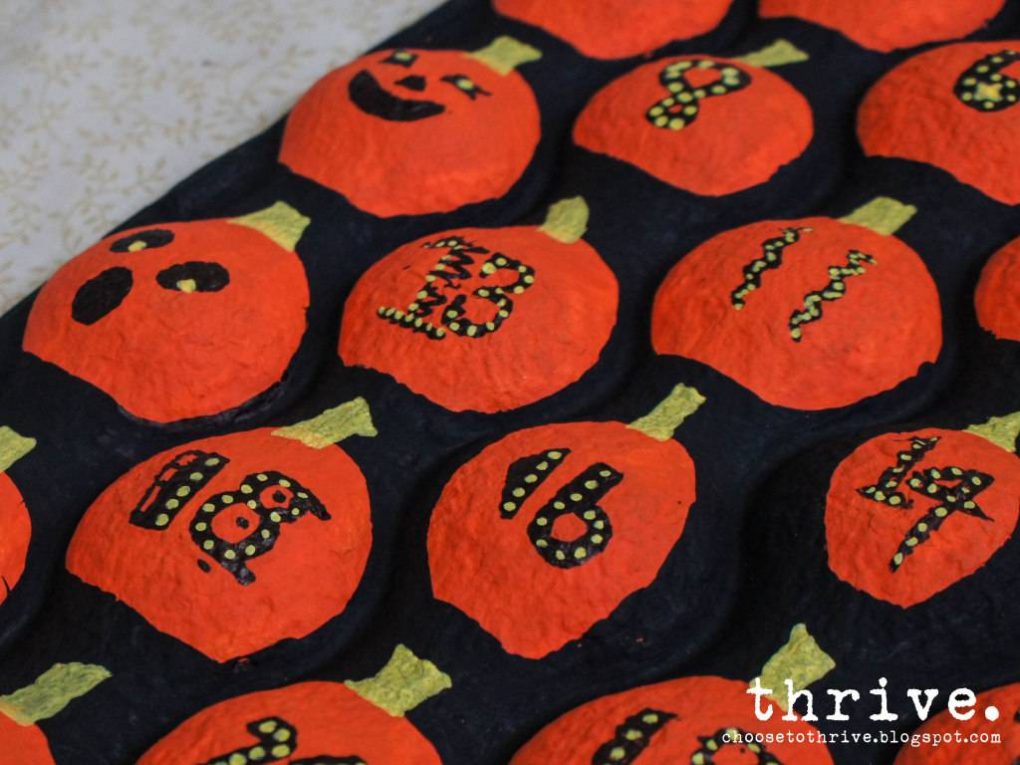
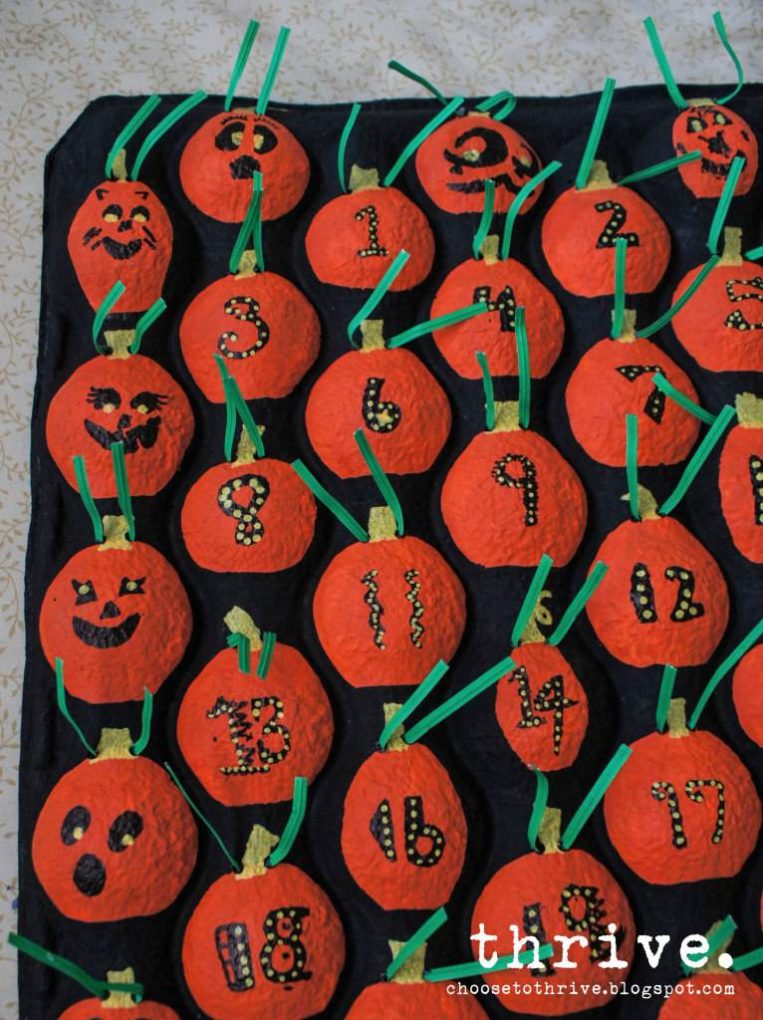
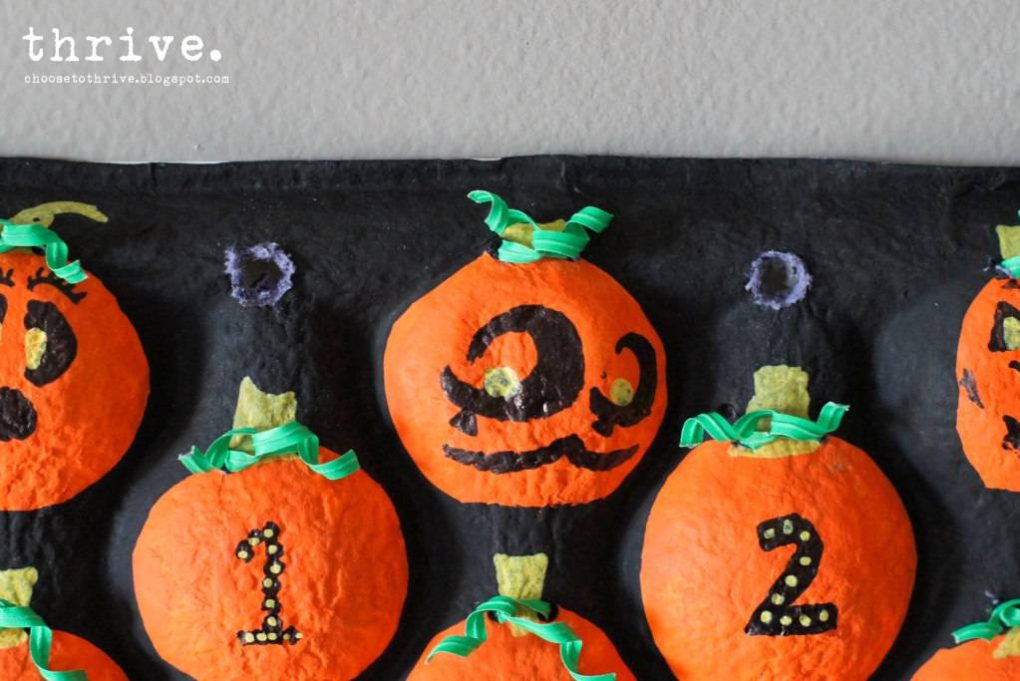
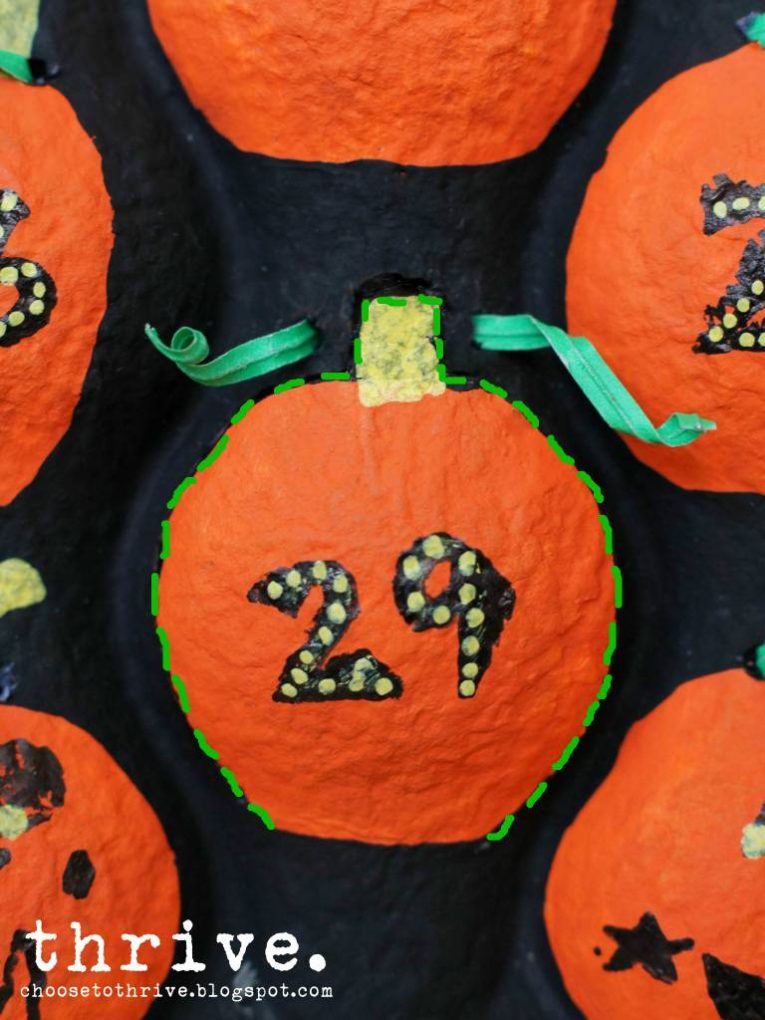
Add stems and calendar numbers with a Sharpie and paint marker.
(I marked the numbers first and let my kids do the decorating.)
The remaining pumpkins on the sides can be dressed up with jack-o-lantern faces or left plain.
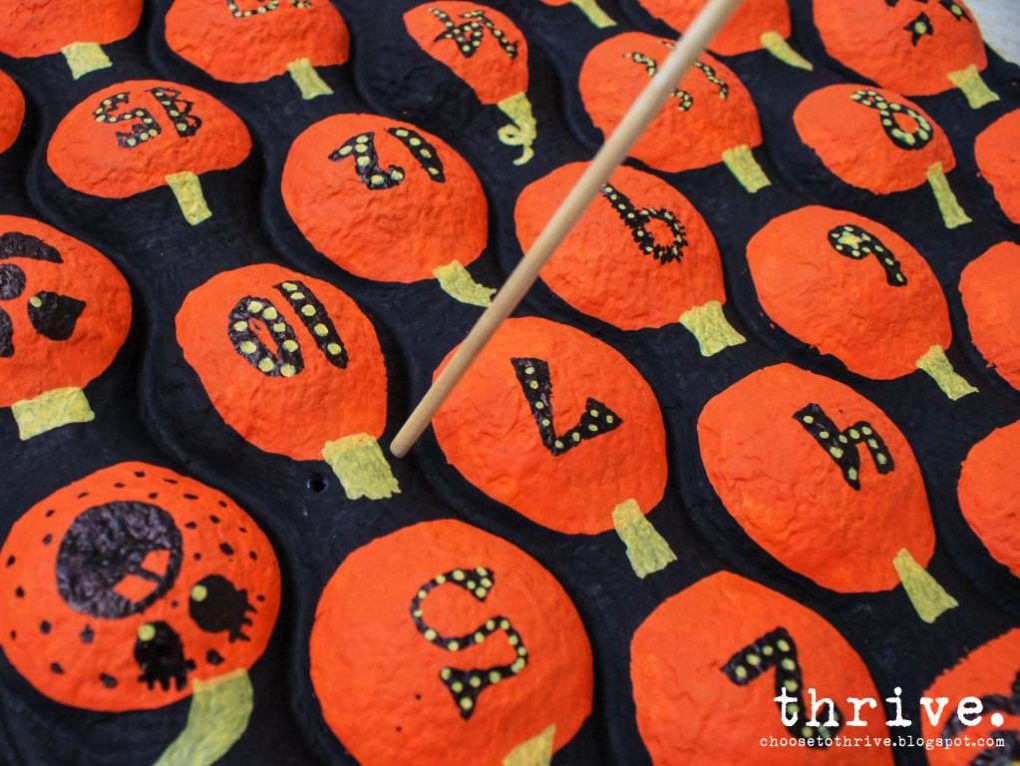
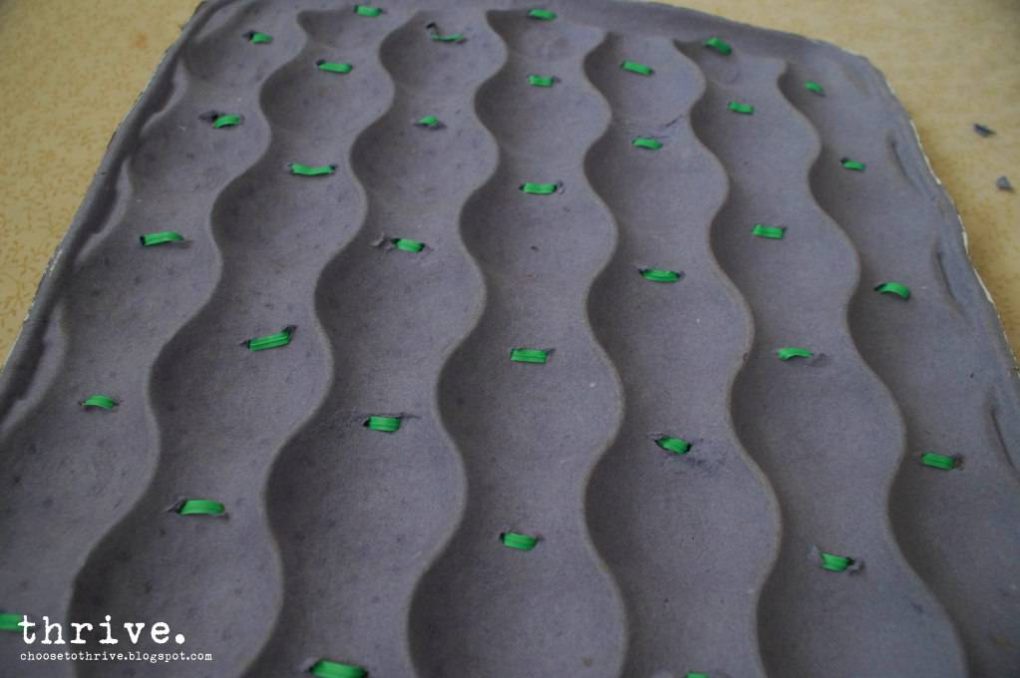
Have a grown up punch two small holes on each side of the stems with a bamboo skewer …
… and thread twisty ties from behind …
… so that your calendar looks a little something like this:
Tame those unruly twisty ties with a bamboo skewer or paint brush.
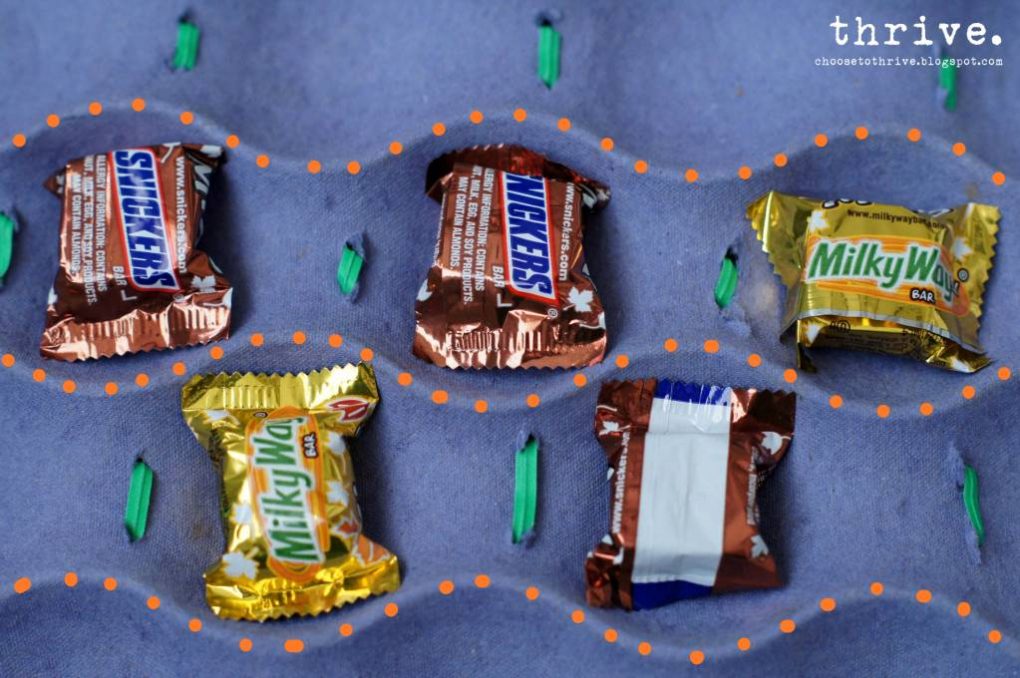
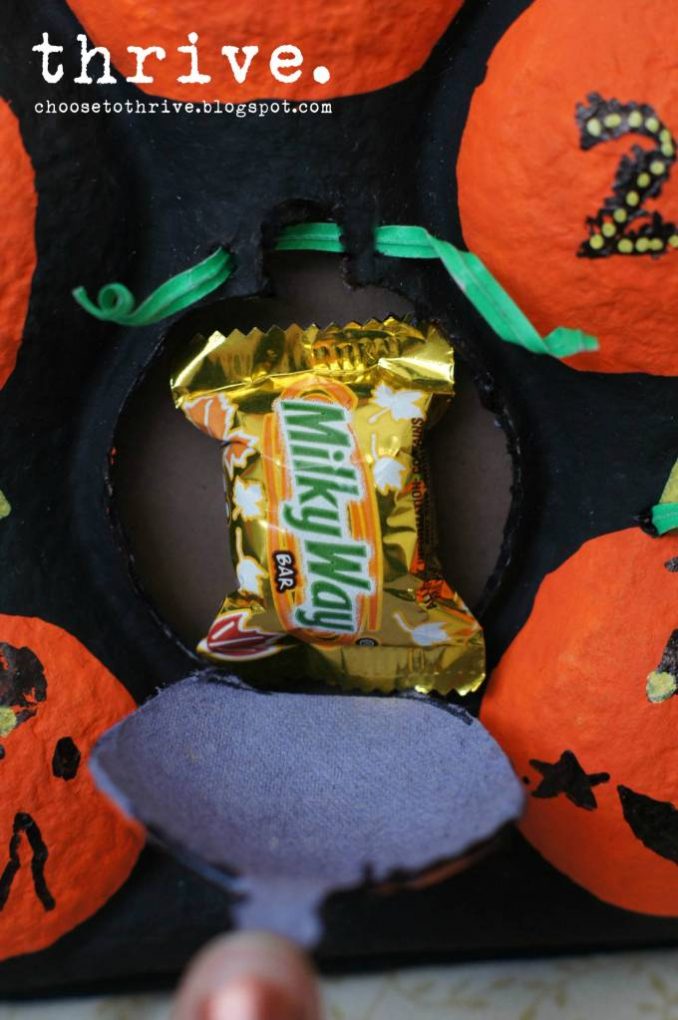
Time to add the treats! Flip the tray over and add some small treats, toys or stickers to each pumpkin back. Then carefully add school glue along the ridges (orange dots below) and sides of the tray …
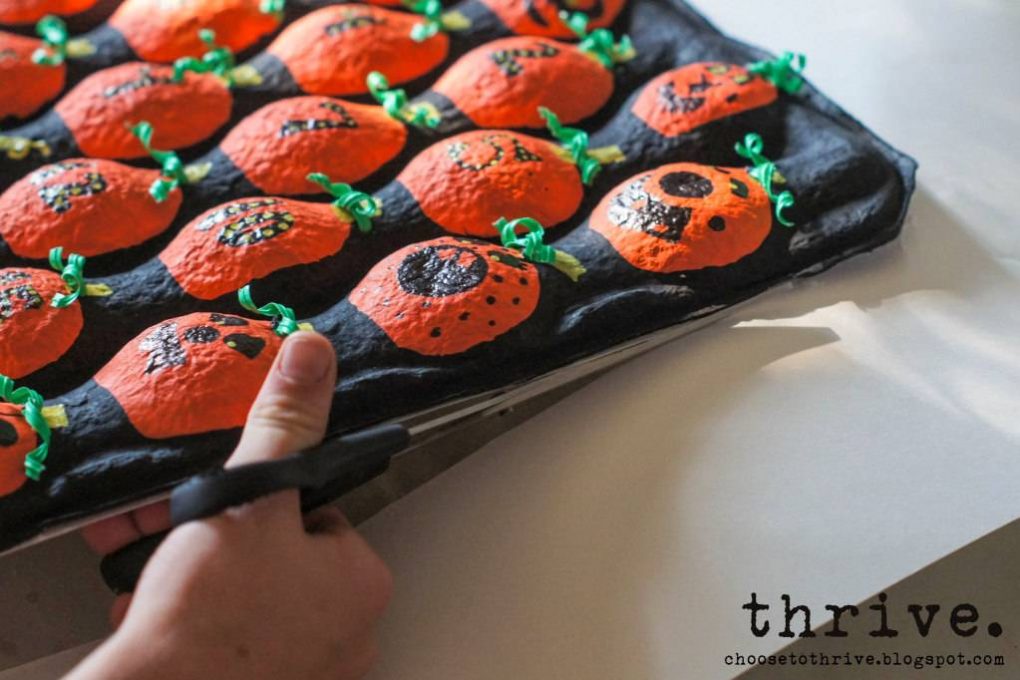
… lay the backing poster board or cardstock over top and gently weight the whole thing down for an hour. When dry, gently turn tray back over and cut away any extra paper or poster board from the back.
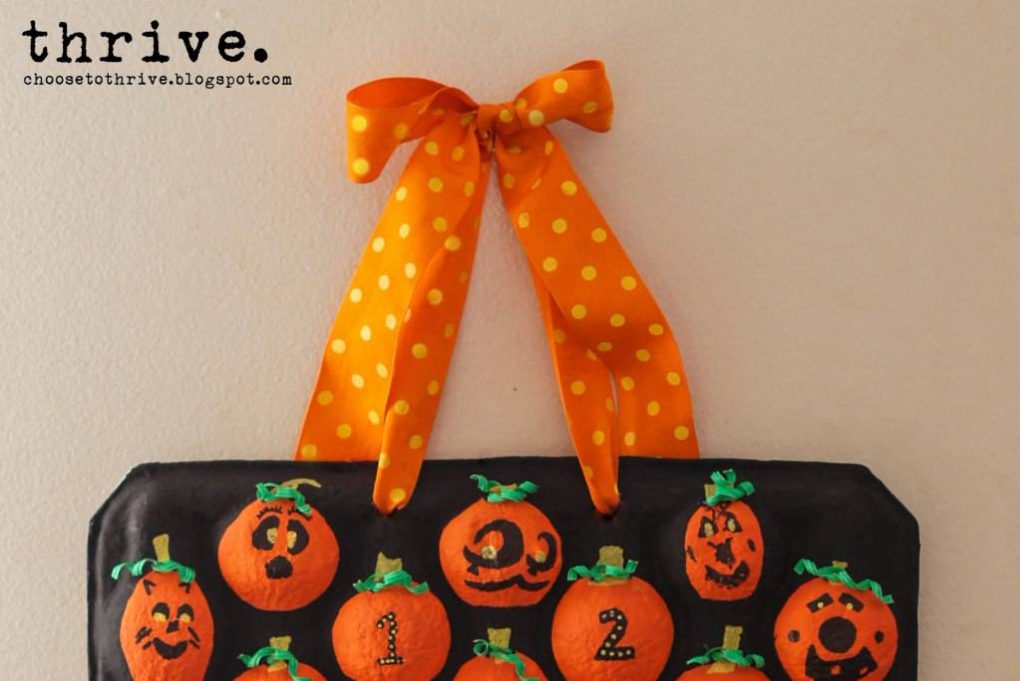
Punch two holes in the top with scissors and thread through some snazzy ribbon.
Yup, snazzy.
Your calendar is ready to be displayed! Starting on October 1st, you can “carve” each day’s pumpkin and enjoy a little treat one of two ways: 1) turn the calendar over and carefully remove the candy from behind — OR — 2) gently untie the twisty tie, carefully cut around the pumpkin and stem …
… open each pumpkin like a little clam shell and enjoy your yummy treats.
Retwist to close the pumpkin and you’re ready for the next day. (Of course you could cut all 31 pumpkin shapes ahead of time and just retie the little twisty ties, but I chose not to. I don’t trust my little ones to stay out of the treats. 🙂 So there you go – two ways to “carve” a Halloween Advent! And if you’re looking for more fun projects like the ones below, check out Thrive’s holiday tutorial page.
For the first time in eleven long years, all six of my kiddos are in school—five in elementary and one in preschool!
That means that I now have dedicated time to get back to spending some quality time over here at Thrive while my kids have a blast with their friends at school.
It also means that I had to shell out for six kids to go back to school. Thankfully, though, a little planning and creativity paid off big for us. Here’s what we did.
#1 – DIY It: The more you create, the less you spend
Shoes
My girls are still on the glitter kick which means expensive, blinged out shoes for school.
Or does it?
Baby Girl headed straight for some $30 graffiti-glitter-rhinestone-rainbow numbers while I wondered toward something more in our budget … like plain $5 black canvas numbers from the boys’ section at Walmart.
Baby Girl wasn’t excited … like at all … until we wondered over to the sewing section and I let her pick out her own bling to make her custom shoes. And to my surprise, we walked out with some fuchsia $0.57/yd. sequined trim that went on in two seconds flat with a little super glue.
Holy cow. LOVE.
Trendy. Funky. Sparkly. Blessedly less over-the-top than those $30 numbers.
Baby Girl loves them.
I love them.
Mr. Thrive loves the extra $24 we didn’t spend.
And she totally rocked that first day of preschool.
$2-3 School Spirit Shirts
I’ve already seen the PTA fliers for the school spirit shirts in the kids’ backpacks …and they’re cute …and they support school programs … but at $10-$20 each x 5 kids in school, it’s just not happening.
*Sigh*
Thankfully our dollar store has surprisingly nice, basic t-shirts in solid colors right now. So a plain shirt + $1 worth of vinyl = custom school spirit shirt for $3 or less. And while we were at it, we grabbed a few old, stained shirts from the kids’ closets and bleached them, too. Completely original, yet very school-spirit-ish shirts for a bucks worth of vinyl?
Score!
We went the bleach route and simply added a vinyl design, lightly bleached around the design with a spray bottle and then peeled off the vinyl. A quick rinse with cold water and a run through the wash and the kids were set. I used my Silhouette to cut my designs, but rock what ya got! This works great with contact paper or freezer paper + scissors and/or a craft knife. Heck, you could even make designs with painters or duct tape. Go crazy!
And since there are roughly a billion bleach shirt blog posts out there, I’ll skip the tutorial and just pass along a few tips I found in making our shirts:
Use a garbage bag
Slip a large garbage bag over a hanger and then place the shirt over top. This keeps the bleach from bleeding through to the back side and keeps everything neat.
(Shirt with vinyl design applied and ready for bleaching)
Experiment with spray bottle settings
Using a full-sized spray bottle on the SPRAY setting produced a fun, blotchy finish.
Love this one.
Go Tigers!
(Tiger image from 123rf.com; Collegiate Black FLF front can be downloaded free HERE)
In this CTR shirt that I made for my niece, I used that same full-size spray bottle set to STREAM and the bleach beaded up on the shirt and ran down the front. I love the look of the run-off and the slightly blurry finish from the bleach stream soaking in behind the vinyl design.
(CTR design was created using Dymaxion Script which free to download HERE)
For this last shirt, I used a small travel size spray bottle for a fine mist and ended up with this even, faded look.
This time I bleached the front and back of the shirt. The garbage bag kept the bleach from bleeding through.
(Eagle design from 123rf.com; Certificate font can be downloaded for free HERE)
Find cute designs
I made shirts using designs from three places: my kids’ school, the Silhouette store and online images.
School: I asked the secretary at my kids’ school for a digital copy of the school logo/mascot and she happily emailed me a black and white copy. I imported it into my Silhouette and started cutting. My kids were super excited to be able to cut their mascot. Plus I can use this design to make teacher gifts for the holidays and teacher appreciation. (For internet safety, I’m not posting that one, but it turned out great.)
Silhouette Store: For $1 each, their shapes are a cheap and fun way to find thousands of designs. It’s like the iTunes store for crafters. And they just added Batman shapes. Kid #4 is going to be ecstatic. 🙂
Online Graphic Websites: I purchased designs like the tiger and eagle for $1 each from 123rf.com. I wanted to do something a little more grown up for my older kids and decided to design my own logos with their school mascots. While the Silhouette can trace and cut any digital image, I’m a stickler for honoring the copyrights of online images and only use royalty-free or paid designs that I have permission to use. There’s so many websites with free or cheap images that there’s no reason to play dirty.
Create Your Own: For all you crafty/artistic types, make your own designs! You can draw or create your image on the computer and cut it free hand from freezer paper or contact paper.
#2 – Buy Year Round
Rather than buy clothes in big, expensive spurts, I’m on the watch for clothing deals year ‘round. I grab staples like jeans and coats at garage sales, thrift stores and clearance sales as I see them. That way back to school shopping is about a few new items to update, not completely overhaul a wardrobe. Mr. Thrive laughed when I bought the kids’ new school backpacks the week after school got out for the summer, but our local store had the popular $20-$25 backpacks slashed to $9 each. Done and done. And when Kid #2 who is brutal on shoes found his favorite pair for 50% off, I bought one pair in his size and another identical one in a half size bigger. For the price of one pair, I got two and was prepared for that day a mere three months later when Kid #2 was ready for new shoes yet again.
#3 – Budgeting for clothes when you don’t have a clothing budget
Back to school shopping used to stress me out because the reality is that we didn’t have a clothing budget for our family at all. Whenever someone needed new shoes or pants, we’d eek it out of our monthly gas or food budgets. But Mr. Thrive came up with a great idea at the beginning of this year that has allowed us to budget for ongoing clothing, birthday and school expenses on our limited income. He set up a savings account for each of our kids separate from their personal savings accounts. When we did our taxes, we put $50 in each kid’s account. Then every two weeks $5 goes into each one. For us that’s $30 a paycheck and is what we can afford—your family may do more or less. It may not seem like a lot of money, but it adds up.
Now, whenever one of our kids needs clothes or field trip money, I just take it out of their account. No worrying. No stretching gas. No panic when they grow through three shoes sizes in one year and we’re already tight on grocery money. The money is there and my kids are taken care of. So the $6 for Baby Girl’s glitter shoes came straight out of her account and not the gas tank. And $2 came out of each of my older kids’ accounts to cover their spirit shirts. And since the money is constantly being replenished, I don’t have to worry about choosing between new jeans or groceries next month because I know we’ll need both.
So what creative, free and/or cheap things do you do to help your kids get ready for back-to-school?
It’s the weekend before Thanksgiving so I’m getting my grocery shopping list together for all my holiday favorites. Here’s what’s on our menus for Thursday.
#1 Edible Decorations: The Cookie Bunting
The cuteness of a pennant banner + the yumminess of sugar cookies. This banner does double duty as holiday decorations and after dinner treat. You can find the tutorial here.
#2 Treats for the table / Place card holders
There will be rioting in the streets if my kids don’t get to make up a bunch of these turkeys to use as place holders. There’s so many ways to dress these little guys up and it keeps little hands busy. You can check out the details here.
#3 Sides: The Turkey Veggie Tray
I found this ridiculously cute turkey veggie platter from Eating With Food Allergies. I’m excited to add this fun platter to the regular stuffing and potatoes, and know this will probably steal the show.
#4 Main Course: CREAM BAKED TURKEY
You heard me: Cream. Baked. Turkey.
Ohgoodheavens.
You may never go back to making a traditional bird again. We haven’t.
And despite the lousy blogging-at-midnight pictures, you can see how easy this is to make.
1. Dice your turkey in 1” cubes (white meat, dark meat, both – you can even use chicken.)
2. Mix equal parts flour + seasoning (seasoning salt/garlic powder) and dredge the chicken.
3. Brown quickly in a skillet with a little butter or oil and drain on paper towels. You DO NOT want the turkey cooked all the way through – just browned on all sides. Fill a glass baking dish 2/3 full with turkey pieces.
4. Cover turkey with heavy cream or half-and-half. Cover and bake for 45 minutes at 375 degrees. Remove foil and bake for 15 more minutes.
And then … holy cow.
I wish I had a picture for you but it gets inhaled within seconds of it being placed on the table. The end result is turkey that has absorbed all that cream and is fall-apart tender. It’s practically an emotional experience. Try it – you’re going to love it!
#5 Dessert: PUMPKIN LUST PIE
I can’t wait to try this Pumpkin Lust Pie from Sweet Treats & More! The recipe calls for a box of Jell-O Pumpkin Spice pudding. If you can’t find it (I couldn’t here in Utah), mix 1/2 c. pumpkin puree and 1 tsp. pumpkin pie spice into a batch of instant butterscotch pudding. I know it sounds weird, but trust me … it’s the next best thing and soooooo yummy.
Dang it. I’m so hungry now.
That’s what’s on my menu.
What special recipes are you guys serving for your Thanksgiving?
I was digging through my stash looking for inspiration when I pulled out this torn, king size fitted sheet. We had this on our bed for years before it finally wore a hole in the center. This sheet was huge (and because it was fitted), never really fit well on my shelf. Since I was drawing a blank on the Thanksgiving outfits, I decided I’d at least clean up the stash a bit and cut the sheet into smaller pieces so that it would store better. I grabbed my scissors, cut the sheet into quarters, and then went to cut off the elastic that ran around the entire thing.
And I stopped dead in my tracks … and just started at the elastic … and wondered if it was a mistake to cut it all off … what if I needed that elastic later ….?
While I was thinking, my daughter the genius picked up one of the ragged pieces and said, “Look Mom! It’s just like a skirt!”
Light bulb.
And from that happy little (divine) accident, I wound up with skirts for my girls in less than ten minutes.
Want to know how?
Seriously … it was that simple.
And if you use bias tape or some type of binding on the bottom, you can skip the hemming part all together – score!
So since I didn’t spend all that time prewashing, trimming, measuring, sewing, adding elastic, etc., I had lots of time to work on the details.
**And quick picture disclaimer — my girls kept bugging me to wear their new skirts so I let them play around while I finished up projects. Consequently, these don’t look freshly pressed anymore. Sorry for the wrinkles. **
You could so do ANYTHING with this basic skirt, but I figured the best thing to add to a happy little accident was a happy little tree … or at least the happy little leaves from the happy little trees.
{Sorry – I can’t stop thinking of these as “The Bob Ross Skirts” and smile every time I see them.}
I grabbed the fat quarter bundle I won a few months ago …
… and cut a bunch of 3.5” x 3.5” blocks with leafs cut out of the centers. I cut my blocks and shapes using my Silhouette, but this is easy-peasy to trace and cut using sewing shears or a craft knife. The blocks were sewn together with a 1/4” seam allowance …
… and the top and bottom edges were pressed under for a clean finish. The whole strip was sewn to the bottom edge of the skirt.
I hand-cranked my sewing machine around each leaf cutout, but you could sew this by hand, too.
I love the creamy flannel poking through the cut-outs. Yummy.
And don’t think the leaf shapes and scraps went to waste. I just made another skirt.
I stitched the scraps together to make a long, 1” wide strip. Then I ironed the strip in half and then in half again to make my own faux bias tape to finish the bottom edge. The leaves were stitched in place with a lot of hand-cranking as well.
Not bad for a fitted sheet and some fabric scraps, huh?
It’s all in the details:
peek-a-boo cut-outs
or sweet appliqué with a simple border.
And how fun would it be to dress up this skirt for Christmas?
Mitten appliqués? Little trees with button ornaments? Ric Rak candy canes? Reindeer?
Or for Valentine’s Day? Or any day?
How much fun could you have with an old fitted sheet?
I like finding creative ways to incorporate natural elements into my home. Which is why I love Nike’s, “Rock-What-Ya-Got” approach to living and crafting.
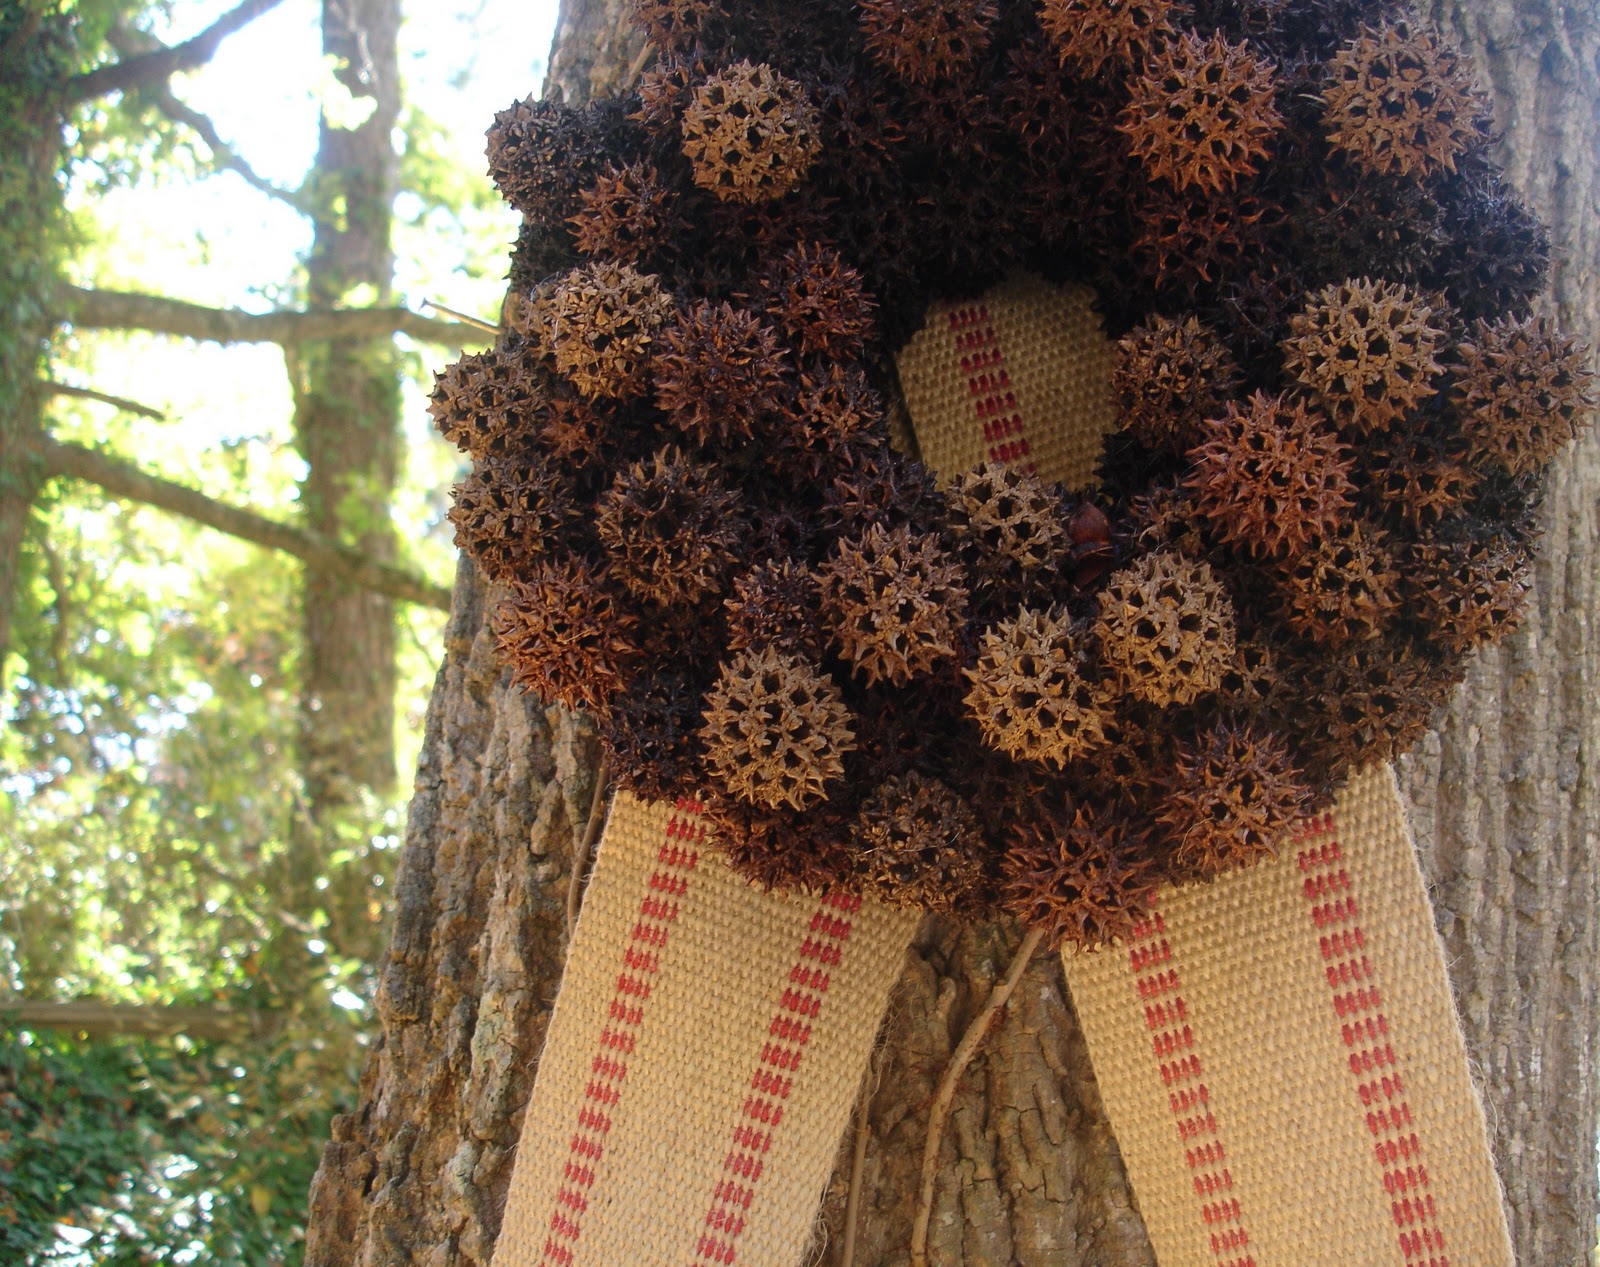
Growing in my yard is a Sweet Gum tree. Sweet Gum trees produce these prickly little balls (“Sweet Gum fruit”). Those prickly little balls are everywhere in my yard! This week instead of raking them into a pile, I went outside and gathered a bag full to create a wreath.
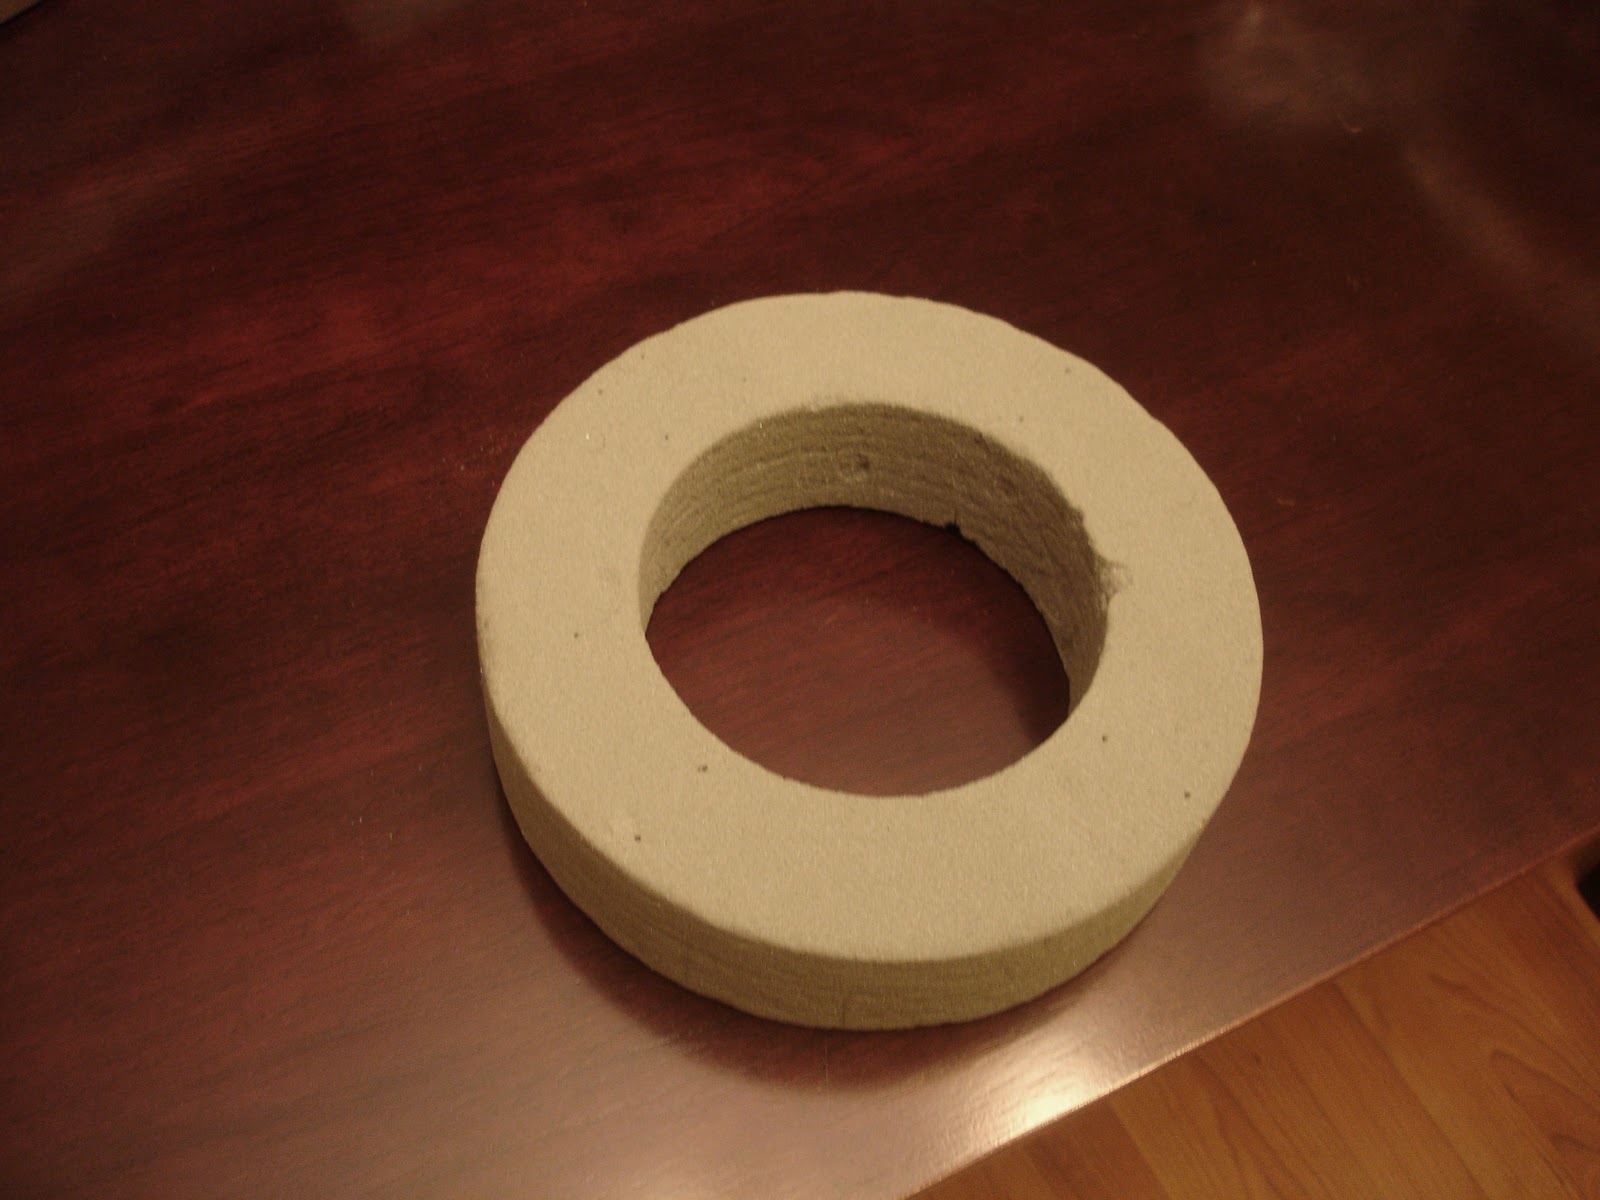
To construct my wreath, I started with a simple wreath form purchased for a dollar.
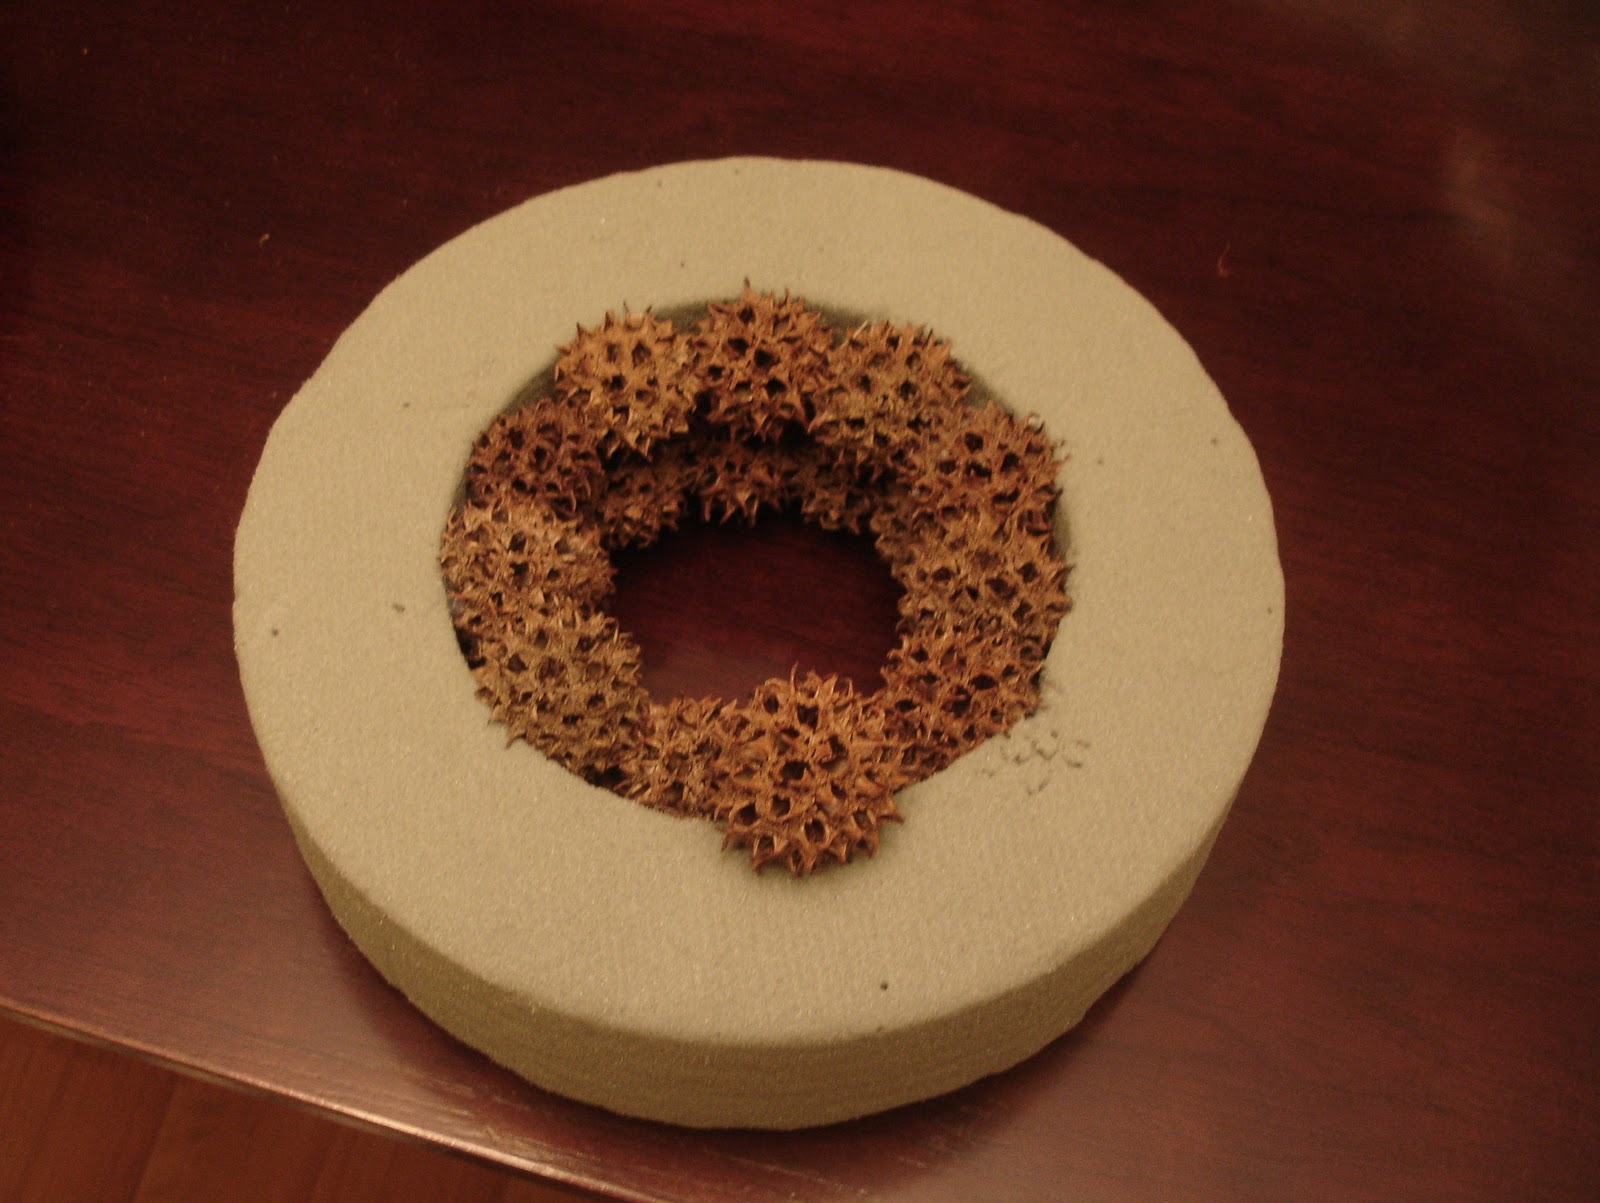
Then using my glue gun, I attached the prickly fruit to the wreath form starting from the inside and working my way out.
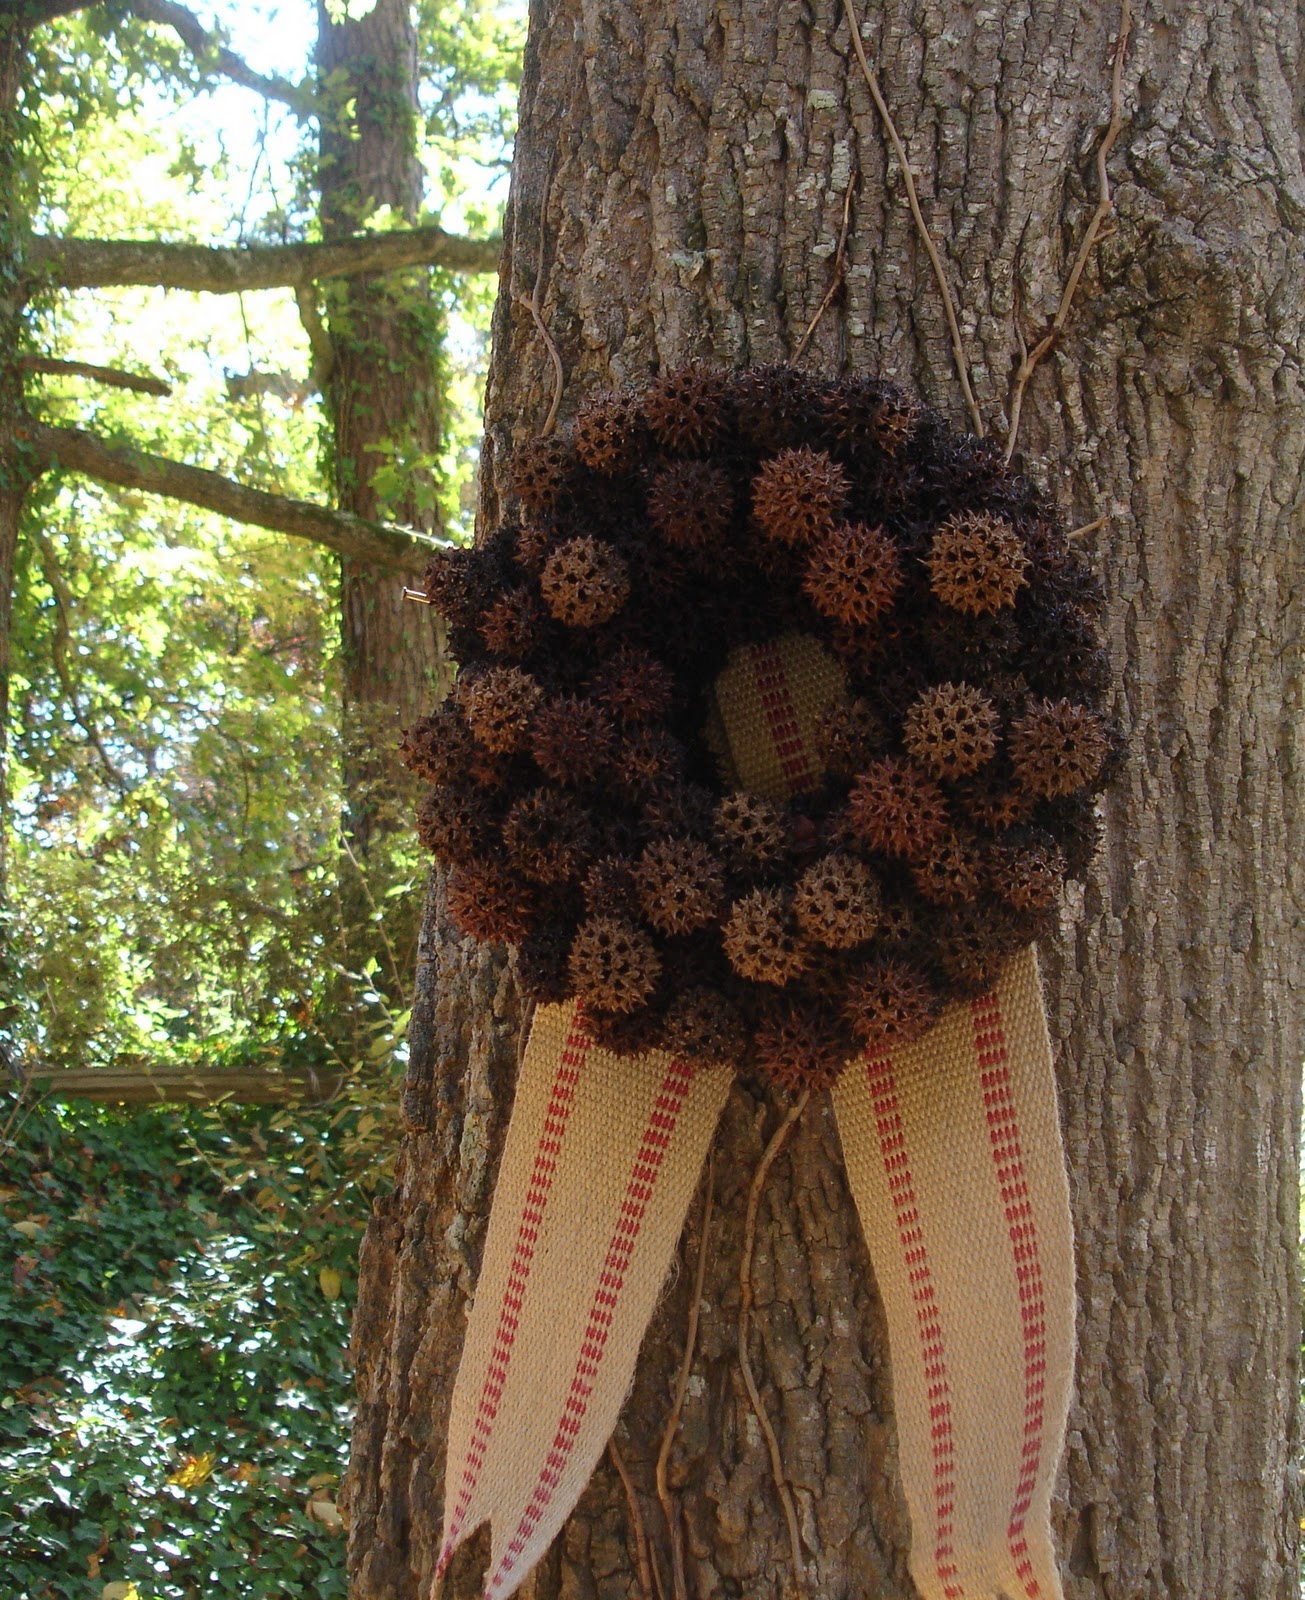
Once completed, I attached a saw tooth hanger to the backside, again using my glue gun.
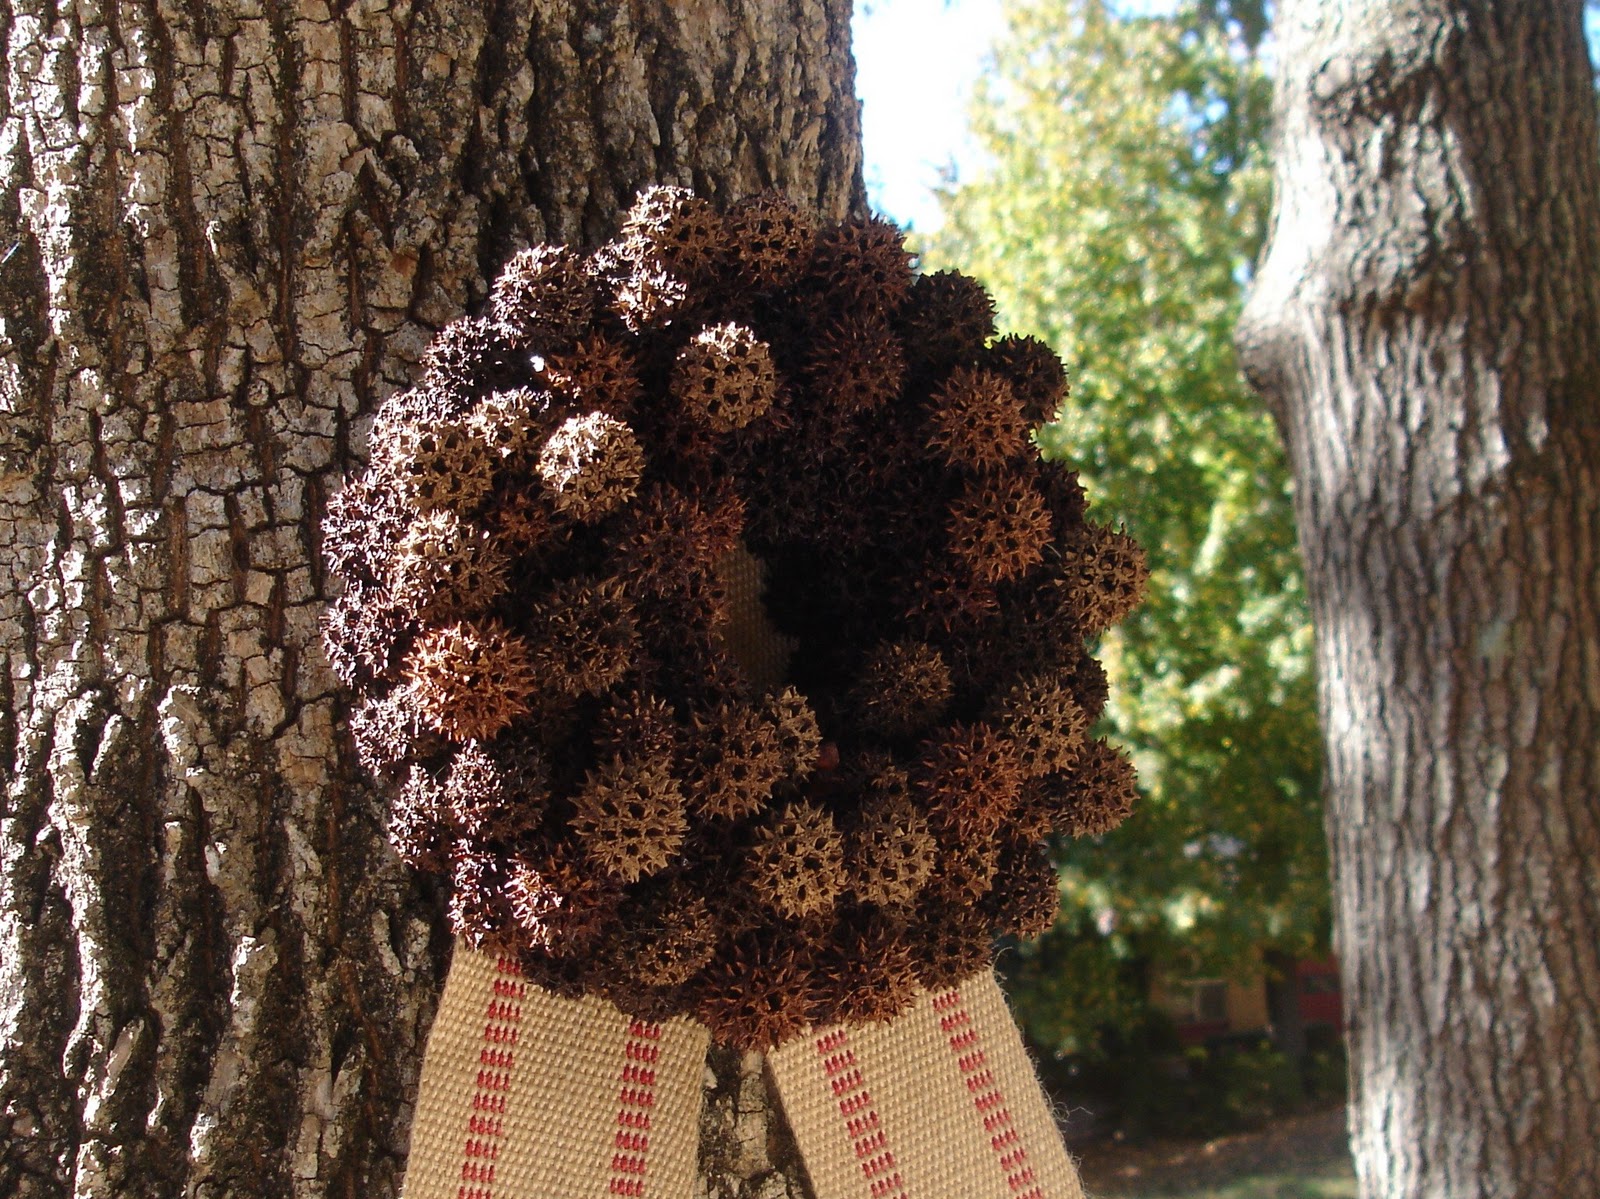
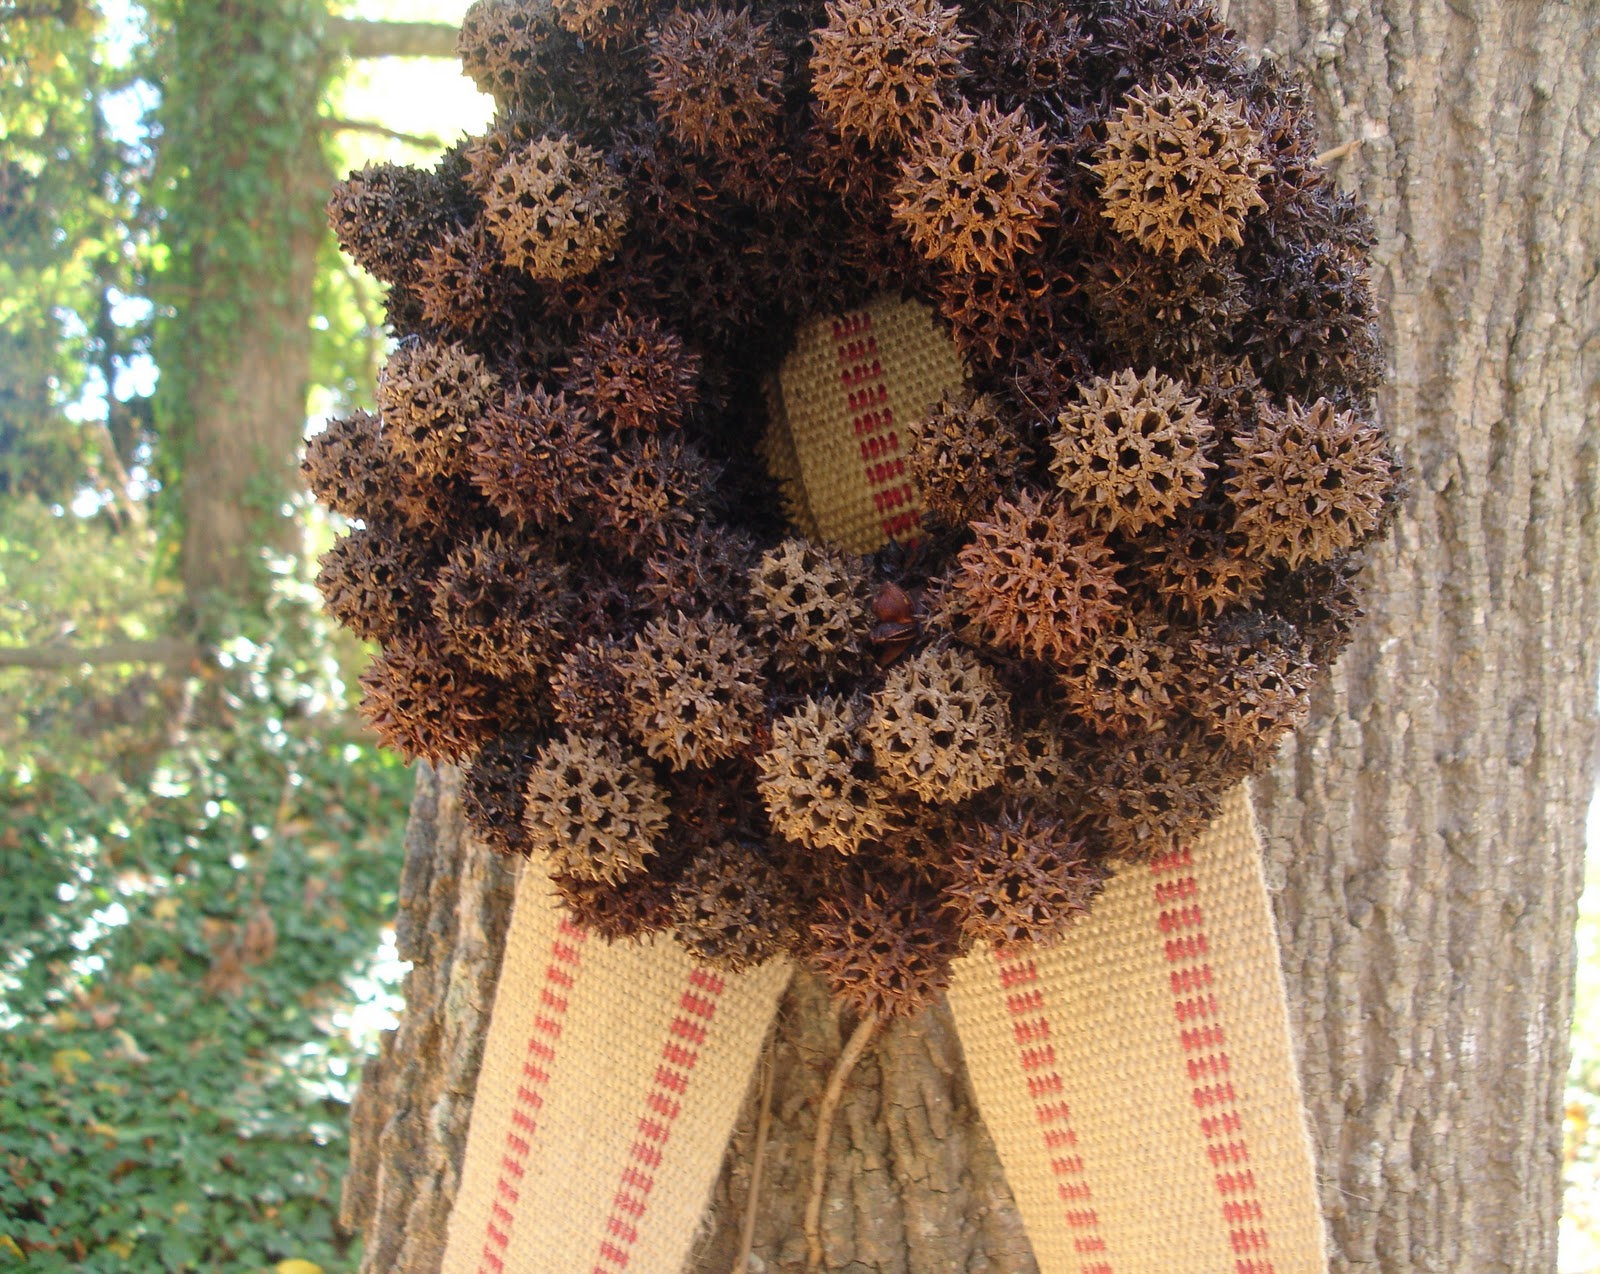
Here it is my friends!
I love the texture of the wreath.
I kept things simple to focus on the natural beauty of the Sweet Gum fruit.
“Study nature, love nature, stay close to nature. It will never fail you”. – Frank Lloyd Wright
I hope you enjoyed my tutorial! Happy Holidays everyone! Thanks so much Nike for having me over!!
************************
You’re so welcome, Brandi! I ADORE how you used natural items from your yard to create this beautiful wreath for the holidays. I’m so pinning this!
Many of you probably know Brandi from around blog land – she’s the wonderfully thoughtful blog visitor leaving heartfelt, genuine comments on some many projects out there. I am constantly encouraged by Brandi’s feedback here on THRIVE and am so not surprised when I see her doing the same for women crafters. And if you haven’t read about her inspiration for her blog title, you need to.
Oh, and did I mention Brandi’s mad crafting skills? No? Seriously … mad.crafting.skills.
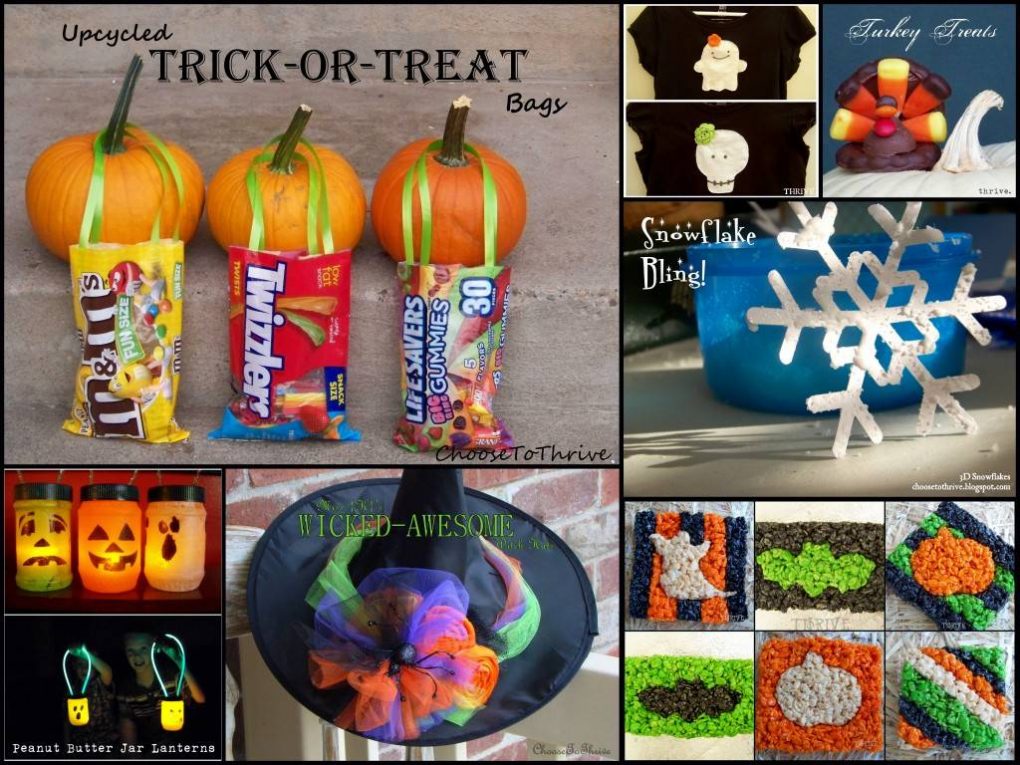
How many of you are stocking up on Halloween candy?
It’s the usual drill of buying bags, emptying treats into a bowl by the front door and then recycling the empty bags, right?
Wait! Don’t Toss That!
Those bags got the candy to your house just fine – why not put them to use to round up candy from the neighbors, too?
Just cut handles from whatever you’ve got on hand — fabric scraps, ribbon, VHS tape, curling ribbon, whatever – and tape them in place with duct or packing tape.
And that’s it. No buying treat bags. No bulky plastic pumpkins to store.
And when this little princess is done with her treats, everything gets recycled or reused—no waste, no extra cost.
Chalk this quick little post up to impulse shopping at it’s finest. Sheesh.
I was walking through Wal*Mart yesterday on my way to the toilet paper isle when this $2.24 wonder practically blinded me from cosmetics.
Wow, that’s bright.
I am so, so not a make-up person — a minimalists at heart who skips make-up all together most days. But for some reason, the freakishly-bright-Halloween-hey-why-not mood came over me and into my cart it went. And while the kids where down for naps and I was supposed to be folding laundry had free time, I started playing around on my otherwise un-prepped and un-plucked eyes.
The result?
A little something I like to call The Candy Corn Cat Eye
What do you think? Kicky or creep?
Obviously I’m no 16-year-old YouTube make-up tutorial wiz, but for some reason I really enjoyed brushing wide strokes of garish color all over my eyelids with reckless abandon.
And stepping outside my everyday routine makes me want to do other wild and crazy things today … like take my hair out of a clip, wax my upper lip and get some bangs-ha!
Or maybe go someplace special with my all-dolled-up-self … like Target.
Ah, the power of make-up.
So what are you doing for Halloween?
Do you dress up?
Do you do fun little things like wear funky socks, play with your make-up or drag out the black polish?
After weeks of waiting, Fall decided to show up this weekend.
{About time. Sheesh.}
The only problem is that my little girl is awfully short on fall and winter clothes. So instead of heading to the store, I searched through my boys’ outgrown clothes and fabric stash to come up with new duds without spending a dime.
Here’s what I had to work with:
a boring sweater, a couple ripped pairs of khakis and a stretched out camo henley.
Screams “girly,” huh?
#1 – Sweater to Cardigan
I started by removing the collar (1) and cutting down the center (2) to make a cardigan shell. (I put tape down first and then cut the sweater to prevent major fraying. I pulled the tape off carefully and gave the edges a quick zig zag.)
I made the easiest seam binding ever (3) by cutting the bottom edge of a t-shirt below the seam – no need to fold or iron. The seam binding was pinned in place (4) and then stitched in place with a straight stitch.
I could have stopped right there, but wanted to add a little more frill. I played around with the look and chose the tight ruffles instead the loose folds.
And those ruffles were a cinch to make: I cut 1” strips of t-shirt fabric and ran a gathering stitch down the middle. The ruffles were pinned on top of the binding and then stitched in place.
The result was a cute little cardigan with plenty of ruffles and spunk.
#2 – Cargo Pants to Skirt
Next up with a simple skirt with using as much of the existing hems from two old pairs of my son’s cargo pants as possible. The legs were cut off leaving the top part of the pants: waistband down to just below the front zipper. To make the skirt piece, I sewed pieces of two pairs of pant legs together with the seems out (1) and used a gathering stitch along the top to create just enough gather for the skirt piece to fit the pants(3).
The skirt piece was pinned to the pants (3) and stitched in place with a straight stitch for a shabby look (4). After a quick run through the wash, the seems softened up for the casual look I was after. (Of course you could always skip the rough look and keep those seems on the inside, too. )
Twenty minutes later I ended up with an upcycled skirt that just happened to match perfectly with that cardigan.
Maybe some of her brother’s rough ‘n’ tumble attitude came through in the fabric, eh?
#3 – Boys Henley to Girls Embellished Tee
The last refashionproject started with this Old Navy camo henley. It was the right length, but too wide (1). I grabbed a shirt from my daughter and used it for a template, trimming away the extra fabric on the sides (2) and shortening the sleeves.
I sewed one long seem from the shirt cuff to the bottom hem with a zig zag stitch (3) and added some rosettes to the collar to soften the look (4).
And total cheater alert here: I hot glued the rosettes and then hand stitched them to the shirt. I know you’re not supposed to do that, but I was in a hurry and it worked fine. This shirt has gone through the washer and dryer over a dozen times and is holding up great.
This has to be one of my favorite girls shirts. Ever.
So …
take a look at your kids’ closets, out-grown clothes piles and fabric stash and see what you can whip up.
What you’re ready to toss may just go …
You might be surprised how many adorable upcycles /refashions you’ll come up with from seemingly nothing.
Thanks everyone for your patience this week while we got everything transferred over to the new system.(Thanks Jon & Eric!) It’s soooo nice to be blogging on a computer that isn’t 8 years old. Now back to the regularly scheduled programming. 🙂
***
I believe the children are the future. Teach them well and let them lead the way …
When you find a girl with mad crafting skills, hand over the glue gun and get out of her way.
Check out this hat!
I so wish I could claim credit for this awesome number, but the round of applause goes to this talented, 13-year-old rock star, Miss{K}.
Isn’t she sweet? I’m lucky enough to be neighbors with Miss{K} and her amazing mama Miss{A}.
When Miss{A} showed me these pictures, my jaw dropped. Seriously people … Miss{K} is 13 and she just “threw these together.” I asked Miss{A} if I could share the incredible hats that Miss{K} put together for a local Halloween craft festival they went to over the weekend.
I love this project since it can double as decor and a great costume. I’m not big into dressing up for Halloween any more, but I’d totally wear this all month if I had one. Seriously … if you see me at the grocery store you’ve been warned. The other thing I love is that you could easily adapt these hats toRock-What-Ya-Got and make your own version using items you already have on hand.
Multi-Colored Tulle Hat
Miss {K} loosely wrapped orange, purple and green tulle around the brim and hot glued it in place. The tulle “flower” was made by tying regular bows out of the same colors of tulle and hot gluing them in place. Two rosettes were made from the 1”satin ribbon and tucked in beside the bows, a little scrap of black tulle stands in for a leaf, and a glitter spider adds the final touch.
Black Widow Hat
Same fun look with black and red glitter tulle using a braided band of tulle around the brim.
Purple Potion Hat
Miss{K} glued the tulle in bunches around the brim, added a tulle bow and a finishing black glitter spider.
I totally want all three. For me.
*Swoon*
Hopefully Miss{K}’s awesome hats will inspire you to make your version using items from around your house, Rock-What-Ya-Got-style. (Or even from the store, tulle and ribbon are pretty cheap). I’m so planning on making one of these for me and my girls using what we have on hand: scrap t-shirts and ribbon in the same colors.
If you make one, send me an email or post it on Thrive’s facebook page—I’d love to see it!
Thanks again Miss{K} and Miss{A} for sharing your wicked-awesome hats!
This week while my kids were off track, we drug out the food coloring, cookie cutters and went totally crazy with dessert staple.
I mean holy-cow-that’s-a-lot-of-food-coloring crazy.
Behold the Extreme Home Makeover edition of the basic Kellogg’s Rice Krispy treat.
*EEK*
I kinda love them.
The end result was crazy-bright, marshmallowy mash-ups that are so stinkin’ cute and not much harder to make than the original.
The sky’s the limit here for the colors, patterns and shapes you could use. Here’s what we came up with:
Ghosts & Stripes
Bats
Pumpkins & Stripes
Plain Stripes & Even Quilt Block Shapes (ha!)
Mini Bites
Once you get started it’s sorta hard to stop.
Everyone knows how to make these so I’ll skip the full tutorial thing. However, there were a few tweaks I made to pull these off that I’ll pass along:
1. To get the color super saturated, you’ll need copious amounts of food coloring – like a full teaspoon of the Wilton jells for most colors. For the black, it’s more like a full jar … um, seriously. (Try not to think about it … it’s only once a year. 🙂
First batch with 1/4 tsp. food coloring jell: too pastel-y
Second batch with a generous 1 tsp. jell: much better
2. The other trick to getting a solid color is to use half the amount of cereal the original recipe calls for. Here’s what I wound up doing:
3. To make the stripes, cut long strips from solid blocks of color (like on the tray above) and mush them together.
This worked much better than taking small clumps of each color and trying to form it by hand.
4. Use a generous amount of non-stick coooking spray on the cookie cutters. You’re welcome.
5. Let the cereal cool for 10-15 minutes at room temperature before cutting. That way the cereal mix will be somewhat set, but easier to work with. Once your shapes are made, go ahead and refrigerate to set.