Category

Home and DIY Projects

Category

Last week I found myself walking through Target with the wedding registry for some friends and ended up picking these funky everyday dishes.

rag.4

Of course I spaced gift wrap until I got home. Actually that doesn’t really surprise me because buying bags and tissue paper is one of my biggest pet peeves.

Total waste of money.

I dug through my wrapping stash at home and picked this plain white craft paper over the SpongeBob SquarePants birthday variety.

rag.6

Then I dug through the Bat Scrap organizer for some scrap ribbon and came up with nothing long enough that would match.

Nada. Zilch.

That is until I remembered the four massive bins of old shirts still waiting to be recycled, upcycled or stash-busted.

rag.7

  No problem.

I cut a couple of 1” strips with a rotary cutter to wrap around the box of plates …

rag.5

… and some 1/4” strips that pulled nice and tight to make them nice and thin like string or yarn.

That weird shaped stack of bowls got a simple confetti colored tie …

rag.2

… while the box got a quick wrap and easy knots around the corners.

rag.9

Easy. Fast. Done.

So give rag ribbon a try.

I bet you could pull together a quick shabby-chic wrap for your next party using fabric you already have on hand AND in colors that match the gift inside.

Because us women care about stuff like that.

rag.3

Happy wrapping and stash-bustifying!

Linking up to:

Skip To My LouCraft-O-ManiacC.R.A.F.T., The DIY ShowOff *  Stories of AtoZ, Tip JunkieSugar BeeToday’s Creative BlogSassy SitesMy Uncommon Slice of Suburbia * Someday CraftsLil LunaWe Are That FamilyBlue Cricket DesignsThe Thrifty Home, * House of Hepworths, *Remodelaholic FridayTidy MomWhipperberryKojo DesignsChic On A Shoestring, Momma’s Kinda Crafty, *Tatertots & Jello,  Be Different Act NormalFunky Junk Interiors * I Heart NaptimeUnder The Table and Dreaming

Happy Back To School Everyone!

I’m thrilled to be here sharing back to school ideas this morning to help me and my six kiddos this year!

So here’s the deal:

I have a love/hate relationship with my kids’  lunches.  

hate shopping trips with my kids begging for all the pricey, pre-packaged lunch stuff that’s loaded with preservatives and wasteful packaging.

Sheesh that junk is expensive.

But the convenience? Oh how I love the convenience. 

And there are times of the year when our schedule is so crazy that I cave and load up the cart with lunchables, little bags of crackers and jello packs just so that we can pull a lunch or snack together in two seconds flat.

But no more!

I’m here today to share my plan to eat healthier, save money and still enjoy the convenience that me and my kids crave.  And I hope you’ll tweak the ideas below to fit your family’s budget and nutritional preferences. 

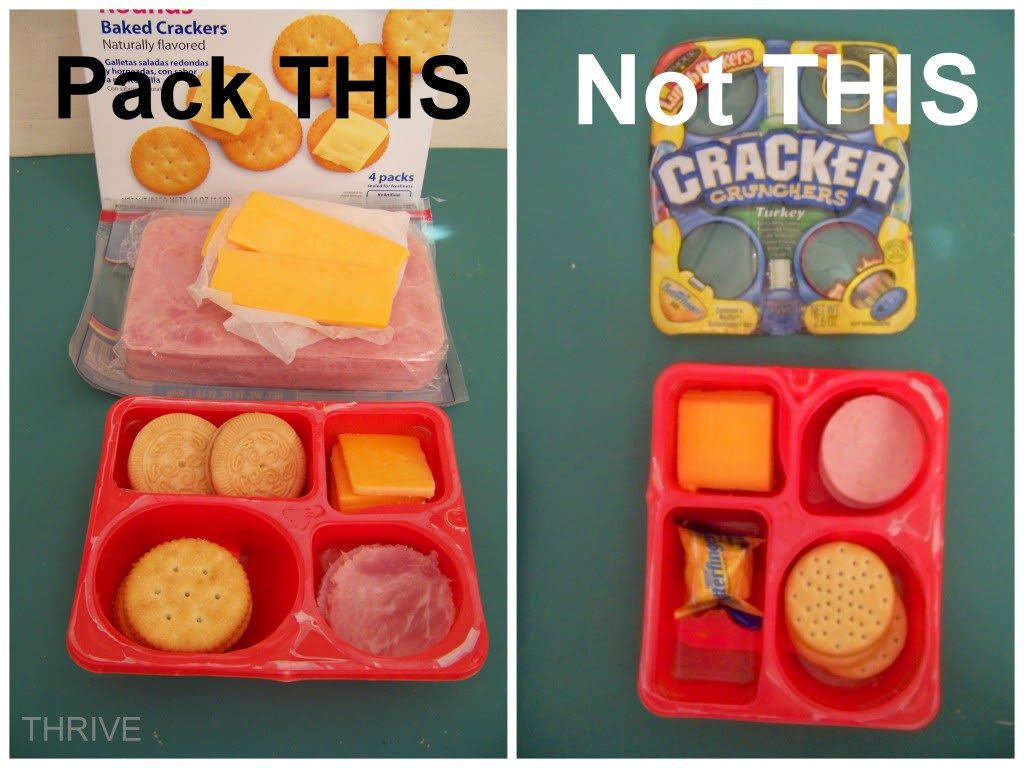
#1 – The Lunchable

Why?

Reusing the store bought tray and packing your own lunch meat, real cheese, crackers and a little treat will save you 40% — $0.60 for homemade vs. $1.00 for the store bought one. Plus the homemade version boasts real cheese, extra calcium and fewer preservatives.

A quick layer of Glad press ‘n’ seal or aluminum foil keep everything in place just like the original.

Don’t have a left-over lunchable tray? Or want a bigger tray to up the serving size for older kids?

No problem. You make your own dividers like I did for this dollar store container using an empty milk jug.

And that extra space means you can supplement that lunchable with some fruits and veggies without spending more than the store bought version.

Which $1 lunch would you rather send with your kids?

Yum … yeah. Me, too.

For a drink my kids prefer the juice pouch …

… while I’m more in favor of the reusable water bottle which make lunch $1.20 the first day and $0.98 every day after.

So we’ll do both: water most of the week and juice boxes on Friday for a little bit of a treat.

Either way these lunches come in significantly less than our $1.60 school lunch and WAY CHEAPER than the big-drink-included-lunchables at the store:

Really?

$3.00 for a $1.00 lunchable and $2.00 juice pouch? Um, no thanks.

#2 – The Pudding & Jello Packs

Why? 

Reusing those little cups (or the small tupperware containers with lids) and making your own will keep the cost and preservatives way down.

Same thing for the gelatin cups:

Making just this switch alone will save you a truck load. Six cents a cup vs. $0.56 for Jell-o brand? You could easily cover back-to-school paper supplies, back packs and shoes with just that little switch.

#3 – The Fruit Cups

The reduction in packaging, costs and preservatives make these easy switches.


#4 – The Mini Cracker Bags

You can enjoy the name brand crackers and still save almost 40% when you prepackage them yourself using $0.01 snack size sandwich bags. Just check out the cost per serving:

If you don’t mind generic, you can reduce those costs another 50+ percent.

And it’s just as convenient to grab a home-packed bag as the store packaged variety. The only difference is the price.

A few more THRIVE tips:

1. The ideas above are only guidelines. Each family will have their own nutrition and budget preferences. The idea is that by getting creative with recycled/reusable packaging, you can still enjoy the convenience of off-the-shelf while controlling costs and ingredients. So feel free to make your own tweaks with whole grain crackers, organic produce and nitrate-free meat. Or try packing a lunchable with mini tuna or PB&J sandwiches. Have fun!

2. Make your kids help with the prep work! They’re the ones asking for the “cool” packaging so they can help. It’s also a great way to teach basic food prep and math skills like measuring ingredients and dividing portions.

3. Have your kids help you shop! Don’t laugh — I’m serious. This is a fantastic chance to practice real life math skills as they determine price per unit, ounce or pound.  There’s also lots of fun ways to to teach math, spelling and budgeting with kids during shopping trips here.

3. Have cheese for sandwiches or lunchables pre-sliced at the deli. I buy the economy loaves and have them sliced right there at the store for no extra charge. It saves so much time and keeps the portions equal.

4. Rock What Ya Got! If your kids are like mine and want the meat for their homemade lunchables to be round like the store bought variety, trying using the lid of a spice jar.  (My cookie cutters aren’t the right size). Stack the meat in three layers and cut away. The lids from my 2/$1 Walmart spices worked perfectly.

And don’t toss those scraps! I save mine in a ziploc bag in the frig to use in omelets and salads.

5. Incorporate fresh produce from the garden! Now is a great time to up the nutrition with yummy, home ground fruits and veggies. I love it when I can ditch the high fructose corn syrup fruit snacks and send my kids with the homemade variety.

They have a soft, chewy texture like other dried fruits and are only $0.01 per serving vs. $0.20 for the cheapest store bought variety!  You check out the recipe here.

Yum!

… and finally …

6. Pennies add up! I know some of you may look at $0.25 or $0.50 savings a day and think it’s not worth it. But trust me – it so is! My kids have been back to school for a month now (year round school) and I’ve kept track of what we would have spent to buy the prepackage stuff vs. packing our own.  So far our averaging savings is around $8 a week. 

If our family takes out the money saved each week and transfers it into savings (or puts it in an envelope Dave Ramsey style), that $8/week times 25 weeks of school should work out to $200 by the end of the year.  And $200 divided between my four school-aged kids equals $50 a piece, or enough to buy a new pair of shoes, back pack and classroom supplies for each of them.

Eating healthier, using less packaging, teaching my kids about cooking-meal planning-math-budgetting AND financing back-to-school shopping for next year? That’s so worth it to me!

Hope you and your kids have fun shopping for your own creative ways to make smarter lunch choices!

(Originally shared on The CSI Project here)

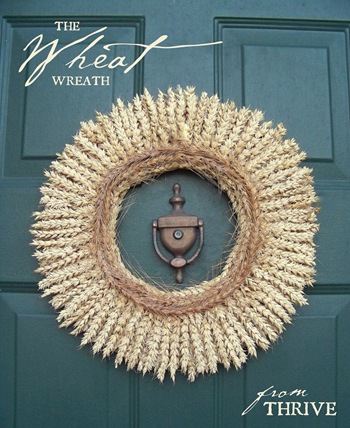
My first fall project of the year just went up on the front door.

wheat.1b

All that gleaning has sure paid off.

And this came together in a single naptime using a cardboard box for a wreath frame and wrapping it with scrap fabric like I did here.

(And do yourself a favor here and wrap some wire around your frame and make a hanging loop on the back before you start gluing on your wheat. I didn’t and it was a pain to do it after the fact.)

Wheat was attached using generous beads of hot glue for a first layer…

wheat.7

… and then second layer.  The ends where trimmed along the inside edge for a nice, clean look.

100_3499

Then extra wheat was glue along the inside edge so that none of the fabric showed through.

And just for fun, I added a double ring of red wheat near the inside edge. I love the rust color and extra contrast.

wheat.9b

I’m so excited to have this beauty up on the door, even if it is 97 degrees outside.

wheat.14

And if you want this look for your door without spending a grundle at the craft store, it’s not too late to glean! I found another field yesterday and grabbed two more bucketfuls. Good luck!

wheat.8

Featured on:

as-seen-on_150x150pixel featured

Linking up to:

The CSI ProjectSkip To My LouCraft-O-ManiacC.R.A.F.T., The DIY ShowOff *  Stories of AtoZ, Tip JunkieSugar BeeToday’s Creative BlogSassy SitesMy Uncommon Slice of Suburbia * Someday CraftsLil LunaWe Are That FamilyBlue Cricket DesignsThe Thrifty Home, * House of Hepworths, *Remodelaholic FridayTidy MomWhipperberryKojo DesignsChic On A Shoestring, Momma’s Kinda Crafty, *Tatertots & Jello,  Be Different Act NormalFunky Junk Interiors * I Heart NaptimeUnder The Table and Dreaming

Ever notice how the threat of company stopping by can motivate you to finish those someday projects?

Well this week’s visitors finally got me outside to make over our curb-side travesty of a mailbox.

Oh sheesh this thing is bad.

100_3122

I mean swinging-from-the-ugly-tree bad.

100_3120

Just check out that chipped paint, rusted top, peeling house numbers and seriously thrashed post. Our neighbors must hate us.

100_3121

But since Katie proved that spray paint and sanding can save anything, I figured a mailbox make over was worth a shot.

I mean really … could the thing look any worse?

I removed the peeling, reflective house numbers with Goo Gone and then scrubbed away the residue with a little soap and steel wool.

100_3123

Next is was the fine sand paper + damp cloth wipe down + coat of primer routine.

Aug 2011 BLOG1-4

Finally two coats of high gloss spray paint on both the box and post + a day to dry …

100_3250

… and my neighbors are speaking to me once again.

100_3297

And thanks to my handy-dandy Silhouette machine, I was able to cut out new house numbers to replace those awful reflective ones.

Since I’m not thrilled about showing my address on the ‘ol blog, so I’ll show you the photoshopped version using the same Porcelain font and ivory vinyl that I did use.

mail.7

Ah, dignity …

mail.3

… how I’ve missed you.

mail.8

*Swoon*

The paint, primer and vinyl were all zero out-of-pocket supplies for me since I had them on hand, but the cost from the store is dirt cheap:

Walmart cheapy spray paint primer – $0.99

Walmart cheapy high gloss spray paint – $0.99

Scrap vinyl or contact paper – $1.00

So whether you’re rockin’ what ya got for paint or buying this from scratch, $0-$3 bucks for a total curb-side face lift ain’t bad at all.

See?

mail.5mail.2mail.6

Enjoy your weekend and go show that mailbox some love!

Linking up to:

Skip To My LouCraft-O-ManiacC.R.A.F.T., The DIY ShowOff *  Stories of AtoZ, Tip JunkieSugar BeeToday’s Creative BlogSassy SitesMy Uncommon Slice of Suburbia * Someday CraftsLil LunaWe Are That FamilyBlue Cricket DesignsThe Thrifty Home, * House of Hepworths, *Remodelaholic FridayTidy MomWhipperberryKojo DesignsChic On A Shoestring, Momma’s Kinda Crafty, *Tatertots & Jello,  Be Different Act NormalFunky Junk Interiors * I Heart NaptimeUnder The Table and Dreaming

One more day of high temps and I swear I’m gonna melt.

100_5487

It’s supposed to be Fall!

Even though there’s still warm/mild temperatures for most of us, now is the time to start watching for those inviting, organic accessories for your fall decor: corn stalks, grape vines, wheat bundles, and changing leaves.

88894034_sMxpdFkM_c

So how do you get those things for zero out of pocket if it’s not growing in your own yard?

Gleaning.

Do you know what it is? Have you ever done it?

Gleaning is basically collecting left over materials that the owner doesn’t want or need. For fall that means lots of opportunities to score left over wheat, corn stalks, grape vine, etc. after the main crop has been harvested.

If you’ve never tried it, you need to!

But before you start tromping through fields with scissors in hands, consider the following:

1. First and foremost, always always always ask before you take anything. Gleaning without permission is the love child of stealing and trespassing. Knock on the door or call the property owner and make sure it’s okay to glean.

2. If you don’t know who the owner is or how to get a hold of them, call the city or county recorder’s office and get the owner’s contact information.

3. Make sure you have an exact (or very close) address when you stop by or call a city/county clerk. The more information you provide, the quicker and easier it will be for them to help you.

BAD: “I’m looking for the property owner of that big field over by the freeway.”

GOOD: “I’m looking for the property owner of the field on the northeast corner of John Street and 80th Avenue.”

4. When you go to glean, be quick, be respectful, stay out of their way, bring your own equipment (scissors, garbage bags, etc.) and don’t ask for special accommodations. Remember: they’re doing you a favor.

5. Send a thank you note to anyone who helped you: the city clerk, the property owner, whatever. It only takes a few minutes and will make it much more likely that you’ll be welcomed back next year.

What and Where To Glean

My all-time fav:

1. WHEAT

Remember this project from the THRIVE archives?

100_0031

I made this project using gleaned wheat from my neighbor’s garden after she picked what she wanted. This would have run $20+ at a craft store after the coupon discount.

This year my neighbor didn’t plant wheat so I called the city recorder of the town where I saw a huge field that had just been harvested.

100_3102

Turns out the city owns that field and they gave me permission right then. Score!

100_3103

That tiny row of left over wheat right along the dirt patch yielded a bucketful. For wheat, oats or any other cereal grain, put the cut stems in a bucket—using a garbage bag for collection makes a huge mess and often breaks the stems.

2. CORN STALKS

corn.stalks

I use them every year on my front door and will this year, too (even though I’m planning some fun, big changes).

Talk to your to friends and neighbors with garden patches now about gleaning their left over stalks. Commercially harvested fields may now have a lot of stalks left over, but small patches that are harvested by hand are great places to look. Bring twine and hedge clippers to lop through and bundle your stalks. Green stalks will need a few weeks to dry completely and acquire that wonderful parchment color.

3. GRAPE VINE

pumpkin

Love, love, love.

But those shapes can get pricey, even with the wonderful 40% off coupons. Making your own shapes is easier than you may think so look around. Ask neighbors, friends, etc. if you can help trim back vines when their grapes have been harvested.  They get some help and you get the raw materials to make wreaths, swags, frames, pumpkins, whatever. Win, win.

4. LEAVES

SANY1296

They’re pretty much everywhere which makes this easy. Picking up leaves at a park or along a public walk way is usually no big deal. If you’re worried, it never hurts to call the local city public works department and double check.  If you see great leaves on private property, again–always ask before collecting! I’ve seen great leaves on lawns while I’m out running errands, pulled over and gone and knocked on doors before.

My favorite way to use leaves is to string them together on twine or fishing line for a simple, pretty bunting.

I usually store leaves in between the pages of large books while they dry out. The flattened, leathery leaves are easier to use for projects than the more brittle, curled shape you usually get with regular air drying.

5. CORN HUSKS

husk.pics Images: 1. Growing Corn 2. Amazon.com

Sure, you could go guy these at the grocery store, but you can also just save those husks after your next bbq. Trim off the thick, curved bottom end and press the individual husks in between book pages (just like leaves) so they dry smooth and flat. Husks are so under appreciated and versatile. Seriously, make sure you save some.

So go put some scissors, gloves and a bucket in your car and try your hand at gleaning!

Happy

please-for-the-love-let-it-cool-down-soon

Fall!

100_3175

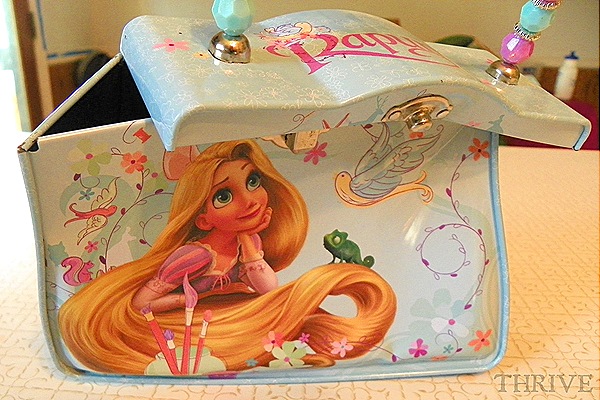
My seven year old daughter is crushed: her Tangled lunch-box-purse-thing is toast.

tangled.6

Frankly I’m surprised it lasted this long.

My daughter loves–LOVES–this little box, but is terrible at putting it away. So in the last few months it has been stepped on, knocked down the stairs, left outside and dumped in the toys box dozens of times. This week she finally admitted through tears that there was no way to uncrinkle the metal or replace the busted off latch. The bottom of the box had a steel logo so I marched it straight to our recycling bins.

tangled.5

Time to toss the box, right?

Wait! Don’t Toss That!

Since I was going to have to cut the handle off her most favoritest toy ever before I could recycle the box, I let her come up with something new to make with the left-over materials.

And the result?

tangled.2

Clear, stretchy plastic cording + the left-over handle beads

=

a quick princess bracelet.

tangled.4

My daughter was thrilled to both save her princess jewels and have something princess-y to wear just for her.

And because we were so focused on the bracelet save, I didn’t even think to save the metal from the box sides.

Dumb, dumb, dumb.

t

What I should have done was *carefully* cut the side panels from each side of the box, crimp the edges together and make a little cup for pencils or stickers for my daughter’s desk.

 Oh well.

At least it’s been recycled and the beads live on as a bracelet on the arm of one very happy seven year old.

tangled.3

Now please remember to put your new bracelet away kiddo.

Busted lunch box / purse?

tangled.9

It’s What Not To Toss this weekend.


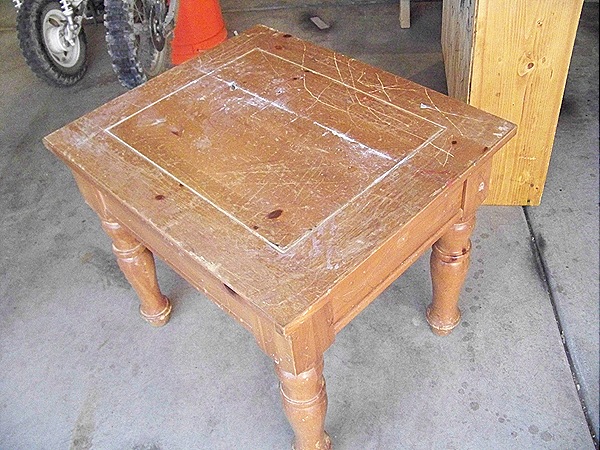
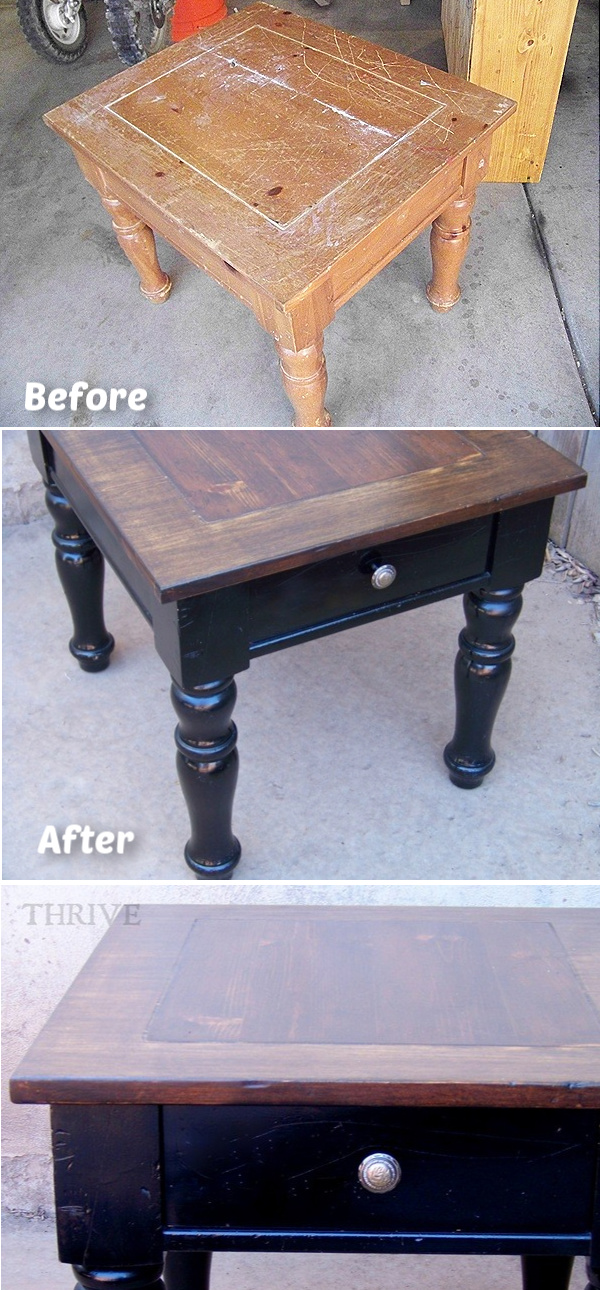
Let me introduce you to Betty, my sad little end table.  I found her seven years ago at D.I. right after we moved to Utah. She was only $10 and in near mint condition. And being a Broyhill, she was the only piece of real furniture that we owned.

100_1812

Since that time though, she has been loved and beat to death by my Dirty Half Dozen. They have decoratively carved her … driven metal trains on her … raced match box cars across her … jumped, climbed and leaped off her … painted, spilled and colored on her. In short, they have sucked every ounce of beauty and grace from her life (just like they did their mother-ha!)

100_1811

So for the past few years she’s been relegated to the living room corner as an impromptu TV stand.  Luckily the screen is big enough to hide the top and cover most of the brutal wear and tear.  But still, Ugly Betty constantly reminded me how sad my house looked and how much I wanted to change that.  I figured Betty would need to go straight to the dump if we remodeled, because come on … who could salvage thatright?

100_1810

Apparently my awesome friend Katie can. 

Hello sexy Betty!

betty.6

I have the most awesome visiting teacher! Katie has one of those houses that strikes the perfect balance between catalog beautiful and warm-inviting-and-children-can-actually-live-here. She is a furniture restoring rock star who has mad spray painting skills that I so envy.

betty.7

Katie had stopped by the week before we left for Washington to see how I was doing and how the house was coming along (or not really coming along). I told her how frustrated I was with how slow we were going and asked for her advice on to do with the living room furniture.  She took one look at Ugly Betty and the bookcase Mr. Thrive made me right after we got married and immediately offered to paint them for me.
betty.5

I thought her offer was sweet and didn’t think much about it until she called the day before we left to offer again. “I’m serious, “ she told me excitedly. “I really would love to paint them for you while you’re gone. That way you’ll have two less projects to worry about when you get back.”

And so she did.

I had Mr. Thrive unpack all the vacation stuff from the suburban and ran Betty and the bookcase over to Katie just before 9 pm. Then we repacked the suburban in the dark, got a few hours of sleep and then left for vacation the next morning at 4 am.

And while I was gone, Katie was busy.  She sanded down the wood veneer around the outside of the table to get rid of most of the scratches. Then she lightly sanded the center area to leave most of the veneer in tact. The result was an awesome, two-toned topper than stained up beautifully.

betty.2

She used Dark Walnut stain from Minwax on the top and sealed it with a few coats of poly.

betty.4

The legs and drawer got a few coats of glossy black spray paint. Katie swears by the .99 Walmart spray paint and I’m a believer now.

betty.1

And I love that Katie left some of the dings, dents and scratches behind to make sure Betty didn’t loose her I’ve-been-well-loved look. 

Katie even added a left over knob she had from her stash to finish off the table. *LOVE*

betty.3

Betty looks amazing and I can’t wait to get the dang house painting done so that she can move back in.

betty.8

Thanks again Katie!

PIN THIS TO SAVE FOR LATER

Saving Ugly Betty A Furniture Intervention

Well bummer.

By August I had hoped to be much farther ahead on our upstairs than we are.  Oh well.  Progress—even the impossibly slow kind—is still progress none the less.

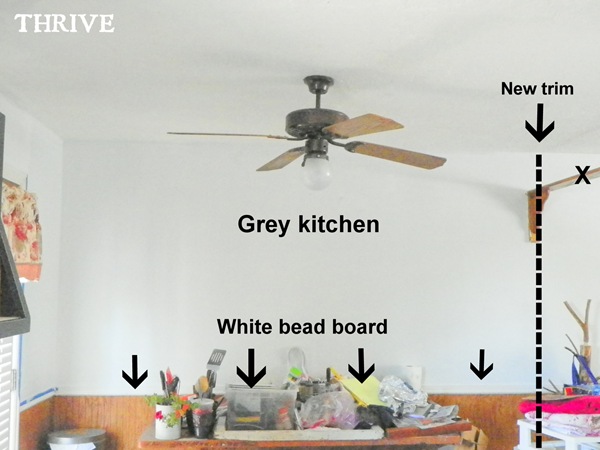
On my last post and Facebook updates, I had decided to move forward with painting the kitchen grey, the bead board white and get rid of the random plant-shelf-thingy dividing the living room and kitchen.

wall.5

I followed your awesome Facebook advice and skipped sanding the bead board all together (thank you, thank you!) in favor of oil-based primer. I’ve never seen any dropped off at our local recycling center (only latex) so I broke down on bought a gallon. Best $16 ever spent thankyouverymuch and totally worth the fumes.

For the kitchen and living room paint, I took the two mostly full 5 gallon buckets of beige from the recycling center and mixed them together to get a single color to use as a base. From there I pulled out 1/3 of it and added some dark grey paint to come up with a kitchen color.

What I ended up with was this:

100_2187(Please excuse the gianormous mess on my kitchen table. We were still pantry-less at this point.)

And I loved it. I mean really, really loved it.

But Mr. Thrive wasn’t thrilled and thought it was still too yellow-y. But being the good sport that he was, he said to keep going and see how everything came together.

And as you can see from the picture above, the next task was to take down the random plant shelf thing that separated the kitchen and living room. I popped out the wood plugs and unscrewed it from both sides of the wall. The first side had only been screwed than then caulked to the wall and came off with minimal damage. Yeah!

June 2011 BLOG22

The other side … not so much.

For some reason the previous owners had used liquid nails along with the screws and caulk which made a much bigger mess. After carefully scraping out all the left over dry wall, I cut a scrap piece of sheet rock and glued it in place. Since the hole are will eventually be covered by a floor to ceiling trim piece I’m not too worried.

My next honey-do from Mr. Thrive was the pantry.  For the last five years we’ve had the uber classy plastic garage shelving from Target.

100_4336

Besides the fact that it was, well, classy, it was a major clutter collection point and always a mess. Plus the textured plastic was a pain to keep clean which means it rarely was – bleh.  So I’ve been wanting a pantry there forever.

So just before we left for Washington, I hauled up a pair of pantry doors that I found at D.I. for $16 three years ago that have been sitting in our laundry room collecting dust. To make this project work, I had been waiting for 2×4’s to frame in the support walls. Luckily we had the chance for a service swap in June and were able to keep the left over materials after helping some friends build some new walls in their house.

So the plastic shelving was moved downstairs to our food storage room to make room for the new pantry.

kitchen.1

I had hoped to carefully remove the trim along the floor and reuse it around the pantry. Yeah, about that ….

kitchen.3

The trim had been heavily glued in place and had to be ripped off in pieces. Mr. Thrive had to pry so hard that he actually punched through the wall in a couple places.  Oops.

The other thing we discovered when we started cutting through all the layers of linoleum to get down to the subfloor was that painting the kitchen floor was out.

kitchen.4

I had hoped that we had plywood underneath all those layers, but it turns out that that there’s a layer of particle board on top. We’d either have to go down an extra 3/4” and removed the particle board –or—try and paint the particle board itself. Neither option sounds good so we’re back to square one on the floor.  Bummer.

But anyway, back to the pantry.  I decided to hang the doors upside down so that I can use the solid panels for some sort of bulletin board for menus, etc.

kitchen.2

It’s taken a while, but the framing, taping, mudding and inside painting of the pantry is done. All that’s left is to install the shelving inside, clear off the kitchen table (yeah!) and put the trim around the pantry.

June 2011 BLOG22-1

As soon as the finish work on the pantry is done, I can finish the kitchen painting and tackle the living room.

But there’s a bit of a snag there, too.  Hopefully it will be worked out by Wednesday when Mr. Thrive has a day off and we’re scheduled to finish painting.  Fingers crossed ….

In the mean time, I just got two furniture pieces for the living room repainted and am excited to share them with you later this week.

Be back soon!

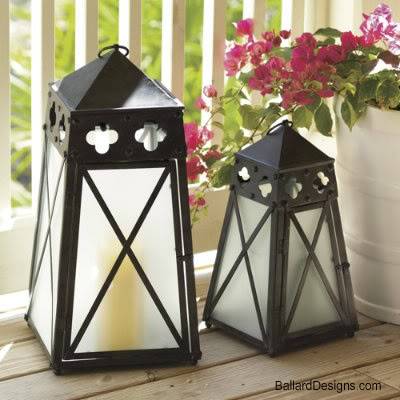
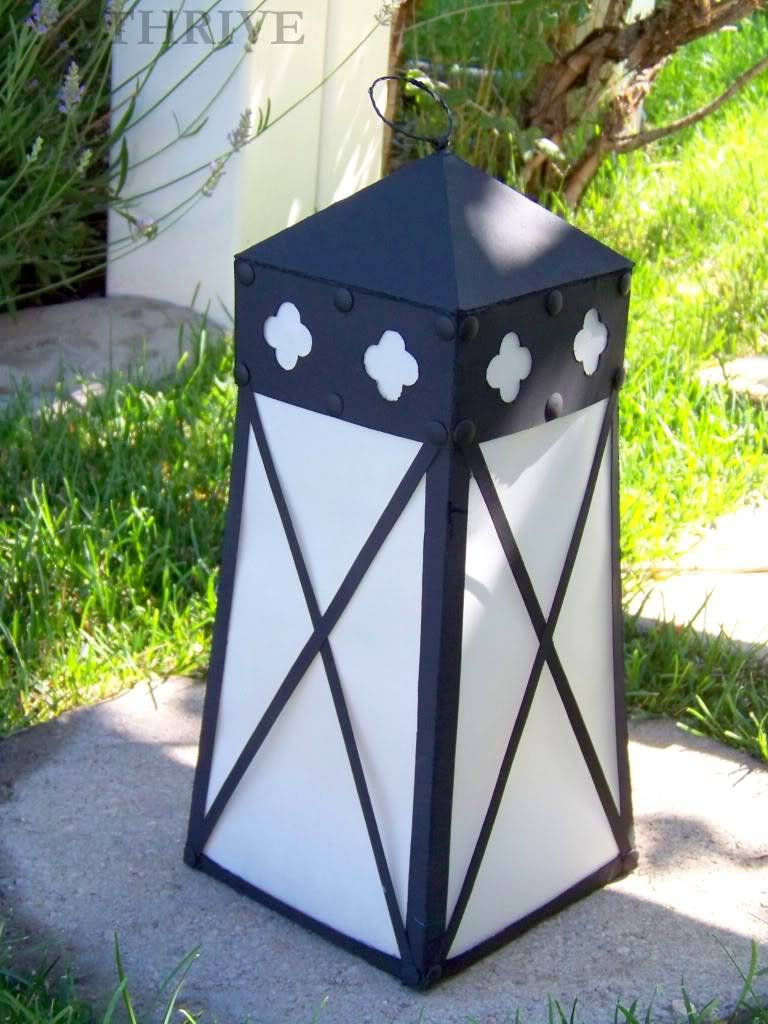
Do you remember these awesome quatrefoil lanterns from the Ballard Designs catalog?


 photo quatrefoil.jpg

I love them. I want them. I can not afford them.

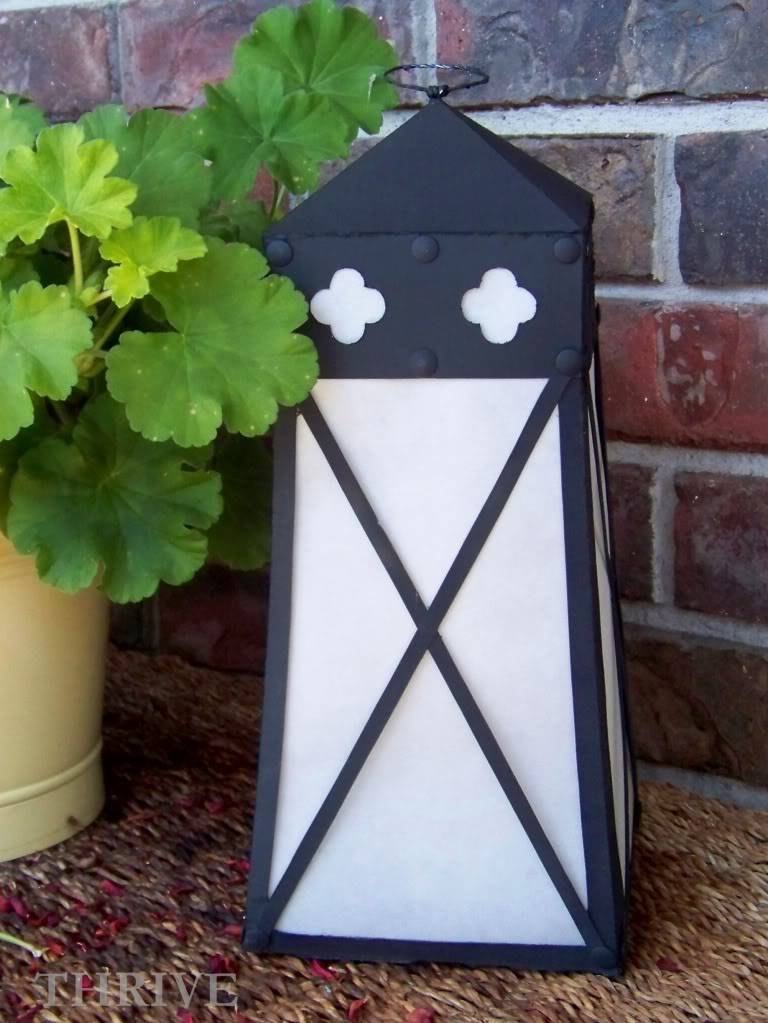
So I made my own.

Ta-da!

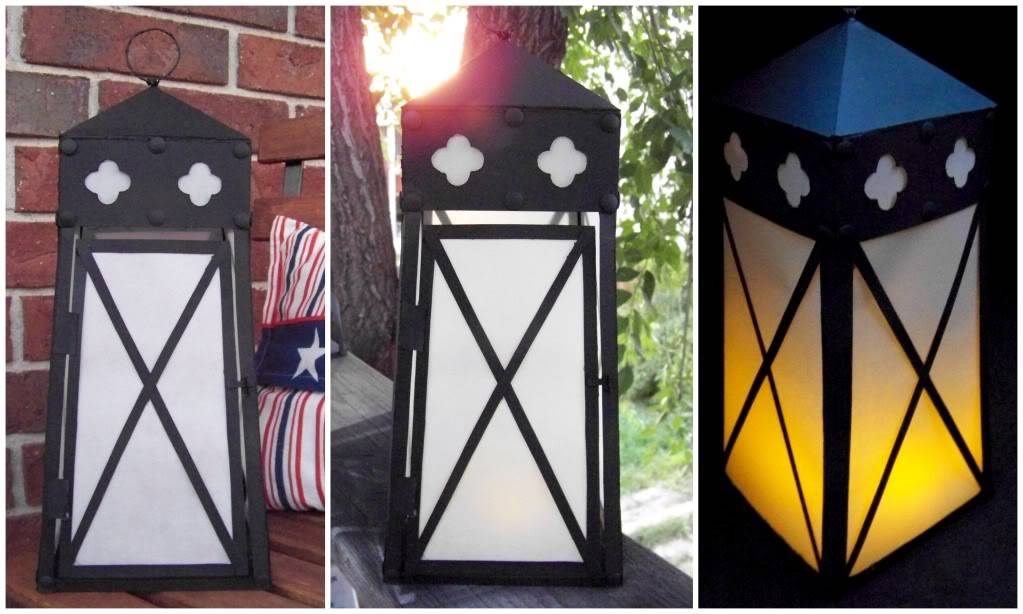
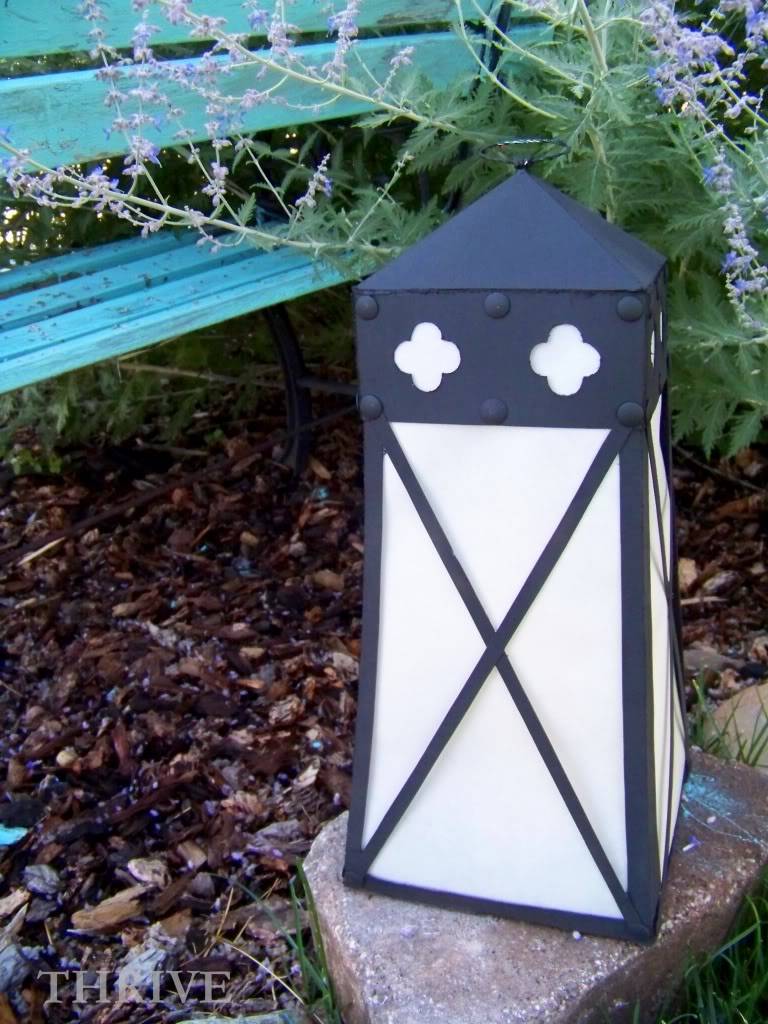
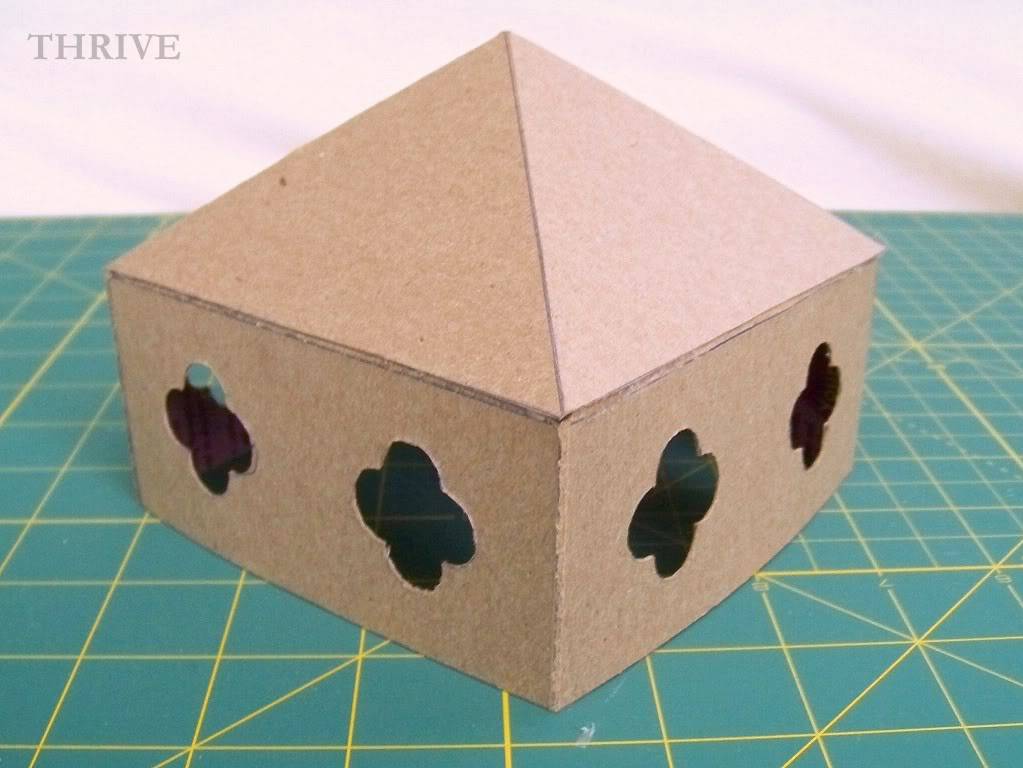
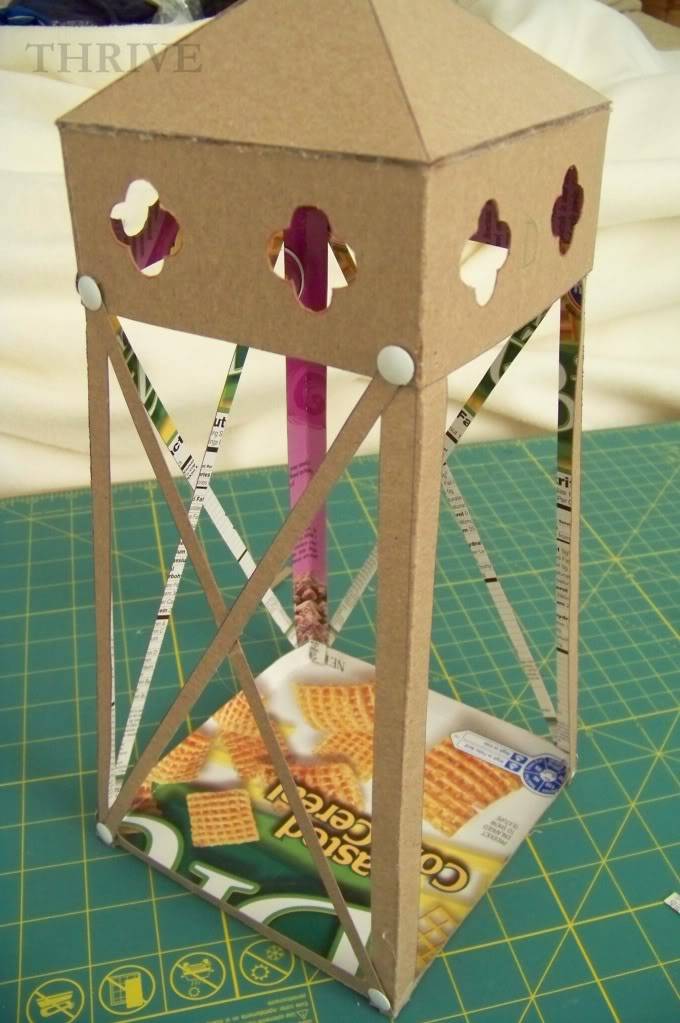
Catalog-inspired quatrefoil lanterns straight from the cereal isle that look good day, dusk and night!

Really.

Want to make your own?

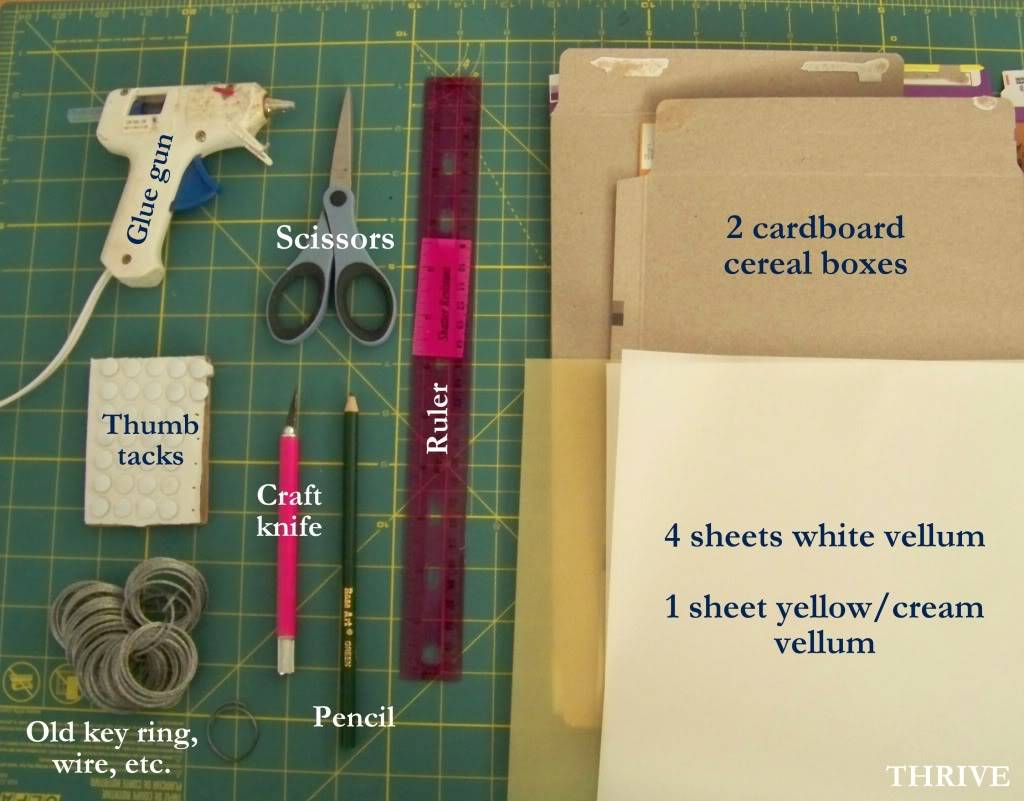
For each lantern you’ll need:

As always I hope you’ll Rock-What-Ya-Got and adapt this project using items around your house to make this without a trip to the store.

And to make life easier, you can even download the pattern pieces I created HERE.

So do that first. (I’ll wait.)

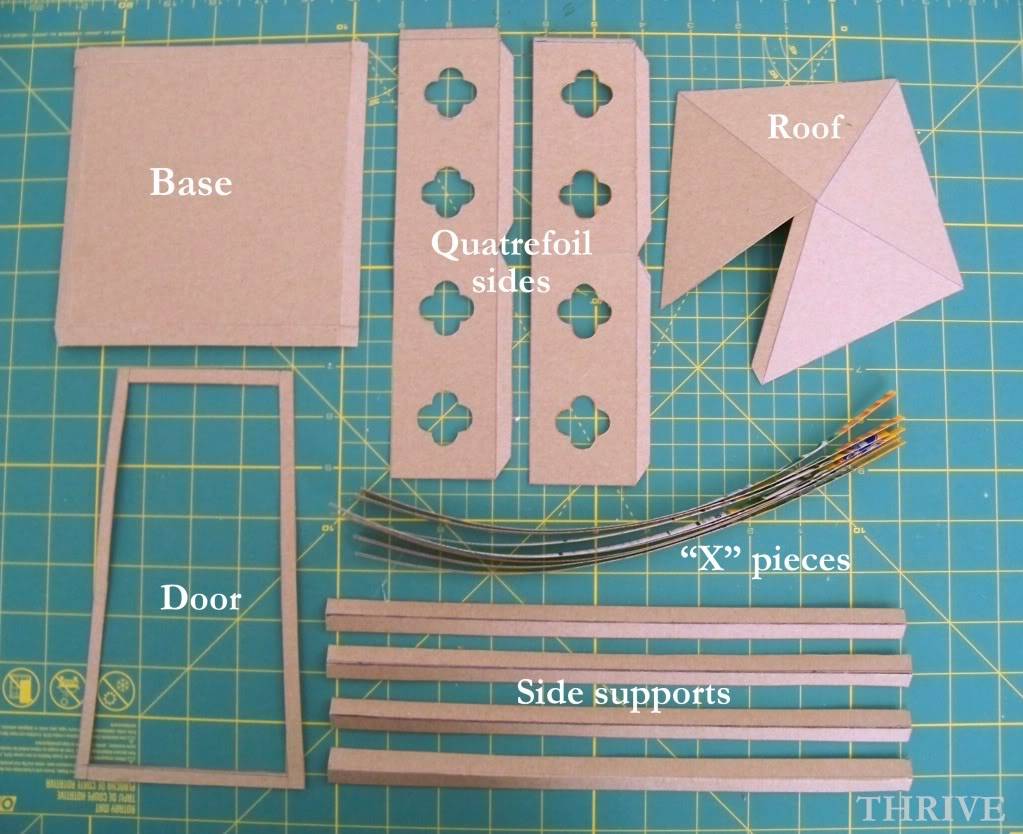
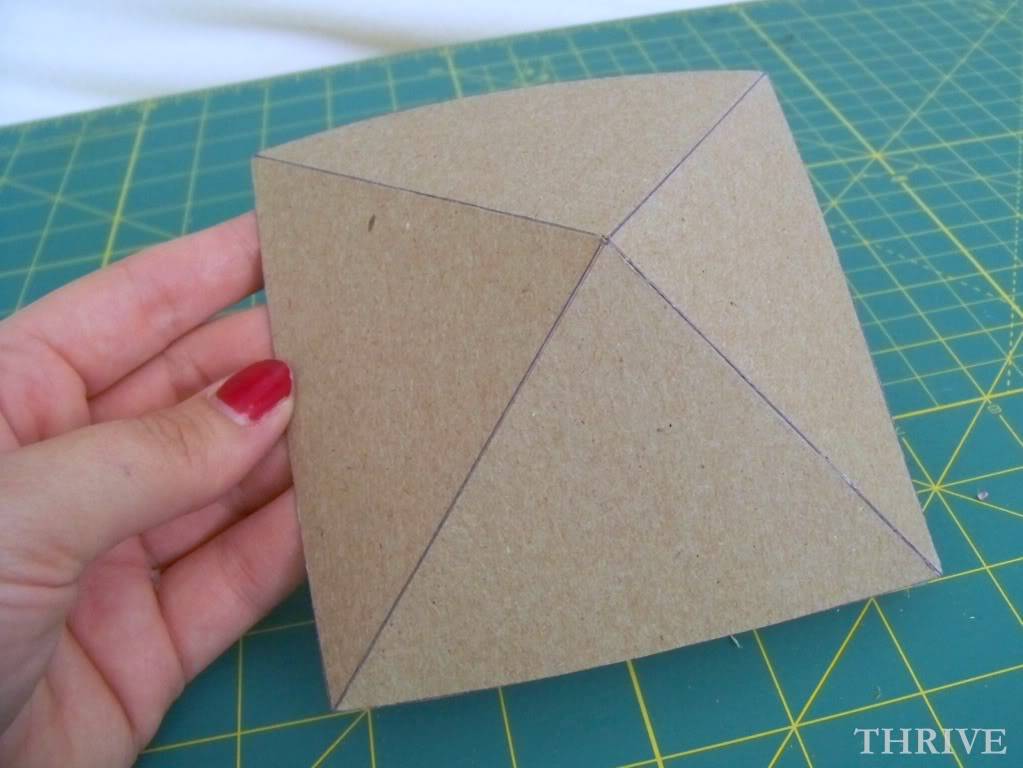
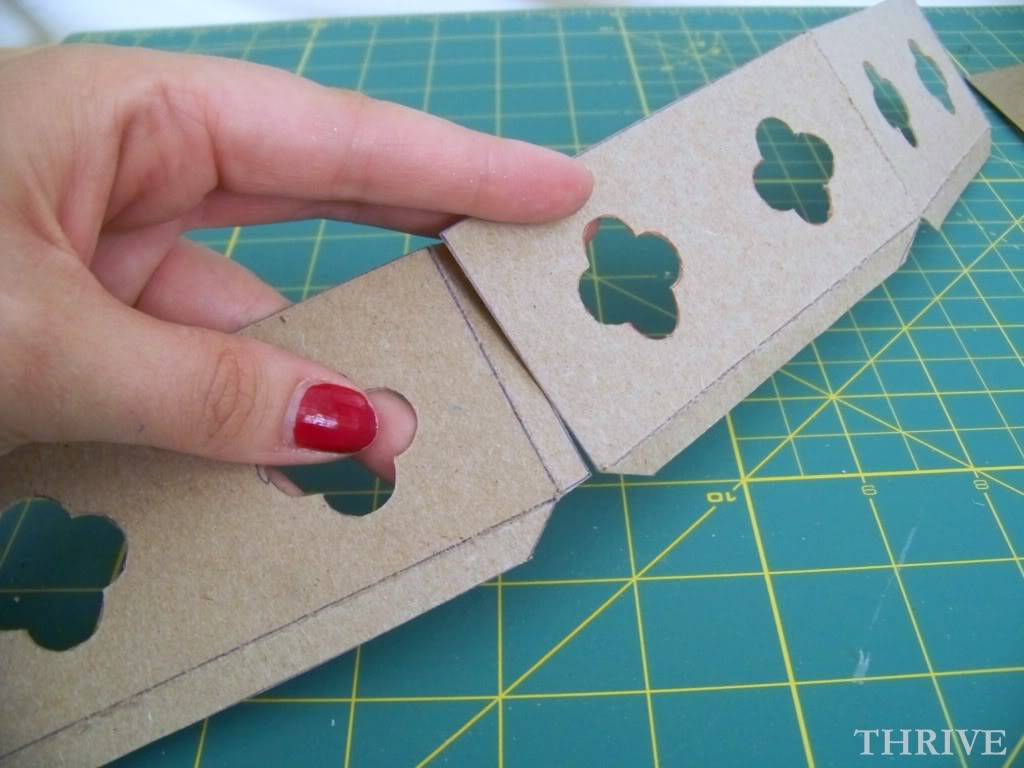
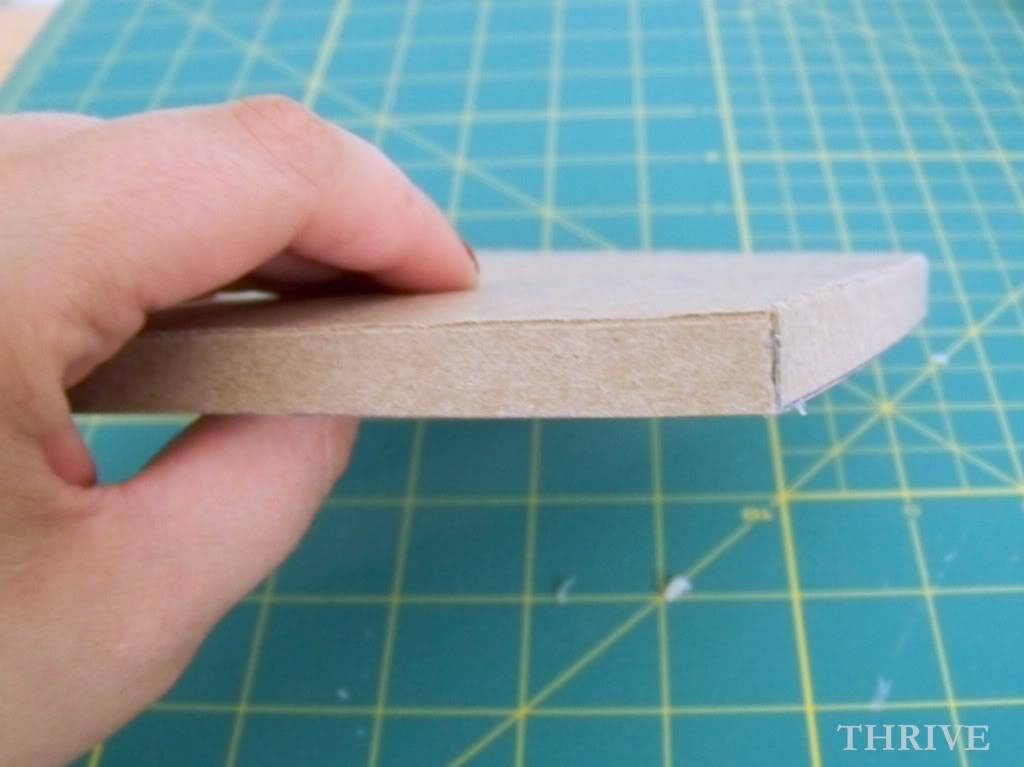
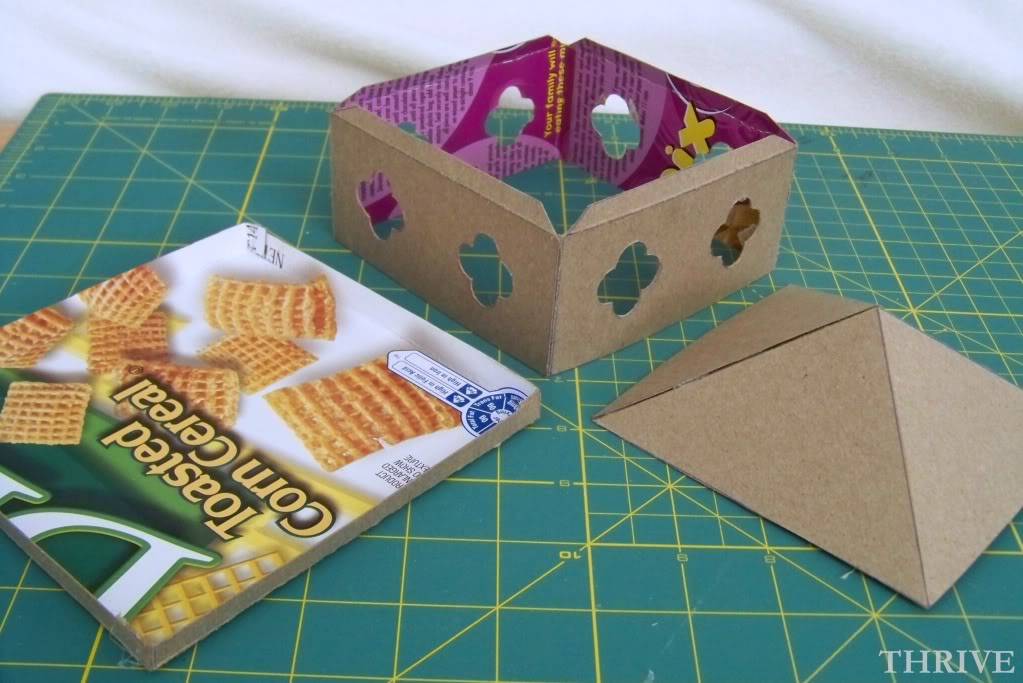
Trace, cut out and score all the lantern pieces according to the pattern instructions.

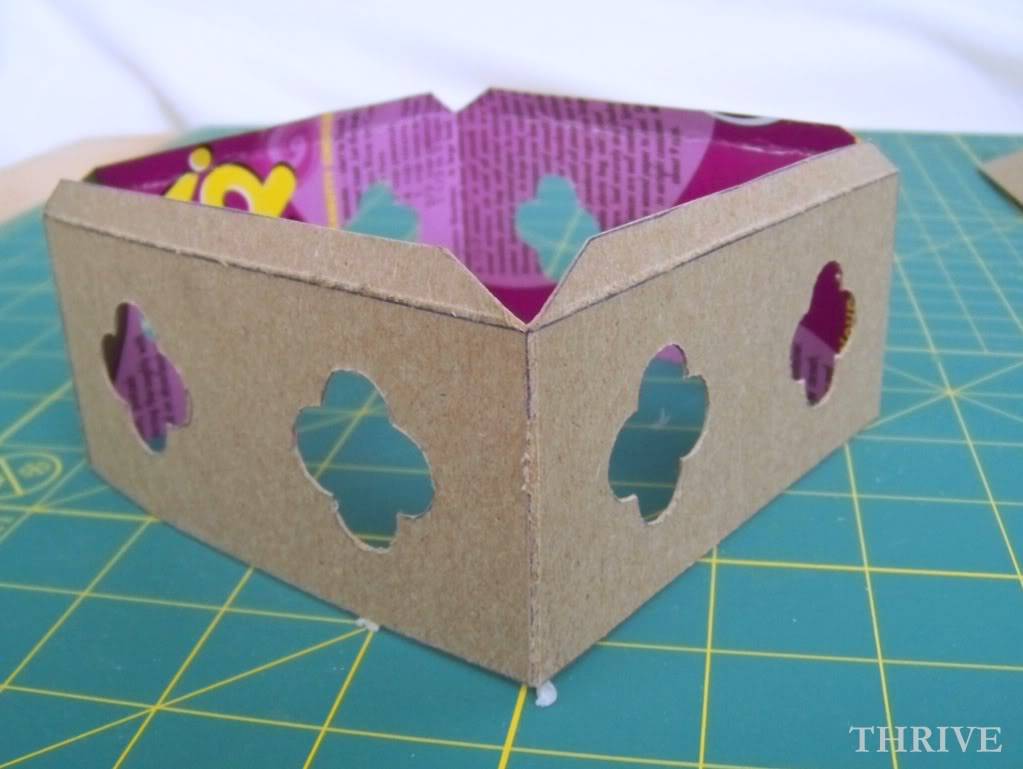
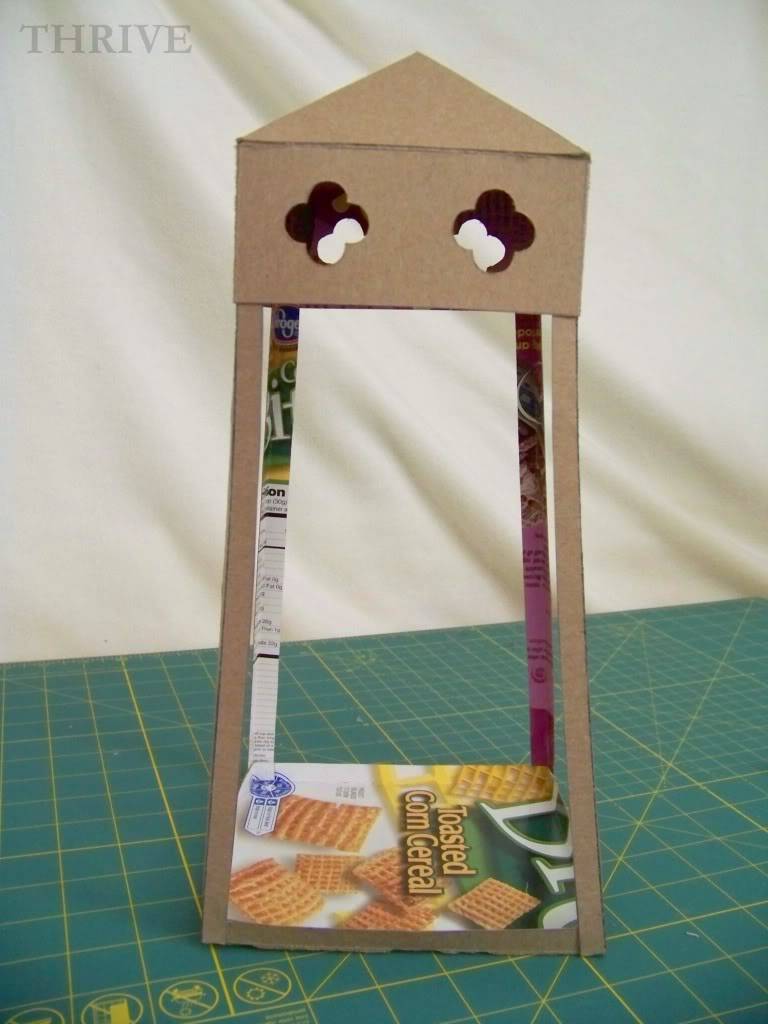
Glue the three main pieces together with hot glue:

… roof …

… quatrefoil side pieces …

… and base.

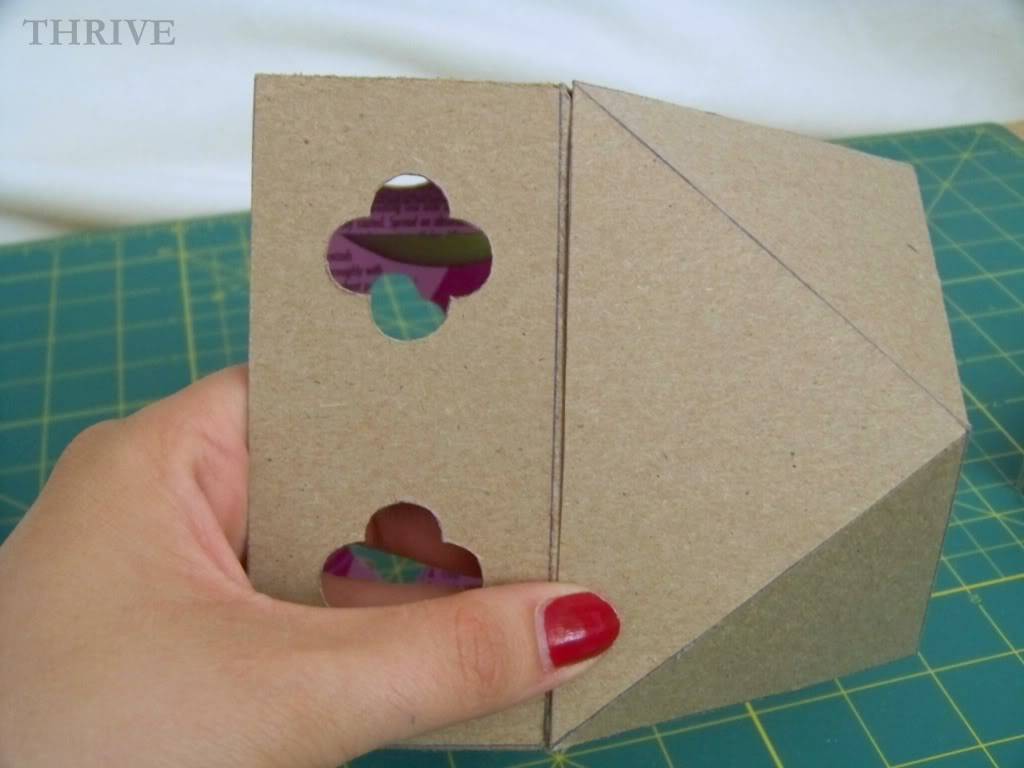
Attach the roof and quatrefoil pieces together with hot glue.

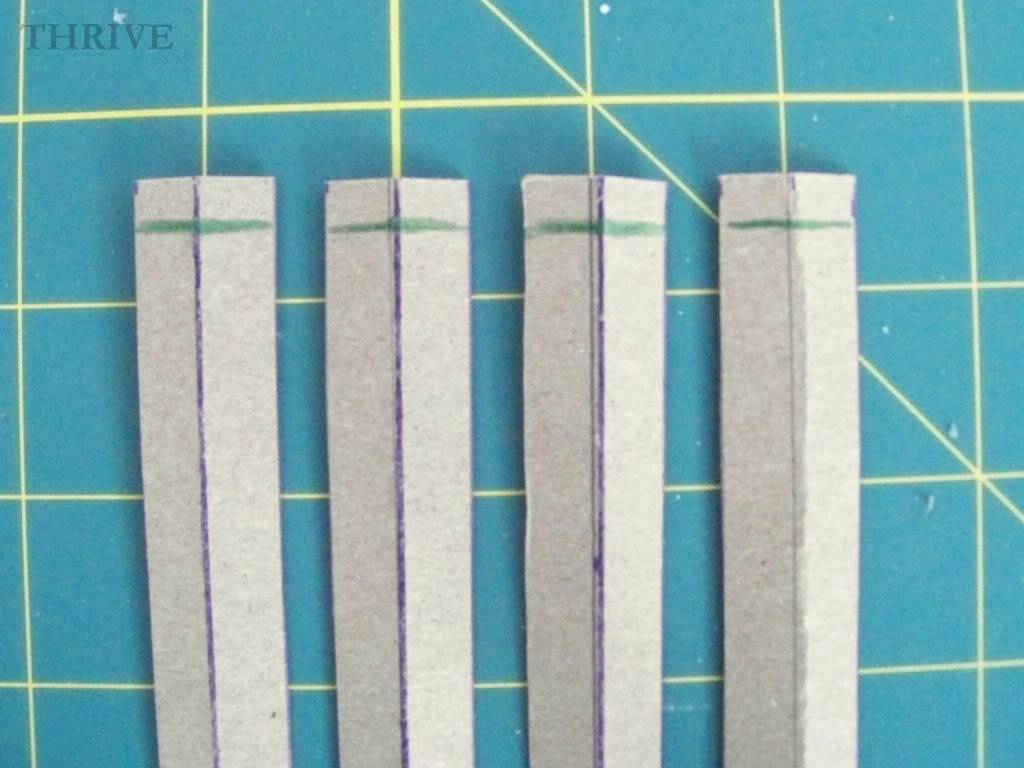
Mark a line 1/4” down on each side support pieces …

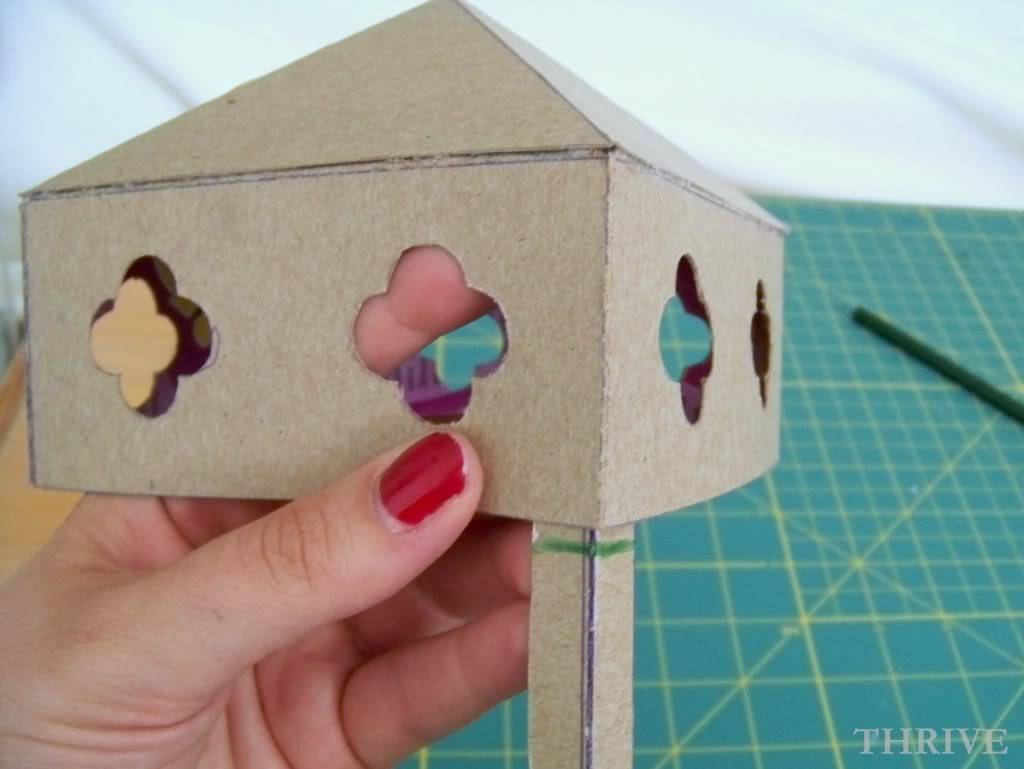
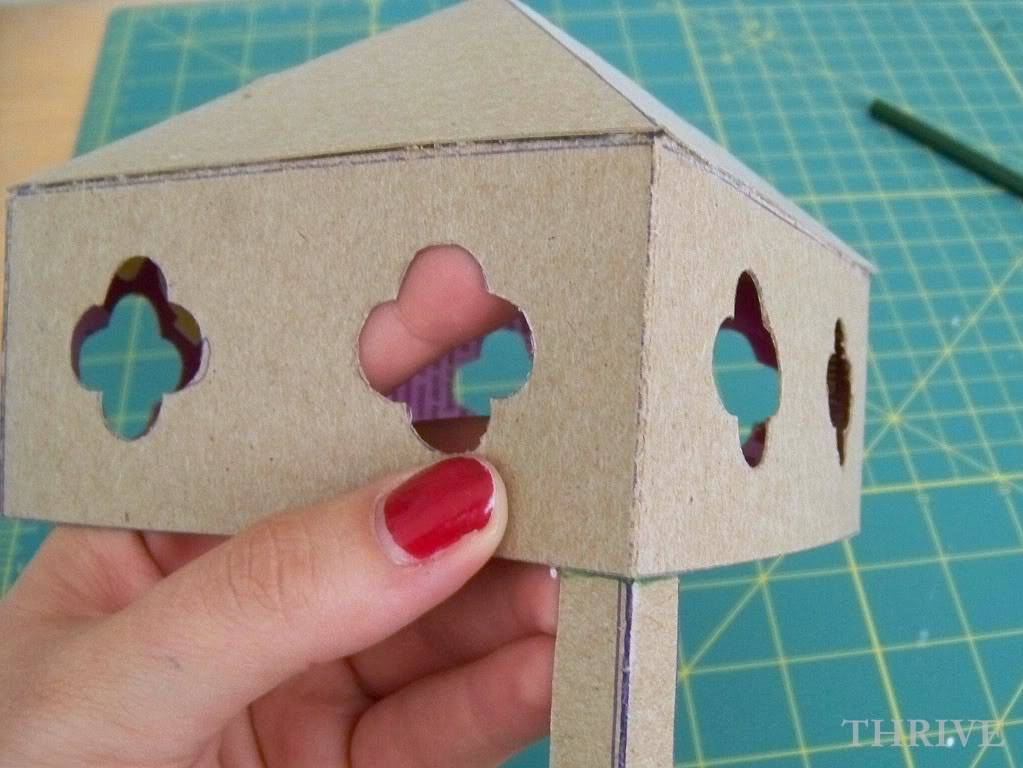
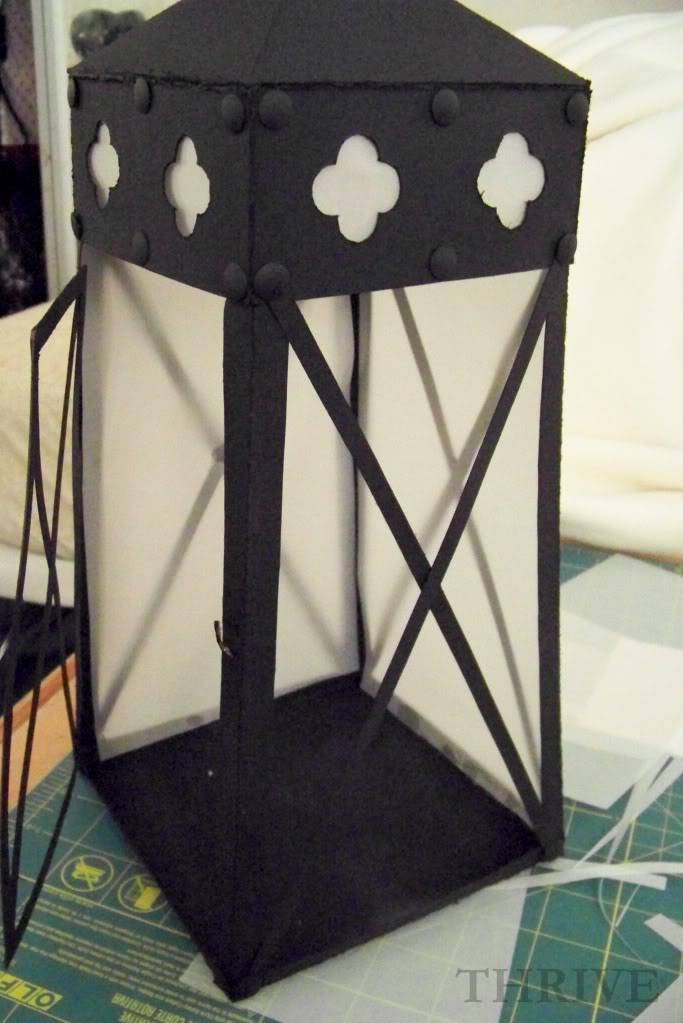
… and glue just the top 1/4” of each side support to the inside corners of the quatrefoil /roof piece.

Glue side support pieces to the outside corners of the base.

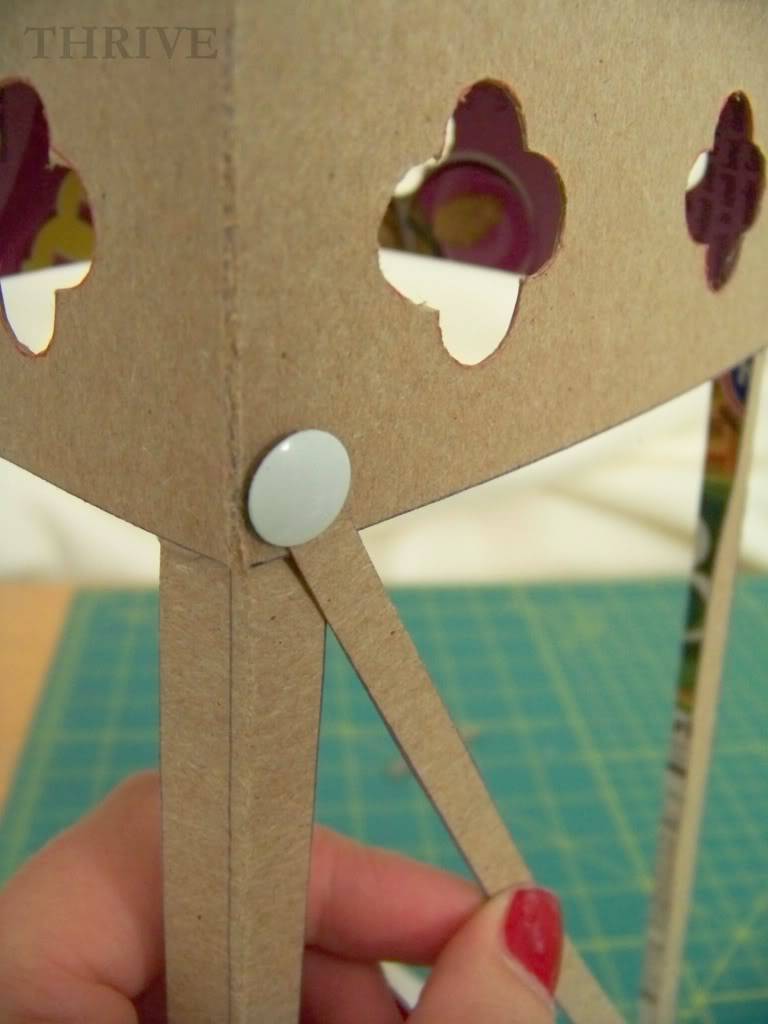
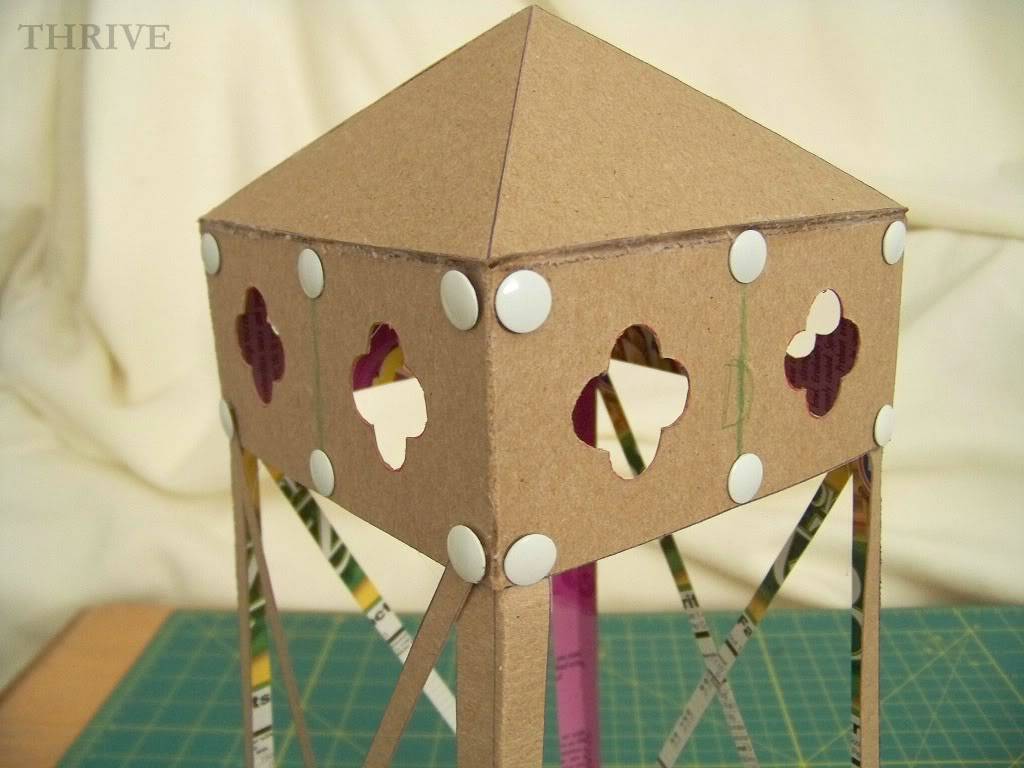
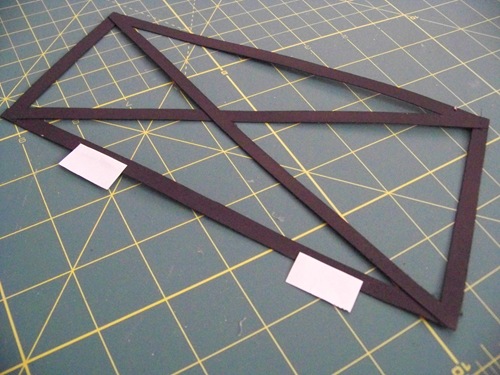
To make the “X” pieces on each side of the lantern, attach the long 1/4” strips with thumb tacks and trim away excess.

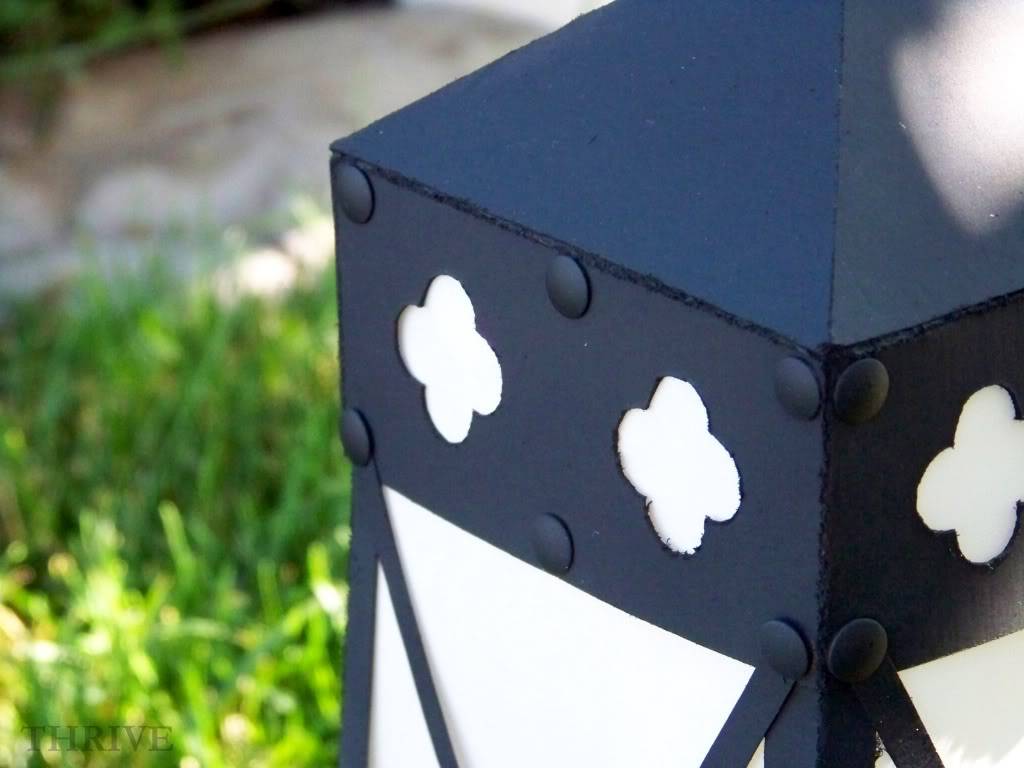
Carefully push through remaining thumb tacks around the quatrefoil piece.

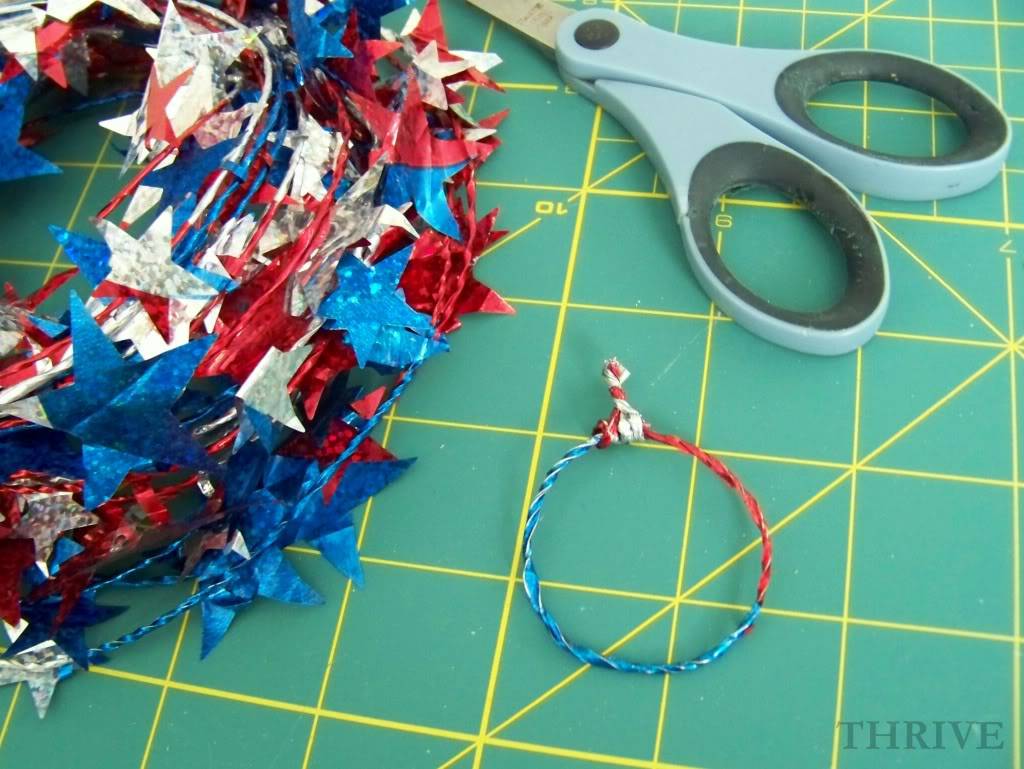
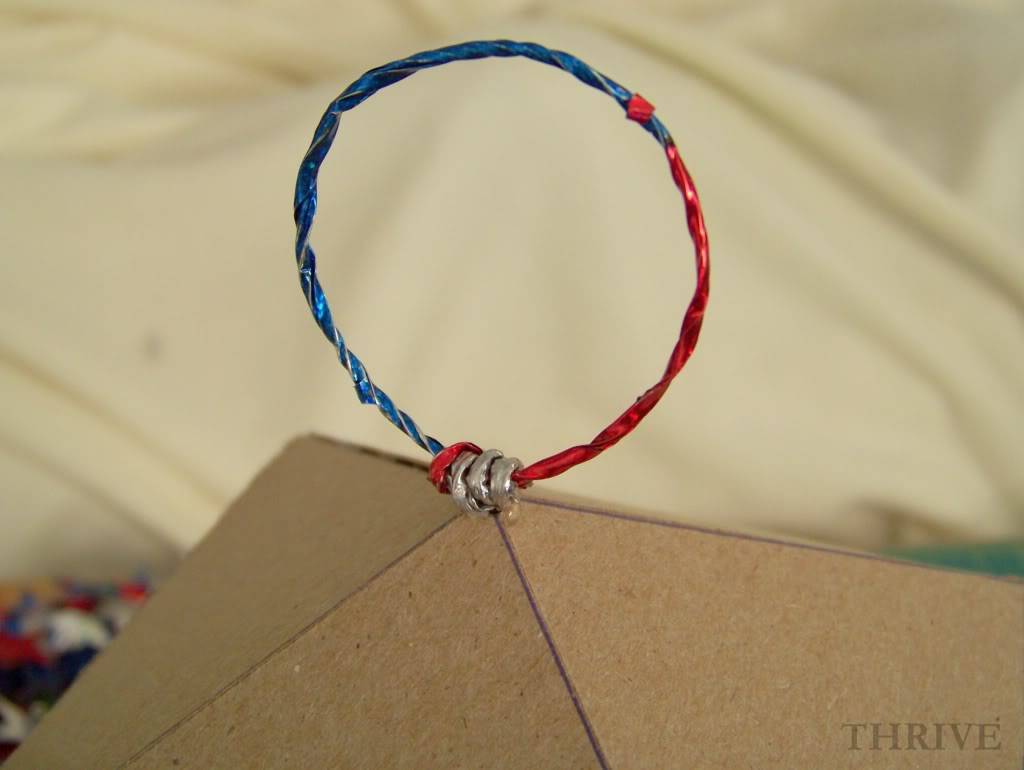
To attach the hanging loop to the roof, make a quick loop out of wire or even left over holiday garland from the dollar store like I did.

Make a hole in the roof with a craft knife and hot glue the loop in place.

(You could also glue a small bead to the top and thread an old key ring or wire loop through.)

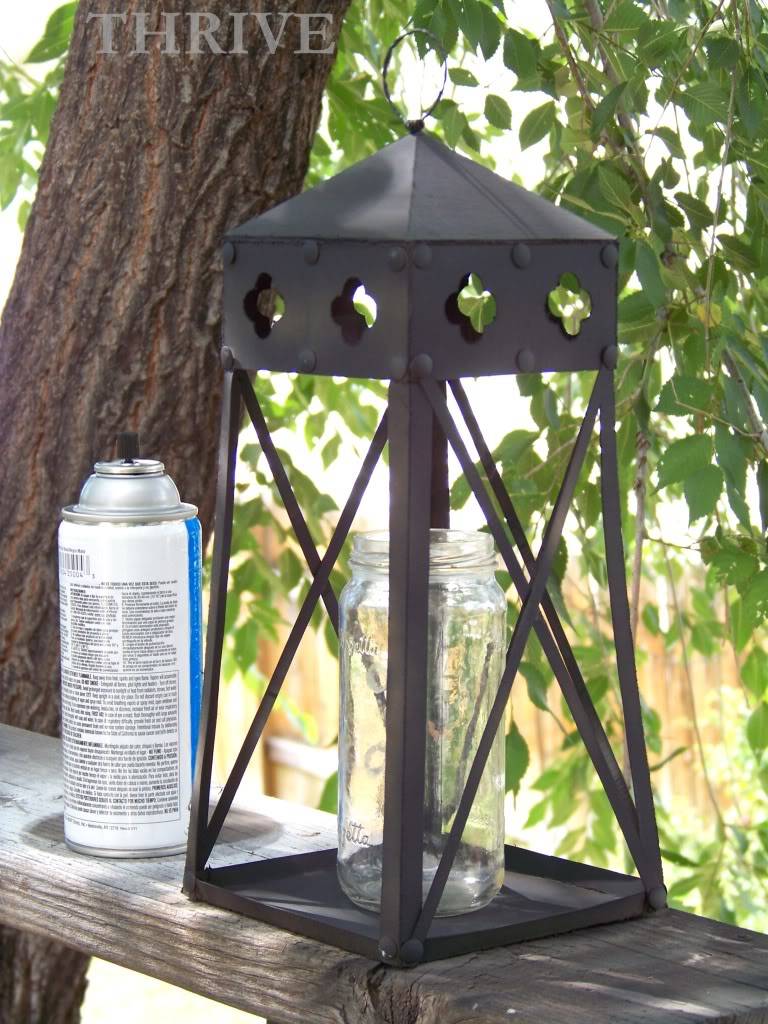
Spray lantern and door piece separately with a couple light coats of black spray paint and let dry.

(You’ll probably want to put something in the middle of the lantern to keep it from being blown over while it’s drying.)

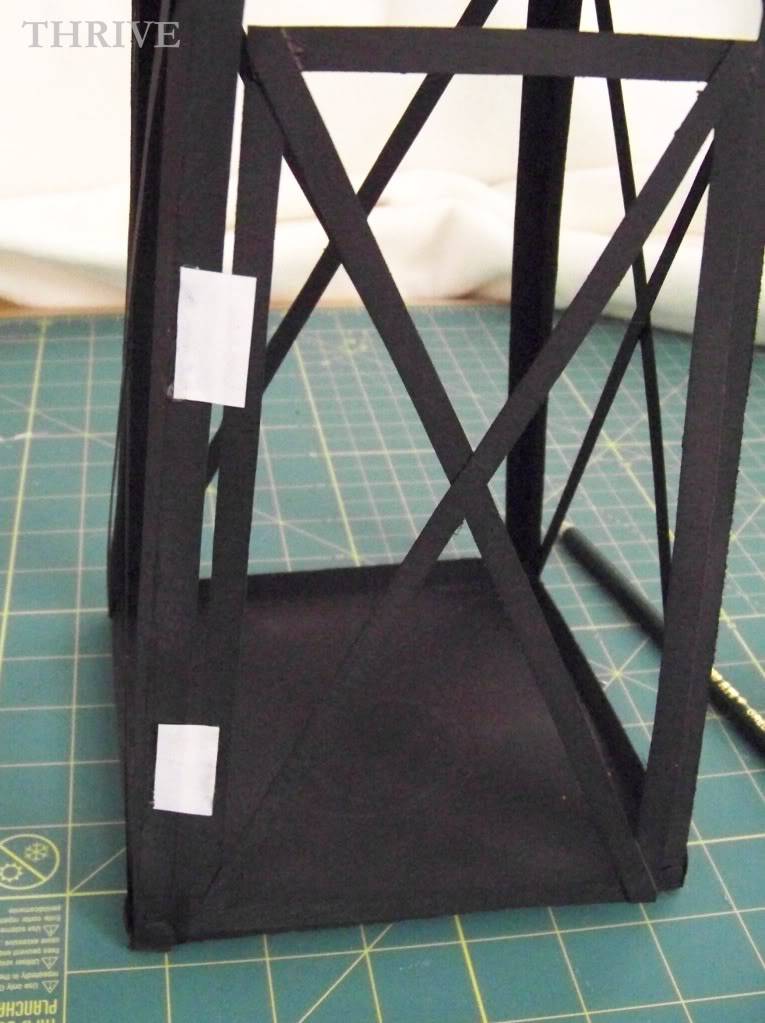
To attach the door, cut two 1/2” x 3/4” pieces of scrap regular paper and glue along the left side.

Line up the door in the lantern opening and hot glue in place, making sure you leave a slight gap between the door and the side.

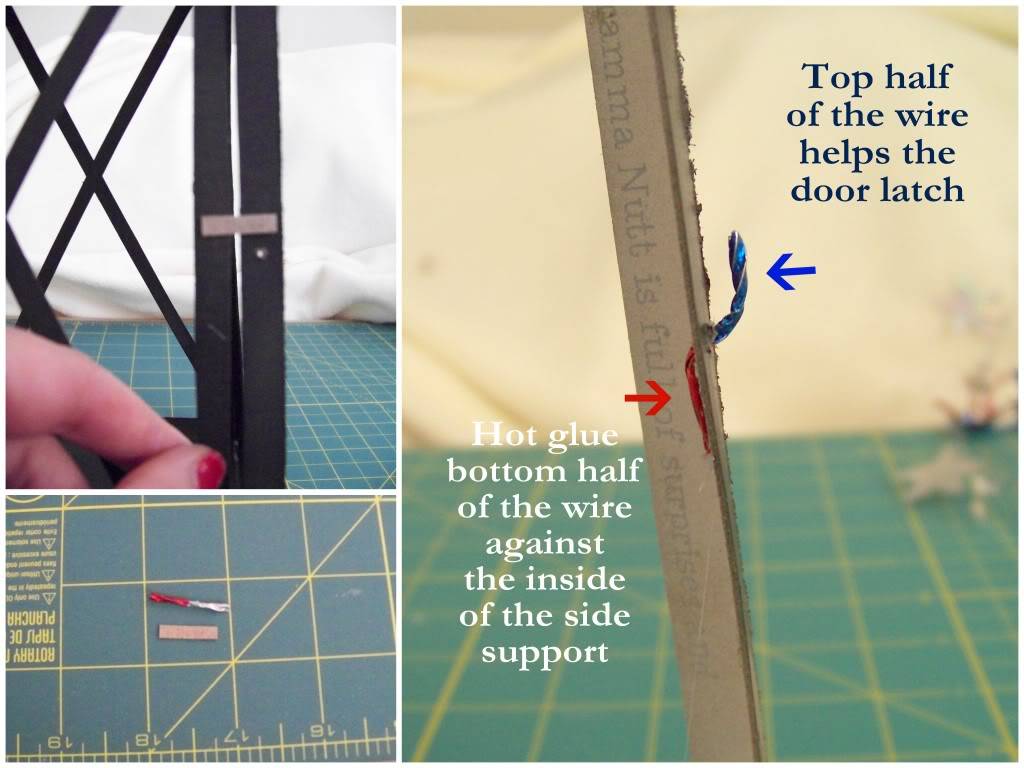
To make a latch to the hold the door in place, glue a small cardboard rectangle on the door, make a small hole in the side support and thread a 1” piece of wire half way through.

Spray the lantern frame one more time and let dry.

Trace “glass” pieces from white vellum and carefully glue in place.

The catalog version of the lanterns left the quatrefoil cut-outs plain, but I chose to add vellum behind them as well.

Either way works. Your choice.

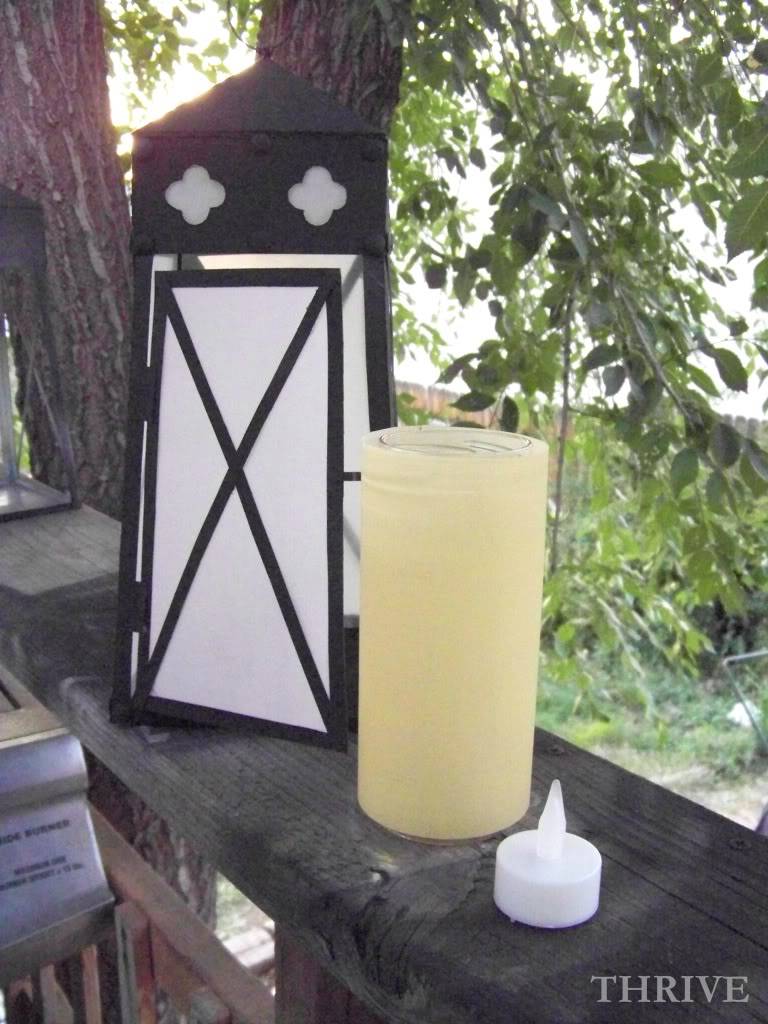
To make the pillar candle, wrap a piece of yellow vellum around a narrow glass jar and drop in a battery operated tea light.

And that’s it — done and done!

Who knew you could get your very own expensive-looking-but-totally-free lantern and a full serving of whole grains out of that cereal box?

Happy crafting for free everyone!

 photo csi34.jpg

(Originally posted on The CSI Project)

My mission to live and craft without spending a dime carried over into my yard this week as me and my kids geared up for the holiday weekend. Because who wouldn’t love to enjoy the 4th in an amazing outdoor space?

But as it turns out, I’m fresh out of amazing outdoor spaces.

The back yard is being reseeded, spending any money on decorating is a no-no right now and my front yard looks like this:

 photo csi3.jpg

average 1970’s split-level, average landscaping, average trees, average grass.

Yawn, right?

I thought so, too, until I started rummaging around the kitchen and junk drawer.

So in true rock what ya got style, I’m here to show you how I used items from around the house to FAKE two great outdoor spaces (and how you can, too!)

Space No. 1: Date Night In The Driveway

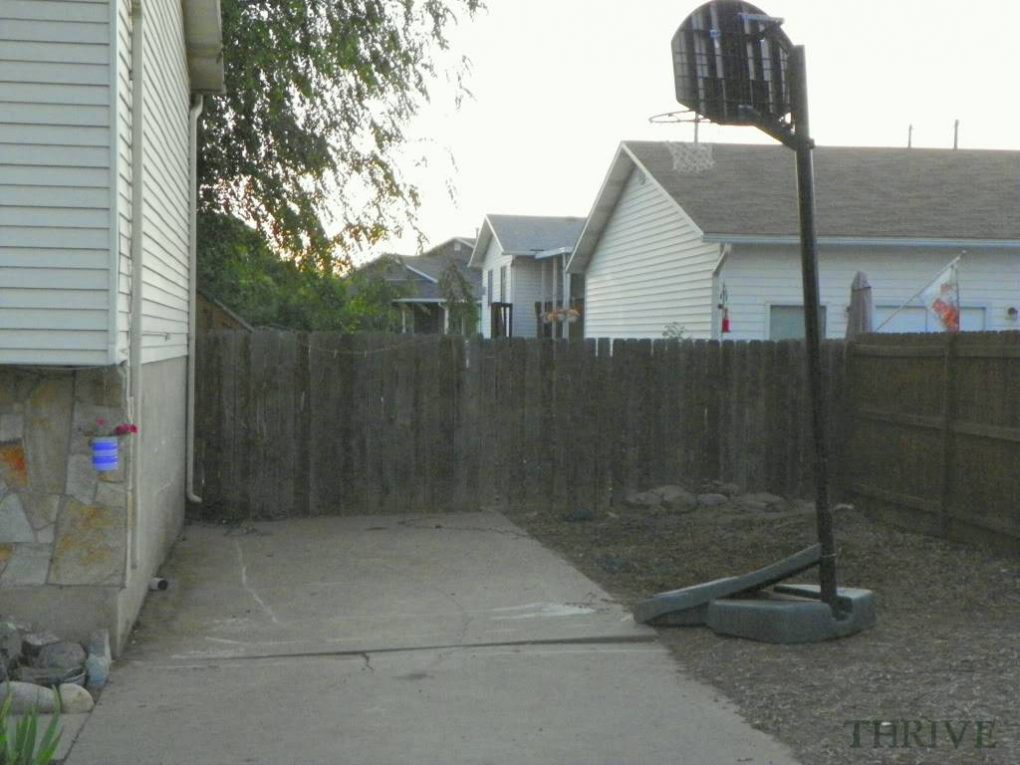
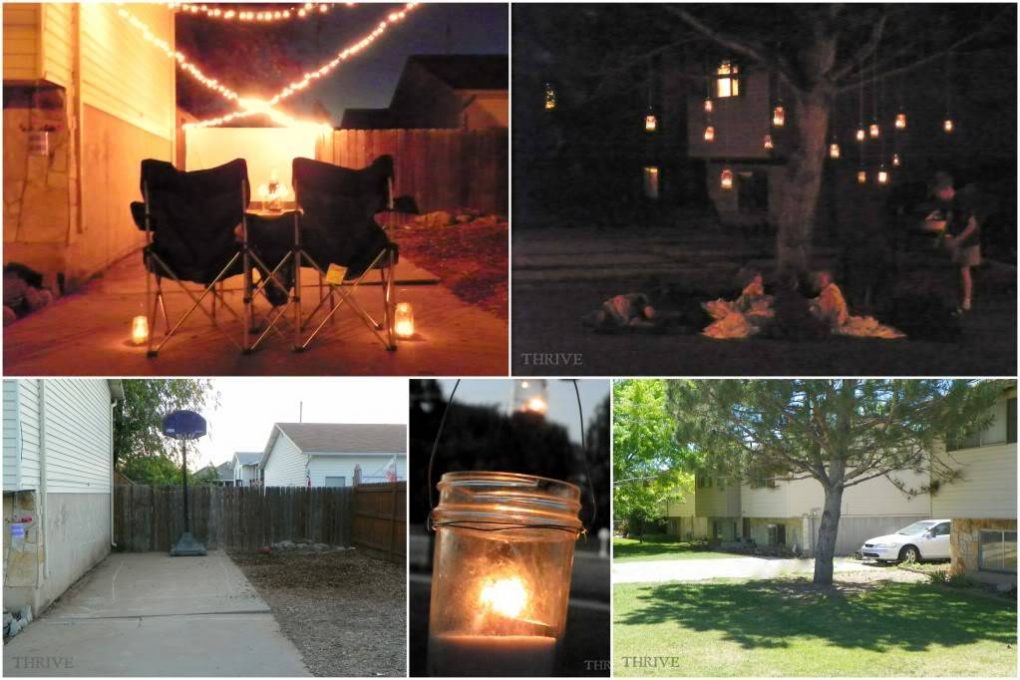
Here’s a look at my boring suburban driveway.

 photo csi5.jpg

But with a little imagination … and some rearranging …

 photo csi6.jpg

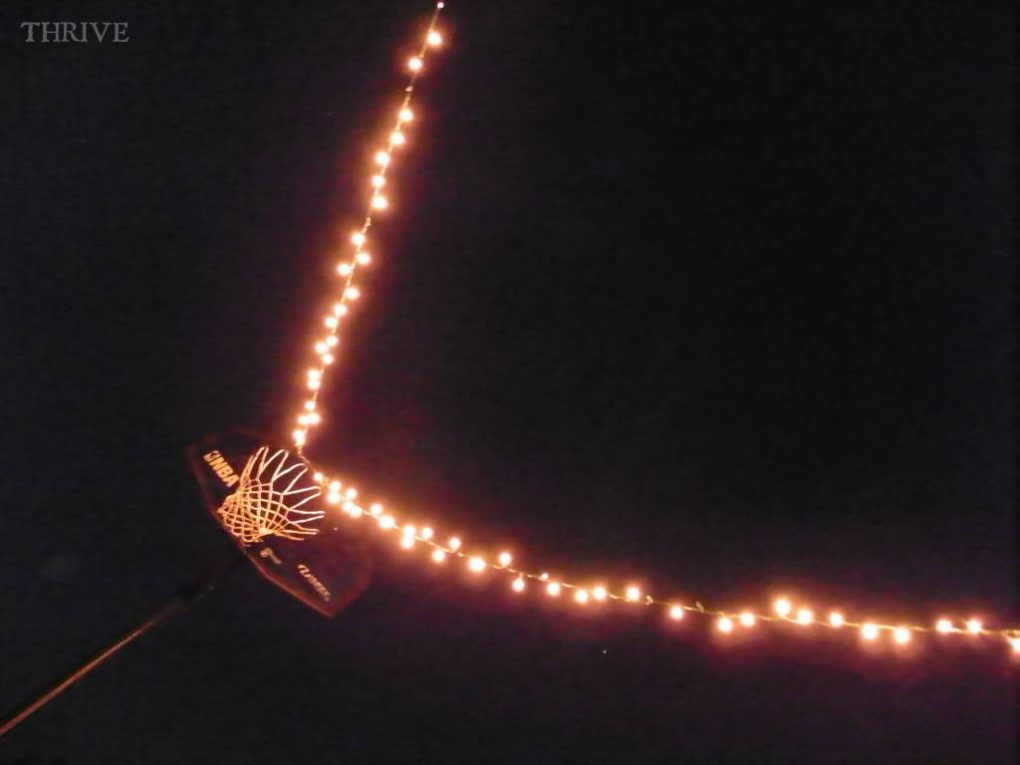
… and some Christmas lights and twisty ties …

 photo csi38.jpg

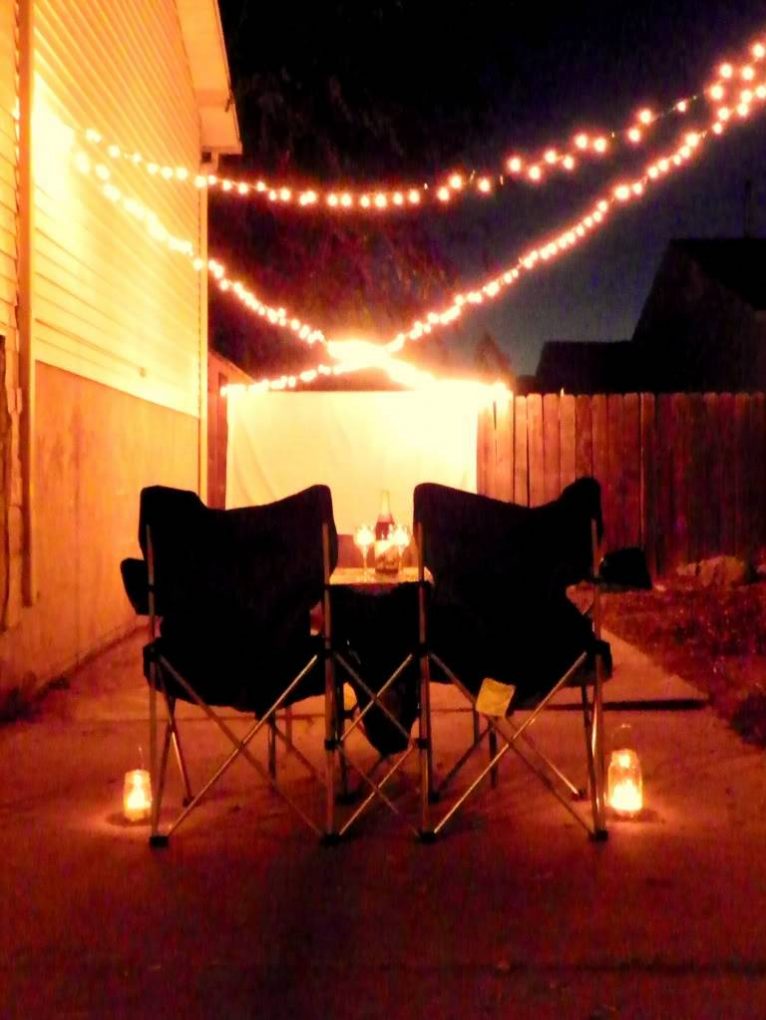
that driveway becomes something else entirely:

 photo csi2.jpg

a driveway bistro get-away perfect for a stay-at-home date night dinner.

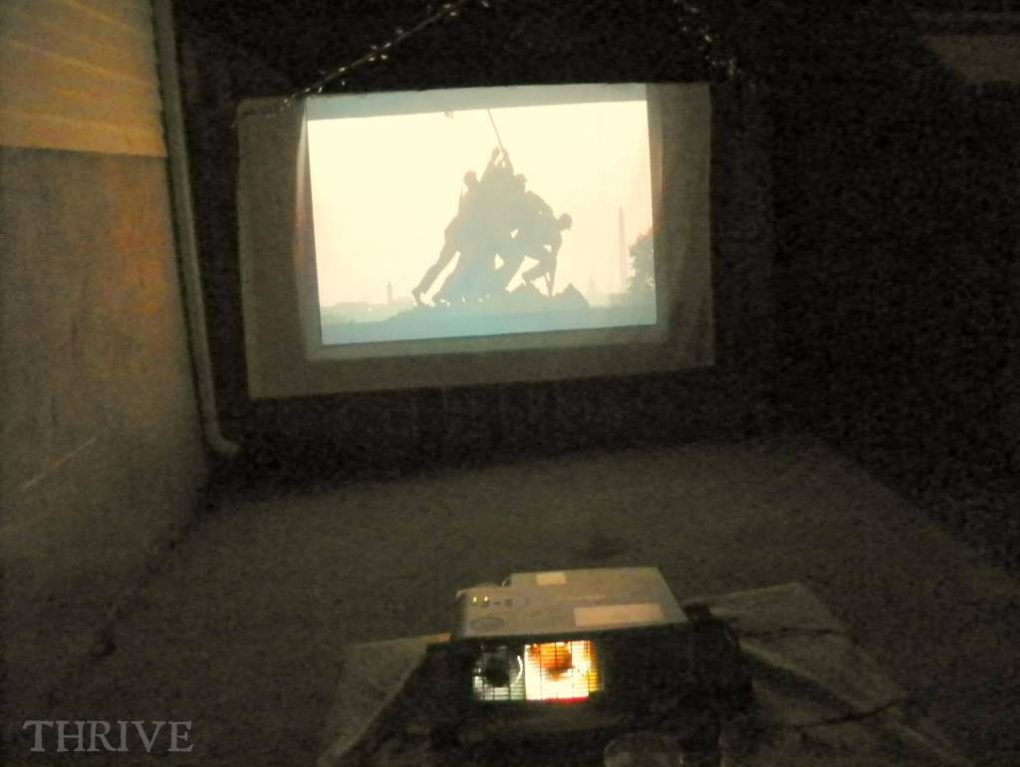
And as soon as dinner’s done, the drive-in theatre comes to you with movie night on the fence. All it takes is a queen size white sheet, a borrowed projector and a $0.99 movie rental.

 photo csi16.jpg

And you can bet that my driveway is going to look just like this again tonight as Mr. Thrive and I remember when we met 15 years ago at a 4th of July display … and how we went and saw Independence Day the next day for our first date … and shared popcorn and Hot Tamales … and how 1 house, 2 layoffs and 6 kids later we wouldn’t change a thing.

Space  No. 2: Under The Tree

Here’s another look at my front yard:

 photo csi3.jpg

Again, nothing to write home about.

But with a little digging around the kitchen and craft room …

 photo csi21.jpg

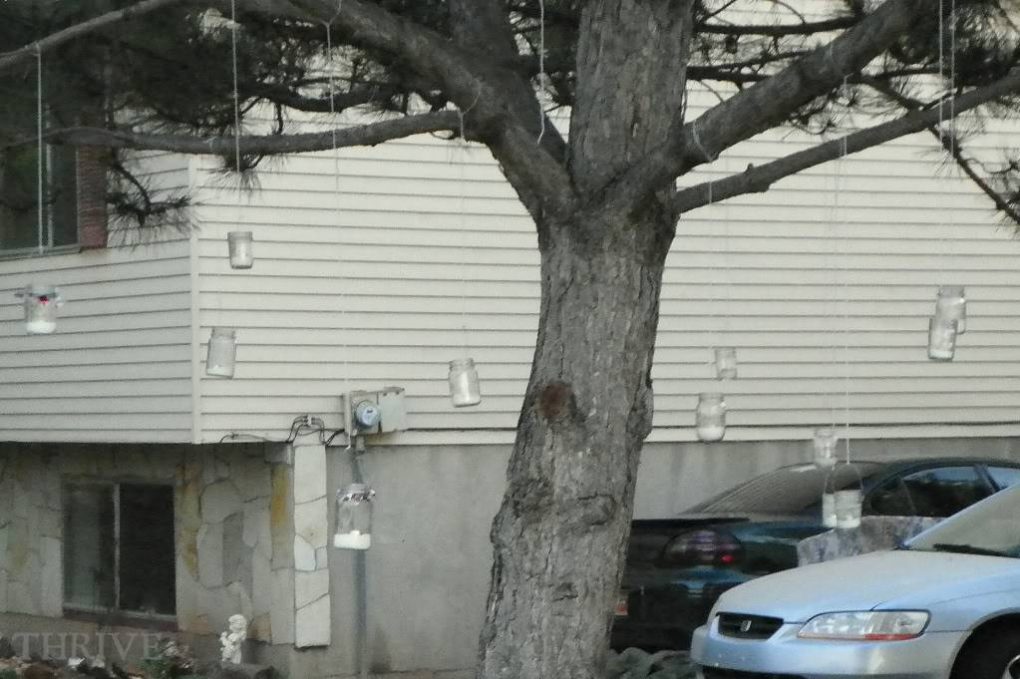
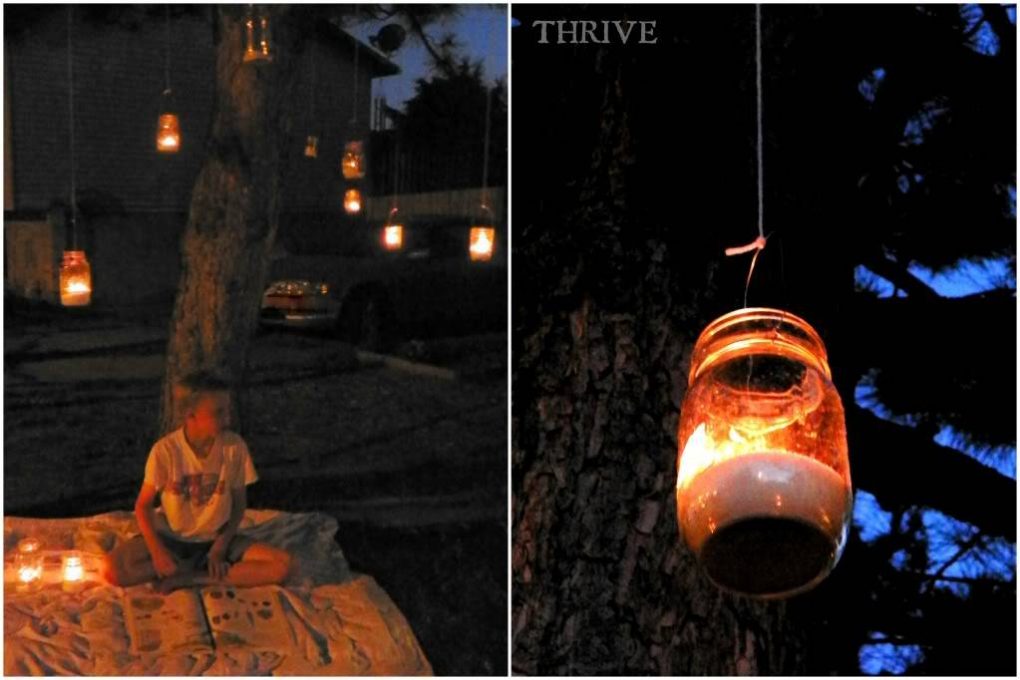
… I figured some make-shift floating lanterns could help that boring tree and spotty grass become something magic.

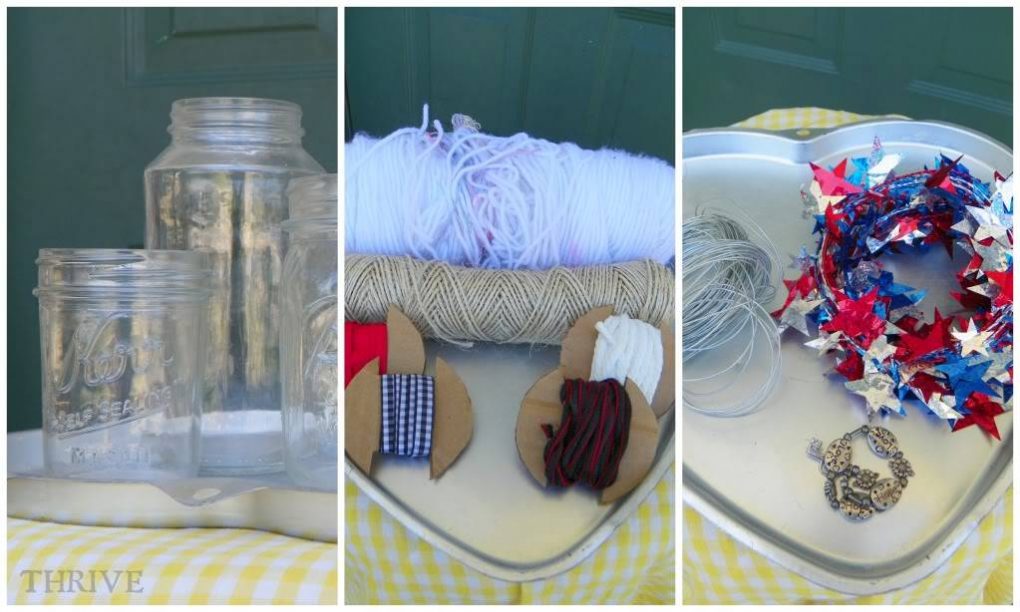
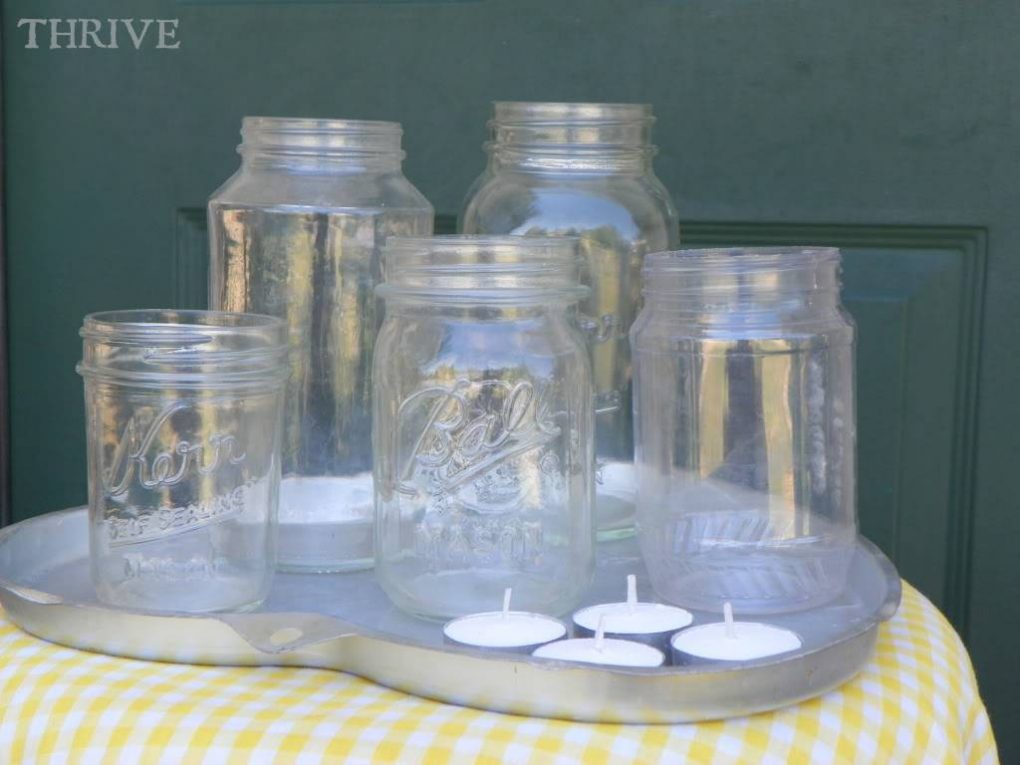
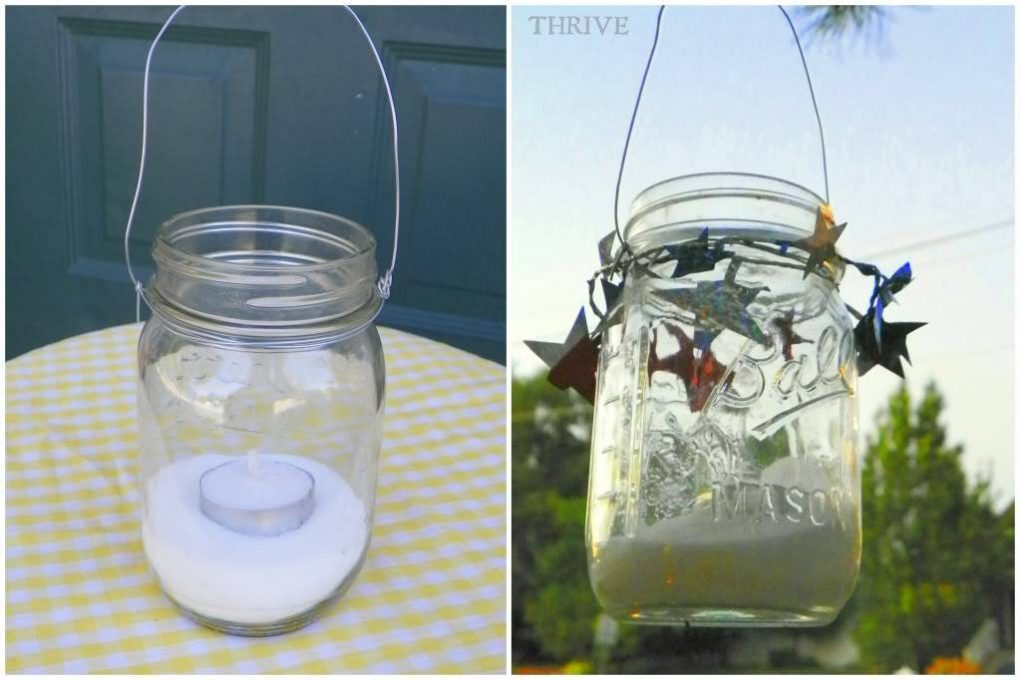
Lanterns can be made from anything: canning jars, empty peanut butter jars, whatever.

 photo csi1.jpg

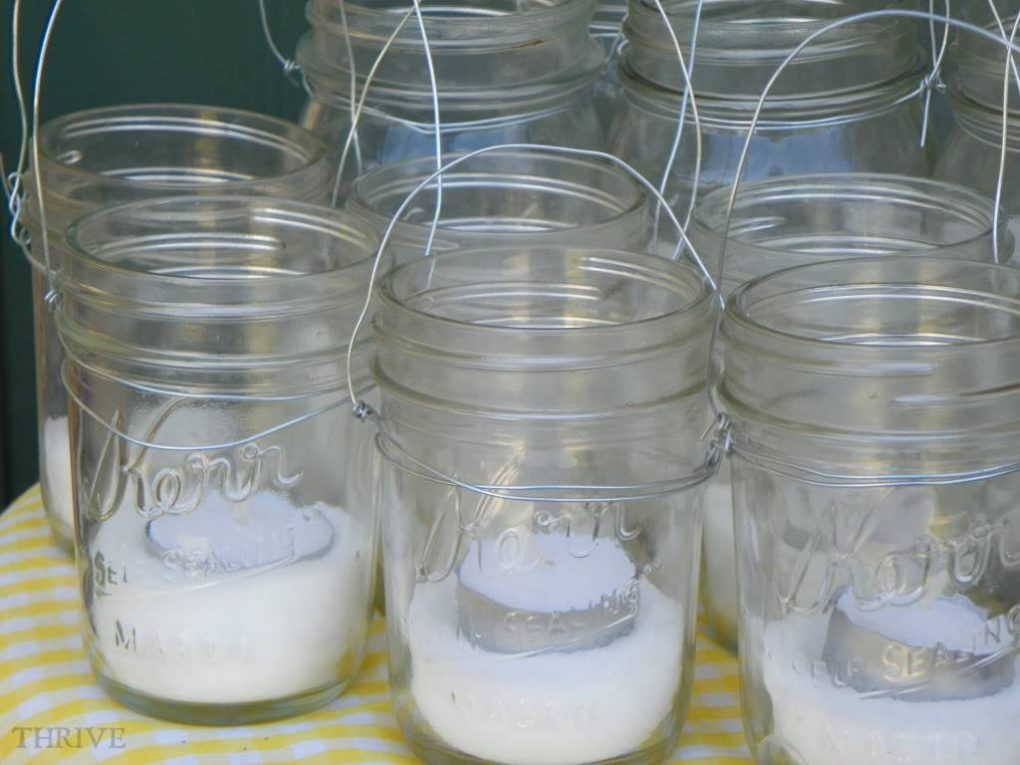
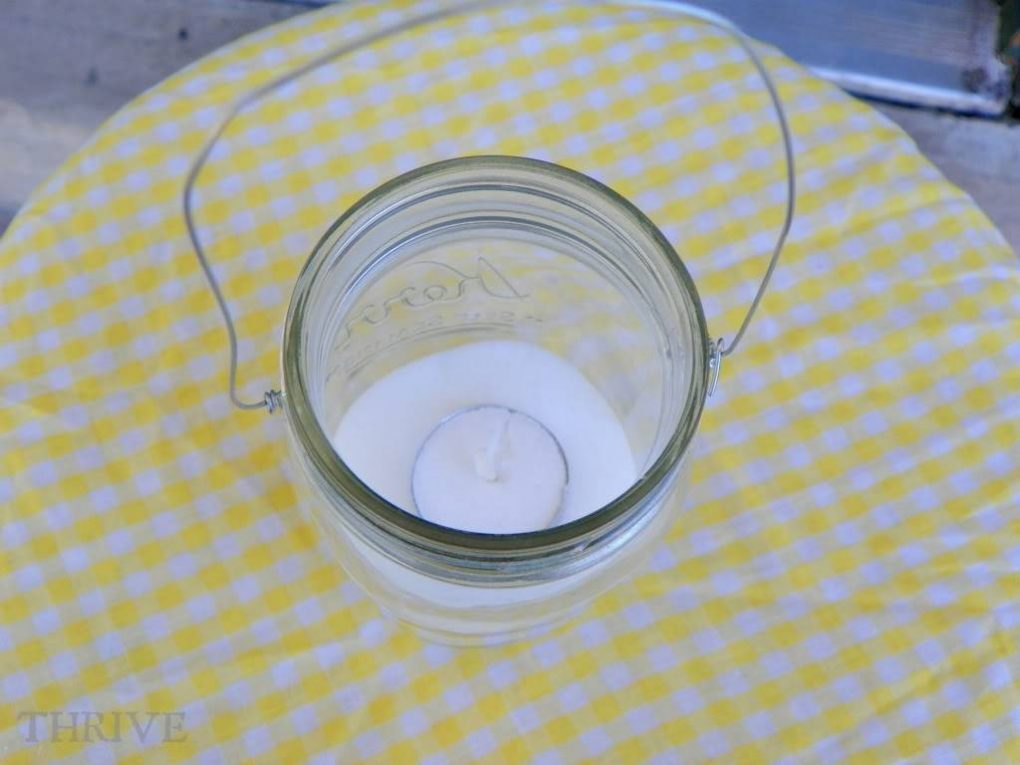
Lantern handles come together by wrapping wire around the lip of each jar a few times and then back over the top.

 photo csi4.jpg

Tea lights (battery or open-flame) work best if they’re set in a little bit of sand.

 photo csi13.jpg

No sand on hand? Me neither. Salt works just fine and can even be tinted with a few drops of food coloring for the looked of colored sand.

You can leave the lanterns plain or dress them up with some beads, ribbon or garland.

 photo csi35.jpg

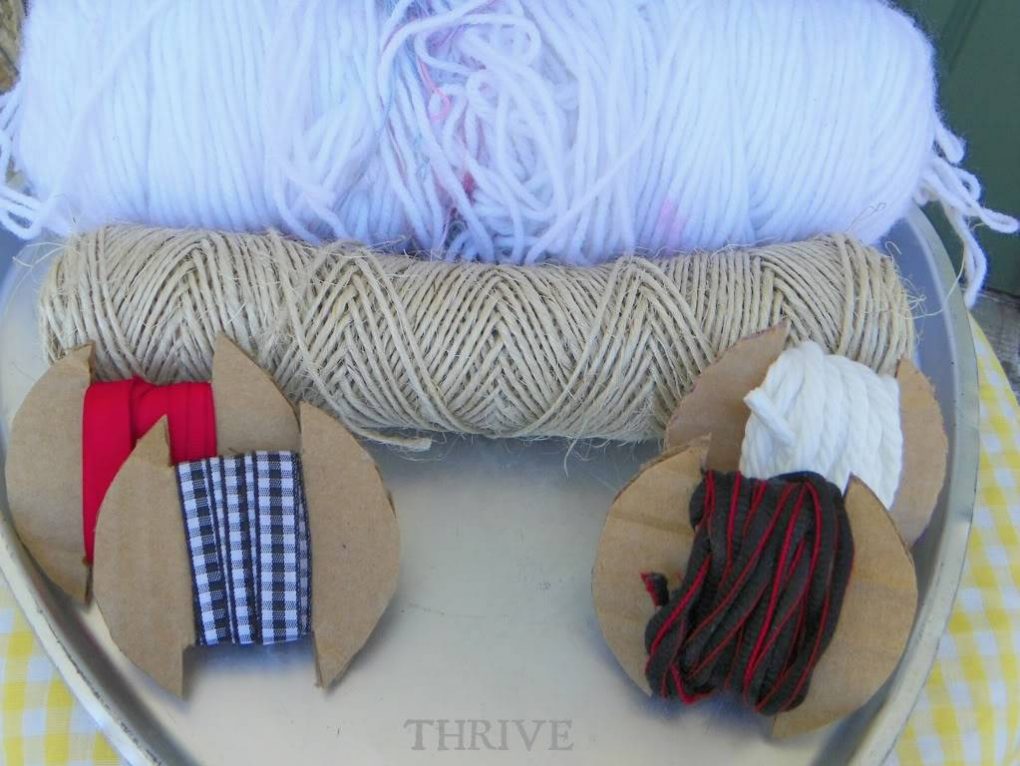
Hanging is a snap using whatever you have on hand—yarn, twine, ribbon, shoe laces, whatever. Rock what ya got.

 photo csi9.jpg

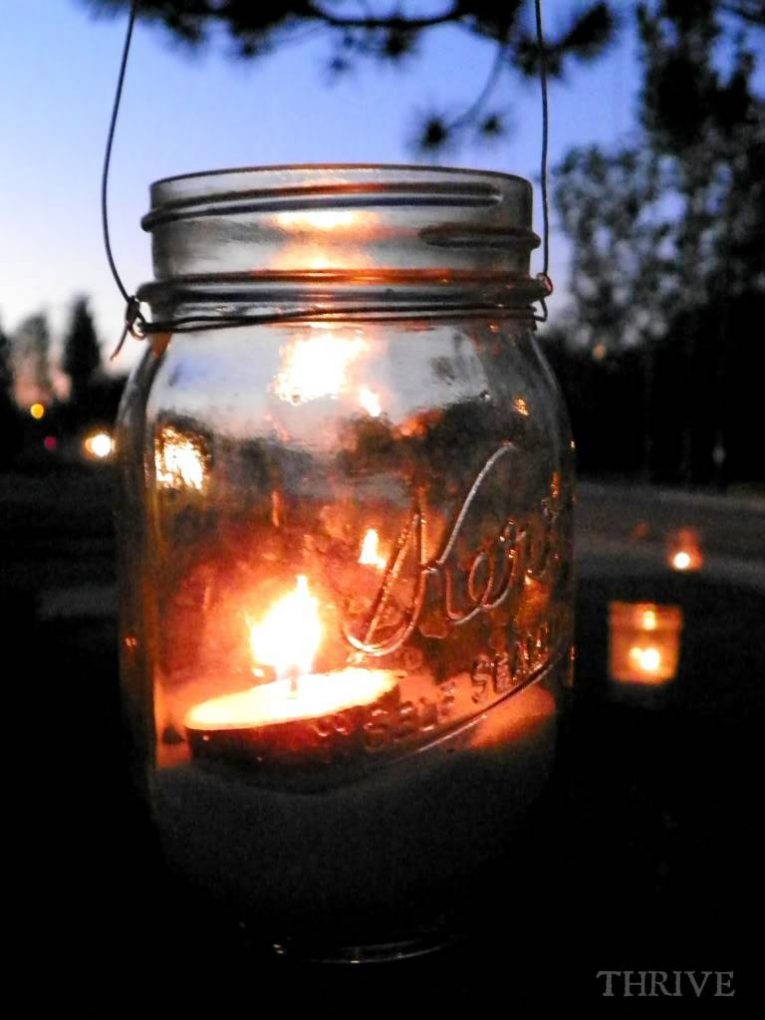
And as the sun starts to set, those lanterns get tied in place …

 photo csi14.jpg

… and candles lit …

 photo csi23.jpg

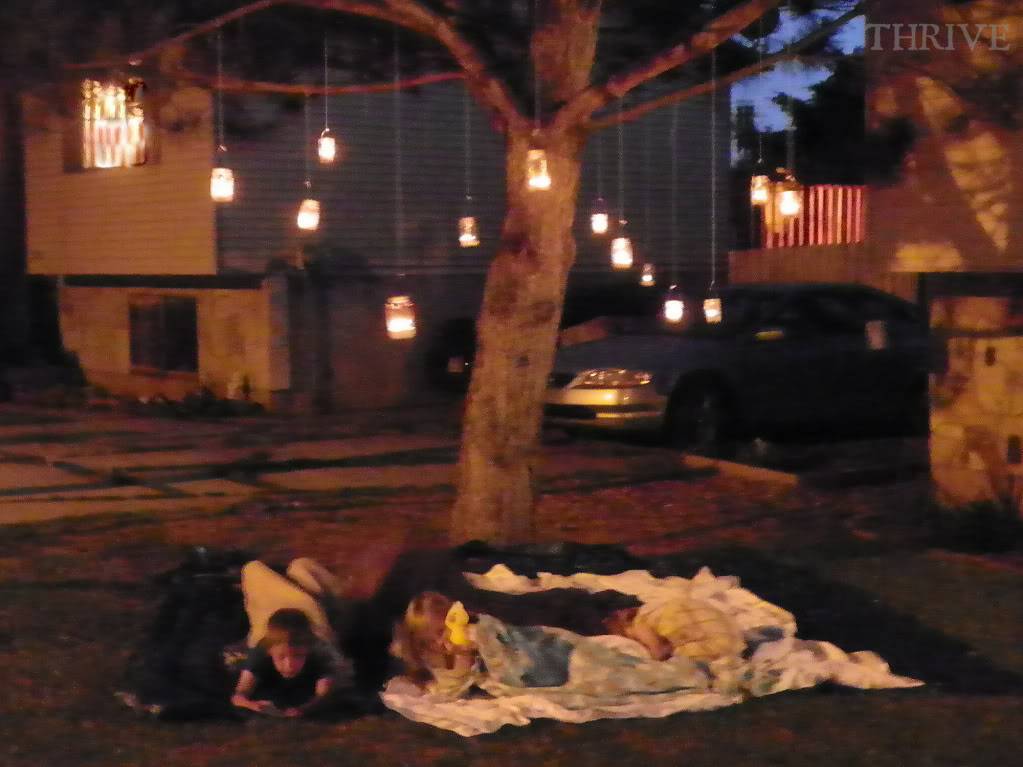
… and little bodies in jammies with story books find their way outside to lay under the stars …

 photo csi36.jpg

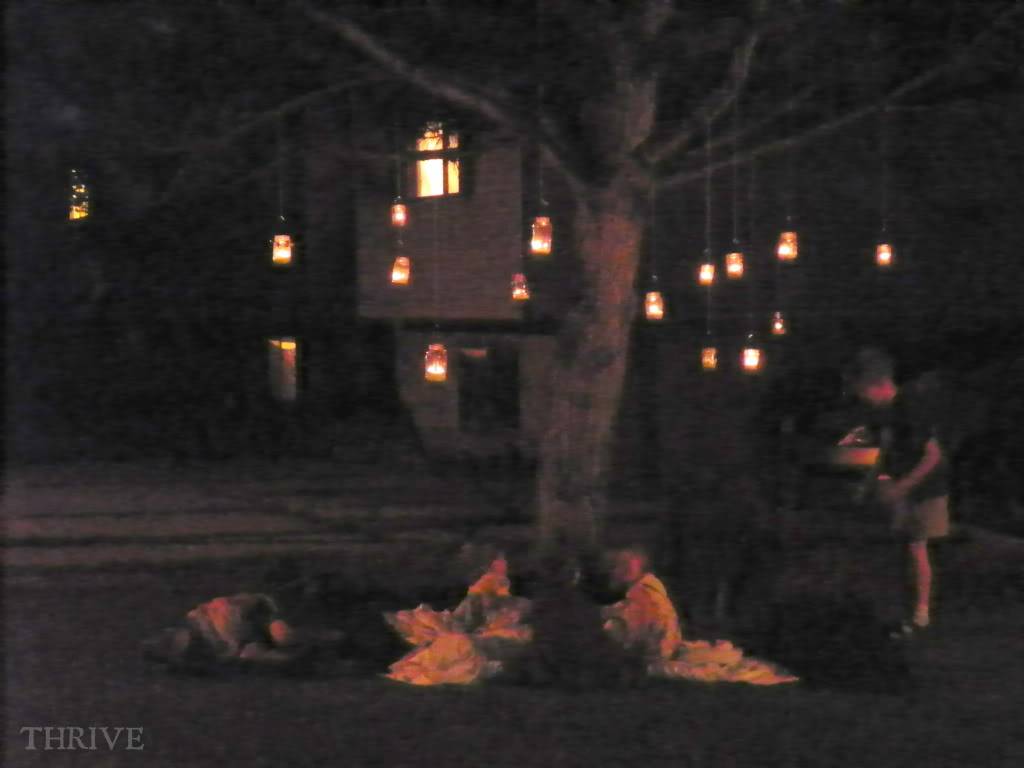
… and curl up with their favorite blankets under a canopy of lights …

 photo csi20.jpg

… telling ghost stories way, way past their bedtime.

 photo csi18.jpg

And seeing my ho-hum front yard transformed with some jars and string, and hearing the laughter and excitement of my kiddos waft through the warm summer night reminded me of my favorite children’s poem ever:

 photo csi31.jpg

So go take another look at those outdoor spaces around your house or apartment and see what kind of magic you can make yourself.

 photo csi37.jpg