Category

Home and DIY Projects

Category

HVAC units are brilliant for heating, ventilation, and air conditioning. However, when they develop faults, they can be responsible for making your home a dirtier and dustier place.

If things go wrong here, it’s important to act fast, because it’s been proven time and again that dust in your home can make residents sick if it’s left long enough. Fortunately, you can get ahead of the curve quite easily here.

Consequently, here are some tips on what you can do to make sure your HVAC unit isn’t making your home dirtier.

Introduce The Right Filters

The first course of action will be to check your HVAC system and select the right filters for it. For example some systems use MERV 13 filters. If you are using lower quality or clogged filters, then before long they’ll be working against you rather than with you, blowing lots of dirt and dust all over the place. Therefore, it’s important to switch them out as soon as their usefulness comes to an end.

Consider buying some top-quality filters from Filterbuy, which offers a range of MERV filters at various standards, so you can find the right ones for your unit and needs. The company helps you buy them in bulk on prearranged orders, which means this ordeal practically handles itself. It’s totally easy, whereas combatting dust and dirt after it has made itself at home is not quite so! Maintaining your home can be a long-winded task but opting for services that organize themselves is a great way to remove some of the bother. A lot of companies are offering discounts and offers to customers that prefer to shop on a subscription basis.

Remember, if you have pets or allergies, then you’ll likely find yourself replacing filters more often than those without. Consequently, it’s important to keep your lifestyle in mind to give you a rough idea of how often changes will be necessary. It would help if you also considered a higher MERV rating to capture larger particles.

Check Airflow

If you were too late to change the filters, then problems may have arisen elsewhere in the HVAC unit. That’s why it’s so important to check in on the filters on occasion. If they have been faulty or dirty for a while, then chances are that other parts of the unit have started to become affected also.

Dust can accumulate on your furniture when there’s not enough airflow wafting through your house to stop it from settling. Unfortunately, faulty filters restrict the flow of cold air inside the machine and can lead to uneven cooling problems. Obviously, you don’t want to be grappling with airflow problems in the midst of another alarming heatwave in the States, so it’s best to keep an eye on things here regularly. Give it all an occasional inspection, and things should be okay.

But how does this correlate to dirt and dust? Well, dust settles in any environment where there isn’t at least some airflow, so your HVAC unit could well be preventing the stuff from building-up in your home when it is fully operational. Therefore, checking this aspect of the HVAC, along with the filters, will help you keep your home cleaner.

Dusty Ducts

Even if your filter is working, the HVAC can still spread dust and dirt through your home if the there are gaps in the ducts of the unit. Still, at least this situation will inform you on how important the filters really are!

Check the ductwork sealing and ensure that everything is sufficiently closed up. Otherwise, not only will the air conditioning or heat escape, but any dust or dirt rattling around in there will too. Run your hands over the ducts, and if you feel air escaping, then that’s where much of your dust will be coming from because it isn’t going through a working filter first.

If you discover these faults or suspect them, call a seasoned professional out so that they can inspect and repair the unit to get it back in good working order. A sealant solution might do the trick if you’re wanting to put things right yourself, but it’s best to call the people in the know for peace of mind.

Examine Air Registers and Vent Covers

A lot passes through the ducts; dead skin, pet hairs, and anything else of that variety. Left to lurk around long enough, other things like mold will begin to form and present problems, as bacteria love to feast in unexpected places undisturbed. So, it’s best to inspect everything to see where the dust and dirt is most prevalent.

If grubby filters really have left everything else in the lurch, then it’s quite likely the registers, and vent covers will be covered in some fresh hell of yucky grossness. Problems can snowball quite easily with these kinds of issues, because if things still aren’t addressed, then you’ll find all sorts of surprises spewing out of these places and right into your home in time.

If you want to see how bad things have gotten, check the registers and vent covers. In the worst of times, one good luck at them will be enough to teach you a lesson in replacing the filters.

Final Thoughts

If your HVAC is making your home dirtier, then you need to focus on sorting the issue out as quickly as possible. Most of the potential problems come from a failure to regularly replace air filters, so as long as you’re on top of that side of things, a tidy and dust-free HVAC unit and home you shall have!

There is something romantic about using reclaimed wood for your home DIY projects. Now I realize that is quite a claim but I honestly believe most people would agree with me if they knew more about what is reclaimed wood, where does it come from and why we should be using it for our home remodeling ventures.

Given below, I have tried to answer as many questions as possible regarding reclaimed wood, its uses, benefits, drawbacks, nature etc. These questions should act as a guide for those trying to understand what reclaimed wood is all about and how to use them.

What is reclaimed wood?

As the name suggests, reclaimed wood is wood that has been reclaimed or repurposed for usage in another project.

This means that the wood in question had already been used either in a past commercial or residential property. Wood is periodically taken down from old properties due to various reasons. This wood is then processed further to make them reusable in various other tasks. It becomes as good as new as far as the new owner is concerned.

Where does reclaimed wood come from?

Reclaimed wood mainly comes from old commercial properties that are no longer in use and is to be taken down. This includes old factories, barns, warehouses, woodsheds, outhouses etc.

Note that some reclaimed wood can come from old residential properties as well. Reclaimed wood has a reputation for having a character of its own with some users preferring to learn more about its history, where it has been used before and the unique patterns formed after processing, before buying the wood.

Why should I use reclaimed wood?

There are several reasons for using reclaimed wood but the two most important reasons would be environment and unique characteristics with rich history.

Environment: According to the Food and Agriculture Organization of the United Nations, our world is experiencing about 10 million hectares of deforestation each year.

Environmental issues such as carbon emissions, clean energy, climate change, deforestation need to be in the forefront of our thought-process before any activity.

Reclaimed wood helps in a big way to curb deforestation. Since this wood has already been used, reusing it simply makes sense so that new trees do not have to be cut down.

By using reclaimed wood for any of your home, commercial or remodeling projects, you are helping the environment, reducing your carbon footprint and lowering the rate of annual deforestation.

Unique characteristics with a rich history: This is another significant reason why so many people prefer using reclaimed wood.

As mentioned already, reclaimed wood is wood that has already been used in a past commercial or residential property. This wood develops its own unique characteristics over time.

For example, there could be a nail mark that after reclaiming and processing has left a distinctive pattern on the wood. Cutting and shaving of the wood before past use also may have left patterns and marks that have become a part of that wood board.

Add to that, certain reclaimed wood come from old properties with a rich history. It could have belonged to a museum in the past or part of a barn belonging to a historical family in the locality.

This lends a lot of character to the reclaimed wood which standard wood simply do not possess.

In fact the unique characteristics, history and the fact that reclaimed wood is better for the environment are the main reasons I had mentioned there is something romantic about using reclaimed wood for any of your DIY or home projects.

Why is reclaimed wood better?

Wood in general is better for the environment than many other materials used for various parts of a property.

Plus reclaimed wood helps in reducing deforestation, adds to the character of your furniture, flooring etc.

Wood that is being torn down from existing properties may simply go to waste if not reused.

All this makes a compelling reason why reclaimed wood is better than other materials or acquiring new timber.

How to buy reclaimed wood?

Reclaimed wood can be bought from big stores such as Home Depot or from local dealers in your area as well.

Note reclaimed wood can also be bought online via the major ecommerce giants and other sites specializing in raw materials.

While I realize the way we shop has changed due to the Covid-19 pandemic, I still recommend to buy reclaim wood after checking it out personally at a store instead of buying online.

There is nothing wrong with buying online and its perfectly safe. However, as I explained above that reclaimed wood has its own unique characteristics and patterns, you may want to see it for yourself before buying. It will also give you a chance to know more about its past history.

What can reclaimed wood be used for?

Reclaimed wood can do everything that standard newly acquired timber can do.

It can be used for both residential and commercial properties. Reclaimed wood is currently being used for making furniture, flooring, window panes, exterior frames etc.

Basically there is no limit to the uses of reclaimed wood. If you can use standard wood for a project, then you can use reclaimed wood as well.

Is reclaimed wood cheaper than new?

This is a yes and no question. Certain varieties of wood can be much cheaper than when bought brand new. However, since reclaimed wood has to be recovered first from existing properties that are being torn down, the availability of the wood can fluctuate.

Whenever availability becomes low and demand remains fairly strong, the price of the wood will rise.

It is advisable to check with a few dealers and stores before purchasing reclaimed wood to get the best deals.

What kind of wood is reclaimed wood?

Reclaimed wood can be a mixture of various types of wood depending upon from where it has been salvaged. Typically reclaimed wood can be Oak, Pine, Chestnut etc.

A dealer may have sourced all their reclaimed wood from a single source or multiple sources. This will dictate if the wood is a mixture or of a single variety.

How long does reclaimed wood last?

This depends upon the past usage of the reclaimed wood. If the wood was from a fairly new property, then it will last as long as any new wood. If the wood was acquired from a property which was built several decades ago, then obviously that much of the wood’s age will be reduced.

However, it is quite reasonable to assume reclaimed wood will last one lifetime. Genuine wood usually do last for a long time and most reclaimed wood is heavily processed to make it as good as new.

Is reclaimed wood safe?

In general, reclaimed wood is extremely safe.

However, just like any other case for building projects, you have to exercise some caution. You need to check whether the salvaged wood has a bug problem. You also need to verify what kind of chemicals or preservatives were used to process the wood after reclaiming.

As long as you check on those matters, reclaimed wood is completely safe to use.

Should you sand reclaimed wood?

Yes, from floor sanding to tabletops, you can sand your reclaimed wood to create an even finish on the board.

Note that some dealers already give you the finished product while others sell raw salvaged wood that needs finishing such as sanding the wood.

How do you seal reclaimed wood without changing color?

Many experts feel you should use a polyurethane solution or sealer if you do not want to change the color of the reclaimed wood.

Note that using standard sealants and polish will alter the final shade of the wood after finishing.

Can I stain reclaimed wood?

Yes you can stain your reclaimed wood to give it the final finishing and look that you want.

Can you paint reclaimed wood?

Yes you can paint reclaimed wood. Note that some reclaimed wood may have paint stains from their old usage. You need to remove this before applying your own fresh coat of paint on the wood.

What are the drawbacks of using reclaimed wood?

I personally think that there are no genuine drawbacks to using reclaimed wood.

However, you need to understand because this is wood that has been salvaged, the wood may have existing nail marks, indentations or faded out old paint. Some reclaimed wood boards are uneven in size.

Mind you some people actually like this aspect of reclaimed wood as it gives a distinctive pattern after the finishing process to make it as good as new.

Final Thoughts

Reclaimed wood is my favorite. I just love a great dining table, patio furniture or flooring that is made out of old reclaimed wood with a unique character and rich history.

If you are still wondering if reclaimed wood is for you or how it works, just remember that reclaimed wood is just like any other wood used in DIY projects. It is just that in this case the wood had already been used in a past property and has been salvaged.

By using reclaimed wood for your home or any DIY remodeling projects, you are not only adding an unparalleled charm to your furniture, you are also helping our world from deforestation.

Whether you are thinking back to your childhood or are simply reflecting on the latest holiday season, there is no denying that Christmas lights can produce some truly magical effects. In addition to being a great way to bring friends, families, and communities together, these lights draw on our natural attraction to intense illuminations and create an aesthetic experience that is almost impossible to replicate in any other setting.

Unsurprisingly, countless parks, zoos, municipalities, and businesses spend more than $6 billion on lights per year, according to some recent estimates. By 2024, this market is expected to experience about 20 percent more growth and will reach an impressive $7.6 billion in annual sales.

Clearly, commercial Christmas lights are a very big deal. If you are someone who is planning on purchasing a significant amount of lights before the next holiday season arrives, you will certainly benefit from trying to reduce the cost of commercial lights to the greatest extent you possibly can.

Fortunately, there are quite a few things that seemingly any organization can do to effectively lower the total amount they are spending on commercial LED Christmas lights and other important holiday decorations. In this article, we will discuss eight time-tested strategies that have helped organizations of all varieties reduce their annual costs. By taking the time to be cost-effective with your major illuminating purchases, you can purchase even a greater quantity of lights without needing to break the bank.

1. Invest in LED Christmas Lights

When determining which Christmas lights will be best for your bottom line, it is important to take a holistic approach and account for every cost involved. If you simply purchase the cheapest set of lights you can find, you’ll likely end up purchasing lights that break or go out in a very short amount of time. Once this happens, you’ll need to end up purchasing new lights and your entire savings will have been for naught.

Though they will cost a bit more upfront, LED Christmas Lights are overwhelmingly the most cost-effective option for people who plan on creating long-term holiday displays. These lights can be up to 80 percent more energy-efficient, which can really begin to add up, especially when you are working with millions of lights at once. Furthermore, these lights have a bulb life that is five times longer than traditional incandescent lights, meaning they will not need to be replaced nearly as often.

2. Buy in Bulk

As you will find when making most purchases, buying Christmas lights in bulk is one of the easiest ways to reduce the amount you are paying on a “per bulb” basis. Rather than buying a few thousand lights here and a few thousand lights there, take the time to calculate how many lights you are likely to need and make your purchase all at once. If you are unsure how many lights you think you’ll need for your display, consult your supplier prior to purchasing.

3. Purchase Backup Bulbs

Once you have a comprehensive understanding of how many bulbs you’ll need for your display, consider purchasing an adequate “backup” supply of bulbs and cords as well. When operating at higher volumes, the probability of a bulb—or even an entire string of lights–breaking will increase. As a good rule of thumb, you should purchase about 2 percent more bulbs than you actually need. However, this can vary, depending on the dynamics of your specific display.

4. Purchase Christmas Lights During the Offseason

As you might expect, most major commercial Christmas light suppliers experience an increased volume of sales towards the end of the year. In order to offset their uneven cash flows, many of these companies will offer dramatic discounts during other seasons.

Purchasing Christmas lights many months before December can help you save 20 percent on your total purchase, or even more. Additionally, the “offseason” is a great time to purchase lights for other holidays, such as the Fourth of July or Halloween. After all, the magic of these lights can last throughout the entire year.

5. Use an Online Commercial Christmas Light Supplier

Generally speaking, online commercial light suppliers will be more affordable than the lighting specialists operating out of a brick and mortar storefront. These suppliers will usually keep their lights in a centralized warehouse, effectively reducing their total overhead costs and passing the savings on to you. While you may want to explore multiple options before making any final purchases, beginning your search online will usually be your best bet.

6. Create Specialty Displays by Hand

With the so-called “LED Revolution”, the variety of seasonal decorations available has considerably expanded. LED silhouettes and character displays, for example, have become especially popular. If you are looking to save some money, you may want to consider creating these displays by hand, rather than purchasing them pre-constructed. As long as you are willing to put in the time and effort required to make them look professional, viewers are unlikely to notice.

7. Take Actions to Extend the Life of Each Bulb

To reduce the amount you are spending on Christmas lights each year, you should proactively try to extend the life of each bulb to the greatest extent you possibly can. This can be done by always making sure the bulbs are turned off at night, minimizing exposure to extreme weather conditions, and—in some cases—lowering the wattage being used to illuminate each bulb.

8. Look for Special Discounts

Lastly, the best way to save on Christmas lights is to be an active shopper that is consistently looking for discounts. If a company has a surplus supply of a specific string of lights, for example, they will very likely offer temporary discounts until the apparent surplus is eliminated. To remain up to date on the best deals for Christmas lights, consider subscribing to your favorite supplier’s newsletter.

Conclusion

Christmas lights are undeniably fun but, if you’re not careful, the costs of creating a truly impressive commercial display can really begin to add up. Fortunately, saving on Christmas lights is likely much easier than you might think. With these strategies in mind, you can lower your total bill without needing to sacrifice the overall quality of your display.

Did you know that making your own home-based fertilizer for plants is as easy as making a cup of coffee? Quite Literally.

I myself was quite astonished by this in the beginning. However, after a bit of research, I was excited and could not wait to try it at home.

Now you may have guessed by now that the secret ingredient in creating an all-natural home-based fertilizer for your precious plants is coffee grounds.

So that you can understand the entire process before you go ahead and feed your plants some coffee, we shall cover the following topics today:

  • Why Garden Plants or Home Plants Lose Nutrients?
  • How Coffee Grounds Help Enrich the Soil?
  • How to Make Your Own Fertilizer at Home?
  • Important Precautions When Using Coffee Grounds as Fertilizer.

1) Why Garden Plants or Home Plants Lose Nutrients?

Instead of going into the technical details, I am going to give a very simple answer. The reason plants in your home or your garden lose nutrients is that they use up all that is there in the soil over time.

Think of a potted plant. They are relying on the soil in the pot for their nutrients. However, there is a limited supply as the roots have access only to the soil in the pot. As time goes by, the plant starts using up the nutrients, depleting them from the existing soil.

Once the soil has lost the nutrient content, you will see your plants getting weaker with each passing day. They lose their brightness, they feel pale and shed leaves.

This is the reason why you need to replenish the soil of a potted plant either in your house or in your garden with nutrients from a natural fertilizer.

2) How Coffee Grounds Help Enrich the Soil?

Coffee grounds are rich in nitrogen. Apart from this, they do have several other minerals in varying quantities such as potassium, iron, calcium, phosphorus etc.

Many gardeners claim it is not just what coffee grounds add to the soil that is of benefit. What coffee grounds remove from the soil is a huge help as well. There have been reports that coffee grounds can help absorb metal contamination from the soil in a garden.

So considering the nutrients that are being added and the contamination that is being removed, coffee grounds make excellent fertilizers that enrich the soil.

3) How to Make Your Own Fertilizer at Home?

Now, this is the really easy part. At the start of this post, I mentioned making your own home-based all-natural plant fertilizer was as simple as making coffee.

Well, that is it.

Simply go ahead and brew your ideal cup of coffee as usual. However, unlike most other times, do not discard the leftover coffee grounds. Keep them in a separate jar or any kind of container. Wait till they dry and your home-based fertilizer is ready for use.

Just in case you do not make coffee at home, you can easily source coffee grounds from a café. Most cafés would be happy to get rid of their coffee grounds as it is just a waste product for them. Some even neatly pack their coffee grounds and give it to whoever wants them.

4) Important Precautions When Using Coffee Grounds as Fertilizer.

Now while coffee grounds definitely contain a lot of nutrients that enrich the soil and help plants grow, there are a few precautions you must take before using them on your plants.

Ideally use only a little at first to see how your plant reacts.

Remember coffee grounds are ultimately the same as your coffee drink. What this means is that they contain caffeine and are acidic in nature. Not all plants can thrive if the soil suddenly gets a high dose of those two elements.

So my strong advice would be to add little coffee grounds to your soil to check whether there is an adverse effect on your plant. If you see the plant is thriving, then use it regularly to mix with the soil. If you see stunted growth or any other issue, do not use it for that particular plant.

You have to do this individually for all your plants. Do not go spreading coffee grounds all over your garden as that can cause some plants to grow well and others to wither quickly.

Final Takeaway

Coffee grounds contain several nutrients that can help enrich the soil of your garden. They can also help in the removal of metal contamination.

Coffee grounds are also possibly the simplest way of making home-based plant fertilizer. They are environment friendly, do not cost anything extra and are a good example of converting waste into a useful product.

As long as you are taking the precautions as mentioned above, you should be fine. Also just in case, your garden has more plants that prefer acidic soil, then coffee grounds can be the perfect fertilizer for you.

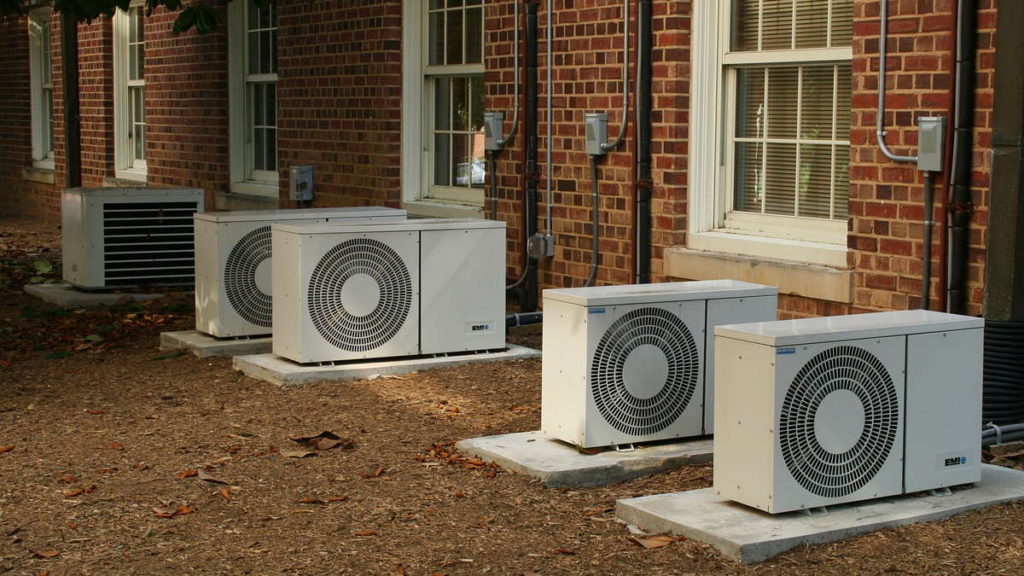
As summer approaches, you need to make sure that your home is in tip-top condition. There are several appliances you are going to come to rely on in the warmer weather, such as your AC unit. It is incredibly important that this piece of equipment works to the best of its abilities as the months turn warmer. Here’s what you need to do to get this ready for summer.

Give It a Quick Assessment

First up, you need to give it a once-over to establish its general condition. Depending on where you live, you may not have touched it for several months. As a result, it is likely to be in not the best condition compared to how you usually like it to look.

Even if you are not HVAC-savvy when it comes to fixing things up, you should be able to tell from a general once-over what condition it is in. If it looks battered and old, it is going to need either some repairs or potentially even replacing fully. This first little assessment of fins, electrical components, belts, and other essential parts of the system could be key in ensuring that your AC is actually able to stand up to the job without breaking halfway through the season.

Clear It Out

Through fall and winter, dirt and debris can become lodged in an AC unit if it is not properly cared for belts, and electrics. Many areas of your AC can get clogged with dirt and grime that can impair them, so when you’re checking that your AC is workable, you should also clean it out. This is such a critical part of the maintenance and it can’t be a step that is skipped. If you feel like this is going to be beyond your skillset, make sure you enlist the help of an expert instead.

The very first thing you need to do is cut the power to the AC unit itself. Make sure that power is off to avoid any issues you may encounter while trying to clean it. You then need to clean the inside. Make sure the evaporator coils are clean, and then empty and clean the drain and drain pan. If the drain is clogged, you can use a wet/dry vacuum to try to shift the blockage.

You should also clean the outside of the unit once the power is off. There should be enough slack in the wires for you to do this without needing to disconnect the wires. You can then clean out any debris from the bottom of the unit itself. If you use a solution to clean your condenser coils, you need to make sure that it does not get on any of the inner workings or on you as it can cause burns and damage the unit itself. Finally, straighten the unit’s fans to help maintain its efficiency. Make sure you are using the right set of tools for the job when you do so. As you close up your AC unit, make sure you check that it is still level.

Check the Air Filters

Air filters are one of the most crucial parts of the AC unit and it is something that you will check fairly regularly, even if you only clean the full unit a few times a year. Air filters are such an easy change to make but they can make a real difference to the inside of your home. If you feel like things are a bit stuffy, or it seems like the air is not circulating as well as it should, that is a key indicator that your air filter needs to be changed.

Air filters come in many sizes – while you’ll likely have a common size like a 16x25x1, make sure to check the size of your current filter before stocking up. A good-quality air filter should last you at least two or three months, but you may want to change it more often depending on your household. As a result, you need to make sure that you have enough filters to last you throughout the season.

Maintain Your AC Regularly

We rely on our AC systems more than we might realize. If you think that yours needs some work as we move into the summer months, you should think about updating it as soon as you can. This is just one part of your house that should be refreshed in time for summer, but things can get unpleasant if it does break down.

Make sure you are giving yourself enough time to properly assess it and any repairs it might need. Better to get them sorted now before you have to rely on that AC keeping you cool after all! If your home needs its AC in the warmer months, you should check on it today to make sure it is ready!

Having a space that is truly theirs is a luxury that every child wants. No matter what your budget might be, you will be able to create a fun place for your child to relax in during their down-time. Here are some of our top tips for decorating, to make it a truly unique space.

Keep Things Neutral

By choosing neutral furniture, you will be able to swap smaller things like bedclothes and décor out as they age. Though a racing car bed is cute for a toddler, they might not appreciate sleeping in it when they become teenagers. One bed made from a neutral wood or metal will be more appropriate and can stay with them as they age.

This also allows you to potentially spend a little more when you initially buy it if you have the budget to do so. Try to make a good investment that you know will last for years. The furniture could even potentially leave home with them when they get their first adult home too.

Make Storage a Priority

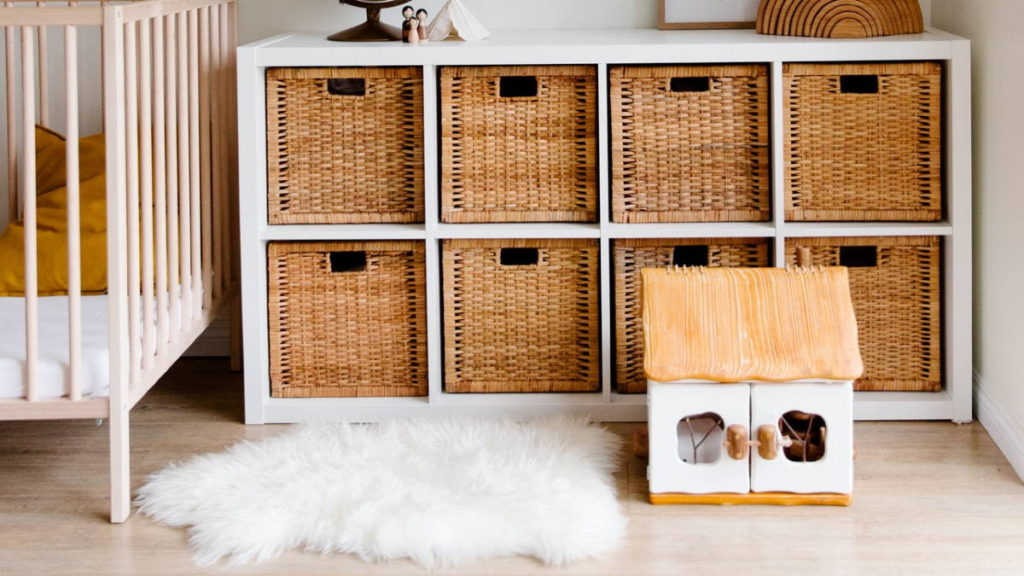
No matter how old your child is, you need to make sure that their room has plenty of storage. A young child is going to have a lot of toys to put away, while an older one may have interests like an instrument or art that needs storage space.

If you don’t have enough room within your home, you might want to consider renting some storage spaces nearby. Not only will you be able to keep your children’s items there, but you should be able to store other items around the house. You may have questions like “how much does storage cost?” or ‘how long will I need a rental space?’. However, you may find that it can fit into your monthly budget much easier than other items like expensive gym memberships that you hardly use. This could give you the chance to expand on your home’s storage capabilities, and leave room for some other things that might be needed a lot more.

Take Their Thoughts on Board

Whether your child is a toddler or a teenager, they will probably have some ideas on how they want their room to look. They will require a little more guidance as a toddler, and some of their ideas might need a few creative interpretations, but they can definitely still provide you with some ideas about what they would like to see in their room.

The older your child is, the more likely it is they might be able to help out with some of the choices around the room. For example, a smaller child could pick out their paint and help with the decorating. Meanwhile, a teenager could be given a complete budget and asked to handle the full renovation themselves if they are responsible enough to do so. There are many ways to get your children to help you out with a renovation, so think carefully about their capabilities before you get stuck in.

Ideally, you want to create a functional and relaxing space that is an extension of your child’s personality. You also need to make sure that you are creating a space that will last them for several years. Changing rooms for them every few years can be incredibly expensive, and just simply isn’t worth it. Take the time to speak to them and work with your children to create a room that they are going to love spending time in. From the colour of the walls to the choice of bedspread, there are tons of little things that could make a difference.

Saving money on weddings can seem something of an oxymoron. As any blushing bride will attest, spending a lot of money and planning a wedding go hand in hand. That need not be the case.

If you consider yourself to be something of a frugal bride, then this handy guide will give you great cost saving exercises that you can implement into the planning your big day:

1. Forgo the Church

Many brides want to get married in a church as it forms part of the ‘big, white wedding’ dream. However, getting married in a church is notoriously expensive. If you want to save money on your venue costs, then you need to start looking around for other wedding venues.

There is a great selection of alternative wedding venues in the UK, which are still as beautiful, and grand, as getting wed in a church.There are hotels, parks, town halls and registry offices to name but a few. This means that you can still have a white wedding, but on a budget in a great wedding venue.

2. Get Crafty

If you want to save a fortune on wedding stationery, which is hideously expensive, then you need to start getting creative and start making your own. With a plethora of arts and crafts shops, you will be spoilt for choice. Enlist the help of the bridal party to assist with the creating, and making, of the invitations.

3. Invite Less People

While this handy tip may seem commonsensical, inviting fewer people to your wedding will save you a lot of money. This means that you may not be able to invite your aunt that you haven’t seen in years, but it does mean that you will get the people there that you want involved with your big day.

Think about your close friends and family, and don’t invite long lost relatives or someone you met in a pub once. You will save a small fortune in the process. Having a small, select wedding will be a blessing.

4. Pre-Loved Bargains

Saving money is imperative when planning your big day, so it may be time to start digging around for pre-loved bargains. You can shop for pre-loved accessories, such as veils and tiaras, or you can look for second hand table decorations. If you are feeling particularly thrifty you can look online for pre-loved bridesmaid dresses.

Scour charity shops, factory outlet stores and eBay for some serious bargains. You can still have a beautiful wedding, but you do not have to spend mega bucks to achieve it.

5. Use Paper Flowers

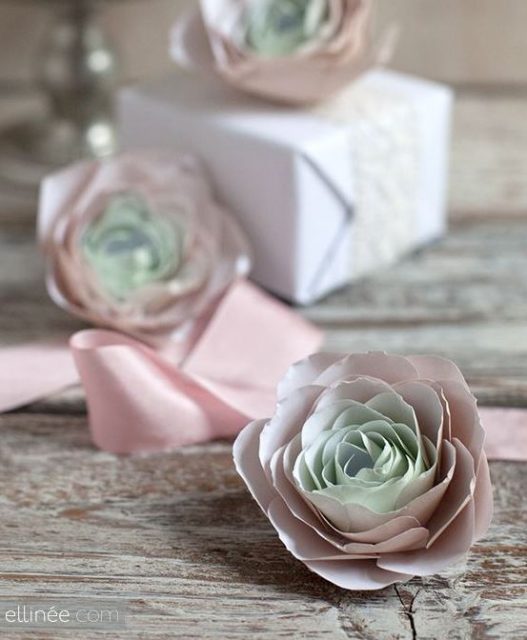
Fresh flowers can be pricey, but many brides do not want to forgo flowers on their big day. You can still have a picture perfect bouquet, but at a snip of the cost should you choose to have paper flowers.

Paper flowers look amazing and are a cost-effective solution for brides on a budget. They look particularly beautiful when formed part of a vintage wedding theme. Your paper flowers can have beautiful pearl and gem adornments to ensure that they sparkle on your big day. You could even try making them yourself for that extra special touch.

It is the time of year when we all try to become enthusiastic about our garden design. It is not always an easy thing to do because looking after that piece of land is a never-ending and often thankless task when we are unable to use it thanks to the unreliable British weather.

Try to imagine for a moment, how you would spend money on your garden if you received a lump sum unexpectedly. The garden probably comes last on a long list, but it shouldn’t. There is much entertainment and pleasure to be found in your backyard, if you install some desirable features there. Honestly, sometimes just an interesting garden table and chair set can make a huge difference to your overall experience.

Here are some exciting features to renovate your garden with this summer.

New Decking

Decking is a fantastic and versatile material that will enhance any garden. It is useful for building platforms on sloping land, or for bringing patios up to the back doors at floor level, so going to sit on the garden furniture is like walking from one room to another. The deck is relatively easy to install compared to other materials and is suitable to take on as an amateur construction project. The platform is usually constructed with timber from trees grown in sustainable forests, but modern composite materials are now in common use. Composite timber has several advantages over real wood.

  • Resistance to mould and fungal infestations
  • Anti-slip properties when wet
  • Does not need annual treatment to protect it
  • Easily washes clean
  • Has a longer lifespan than timber
  • Keeps its looks over time

Are we going to see the demise of timber decking? We will have to wait and see.

Spa pool

Jacuzzis are a very popular garden feature at the moment. They are quite expensive though, and you will pay a few thousand pounds for a basic model. They come as complete units that only need power and  water supply to function. Gardens up and down the land are hosting sophisticated parties that finish with a glass of bubbly and a social soak in the tub.

Summer House

Do you enjoy days in the country? Well, take the kids out for the day without leaving home by building a stylish new summer house. Summer houses were once simple structures; little more than fancy garden sheds. Nowadays they are incredible buildings that have all conveniences built into them. Interior designers have worked their magic to make this garden feature into a room good enough to grace any home. Position it so that the main house cannot be viewed from there if possible, to help with the illusion that you are elsewhere. It will also work well as a heated dressing room to use when stepping out of the jacuzzi.

Water Feature

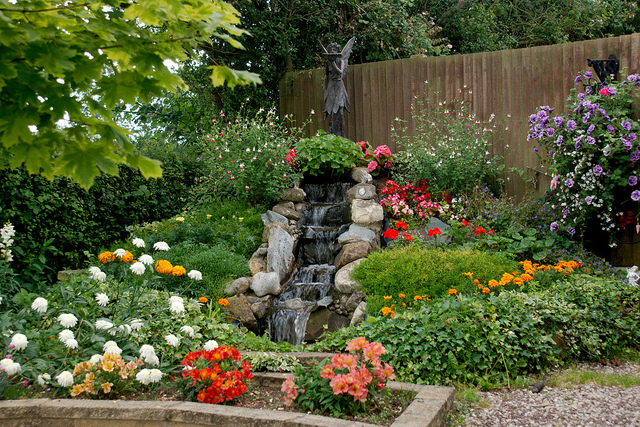
All gardens should have the sound of running water in them. Some people have gone to great lengths to build wild rapids in their garden, and others settle for a simple fountain feature that stands on the patio. The choice is yours.

So now you have imagined what features to install when you land a windfall, go out and buy a lottery ticket. Someone has to win it, and your numbers are as good as any others. you’ll never know if you don’t try.

Baking and cooking with your kids is a great way to bond with them and have fun together. Kids just love getting messy in the kitchen, and they love the responsibility you give them even more.

By baking and cooking with kids, you can teach them the value of food and the skills required to support themselves when they’re older. If your kids love making potions in the bathroom, show them how they can make a potion in the kitchen that turns into something edible!

Almost all children love chocolate and some of the easiest things to bake with kids contain chocolate. Anything with melted chocolate is double the fun because it creates a gooey mess. But don’t forget you can teach your kids how to be clean and tidy in the kitchen too.

Try making some of these delicious chocolate treats that just about anyone can make whether they’re 5 or 85.

Just a word of caution. When you’re baking with the kids, make sure they’re supervised with anything hot or sharp. Also ensure all your kitchen appliances are in good working condition. Baking should be fun, not cause for a trip to the ER.

Chocolate Nests

All you need is chocolate and cereal, and maybe some treats to decorate. Pick whichever cereal you like, but since you’re mixing it with chocolate, don’t go too sweet. You can use Rice Krispies, corn flakes or even bran flakes.Just melt the chocolate (it’s best to do it in a bowl over another bowl or saucepan of hot water), mix it into the cereal and spoon it into cupcake cases. Add some decorations (chocolate eggs are great for Easter) and put them in the fridge to set.These chocolate treats are so easy any adult or child can make them. If you want to get the kids into the kitchen, but you’re not very confident with your skills, these are simple enough for anyone to do.

Fun Chocolate Treats You Can Make with Your Kids

Chocolate Cupcakes

Chocolate cupcakes are also easy enough for the kids to help out. They’ll need a bit of a helping hand with measuring, breaking eggs and handling anything hot, but they can do a lot of the tasks involved.

Have the kids mix, measure and pour, and they’ll feel so proud of themselves for helping in the kitchen. Once the cupcakes are out of the oven and have cooled down, let the kids have fun with decorating.

They may not be the prettiest cupcakes ever, but they’ll be a great achievement for your children.

Chocolate Brownies

You can have all kinds of fun with brownies too – they don’t have to be just plain chocolate. Try adding popping

Fun Chocolate Treats You Can Make with Your Kids

candy for a giggly time. You can use nuts, caramel, marshmallow, and peanut butter. There’s no limit to the different flavors you can add to your brownies. You can even try blondies – brownies with white chocolate. Brownies are another easy thing to put together with the kids. You can buy a ready-made brownie mix, or you can be a bit more daring and start from scratch. For extremely sumptuous brownies, use a good quality dark Italian chocolate, instead of just cocoa powder.

shamrock

In the middle of our crazy bedroom switcharoo project, we stopped for a quick, green little snack in honor of St. Patrick’s Day.

The inspiration came from the plastic mesh bag that grapefruit and onions are sold in. After the kids inhaled four giant grapefruit, I was wondering if I could possibly make something out this sack before I tossed it. The result was a quick little basket perfect for taming that treasure at the end of the rainbow (or at least a rainbow of fruit flavors.)

Want to make one?

For this project you’ll need:

shamrock.4

As always though … rock what ya got.

Trace and cut out the outline of a small cup or jar on a scrap piece of paper …

March 2011 BLOG2

… then place paper against the bottom of the glass, wrap the mesh tightly around the sides and trim away the extra mesh. You should have just enough length at the bottom to fold into the middle to make the bottom of the basket.

Carefully add a ring of hot glue to the paper base and carefully fold the mesh into towards the center. Again … carefully.

March 2011 BLOG3

Trim the top edge to make it flat and run a small bead of glue down the back seam of the mesh to close the side seems. When glue has set, carefully remove basket from the mold.

My kids liked the look of a handle Easter basket style so I added a narrow strip of mesh with a dot of glue on each side to the smaller one. A quick coat of spray paint …

March 2011 BLOG4

…  and my pot of gold was done. Drying time was only an hour.

(And I’m already thinking ahead to Easter and picturing a table setting with these little baskets painted white and filled with small pastel Cadbury Robins Eggs. Yum!)

At the last minute I added a quick shamrock out of felt. No biggie.

shamrock.3

So there you go!

Some recycling magic and yummy treat that even St. Patrick would like.

Now that’s my kind of green.

Happy St. Patrick’s Day!