Category

Home and DIY Projects

Category

Did you know that wallpapers have been around since the 18th century? That’s a really long time and it is not surprising that wallpapers have not just survived but thrived even in the times of modern home décor.

While the industry has come a long way since its nascent days, the overall value proposition of wallpapers have pretty much remained the same.

I personally love wallpapers and feel it can be a great addition to your room décor giving it the extra bit of life or spark that we all crave.

So here are some of my personal reasons for using wallpapers at my home and why I always recommend to my friends and family as well.

1) Hand Painted Art

Great art can completely alter the look of a room. Boring spaces can be converted into exciting, breath-taking areas of the house.

Enter hand painted wallpapers. I have often been amazed by the artistic beauty of hand painted art as well as crafts. I was instantly drawn to the beauty of hand painted wallpaper when I first came across them few years back.

When it was time to redecorate our home, I ensured at least couple of the rooms had one side of the wall covered with these artistic wallpapers. I love how these wallpapers transformed a simple wall into a masterpiece.

It was like I had got a professional artist to paint a picture on my walls. While wallpapers can come with great designs, I personally am extremely attracted to the hand painted styles as those speak so much more to me than generic patterns.

2) Cost-Effective

While getting quotes for painting and wallpapers, I was quite surprised by the cost-effectiveness of wallpapers regardless of quality and design.

Honestly, cost was one of the factors that helped me take a decision to opt for wallpapers on one side of the wall in each of our rooms.

Quality with a value proposition is definitely something I look for when planning my room decorations.

3) Durable

I have used wallpapers before as well and have seen them in my parents house. They always seem to last a long time without any need for replacement.

Unless the wall behind the wallpaper is itself damaged, most wallpapers will last for many years to come.

So durability is another factor why I love wallpapers in the house.

4) Mix and Match

I love it how we can have multiple wallpapers around the house to create a special one of a kind look.

Mix and match aspect of wallpapers is definitely a big thumbs up for me.

5) Easy to Install

This is definitely an important reason for me to choose wallpapers.

I just cant go through long days painting around the house, waiting for things to dry, cope with the paint smell etc.

With wallpapers, you can have it all completed within a day provided you do it properly. Of course you can have a professional install it for you just in case you are worried your wallpapers will end up with air bubbles and will need removal.

6) Cover Up Wall Defects

As much as we want our homes to be perfect, some defects always creep in our walls in certain areas. Instead of having to go through extensive repairs, you can simply use wallpapers to hide these defects while enhancing the appearance of the same wall.

So simple addition of wallpapers can transform bad patches from defective to artistic.

Final Thoughts

The above given reasons were my personal reasons for choosing wallpapers. I of course do love good paint as well with unique textures.

However, wallpapers can save a lot of trouble and time while adding to the creative value of your room décor.

A few weeks back, my 10 year old daughter decided it would be a great idea to put up several stickers outside her room door. Surprise, surprise, exactly a week later she decided those stickers looked lame and just had to go.

Unfortunately for me though, she removed the stickers using her nails and left massive glue marks on the doors. In fact, some of the white paper from the stickers were still on the door along with terrible glue stains.

It was such an eyesore and I decided to try and remove the sticker stains myself. What surprised me was absolutely nothing I tried actually worked. I even tried the hair dryer idea that I read online and that did nothing. Using the standard cleaning solutions at home also did not remove any of the glue stains.

That is when someone suggested to me to use white or distilled vinegar from my kitchen for the stains. At first I was a bit afraid of the vinegar spoiling the door paint but using just a bit of it on a cotton and rubbing it on the stains worked like some real magic. All glue stains were out in less than two minutes. I couldn’t believe it and since then, I have been obsessively researching about using vinegar for all stubborn household cleaning jobs.

Why Vinegar Works on Stains?

Vinegar is such an effective cleaning product simply because it is an acid. Of course it is an acid that can be consumed by humans in small quantities and hence not harsh on your house furniture, fixtures or fabric.

According to Scientific American, the acid from vinegar adds a chemical charge to the molecules of a stain that in turn get pulled to the positive and negative charges of water. There are some more scientific reasons for vinegar being so effective on stains which I will not get into complete detail over here. Just know that vinegar’s acidic properties make it one of the best and cheap cleaning products that you will find in your house.

Which Types of Vinegar is Most Effective on Stains?

Even though there are many types of vinegars whose properties are pretty much the same, the best vinegar to use for cleaning purposes is the standard white distilled vinegar.

In some places, it is also known as white synthetic vinegar.

Ideally you should not use other types of vinegar like apple cider vinegar, balsamic vinegar etc as those could end up causing a different kind of stain and have a distinct smell as well.

How to Use Vinegar for Stain Removal or General Cleaning?

There are two ways you can use vinegar for both stain removal and general cleaning.

1) Put a bit of vinegar directly on a cotton ball and gently rub the area in and around the stain. For glue marks, you may have to apply a bit of pressure.

You can keep pouring the vinegar bit by bit on cotton balls and rubbing the area of the stain till it is completely clean.

Note this technique works best if you are removing stains and not cleaning windows, bathroom tiles etc.

2) The other method is to mix equal parts of vinegar and clean water in any spray bottle you have in the house.

Mix it well and then spray on the area you want to clean. Then take a clean cloth and rub over the area to get a nice smooth spotless finish.

This technique works well with furniture, bathroom tiles, glass windows or any place where you need to clean a larger area.

What Types of Stains Can Be Cleaned by Vinegar?

Ideas for when to use vinegar for your household cleaning jobs.

1) Glue stains from stickers etc.

You can use vinegar directly on those nasty glue stains left over by all kinds of stickers. Vinegar is especially useful when you have stubborn barcodes stuck to brand new plates and other kitchen items.

2) Tea or coffee stains

Tea or coffee stains can be quite a handful even for the best detergents. Vinegar can be used to slowly remove these stains from your clothing, fabric on sofas etc.

3) Stains from car seats

Stains in car seats, especially fabric car seats are a pain. You can spray vinegar and water mixture over your car seats and then after a few minutes scrub the area with a clean cloth to remove any stains in your car.

4) Removing moulds from bathroom tiles

Moulds are a real nightmare for all. I personally have had to deal with this menace in my bathroom. Vinegar really helped in getting rid of moulds from tiles, bathtub and even the sink. Best part about using vinegar is that it reduces the formation of new moulds over time in your bathroom.

5) Window cleaning

If you want a nice spotless shining window, simply spray vinegar and water mixture on the glass and clean normally with a cloth. Vinegar will remove dust, stains, prints etc that glass pick up over time.

6) Sofa cleaning or removing any kind of stains from sofas

Just like you would clean your car seat, you can use vinegar and water mixture to keep your sofas neat and tidy. Spraying vinegar mixture on sofa seats will slowly get stains out of the fabric and give it a spotless look.

7) Removing food stains from clothing

Again, just like tea or coffee stains, you can remove other food stains as well using vinegar from your clothing. The best example that comes to mind is ketchup stains as those used to be all over my daughter’s clothes pretty much on a daily basis.

8) Flooring and Kitchen Sink

Using vinegar and water mixture, you can clean flooring all across your house including the kitchen. Vinegar can be especially used for bathroom and kitchen sinks.

Precautions to take when using vinegar for household cleaning

Overall, vinegar is quite a safe ingredient to use for your household cleaning. Especially white distilled vinegar. Since it is safe for human consumption, it is usually gentle on the objects around your house.

However, considering vinegar is an acid, it is always best to apply a little bit first to check if there is any kind of reaction. If you feel there is discoloration in your fabric or anything else, then you may stop using it.

Also note that vinegar will have its own distinct smell and hence maybe you should not use it if you find the fragrance too strong for you or any household member.

Final Thoughts

For me, discovering vinegar as a cleaning agent has been a real blessing. I have used it for some time now on various objects in my house. From cleaning my daughter’s glue mess to removing moulds from my bathroom tiles.

Best part about vinegar is that most of us would have white vinegar in our kitchen already. So if there was a sudden incident or you have a stubborn stain that just won’t budge, now you know where to turn to any time of the day.

Working remotely is now more common than ever. Large corporations already announced that they plan to keep remote working the norm, and smaller businesses are following suit. This means that investing in a comfortable home office makes more sense, since you can be more productive when you have the space to support your work.

Of course, a home office doesn’t have to be the spare bedroom converted into one. You can also set up a garden office and have an even better time working. Before you start planning to build a garden office, however, here are some of the things you need to know first.

Check Local Regulations

Before you go ahead and start planning for a garden office, make sure you check with local officials first. You want to be extra certain that you can create the garden office without breaking any rules, and that you get the proper permits before you get started.

Now is also the best time to identify the right outdoor space for your office. You cannot just pick a corner and start building; you have to think about lighting, heat and weather conditions in general, and of course, space for the office.

Separation is a key factor here. You want the garden office to be far enough from the main house so that it can be quieter and more private, but you also want to pick a spot that gives you the best lighting without sacrificing a lot of the landscape you already have.

Safety First

The next thing you want to think about is safety. Having a separate building means you have to also secure it. Remember that you’ll be storing office equipment, a computer for working, and other appliances in the garden office. Sufficient security measures must be put in place.

If the garden office is positioned in the corner, you must also think about access from outside the property. What’s behind the wall closest to the office? Is it easy to gain access to the property if you have a structure near the wall?

As an added measure, consider adding a CCTV system to the outbuilding and nearby areas. If you already have a home security system in place, the systems for both buildings can be integrated for easier monitoring.

Design and Plan

The design of the outbuilding will determine how comfortable the garden office is once it is ready for use. You may be tempted to go with a simple, all-enclosed building design, but comfort will not be at a maximum if the garden office is too enclosed.

Your choice of materials matters too. Glass is great for a modern-looking garden office, but it also means you have to take extra steps to make sure that the inside of the office is cosy enough for work. You wouldn’t want to be in a hot space in the middle of the day, would you?

Composite is a great material to consider for decking, cladding, and fencing. Ecoscape UK, a leading name in composite decking and cladding, has a wide range of materials that are perfect for a garden office. You can choose from the available colours and textures for different looks.

Connecting the Garden Office

Once you have a design created and materials picked, it is time to think about how you can connect the outbuilding from the main property. A pathway is the obvious choice, but it is not the only thing to think about when designing the connection.

You also need to think about whether to add shade to the pathway so that you can access the garden office when it rains. Your choice of materials once again plays an important role, along with the shape of the pathway itself.

One thing to also take into account is access to the garden office. Do you want to have access to the garden office only from the house? Or do you need to create additional pathways to the front garden or the garage? Answer these questions and you are ready for the final part.

Getting It Built

The last piece of the puzzle is building the garden office. There are two things you need to decide here, the first one being whether you want to use a prefabricated structure or build a custom one from scratch. This depends highly on your budget and timeframe.

The second part is choosing a contractor for the job. You want to make sure that you are working with a reputable contractor so that you can realise your vision for the perfect garden office without dealing with complications along the way.

With these basics covered, you can start building your garden office and have a new, more comfortable place for working remotely, away from the main property and the distractions that come with working from home. A garden office is a fantastic investment to make right now indeed.

I don’t think I need to emphasize what a menace mosquitoes can be. Not to mention the number of dangerous diseases these little insects can spread, its quite scary.

Where I live, depending upon the season, we get a lot of mosquitoes and from time to time other insects as well. I have tried some store bought mosquito and insect repellents in the past but those seem to repel my family more than the mosquitoes.

Firstly there is the strong smell. Then the powerful chemicals, artificial substances used. Both my daughter and I end up getting rashes on our skin even while staying away from these repellents as much as possible.

That’s why I did some research and thought wouldn’t it be a good idea to make my own mosquito and insect repellent that not just works but does not keep the family away as well.

As far as DIY or make your own projects go, this particular project checks all the boxes for me as follows:

• It’s environment friendly – Tick
• It’s completely organic with no artificial substances – Tick
• It’s safe for everyone in the house – Tick
• It’s super easy to make – Double Tick

It is also insect friendly to be honest (if that’s possible). It does not kill the insects but just makes them stay away from your room or house.

So without further ado, this is how you can make your own eco-friendly mosquito and insect repellent.

Ingredients Needed

Make Your Own Eco Friendly Mosquito and Insect Repellent

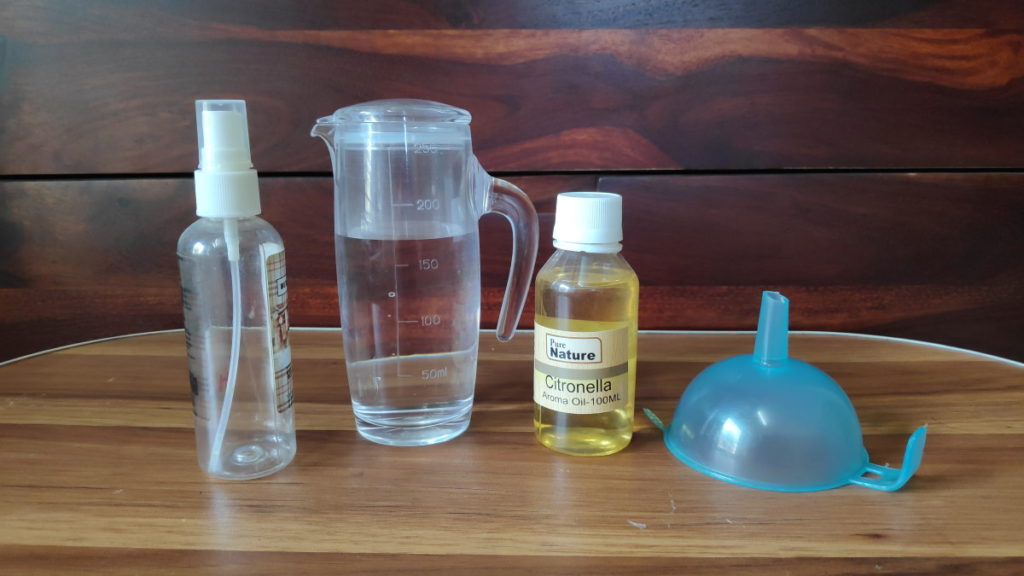
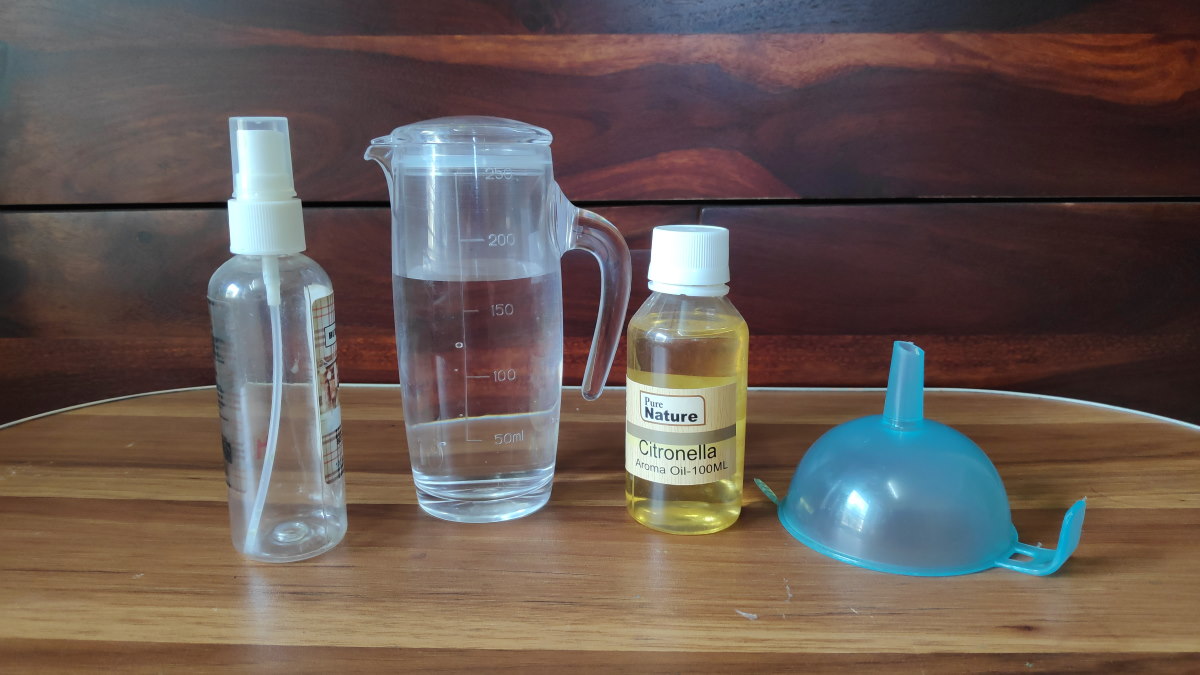
You will need the following:

  1. Pure Organic Citronella Oil
  2. A glass of water
  3. Funnel (not required but it will make your life easier)
  4. Any empty spray bottle.

NOTE:

1) When purchasing citronella oil, do not get confused with lemongrass oil. Sometimes vendors try to cheat by saying it’s the same thing as they look quite similar. However, the two oils are different and have varied uses. Please buy citronella oil only.

2) There is no need to buy oil that is marked as “Essential”. Believe me, there is nothing essential about these oils. The word ‘essential’ is just a marketing gimmick and used to increase the price of the oil threefold. Just any pure citronella oil will do here. Cheaper the better but pure with no mix of anything else.

3) When using an old used spray bottle, make sure you have washed and dried it completely. You don’t want any of the old fragrance or residue remaining from whatever it was used for earlier.

How to Make Your Own Mosquito and Insect Repellent

This is the easy part. Basically you need to mix citronella oil and water in the ratio 1:4. Hence if you take 20 ml of citronella oil, take 80 ml of water. Just follow these simple steps:

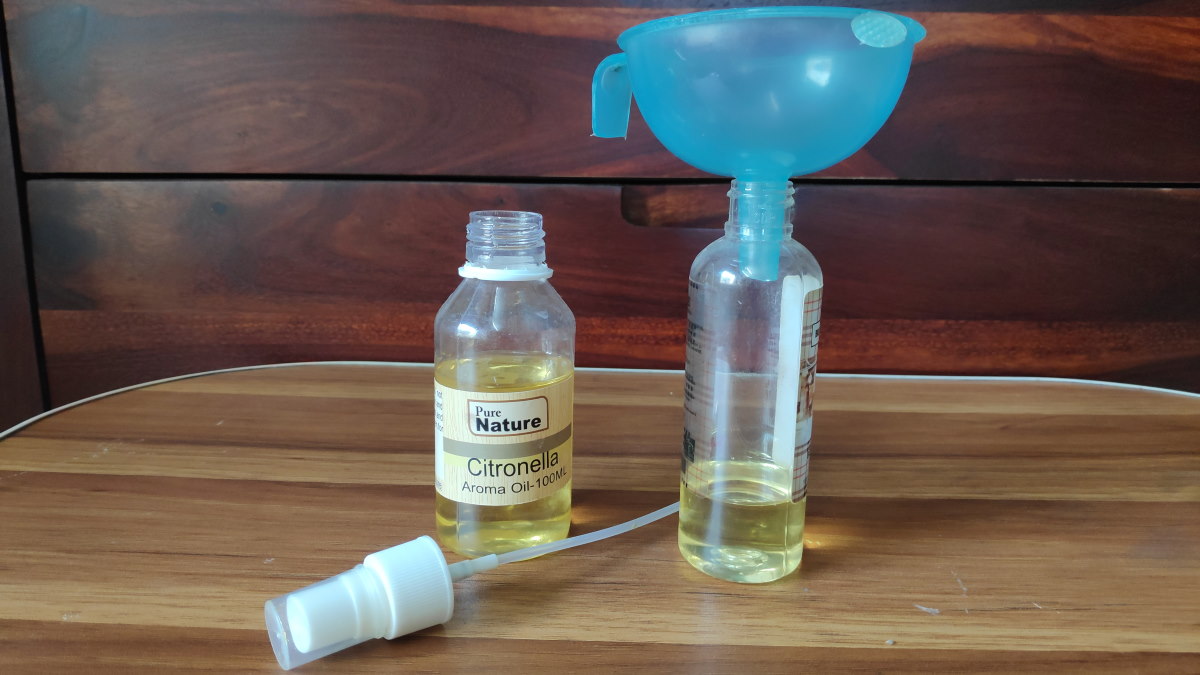
1) Pour 20 ml of citronella oil in your empty spray bottle. If you do not have a measuring cup or your bottle does not hold 100 ml total, just use your estimation and pour 1/5th of the bottle. Use a funnel to make it easier to pour the oil.

In my case, as you can judge from the photos, I used my estimation as the spray bottle I was using was quite small.

How to Make Your Own Mosquito and Insect Repellent

2) Next pour 80 ml of water or 4/5th of the bottle depending upon what you did in the first step.

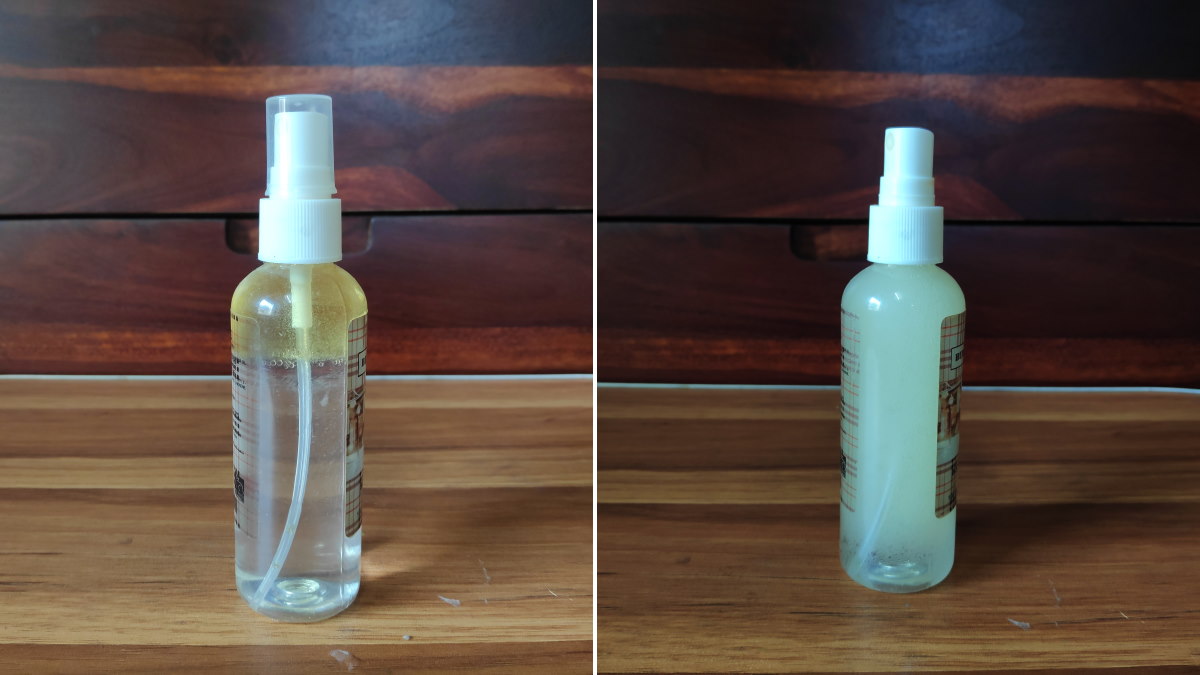
3) Close the bottle cap properly and shake gently so that the oil and water can mix. You may have to shake for a while for the two to amalgamate properly.

That’s it. Your own eco-friendly, organic mosquito and insect repellent is now ready.

How to Make Your Own Mosquito and Insect Repellent - Final Product

How to Use

Before each use, you have to shake the bottle again as overtime, the oil and water separates. Hence shake the bottle and simply spray around the corners of every room in your house. I sometimes just spray the corners of my bedroom and also on the sides of the bed.

Keep in mind that citronella oil has a sweet, citrusy aroma. Hence your room or house will smell kind of sweet after this. It acts like an eco-friendly room freshener as well.

I sometimes spray just outside my main door and windows as well. This keeps all the insects away who are trying to get inside.

Precautions

1) Considering this is a liquid, do not spray near electrical power outlets as otherwise it may cause a spark and lead to something potentially more dangerous.

2) Typically pure citronella oil is quite safe and there are no known allergies. However, just in case you or any member of your family experiences skin rashes, you should stop using it. As it is you should not spray this on your skin. It is meant to be sprayed on the corners of the rooms of your house. Also wash your hands thoroughly after each use and ensure nothing goes in your eyes.

Final Thoughts

As you can see, this is a super easy DIY project. It also helps you maintain a holistic lifestyle as this repellent does not hurt any insects. Just keeps them away. Yet, it works wonderfully and I have seen amazing results.

Please go ahead and give it a try. Do not forget to let me know how it goes.

Adding a room to your home is not an easy decision to take, and one mistake here could cost you lots of money. Make the right choice, however, and you could end up significantly increasing the value of your property. This could also give you more living space to enjoy or allow you to use it as rentable space. Let’s take a look at some of the things you’ll need to consider before planning for a room addition.

The Contractor

The first thing is making sure that you work with the right contractor. They need to have years of experience and a stellar track record to show for it. It would also be wise that you have someone that has experience with all sorts of projects as you may need to add more elements to the room, and you don’t want to have to bring more people in.

People like Cattenacci Construction are a perfect option. Not only have they been in the addition construction business for years, but can also handle everything from home remodeling, kitchen remodeling, bathroom remodeling, and more. Having a well-rounded team like this will make sure that they will be able to give you a quote on the whole project and keep costs to a minimum.

In addition to experience, you want to make sure that the contractor is licensed, bonded, and insured. Licensure will make sure that they are lawfully operating, and a bond will be essential if you want to make sure that the job will be completed.

When it comes to insurance, you want to make sure that they and their employees are covered and that you verify their documentation. If they’re not insured, any damage to your property, third parties and inhabitants, and even their employees might have to be covered by you.

Surveying

Another thing you have to do is make sure that you have the land surveyed. For one, you have to make sure that you won’t be encroaching on someone else’s property. But it’s also very important to check soil conditions.

For instance, you might find out that the house is built on solid rock. This could make something like basement additions difficult if not impossible. You also don’t want to build on top of shifting soil, and you want to know about anything that might be installed under the soil like water or phone lines, for instance.

Also, you must look at the area if you’re going to be building out instead of up. You might have to work around trees or have them removed, or maybe you have power lines and utility poles. These are all things that will need to be considered, as they will add to the project’s cost.

Your Budget and Goals

You also have to look at what your motivation is to build an addition. Sometimes, you may not have to add a room at all. Or you may not have to add a whole story. Or maybe there is space in your home that you could convert, like an attic.

Unless your budget is unlimited, it should be dictating the design, not the other way around. You need to know what your priorities are and separate your needs from your wants. Then you can eliminate as many wants as possible until you find something you can work with.

As you can see, there are many things you’ll need to take into consideration when building a room addition. Make sure that you work with the right team first and foremost and be reasonable with your design choices.

It never ceases to amaze me how a relatively boring corner of the house can be completely transformed with a simple hanging décor.

With my love for using flowers to give a fresh look to my home, coupled with spotting a barren wall that felt like it needed something, I immediately got working on creating a simple hanging flower holder.

What I ended up making, was so simple yet charming that it gave me that satisfying feeling after my little experimentation was over.

So this is how I made my super simple DIY hanging flower holder.

What you need?

What you need for your hanging flower holder

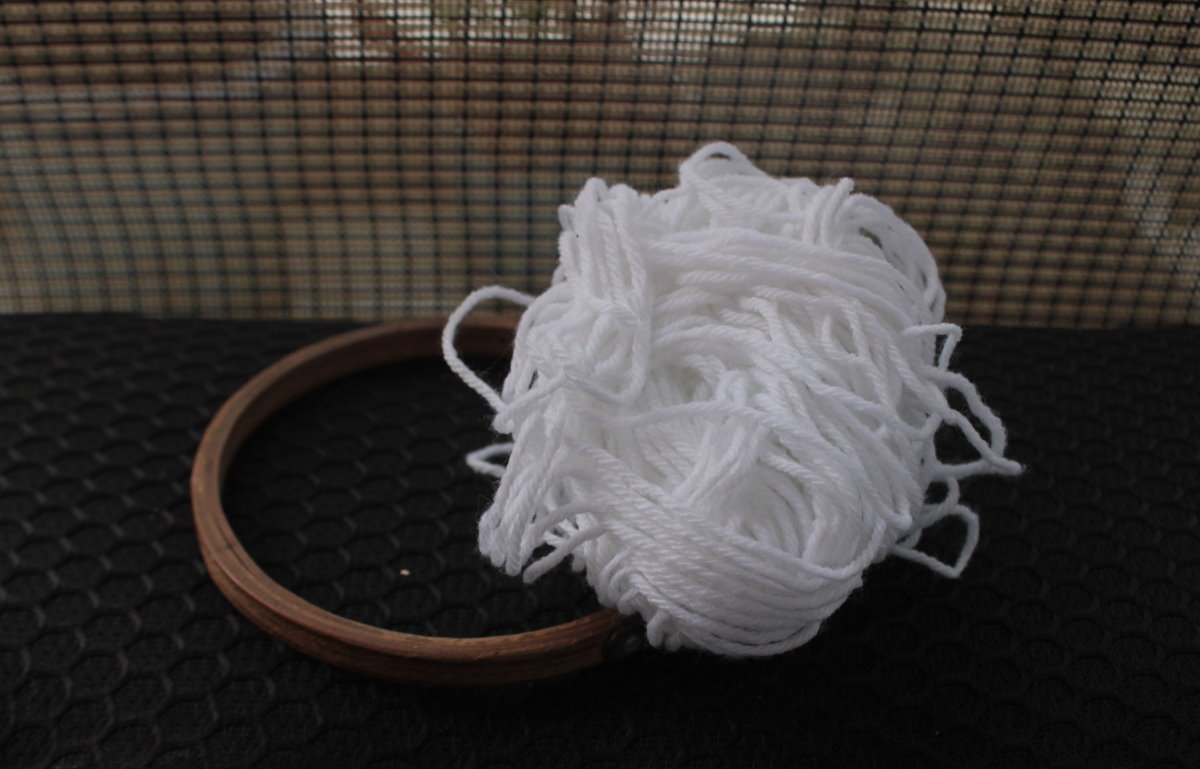
You just need two items for this beautiful hanging flower holder, both of which were sitting happily in my arts and crafts drawer:

  1. Embroidery hoop
  2. Yarn or jute rope

Note that I had white yarn leftover from another project and hence I used that. You can use any color you like and it really changes the look especially depending upon the flower you plan to use in the end.

Also note that I used an embroidery hoop as that is what I found in my house. You can use any circular object as long as it fits the final purpose of this project.

Steps to create the hanging flower holder

Step 1:

Take the embroidery hoop and separate the inner and outer part. For this craft we will only be needing the inner smaller part.

Step 2:

Make a knot around the smaller hoop and start wrapping the hoop with the yarn until the whole wooden portion is covered.

Step 3:

Start wrapping the yarn around the diameter of the hoop, making sure to go above and under to create crisscrossing loops.

Step 4:

At the top, tie a piece of yarn to create a loop so that you can hang the piece of décor.

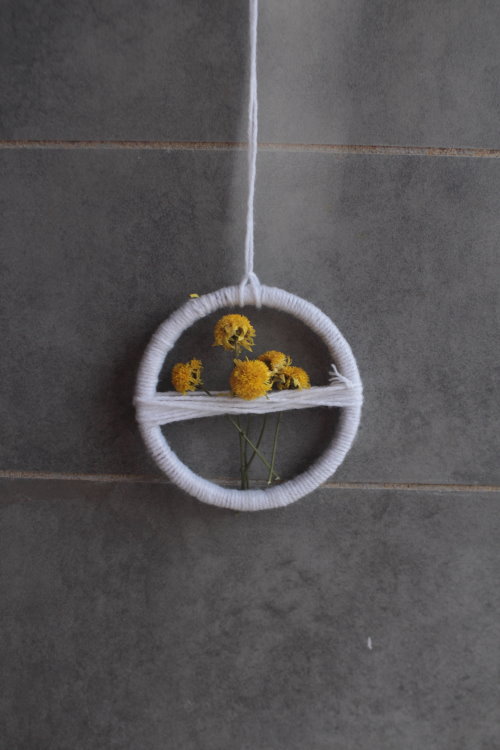
Simple DIY Hanging Flower Holder Final Image 1

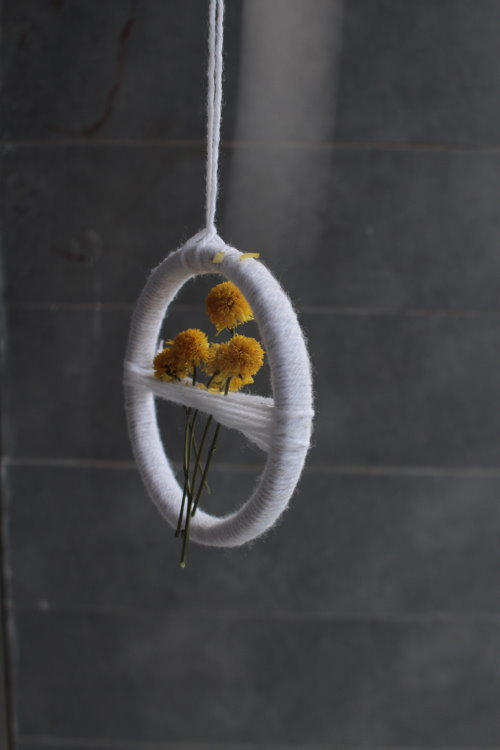
For the final step, put some dry or fresh flowers through the crisscrossed loops. And that is it! Hang it somewhere high and watch it spin around!

Simple DIY Hanging Flower Holder Final Image 2

Final thoughts

This really is as simple as it gets with DIY crafts. Please do try it and let me know how it went.

I am now off to get some more flowers. I plan on changing the flowers regularly. That way the wall will always look fresh and colorful.

I also plan to hang paper flowers that I have seen in various craft shops. Maybe I will even make my own paper flowers. Looks like a new project is coming up soon.

Also one final note. It’s not necessary to hang just flowers with the hanging flower holder that we created. Simply use your imagination and you can actually add anything you desire giving the look that you want for your wall and corners of your house.

I love planners. Not as much as I love Christmas though. Hence I thought of doing the obvious. Create Christmas themed daily and weekly planners. And considering this is the season of sharing, I would like to share these planners with all of you.

You can download these planners for free. You do not need to provide any email address or do anything else. Just download and use them as you like.

Why I love Planners?

Apart from the usual reasons that planners help me stay organized, know what’s coming up and not miss out on anything important due to getting side-tracked, there is another important reason what I love planners.

I actually like to leave messages for myself in my planners. These are not necessarily messages related to the task to be completed. I write motivational messages. Sometimes I write quotes that have moved me. I know it sounds weird but I use planners to talk to myself sometimes.

Overall I feel planners help me stay happy. They let me focus on what’s important and see the bigger picture with all the messages and quotes I leave for myself and sometimes for my family.

Thanks to my absolute love for Christmas, these particular planners bring even more joy to my life. Just viewing the planner with the Christmas delight just makes my day.

About These Christmas Themed Printable Planners

1) There are three planners in total for you to download as of now. Two daily planners and one weekly planner.

2) I have not marked or written down the “Day” of the week. This is so that you can use them the way you like and add your own day. You can start the week at any date you want. This makes these planners quite versatile and can be used on any day you wish for.

3) The planners are in printable PDF format. You can print them using any printer and on paper of various sizes. The recommended size is A4.

4) You can preview the planners below before downloading.

5) Download link and instructions are given below.

Planner Previews

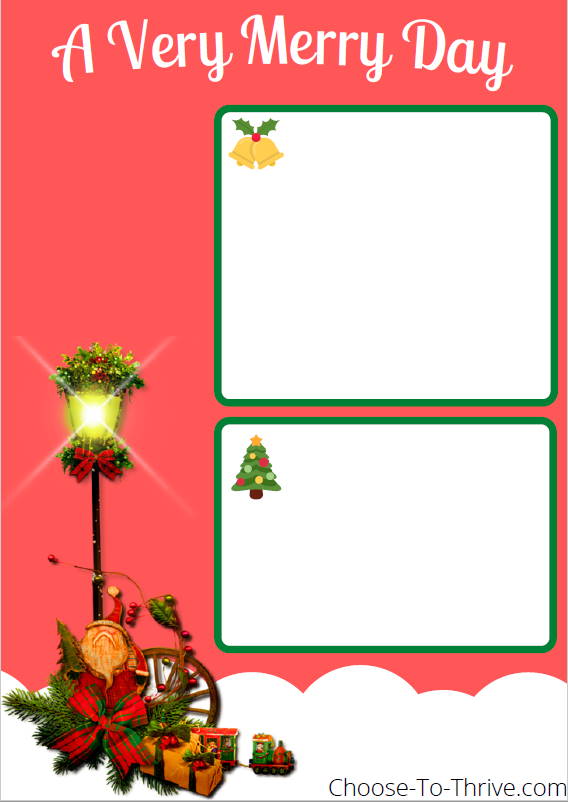
Christmas Themed Daily Planner Design 1
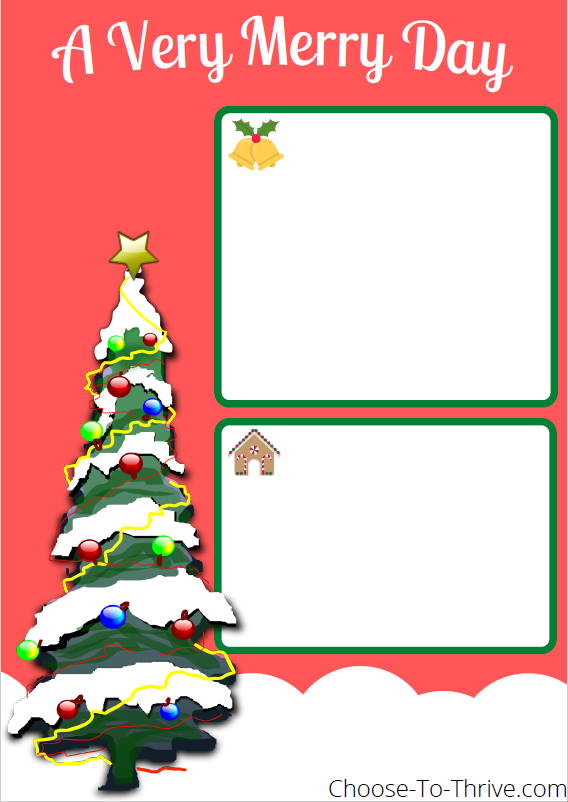
Christmas Themed Daily Planner Design 2
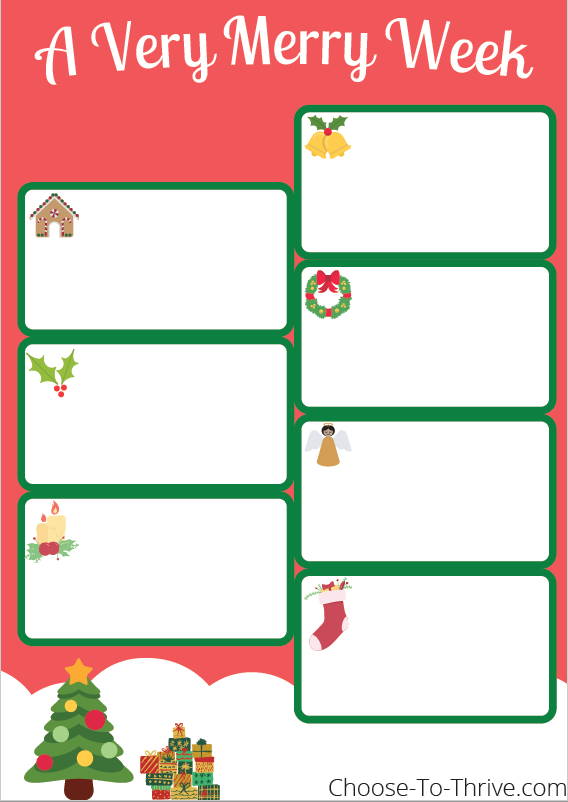
Christmas Themed Weekly Planner

Download Links

Download Instructions

If you are downloading using a Desktop or Laptop:

1) Simply click on the “Download” button next to the links to download each file. However, if the buttons don’t work for you, go to the next step.

2) Right-click with your mouse on the text links above.

3) You will see either “Save File As” or “Save Target As” or “Save Link As.”

4) Click on that and save the file on your computer. Do this for all three planners.

Note: If you simply click on the link instead of right-click, you can view the planner in PDF format in your browser itself.

If you are downloading from a mobile device or smartphone:

1) Simply click on each of the links and they will download automatically.

Final Thoughts

I really hope you will enjoy using these planners. I will try to create more and upload them on this site whenever possible.

I wish all of you a wonderful holiday season. I pray all of your days ahead are merry and filled with joy.

Winter can be a hard time, and with the coronavirus pandemic, this winter looks set to be harder than ever before.

Sprucing up your home this winter can be a great way to keep busy and improve your overall mood – after all a change can be as good as a rest.

Christmas Decorating

This one is great fun for all members of the family. This winter spreading the festive cheer is more important than ever before, so consider going all out with your decorations, inside and out, to help bring some festive fun to your family and your neighbors up.

The great thing about Christmas decorating is that there’s something for everyone. Whether you want to create a winter wonderland for the kids or pick a tasteful natural theme, the world is your oyster at Christmas.

Time For A Renovation?

Winter might not seem like the obvious time to do work on your home but it can be a really fantastic time to change things up. Rustic is very much back in fashion now so why not try out some new wooden fittings for the kitchen?

Some quality new garden furniture which will be a great investment for the warmer months as well as providing a great place to have socially distanced visits from friends and family. No matter the size or scale of what you want to do you can be sure that you’ll find just the thing at Kefauverlumber.com

Invest In Some Cozy Blankets

There’s nothing better when it’s bitter and cold outside than snuggling up under a blanket to watch a film with the family. Blankets can add a great splash of color to your home as well as providing much-needed warmth and comfort in the colder months.

You can get the kids involved again with this one by having them choose their own blankets to use on family nights at home. Consider getting a blanket box to keep them in to reduce clutter.

Candles

Candles can be a great way to improve the atmosphere of your home – though of course, you will need to be careful that they’re out of the reach of any little ones! Candles are another great addition to make your home extra cozy this Christmas.

Whether you choose a festive scent or a calming scent like lavender you can really improve the atmosphere of your home with the right choice of candle.

Bring The Outdoors Inside

This doesn’t have to be limited to the standard Christmas tree! Plants and flowers have all kinds of benefits for your health and mood so winter is the perfect time to consider investing in some home plants. You could go for poinsettias for that Christmas vibe, and they will last well into January with the right care.

You could even try some indoor herbs or create an indoor fruit or vegetable garden. This can be a great one to get the kids involved with to teach them about the world around them and caring for another living thing.

Winter is right around the corner, meaning cold weather and a requirement for you to make your home as warm and energy-efficient as you can.

Warming your home over winter can be something of a chore, but a necessary one. If you have a family to look after, they will turn to you for protection during the colder months, something you will have to provide with one eye on rising costs. Energy and heat do not come cheap and with many US states entering some form of restrictions, it is likely you and your family will be at home more. That means rising energy usage and rising costs.

How can you get ahead of the game and protect your home without breaking the bank? We have got some simple hacks that will help you look after your family and your bank balance at the same time.

Soft Furnishings

Traditionally, soft furnishings might not have been an element of home design that the man of the house concerned himself with, but when it comes to winter, they are essential. With darker nights the need for drapes is pressing, and the thicker they are, the better. Windows and doors can let in cool air, which ultimately costs you money and can pose a health risk for your family. Thick drapes help insulate your home, and rugs on hard floors stop the cold coming up from below as well. Think of it as putting a coat on your home, stopping the cold getting into the heart of your family.

Insulation

This one might cost you a few bucks, but the savings in the long term could be significant. Insulation is a huge part of protecting your family home, and you would be wise to check yours is adequate going into the cold months. If you do not have insulation in your loft space, HomeServe believes you could be losing up to a quarter of the heat from your home, so the best place is to start is the roof. Remember, not only is the money going straight out of your pocket and through your roof space, your house will be colder and less pleasant for your family if it is not insulated adequately.

Service Your HVAC

Many homes will be heated by a warm air system, rather than the older radiator and boiler system, so make sure yours is winter-ready and efficient as it can be. This could have health benefits for your family too, as we explored in our article Is Your HVAC Unit Making Your Home Dirtier? Even if you are on the older boiler system, it is still important to give it a service, just to make sure you are being as efficient, and thus cost-effective, as possible.

Reverse Your Ceiling Fan

Ceiling fans are great for the summer as they suck warm air upwards and away from your family. In the winter, you might think they are redundant, but that is not the case. If you reverse them to go clockwise, it will push the warm air back down, into the room. Good Housekeeping suggests that you could save up to 10% on your bills using this method, and it helps keep your home comfortable and warm for your family. Home Depot should have fans that you can reverse if yours does not have the function.

While the pandemic has caused a lot of changes for most of us this year, one of the things that it has meant for almost everyone is more time spent at home. A lot of people are now working from home or studying at home rather than attending colleges and schools. As well as this, there is much less general social activity, and many people are beginning to think about how they can make better use of the space in their houses to help everybody in the family stay sane!

If you have a garden, patio, deck or other outdoor space, then naturally, when the weather is good, this can offer an extra place where you can relax, work or play without leaving your home. However, as we head into the colder months, it can feel like even that option isn’t really available any longer. This is why now can be a great time to consider making some home improvements geared towards letting you and your family enjoy the outdoor spaces around your home all year round. This can be with things like patio awnings and other styles of patio shelter, outdoor lighting and heating.

Get More from the Space You Have

There aren’t many ways to make your house bigger and feel less cramped during the pandemic, but making the most of all of the space you have can make a huge difference. Outdoor spaces tend to get overlooked as they are seen as seasonal, but that really doesn’t have to be the case. You can consider looking into the awnings for sale from great awnings UK company Nationwide, who offer a huge range of patio solutions like patio roofs, verandas and retractable awnings. An electric awning can offer you the ability to put your awning out when the weather isn’t ideal or when you want shade in summer, and still enjoy the open air when it’s sunny, or you can consider more permanent patio roof structures that give you a covered space you can always use. Nationwide offer patio awnings and garden awnings of all different styles, so you can definitely find something to suit your home and needs.

Feel Like You’re Getting Outside More

Staying at home is important during the pandemic, but it can certainly feel like you don’t get enough sunlight and fresh air. Being able to spend more time outside even in winter because you’ve prepared your patio for this can really make you feel less like you’ve been shut inside for weeks, and make even lockdowns a little more comfortable.

Long Term Benefits

Of course, we all hope that the pandemic won’t last forever and we will be back to normal before too long, but even once that happens, the changes you can make to your patio now will continue to be useful and will also add value to your home!

It really is a great time to think about making your patio more suitable for year-round use, so why not think about how you can provide light, heat and shelter to your outdoor spaces this winter?