Soft, Trendy Ombre Nail Designs (Gradient Technique Explained)
7 min read ·
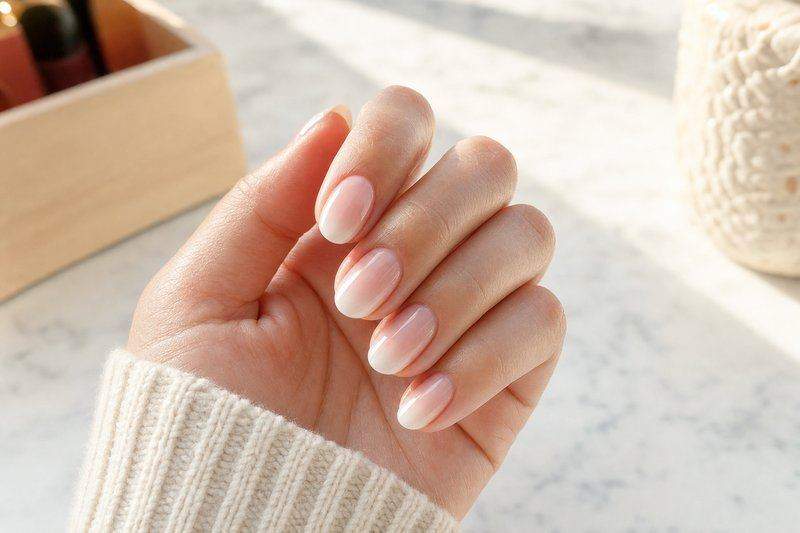
Ombre nail designs look like they need an airbrush kit, but the actual technique is closer to a craft-table trick than a salon secret. A makeup sponge, two or three polish colors, and a little patience get you a soft gradient that blends from light to dark (or one color into another) with no hard line in between. This covers the basic sponge method, a few trendy color combinations, and the small adjustments that keep the gradient looking soft instead of streaky.
The Basic Sponge Method for a Soft Gradient
The sponge technique is the most common way to get a genuinely soft gradient at home:
- Paint a base coat and let it dry fully.
- Apply 2-3 polish colors in stripes directly onto a makeup sponge (not the nail), slightly overlapping where they meet.
- Press the sponge onto the nail and dab (don’t drag) 2-3 times, repositioning slightly each time.
- Let it dry for a few minutes, then clean up the skin around the nail with a small brush dipped in polish remover.
- Seal with a topcoat once the gradient is fully dry.
The dabbing motion, never dragging, is what keeps the transition soft instead of leaving visible sponge-texture streaks. A slightly damp sponge (not soaking wet) also blends more evenly than a bone-dry one.
Getting a Smoother, Softer Blend
A few small adjustments make a real difference in how soft the final gradient looks:
- Use colors that are close in tone, a soft gradient from blush pink to mauve blends more seamlessly than one jumping from bright yellow to navy
- Reload the sponge lightly between dabs so you’re not pressing on wet, thick polish repeatedly, which tends to smear
- Work on one nail at a time and let each one dry before moving to the next, so you’re not accidentally dragging a sleeve or finger across wet polish
Softness comes mostly from color choice and a light touch with the sponge. Heavier pressure or high-contrast colors both push the look toward “bold gradient” and away from “soft gradient.”
Trendy Ombre Color Combinations
A few combinations show up again and again in current ombre nail designs because they photograph well and suit a wide range of skin tones:
- Nude to white, a soft, barely-there gradient that reads as understated and works for almost any occasion
- Pink to lavender, a popular pastel pairing, especially for spring and summer
- Sunset gradient, orange blending into pink or coral, a trendy warm-tone option
- Two shades of the same color, a lighter and darker version of one color (say, two blues) for a subtle tonal gradient in place of a color-to-color transition
Sunset-style multi-color gradients tend to need three colors on the sponge, not two, since the middle color needs its own space to blend into both neighbors.

Vertical vs. Horizontal Gradients
Most ombre nail designs run horizontally: light at the cuticle, darker toward the tip, or the reverse. A vertical gradient (light on one side of the nail, dark on the other) is a less common but genuinely trendy variation, especially paired with an almond or coffin nail shape where the vertical space reads well. The sponge method works the same way for either direction; you’re just rotating the stripes on the sponge 90 degrees before pressing it onto the nail.
Which Nail Shape Shows Off a Gradient Best
A gradient needs some surface area to actually read as a gradual transition and not two abrupt blocks of color, so nail shape and length both matter. Almond and coffin shapes, being longer with a flatter free edge, give a horizontal gradient the most room to blend smoothly from base to tip. Round and oval shapes work fine for a gradient too, though on very short nails a two-color transition reads more clearly than a three-color one simply because there’s less physical space for a third color to have its own visible zone. Square and squoval shapes handle a vertical gradient particularly well, since the flat sides give the sponge a clean, even surface to press against without the curve of a rounder nail distorting the blend.
Adding Simple Nail Art on Top of a Gradient
An ombre gradient works well as a base for additional simple details, and doesn’t have to stay a plain fade. A few low-effort additions:
- A few small dots in a metallic gold or silver polish scattered near the tip, echoing sponged-on stars or confetti

Any of these additions go on after the gradient is fully dry and sealed with a base topcoat layer, so the extra detail sits on top of the still-soft gradient without smudging into it.
Fixing a Streaky or Uneven Gradient
If the gradient comes out streaky, it’s almost always one of two things: the sponge dried out mid-application, or too much pressure was used when pressing it to the nail. The fix in both cases is the same: remove the polish with a bit of remover on a cotton swab (not the whole manicure, just the streaky section) and redo that dab with a freshly-loaded, lightly damp sponge and a gentler touch.
Ombre for Different Skin Tones
A gradient that flatters one skin tone doesn’t automatically flatter another, mostly because of how the base color reads against it. On fair skin, soft pastel-to-pastel gradients (blush to lavender, for example) tend to look the most seamless, since there’s less contrast between skin and nail. On deeper skin tones, gradients that include a warmer, richer color (terracotta into gold, or a deep berry into a lighter rose) tend to stand out more clearly than very pale pastel combinations, which can look washed out by comparison. Neither rule is absolute, but it’s a useful starting point if a gradient combination that looked great on someone else doesn’t seem to be reading the same way on your own hands.
How Long an Ombre Manicure Actually Takes
Compared to a single-color manicure, an ombre gradient adds real time, mostly in setup and drying, well beyond the actual sponging itself. Loading the sponge with 2-3 colors and testing the dab a couple of times on scrap paper first (to check the blend before committing to a nail) is worth the extra five minutes it takes, since it’s much easier to adjust color placement on paper than to redo a smudged nail. Budgeting close to 40 minutes for a full set, against the 20 a plain manicure takes, keeps the process from feeling rushed partway through.