Modern, Simple Geometric Nail Designs (Bold Without the Fuss)
9 min read ·
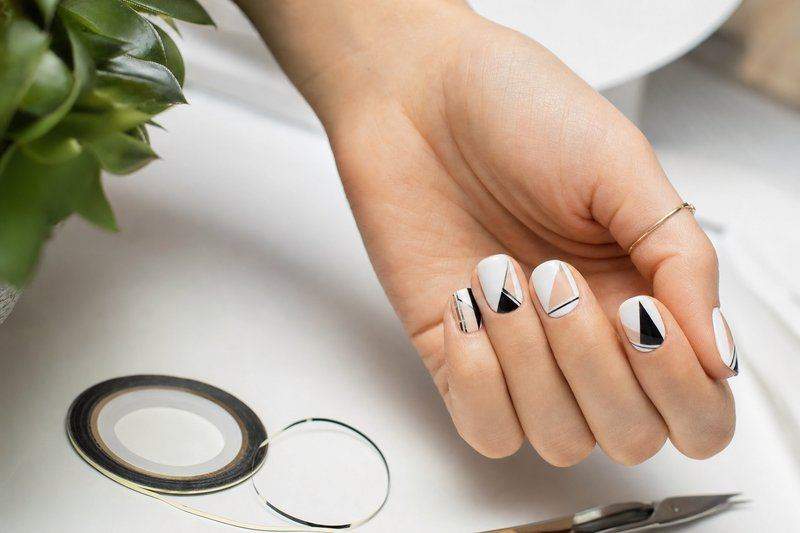
Geometric nail designs get a reputation for being hard because the finished photos look precise, but most of the technique underneath is just straight lines and clean color blocks: genuinely easier to freehand than a floral or a fine linework design. This covers simple geometric nail designs for beginners, bolder options once you’re comfortable, modern color pairings, and the small mistakes that make a geometric look sloppy instead of sharp.
Tools That Make Geometric Lines Easier
Striping tape is the single most useful tool for geometric nail designs: it gives a perfectly straight edge without any freehand steadiness, and it peels off cleanly before the topcoat seals it in. Beyond tape, a thin detail brush handles any line you do want to freehand, and a small piece of makeup sponge can dab a soft gradient behind sharper geometric shapes for extra depth. None of this requires a full nail-art kit; tape and a detail brush cover almost every design below.
Simple Geometric Nail Designs for Beginners
- A single diagonal line. One piece of striping tape laid corner to corner, with each half painted a different color, is the easiest true geometric design there is.
- A color-blocked half-moon. Paint the base of the nail one color and the tip a contrasting one, dividing with a strip of tape for a crisp line.
- A single triangle accent. Tape off a triangle near the cuticle on one nail only, fill with a bold color, and leave the rest of the set a plain neutral.
Each of these uses tape to do the hard part, which is exactly why they’re a good starting point.
Bold Geometric Nail Designs for a Statement Look
Once basic taped lines feel comfortable, bolder geometric nail designs usually add more shapes or more contrast, not more difficulty:

- A checkerboard accent nail. Small taped squares in alternating colors on one nail, left plain on the rest of the set.
- Overlapping triangles. Two or three taped triangles in different colors, slightly overlapping, for a stacked, angular look.
- A full geometric grid. Horizontal and vertical tape lines dividing the whole nail into color blocks: more taping steps, but each one is still just a straight line.
Modern Color Pairings for Geometric Nail Designs
Geometric designs read as modern mostly through color choice, not through the shapes themselves:

- Black and one saturated accent (cobalt, emerald, or a hot coral) for high contrast
- Two muted neutrals (taupe and sage, or cream and terracotta) for a quieter, editorial look
- Metallic gold or silver as a thin dividing line between two bolder colors
A high-contrast pair reads bolder and more graphic; two muted tones read more like a design detail than a statement.
Which Nail Shape Suits Geometric Designs Best
A squared or squoval shape gives straight taped lines the cleanest surface to sit on, since there’s no curve at the edge to distort a line meant to be perfectly straight. Almond and coffin shapes still work well for diagonal or angular designs, where a slight curve in the nail actually complements an angled line. Very short round nails are the one shape where geometric designs need simplifying: a single line or one small triangle reads better than a full grid, since there’s less surface area for multiple shapes to stay legible.
Geometric Nail Art Beyond Tape
Tape covers most straight-line work, but a few geometric shapes are easier freehand or with a different tool. Circles and dots are simpler with a dotting tool than with tape, since curved tape doesn’t lie flat against the nail. A thin striping brush loaded with steady, even pressure can freehand a grid faster than taping each line individually once you’re comfortable with the tool, though tape still gives a cleaner edge for anyone still building that steadiness. Rhinestones or small metallic studs placed at the intersection points of a taped grid add a bit of dimension to an otherwise flat geometric design without much extra effort.
Fixing Common Geometric Nail Design Mistakes
Most geometric nail designs go wrong for one of three reasons. Lifting the tape too early, before the first color is fully dry, drags color across the line and blurs the edge: wait a full few minutes before removing it. Pressing tape down loosely lets polish bleed underneath, so run a finger along every edge to seal it before painting. And skipping a topcoat over taped lines leaves a visible ridge where the tape sat; one thin topcoat layer smooths that out and protects the sharp edge underneath.
Geometric Nail Designs for Special Occasions
A negative-space geometric design, where bare, unpainted nail forms part of the pattern instead of a taped color block, reads as more polished and less casual than a fully covered design, which makes it a good option for a wedding or a formal event. Taping off a thin triangle or strip and leaving it completely unpainted, with polish only on the surrounding area, is the simplest way to get this effect without any extra tools beyond what a taped design already needs. For a bridal or all-white event specifically, a geometric design in tone-on-tone white and ivory, divided by one fine metallic line, keeps the graphic structure without introducing a color that might clash with a dress.
Caring for Geometric Nail Art Day to Day
Because a geometric design relies on a crisp edge between colors, everyday wear shows up differently than it would on a single-color manicure: a chip or a worn patch reads as more noticeable right at the color line than the same amount of wear would on a plain nail. Applying a fresh topcoat every few days protects that edge specifically and is worth doing slightly more often than for a plain color set. Hand cream and cuticle oil still matter as much as with any manicure, but they’re best applied sparingly right at the taped line during the first day while the topcoat is still curing, since a heavy application right after painting can soften the edge before it fully sets.
Removal is also slightly different with a taped design that used two or more colors, since the layers under the topcoat can be thicker at the color boundary than elsewhere on the nail. A standard foil-and-remover soak still handles it fine, but it’s worth leaving the foil on a minute or two longer than usual at that thicker seam so the whole design lifts off evenly instead of leaving a stubborn line of color right where the tape once sat.