Category

Home and DIY Projects

Category

metal stars

Anyone else in love with the metal stars all over craft stores, decor catalogs and blog land?

I have one—just one—in my house and have been pining for more, especially for holiday decorating.

When I saw these on the At Home America website, I loved everything about them but the price:
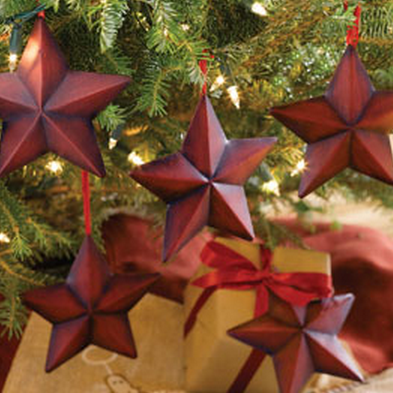
Stars from At Home America

$3 each? Really?

Since spending money is a no-no in my house right now, there was only one thing to do:

Grab an old disposable baking pan and get to work.

And the result?
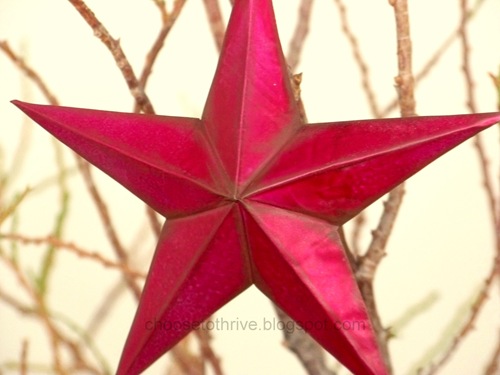
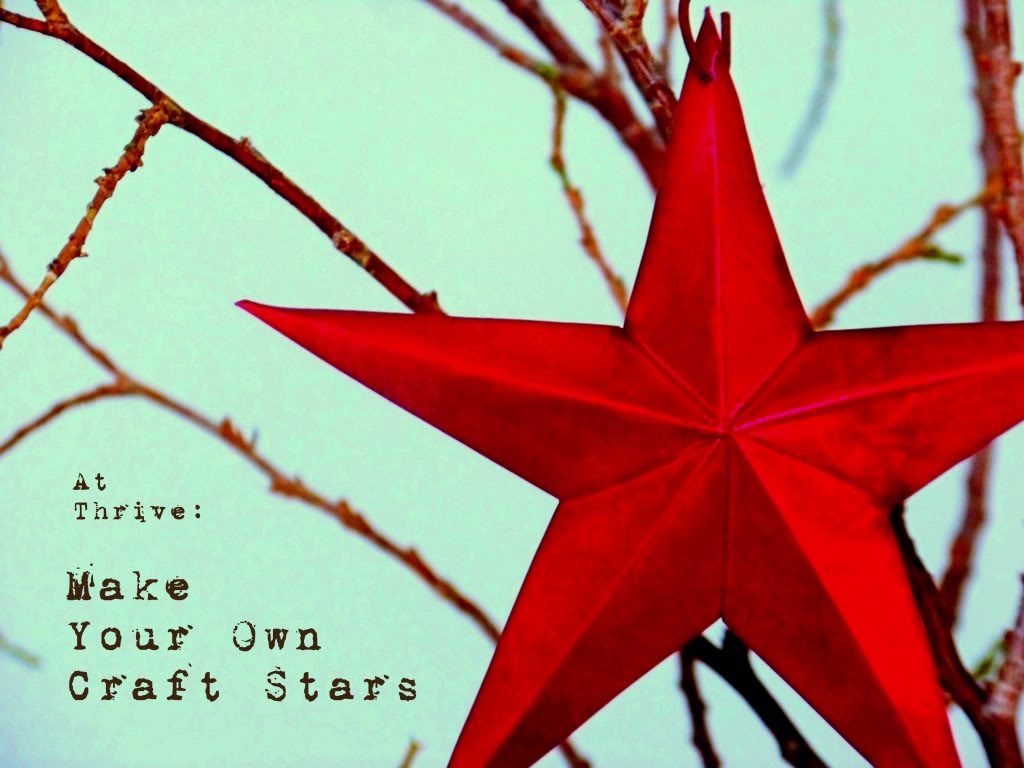
metal stars for ornaments

Adorable metal stars for ornaments, gift tags and decor straight from the recycling bin.

Easy, fast and FREE with no sharp edges or points.

Want to make your own?

For this project you’ll need:

star.29

… and …

star.53

… and …

star.54

As always, I hope you’ll Rock What Ya Got and make this project work for you using what you have on hand already.

********************************************************

Begin by removing any border from the pans and smoothing them out as much as possible.

star.1(This was as good as I could get my pans and they turned out fine.)

Print out a star to use as a template for cutting and tracing.  I found my image here.

Adhere your template with a small piece of double-stick tape …

star.3

… then trace along all the lines using a ball point pen and a ruler.  Yes, you need the ruler.

star.9

When you remove your template it should look like this:

star.34

Carefully cut around your star leaving an 1/8” border all the way around …

star.28

… tapering the border near the points …

… and snipping up to the tracing line on the inside points of the star.

Fold the star over and go over all of the trace lines with the lid of the pen to make the lines both easier to see and bend.

star.35

To finish the edges, place the ruler just below a trace line. Starting at tips and working towards the center, carefully lift up along the border …

star.25

… and fold it over the ruler lip.

star.30

Remove the ruler and press the border down first with your fingers …

star.2

… then smooth completely with the pen lid.

The shape of the star is a series of mountain and valley folds.

Starting from the center, fold the short lines in between the points downward to make valley creases.

star.40

To shape the points, push up from the back of the star along the center seam, working from the center out.

star.43

When you’re done, your star should look like this:

star.42

To make the ornament hole, gently twist a small eye screw in one of the points.

star.8

You can leave your stars plain …

star.39

…  or hit them with a coat of primer and spray paint for a smooth, seamless finish …

star.7

… or sponge on a coat or two of craft or house paint for rustic, weathered look …

star.50

… or rock out your favorite dollar store nail polish for a little bit of BLING.

star.4

My genius six-year-old actually came up with the nail polish idea.  She snuck off with one of the stars and returned a few minutes later with this little beauty:

star.37

Love, love, love all of the paint options!  Have fun picking your favorite!

**********************************************************

A few THRIVE tips to save you some headaches:

1. What if I don’t have any disposable baking sheets lying around? Will aluminum foil work?

Not really. See?

star.44

I tried several different thicknesses and it never was stiff enough to hold it’s shape well.  The star above was with eight layers which is about the most you can cut without the layers separating horribly.  You really do need the stiffer material.

2.  Is there a shape or pan size you recommend?

I used old cake pans like these to make my stars since it was all I had.

star

But, if you are going to buy pans to make this project, I’d recommend using a disposable oven liner if you can find it. You get the most bang for buck with that size and have minimal waste.

100_1730

The price is pretty cheap either way:

star.1

The dollar store carries pans like this, too. Just stay away from the deep-sided pans with heavy grooves in the bottom.

3. How big (or small) can you make these things?

The only real limit is the size of baking pan you can find–the oven liner pan will make a 12” x 12” star easily. On the small end, I wouldn’t go much smaller than 2-3” tall.  Any smaller is too much of a pain to work with.

I made two sets of ornaments for my tree.  Just for comparison, here they are next to a graham cracker box.  The scale was perfect.

star.38

4.  One last thing … print out your template 130-150% of what you want the finished size to be.  The folding and dimension will make your finished star shorter/smaller than the template.

*******************************************************

Wishing you and your family happy holiday decorating!

star.36

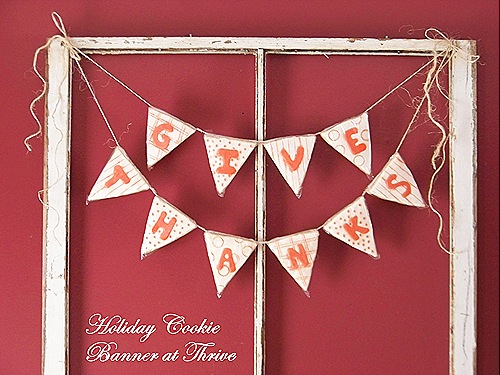
banner

Inspired by all the cute holiday banners floating around out in Blog Land, this delicious version does double-duty as holiday decor and a treat for your guest to take home with them.

Soft and thick sugar cookies stand in for the traditional fabric and paper pennants, while the royal icing gets a festive upgrade with fun “tattooed” patterns.

banner.3

Best of all, this was simple and easy to make using items from the pantry that I already had on hand, so FREE!

(Just a note: There are pictures from two different batches so please ignore the differences of colors.)

Want to make your own?

For this project you’ll need:

banner.12

(For the cookies and icing, use your favorite sugar cookie and royal icing recipes.)

To make the pennants, I cut out a simple template using my nicest junk mail and a pair of blunt-nose scissors from the kids’ pencil box.  The size doesn’t really matter as long as it will fit in a sandwich-size plastic zipper bag.

I used my mom’s sugar cookie recipe and rolled it out almost a half inch thick for a super-soft cookie.  Trace and cut out your pennants using a butter knife …

banner.16

… smoothing out any rough edges and baking until just barely golden on the edges.

When completely cool, pipe the letter outlines and around the edge of the cookie with royal icing …

banner.15

… then flood the inside with more icing …

banner.14

… and smooth out with a butter knife. And don’t worry if your letters look a little bit like blobs (mine did).  Simply scrape away any problem spots with a knife.

Let set for 5-10 minutes and then lightly score decorations in the frosting with a thin knife, cap lid or other interesting shape.

For the “tattoo” color,  add a drop of food color to a plate with a teaspoon of water and mix …

banner.18

… then dip your cap or drag a knife through the color and then through the icing for subtle “tattooed” designs.

banner.28

No worries if you goof … just blot away color with a paper towel.

Let background icing set before filling the letters carefully with another color.

banner.23

Let finished cookies set for a few hours to fully dry.  Really.  Do not rush this.

To assembly the banner, cut the tops off enough zipper bags to cover your letters …

banner.25

… insert each letter …

banner.26

… carefully turn over and pull excess plastic taut, taping in place.

banner.8

Cut a generous length of ribbon/twine/rope, etc. and place above cookie …

banner.13

…tucking the loose plastic into a neat triangle-ish shape …

banner.9

…folding over the twine and taping in place. The twine should rest along the top edge of the cookie pennant and be able to slide easily.

To help the banner hang better and keep the cookies more securely attached, attach an extra strip of tape to the top corners so that the twine lays flat across the top and doesn’t pull up at the ends.

banner.6

Attach the rest of the letters the same way in reverse order or your banner will read backwards.

banner.24

To keep the cookies from bunching together, wrap a piece of tape between each pennant.

banner.4

And for the fun part, hang your awesome cookie banner proudly during the celebration …

banner.27

… and then slide the cookies off the twine to send home with guests for a fun good-bye treat.

banner.30

And that’s it!  Easy, delicious, unique, FREE!

And how cute would this cookie banner look for Christmas? New Years? A birthday party? Welcome home party?

I’m already plotting.

***************************************************

A few THRIVE tips to save you some headaches:

1) Do not rush the drying on the icing or bad, bad things will happen.  Oh, and double-check the order on those letters.  If you mess up either of these important steps, you end up with this lovely mess.

banner.20

Yes, this was my afternoon yesterday.

2) If you totally mess up a cookie, don’t freak. Just scrape off the icing and frost again.  I ended up doing that on all of mine after “skipping” tip #1.

banner.22

3) Help out the flavor of your royal icing substantially by subbing out the vanilla extract for a stronger flavor.  I love almond, but orange, butter or lemon would be great, too.

4)  Cut out a few extra pennants. You may end up needing them – I did.

5) I have really dark walls so I purposely went for light colors and simple patterns.  But this would look great with dark, rich colors and bold patterns.  How great would olive green and brown pennants look with cream or dark yellow letters?

***************************************************

Wishing everyone a warm and safe holiday weekend!

banner.31 

Linking up to the wonderful showcases on my sidebar, including:

Visit thecsiproject.com

Happy Friday everyone! I’m so excited to guest blogging over at Ucreate with Kids, one of my favorite new blogs for fun projects to do with kiddos. Come stop by for a quick, easy and flat-out-free project to do with your kids on a lazy weekend or afternoon. Hope to see you there! Let It Snow!

planter.20

I love getting catalogs in the mail, especially at Christmas time. 

That’s why I’ve had this page from the Ballard Designs catalog on my bulletin board for the last few weeks.

planter.f

I love everything about this look, especially the bucket planter with the hand applied antique white finish.

planter.k

But as it turns out, I was fresh out of bucket planters with hand applied antique white finishes.

And I had roughly a thousand other things that I wanted to spend that money on right now … and spending anything would break the rules of my self-imposed THRIVE challenge … so there was only one thing left to do:

Grab an old oatmeal container and get to work.

And voila!

planter.r

Catalog style for flat-out free!

Want to make your own?

For this project you’ll need:

planter.v

… and …

planter.u

(FYI: I took this picture before I made my planter boxes.  I ended up using different paint.)

And as always, Rock What Ya Got and see if you can pull this project off without spending a dime.

***************************************************

Measure out, mark and cut five 1.5” wide strips from a sheet of thin craft foam. 

Nov 20104

Mark your guide lines on your oatmeal container.

planter.5

The 42 oz. container I used was 9.5” tall, so I made marks at 1.5”, 4”, 5.5” and 8” down. I also made four sets of marks around the container so that I could keep the foam strips level as I glued.

Hot glue foam around the top, bottom and middle of the oatmeal container, keeping the strips flush with the top and bottom and the center band level. 

Nov 20107


My bands weren’t long enough to go all the way around …

planter.3

… so I cut filler pieces from the remaining two strips to fill in the gaps, making sure that all of the seams lined up in the back.

planter.2

When I finished gluing all the strips, it looked like this:

Nov 20105

nice and neat on the front … back seams lined up nicely.

Before covering with the newspaper, I added a few drops of water to my Mod Podge to thin it out just a touch to help it really soak into the heavier newsprint.  And you know the drill for Mod Podging anything:

Coat … Cover … Coat again …

planter

… making sure to get plenty of Mod Podge along the lip of the foam strips so that the paper sticks well.

And don’t freak out if the Mod Podge looks like it’s not sticking at all. 

planter.6

It’s okay.  It’s still sticking enough to make this work.  I just went a little heavier on the top coat of Mod Podge to make sure the newsprint was well attached.

A quick tip here: make sure you line up your newspaper seams over top of the foam seams in the back or you’ll end up with lots of seams all over the place. 

planter.7 

It’s not a big deal, but if you’re OCD, it will drive you crazy.

Please don’t ask me how I know this.

For paint, a couple coats of spray paint will work, but I decided I wanted the more textured look. I ended up rollering my planter with a small roller brush …

planter.l

… and some left over latex ceiling paint.

planter.e

Ha! Rock what ya got.  Craft paint would work fine, too.

After one coat, the planters looked like this:

planter.d

… and after a second coat, they looked like this.

planter.a

So loving the added texture from the Mod Podged newsprint and foam roller.  Big, puffy heart love.

For the filler, I grabbed some tall branches off the only trees I have in my back yard–tall arborvitaes—and stripped off the greenery …

100_0839

… and thoroughly trashed my kitchen and arranged them in my planter.  You’ll probably want to weight your planter like I did.  Oh, and for the record, two cans of Campbell’s cream of chicken soup work great.

Decorating is a snap.

planter.s

I used ornaments from my stash, including these beautiful hand-crocheted snowflakes that my grandmother made for me as a newlywed.

And that’s it!

The back side of oatmeal never looked so good.

***************************************************

A few THRIVE tips to rock what ya got:

Do I really need to Paper Mache this? Can’t I just spray paint the oatmeal container after gluing on the foam strips?

Um, no. I tried, see?

100_0750

The foamies are crazy porous and after four coats, it still looked like crap. Also, the shiny coating on the container makes the paint run like crazy.  If you really want to skip the newsprint step, hit the outside with some fine grit sand paper and a coat or two of primer.  Just remember that every little hot glue blob and scratch will show up.

What do I use if I don’t have foamies? Or an oatmeal container?

For the bands, try thin cardboard, weather stripping foam or even several layers of folded newspaper.  For a container base, try using an old garbage can, #10 tin can, or even a 3 – 5 lb. plastic bucket.

**********************************************************

Wishing you and your family happy holiday decorating!
planter.m 

Linking up to the amazing link parties on my sidebar including this sites:

Join us Saturdays at tatertotsandjello.com for the weekend wrap up party!

handmade projectsU Create

One of the challenges of trying to get dollar-free during the holidays is that some of my favorite traditions just don’t work.  Case in point: sending out photo cards to family every year … no way to get around buying the photos and the cards.  And to date, I haven’t met a photo developer who’s willing to trade or barter or toss out a freebie.

Until today.

Please meet my new BFF, Shutterfly.

And thanks to their incredible offer (more on that later), our traditional Walmart Walk of Shame Christmas pictures will be going out again this year so that everyone can take one look at our family and realize just how good they’re doing.

Because here’s the deal: I have six, small, loud children who don’t do the picture thing well… and family pictures are something of a joke … and so a few years ago I found myself a week away from Christmas, browsing the holiday stuff at Walmart when I did the unthinkable.  I honestly, truly snapped a quick picture of my kids in the store and called it good.

Think I’m kidding?

100_3388

That’s my crew in front smiling in the Walmart BBQ Clearance area / North Pole merchandising area.

And the next year I did it again … just down to Walmart we went, to stand in front of boxes of Christmas trees and snap away.

100_1442

Classy stuff people, classy stuff.

Walmart offered trick-or-treating again this year and I managed to get this:

100_0213

And until this morning, I was thinking that this may be the money shot for Christmas cards this year, kids.

The only problem is that the Shutterfly cards are beautiful—as in to die for beautiful—so Christmas in the seasonal isle just isn’t going to cut it.  I want to do better, try harder … even go for something more warm and classy … like a family picture in Electronics.  Ha!

With 700+ designs, It’s going to take me weeks to decide between:

STATIONERYCARD_5x7-23046-2407-MERCHLARGE_FRONT-v1281039723000112300

… the elegance of the monogram …

PHOTOCARD-103-361-MERCHLARGE_FRONT-v125210396000067482

… or the bird & brown combo that I’m so into right now …

STATIONERYCARD_5x7-23046-2372-MERCHLARGE_FRONT-v128103885300099082

… or something fun and vibrant …

STATIONERYCARD_5x7-23052-2740-MERCHLARGE_FRONT-v128104005600081309

… or a declaration of faith ….

And for the kids’ neighborhood cookie party ….

STATIONERYCARD_A2-24047-2675-MERCHLARGE_FRONT-v128096229800058199

… I’m really feelin’ the Frosty vibe.

And I love, LOVE, that all you have to do is upload your pictures, pick your style and DONE.  A few days later these beauties will be in your box. I’ve ordered from Shutterfly before and love how quick and painless it always is. And really, anything that keeps me from dragging my dirty half dozen into a store makes my Awesome List.  Besides, the colors always turn out great and the quality rocks.

But here’s the best part:

(*squeal*)

All you amazing blog ladies can get 50 holiday cards free, too.

Serious.

Check it out here.

So there you go.  Merry FREE Christmas to me … and you!

Happy Shopping!

*********************************************************

FTC Disclaimer: I score 50 free Christmas cards for writing this post and couldn’t be happier. But free isn’t worth it if it’s crap, so my recommendation is based on my past, very awesome experiences with Shutterfly and my excitement to hook my amazing readers up with the same bit of holiday loot.

btl.2

~ 1 Thessalonians 5:18

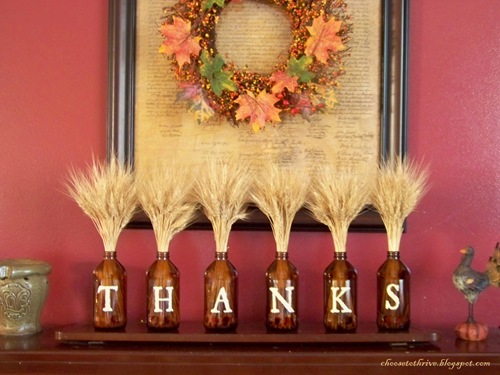
New today at Choose To Thrive, a simple and elegant word art display for your Thanksgiving decor or table. And you can use this same idea for all kinds of word ideas and displays.  Here’s the version I made for my kitchen table:

btl.3

Ready to make a set for your home?

Here’s what you’ll need:

100_9854

As always, I hope you’ll  Rock-What-Ya-Got and adapt this project as necessary to make it work with what you have on hand.  See tips at the end of the post for more ideas.

**************************************************

Start with any bottle with a great shape. DH found these at our local Associated Foods grocery store.

bottle.12

Remove as much of the front and back labels as possible, then soak for 12-20 minutes in warm water. 

bottles.1

The remaining paper and glue should wipe off easily with a rag or scrub pad.

Aug 2010

If your bottle has a stamped expiration date (and most do) …

bottle.3

… gently scrub it off with a scrub pad.  Mine came off in two seconds flat.

 bottle.4

Allow to dry thoroughly inside and out.

For the words, having access to a CriCut or one of these lovelies helps a ton.

bottle.6

(And just in case anyone is curious, I used one of my favorite fonts, JSL Ancient, available as a free download here.)

bottle.7

Apply vinyl lettering to bottles as you would for any other project …

Oct 20106

(And remember: if you’re using these for a table, make sure to cut two sets of letters so that your guests can see the letters on both sides of the table!)

To prepare your wheat, remove any weeds and leaves (if using home-grown) or remove outer wrapping from store-brought bundles.

bottle.5

Gather a bunch of stems roughly the same width as the bottle opening into a nice, tight cluster.

bottle.9

Carefully insert wheat, removing any stems that won’t quite fit.   You want the wheat to fit snuggly and not move around.

bottle.11

And that’s it!  Quick, easy, DONE!

***************************************************

A few THRIVE tips to Rock What Ya Got:

What if I don’t have a CriCut or Silhouette machine?

1) Cut letters from vinyl sheets or contact paper with regular craft scissors.  2) Barter, trade or just talk one of your really awesome neighbor-friend-cousin-coworkers into cutting letters for you.  3)Paint letters with craft paints using a stencil.

How can I get wheat for cheap? It’s so expensive at craft stores, even with a coupon.

Free wheat is easier to find that you might think. The wheat I used was from my neighbor’s garden. She wanted to see if she could actually grow this stuff and it worked great. If you like this look, consider planting a section next to the tomatoes or flowers next spring. Also, many farmers will let you glean left-over wheat along the edges of their fields as long as you ask first. I live in a large metro area of a million people, but was surprised how many fields I saw within 15 minutes of my house. Your local city or county clerk can get you the owner’s name and contact information. Good luck!

*********************************************************

Wishing everyone the start of a magical holiday season!

btl.8  

Linking Up to:

DIY Show Off Fall Festival

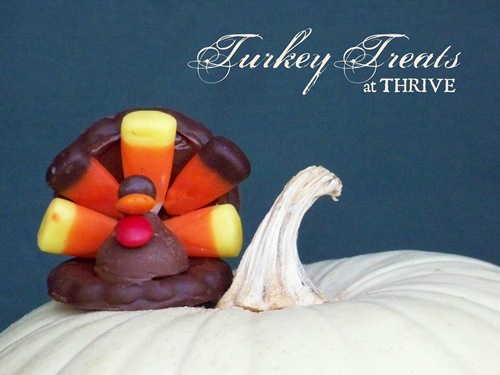
Just in time for Thanksgiving, these quick, easy and very kid-friendly treats are almost as fun to make as they are to eat.  And the best part is that most of us have this stuff lying around from Halloween so maybe even free (or at least cheap!)

tt

Great pared with place cards or as a dessert on your holiday table, try whipping up a batch of these gobblers as part of your Thanksgiving menu.

100_0194

For each turkey you’ll need:

100_9879

Cut the bottom off one of your cookies as straight and level as possible.  Then pop the small left-over piece in your mouth quickly before anyone notices that it’s gone.

100_0149

Melt chocolate chips for 30-60 seconds, just until they’re smooth and easy to spread.

Oct 20102

Coat the trimmed cookie with chocolate using the back of a spoon …

100_0157

… add the candy corn …

100_0159

… and set aside to dry for a few minutes.

Dip the Kiss (wrapped or unwrapped) in chocolate  …

100_0165

… and place on the edge of the whole cookie.  Let both pieces set for a minute or two before assembling.

100_0168

To attach the turkey feathers, coat the cut edge of the cookie with chocolate …

100_0181

… and place it directly behind the kiss.  “Glue”on mini M&M’s for the head and waddle using more of the melted chocolate.

100_0187

Voila!

Ridiculously cute turkeys just begging to get bit.

And the best part is that you can make these little guys as simple or fancy as you’d like:

mct

100_0098

ft

mdt

These turkeys have been a Thanksgiving staple in my family courtesy of my awesome Aunt Claudia.  And this is a great project for little fingers while the grown-ups are getting last-minute dinner stuff ready.  Just be prepared—there’ll probably be a lot of licked fingers so you may want each kid to make their own. 😉

Hope you enjoy making—and eating—these fun Turkey Treats …

Oct 20101

Every  … last … bite!

htg

*********************************************

Thank You to the awesome blogs that featured this project:

I’m always on the lookout for fun holiday projects in keeping with the Thrive Philosophy:  

No money. No shopping.  No problem.
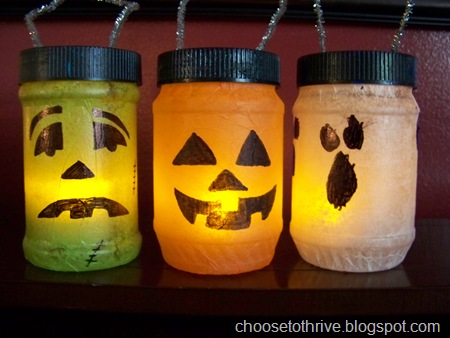
And just in time for Halloween, check out these frightfully cute lanterns!

100_9710

Perfect for adding some whimsy to your mantel, piano or shelf …

100_9700

… and rocking out a mitten tree until the snow starts to fall …

Oct 20108

… and especially for  keeping your little monsters safe and easy to spot on Halloween night!

100_9816

Ready to make your own?

lanterns

(and a battery-operated tea light that I forgot to include)

As always, I hope you’ll

Rock What Ya Got

and adapt the materials I used to make what you have on hand work.  With a little creativity, you’ll probably be able to make this project without a run to the store.

Cut a small piece of sticky back Velcro (mine is 1/2” wide) and attach one side to the inside of the jar and the other to a battery operated tea light. Set tea light aside.

Oct 201015

Apply a thin coat of Mod Podge (or a mix of half water, half white school glue) starting at any left over seam from the label.

Oct 201010

Trim craft tissue to the same width of the jar plus an extra 1/2” inch.  Line top of tissue up with the top of the jar and very gently press into place, working from the center out.  Careful—tissue will tear very easily.

Work around the jar one small area at a time, thoroughly covering the entire jar surface,  and overlap tissue along back seam by a 1/4 – 1/2” inch, trimming if necessary.

Oct 201013
Don’t worry if there’s a slight gap along the back (like in the pumpkin above) or a few tears.  Just cover any gaps with more Mod Podge …

100_9610

… place a small tissue patch over top …

100_9611

… and cover with a thin coat of Mod Podge.  Easy peasy. 

100_9612

Cover the entire top of the tissue with a good coat of the glue as well to make sure all the tissue is good and stuck.

Oct 201014

To finish, cut a small circle of tissue slightly smaller than the bottom of the jar, coat bottom of jar with glue, place circle down, smooth in place …

100_9621

… and finish bottom with a coat of glue as well.  Let these dry upside down for an hour or so—until completely dry to the touch.

100_9622

While the kiddos are waiting for their lanterns to dry …

100_9623

… and waiting …

100_9631

It’s time to work on the lids!  Mark your handle holes … 

100_9679

… and drill through with a drill bit large enough for your handle. (I used a 7/16” bit for the lids with pipe cleaner handles and 9/16” for the lids with glow sticks).

100_9683

Trim away any rough plastic on the holes with a craft knife …

100_9684

… and paint lids whatever color you’d like.  I had black paint so I used black.  White for the ghost and orange for the pumpkin would have been cute, too.

After the lids and jars are dry, turn the kids loose!

Oct 201011

You could use craft paint, vinyl face shapes from a Cricut or Silhouette machine or plain ‘ol Sharpies like we did.

100_9659

And the best part is the fun faces that appear … like the “Scribble Monster” and the “Vampire Guy With A Bloody Nose and Furry Teeth.”

Oct 201012

And your kiddos will be so proud of themselves for making something so totally awesome.

100_9669

To attach the handle, thread your ribbon/pipe cleaner/glow stick through the holes and tie, glue or attach the ends for form a loop.

Oct 20102

Then pop your tea light into the jar …

Oct 20103

… screw the lid on and, voila!
Houston, we have Halloween Lanterns!

100_9735

These fun lanterns are sure to bring out the spooky and the silly in your little goblins:

Day …

 Oct 20107

… or night!

Oct 20104

Thanks for stopping by!

Hope you all have a safe and wonderful Halloween!

********************************

Linking up to:

bulletin.j

I have a problem.  A big, big problem.

I’m an obsessive crafter and DIYer with a very short attention span. That means I have several large bins full of half-finished and non-even-started projects that keep piling up. 
Toss a layoff and a lousy economy into the mix and I decided that now was a great time to stop spending money on anything and everything crafty-DIY-projecty until I used up what I already had on hand.
No money. No shopping.  No problem.
But, I also realized that as long as these projects were tucked away, I’d keep forgetting about them and never finish. 
So what to do?
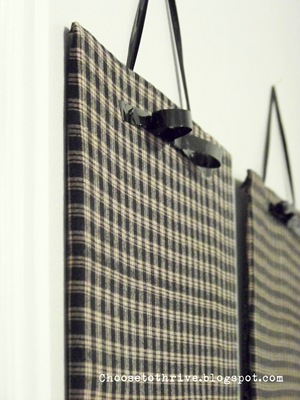
I saw these in the Ballard Designs catalogue and knew this would be a perfect way to keep visual track of everything.

bulletin

The only problem was that I didn’t have an extra magnet or bulletin board on hand that I could recover with fabric.
Then an idea hit when I pulled out my lovely little .88 cent thumb tacks from Walmart:

bulletin.n

They were package in two layers of cardboard.  Hmmmm.

bulletin.o

I didn’t have any large, random sheets of cardboard lying around the house, but I did have plenty of these …

bulletin.a

… and as soon as I opened up the box …

bulletin.6

… and folded it in half—voila!

Double thick cardboard in just the right size for a bulletin board.
This is gonna work … so here we go!
Trim off the extra tab on the end of the diaper box and set it aside.

yyy

You should have a nice rectangle for your base.    The only thing you need to do for prep work is fill in the narrow gaps on the top and bottom so that the fabric will lay nicely across the board.

bulletin.e

Measure the width of your gaps …

bulletin.t

… and cut filler strips from the left over box tab.

bulletin.7

Lay the filler strips into your gaps, trim the ends flush with the sides of the box and tape in place.  Do this to the front and back sides of the box.

100_8324

Spray the inside of your box with spray adhesive and weight the layers down for a few minutes to set. 

bulletin.14

Tape the full length of the narrows ends together and add a few strips on the long sides as needed.  I used 2” clear packing tape and it worked great.

bulletin.1
I also taped the punch out for the handle as well.

There, all nice and smooth.

At this point I noticed that the front and back were not the same length: one side was about 3/8” inch shorter than the other.

(Sorry … forgot to take a picture of that.)

It’s no big deal.  Just make sure you use the longer of the two sides for the front.

Spray the front with a good coat of spray adhesive and lay your fabric over top, smoothing out any wrinkles and bubbles.

bulletin.2

Patterned and plain fabrics are the most forgiving for this project as I learned the hard way.  If you’re using a stripe like I did, make sure you line up your lines along your straight edges or it will be really, really obvious. 

See?
The OCD part of me started to twitch when I first applied my fabric.  It took several minutes to gently pull and tweak my fabric before it looked nice.
Flip your board over and trim the excess fabric to an inch or two around the edges.  Cut the corners at an angle to get rid of extra bulk when you glue them down.

bulletin.5

Fold fabric over the board, starting in the middle of each edge and working towards the corners.  Glue in place with hot glue.

bulletin.s

Your board should look like this on the back …

bulletin.f

… and this on the front. 

bulletin.3

All you need to do is attach a ribbon to hang your board and you’re done.

There are two options for attaching your ribbon.  The easiest option is to hot glue or tape your ribbon on the back side at the fold lines.

bulletin.g

Add a decorative bow to the front and DONE. 

Easy peasy. 
The other option (which I used just because my kids are very active and I wanted extra stability) is to carefully poke holes through the board about 1.5” down from the top and thread the ribbon from behind …

bulletin.4

… tying it in the front, trimming away the excess ribbon …

bulletin.v

… and hot gluing the finishing bow over top.

bulletin.m

Simple. Cute. Done.

Start to finish was less than ten minutes. Tops.
But, I have a confession to make.
I didn’t have enough black satin ribbon to finish my boards (I made two).  And since I’m not spending money for finish up anything, I had to get creative about what to use.
I really had my heart set on the black satin ribbon, especially with my fabric.  So I looked around my house and found this:

bulletin.16

A well-worn, beloved VHS tape from my kids’ playroom.  The top had been broken off and it was ready for the garbage.  But … I noticed that the tape inside was exactly the width and color of material that I was looking for. 

bulletin.r

It was worth a shot ….

I removed the little screws on the back …

bulletin.u

… and opened up the inside to expose the spools.

100_8357

And I laughed when I flipped the spools over because it looked just like two spools of satin ribbon.

bulletin.p

So that’s what I used.

All of the “ribbon” for this project came from our dearly-departed Thomas the Tank Engine movie.  VHS ribbon can wrinkle easily so I was gentle when I was threading it through the hanging wholes and when gluing the bow.  And this is probably stating the obvious, but a low temp glue is the way to go here.

bulletin.l

VHS “ribbon” worked great.

I’m so excited to have found a new medium to work with and have several fun projects for this stuff lined up for the coming weeks.

bulletin.i

I’m loving my new bulletin board and am feeling more organized already.

And for thumb tacks?
I only had those white Walmart beauties that just wouldn’t work with black and cream fabric.  No problem. The tacks got a quick coat of black craft paint from a sponge brush and done.

100_9449

This project showed me that the ability to fuel my passion to create has nothing to with dollars and everything to do with attitude.

I choose to THRIVE.
So thanks for stopping by!
{Now all I need is a brilliant idea for some cute bulletin board hangers.}

Signature

***************************************************

Thrilled to be sharing this tutorial over at

and linking up to:

OrganizeItBasket2_thumb1 funkyjunk

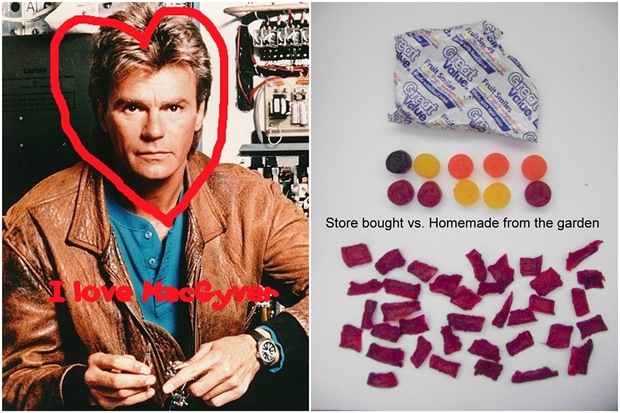
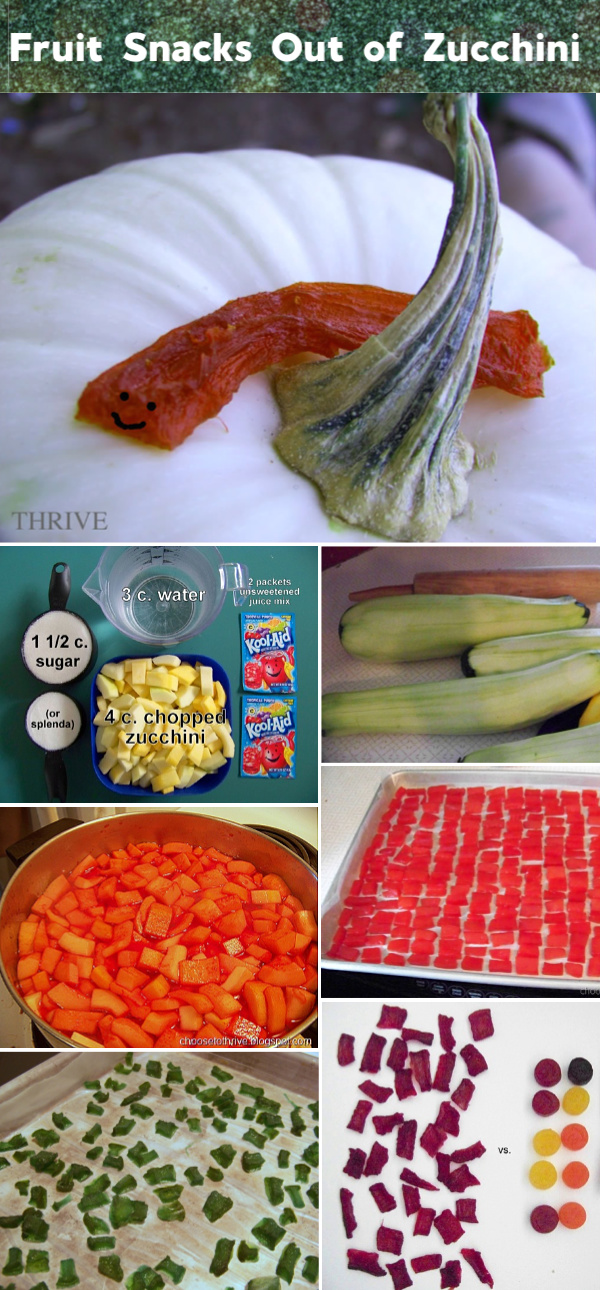
Okay … I didn’t actually use a paper clip.  I got a little too MacGyver on the title.  But, I did make honest-to-goodness homemade fruit snacks out of zucchini and kool-aid.  And you can do it without a dehydrator, too.

And that kind of know-how would so impress MacGyver.

Blog Pics

Curious?

It’s super easy, cheap and way better for the kiddos than the high fructose corn syrup / modified corn starch numbers at the store.

There’s a few different versions of this recipe floating around the web, but this is my own recipes that, in my humble opinion, tastes even better, uses much less sugar and can actually work in the oven if you don’t have a dehydrator.  I have made several batches over the last few days and hope my trial and error process helps someone out. 

Homemade Fruit Snacks

Or the: Your Kids Will The Entire Batch In Two Minutes and You Finally Have Something To Do With All That Zucchini Besides Bread and Muffins Recipe

For this recipe you’ll need:

 100_3268

Wash, peel and halve your zucchini, even if you’re using small, tender squash.

100_6971

You want to get all of the peel removed so that the zucchini meat dehydrates properly and looks in no way healthy.  This is critical for the kids to buy into the idea.  Halve your zucchini if you’re using baseball-sized ones like I did.  It makes them much easier to work with.

Remove the seeds and pulp from the inside with a spoon, making sure the meat has a nice, even thickness.

100_6974

When you’re done the zucchini should look like this:

peel-free and a fairly even thickness.

100_6978

Cut the zucchini in long strips about 1/4” – 3/8” thick. 

100_7834

Don’t worry about being precise, just eyeball it.  Wider strips will work fine, too—just allow for extra drying time.

Cut the strips into 1 inch pieces.

100_7836

These will shrink up by half in the dehydrator giving you a bite sized piece. 

Aug 201050

Heat water, sugar and drink mix over high heat. 

Add the zucchini as soon as the sugar is dissolved and bring to a full boil.  Reduce heat and simmer covered for 30 minutes.

100_3272

Drain thoroughly reserving cooking liquid and allow to cool in the strainer for ten minutes. 

Dump zucchini out onto dehydrator trays or plastic wrap lined cookie sheets and let dehydrate.

Store in ziplock bags until they’re eaten up.

** Then lather, rinse, repeat. **

The next batch of zucchini can be cooked in the left-over cooking liquid with the same favor and texture.

***************************************************

Drying In A Dehydrator:

Dry snacks for about a day, being sure to rotate trays.  Snacks are done with they’re still soft and pliable, but dry to the touch with a matte finish.

Drying In The Oven:

Line sheets with plastic wrap, but do not spray with cooking spray.(I used wax paper in this picture and it stuck horribly and discolored during the drying.  Plastic wrap has worked beautifully on all of the batches since then).

100_7376

You can either spread it around loosely with a spatula …

100_7379

… or go the Martha Stewart route and line them all nice and neat.

100_7380

The Martha way looks pretty, but it takes forever to do.  And both ways cooks just as well so there’s not an advantage either way.

As you can see, the pieces will shrink by about half and darken in color during their drying time.

100_7394

Set your oven between 140 – 170 degrees.  (My oven’s lowest setting was WARM – 170 degrees).  If your oven won’t go below 200 degrees, prop the door open with a hand towel and keep the temperature down a bit.

The drying time in the oven, as well as with the dehydrator, will vary depending on the piece sizes and humidity.  I placed the batch below in the middle rack of the oven at 170 degrees right after lunch.  I turned the oven off around 11 pm when I went to bed and kept the door closed all night. 

100_7398

In the morning they were almost done, so I scraped all the pieces together with a spatula to move them around, spread them back out and finished them in the oven at 170 degrees for about another 40 minutes.  Again, drying times will vary.

100_7401

(Again, use plastic wrap to line your pans. I used wax paper here and although the flavor and texture were fine, the paper discolored and didn’t look very appetizing.)

When they were done, the 1 inch long pieces ended up at 1/2” inch bites and the 1/2” inch pieces ended up the size of mini M&Ms and were chewier.

100_7399

The smaller length pieces were also tough to use in the dehydrator because they kept falling through the cracks on the tray.   They also dried out much faster than the bigger pieces.  That made them much harder and chewy like jerky.  My kids liked the soft, bigger pieces much better.

100_7861

These snacks won’t win any beauty contests, but I’d rather give my kids 0.9 oz. of yummy homemade fruit snacks with all of the extra vitamins from the garden than the 0.9 oz. of the store bought variety with all the fillers and junk.

Oh, and these were supper cheap.

The store brand single serve packs work out to be about .20 each.  The homemade variety ran me .06 each when I bought sugar (and used the cooking liquid for two batches) and .02 a serving when I used sugar on hand.

Edited to add:

We have achieved SOUR homemade fruit snacks!

Oh yeah.

These are sooooo good!

Mix 4 c. zucchini, 3 c. water, 1 c. sugar or splenda and 10 orange Kool-aid packs.

(Yes, you really do need 10 packs.)

100_3452

Bring to a boil and then simmer for 15-20 minutes until soft.  Let cool for 10 minutes before transferring to trays.

100_3450

Then dehydrate as usual.

You can go the bite-sized route with this snacks, but my kids prefer leaving them 3-4 inches long.

Why?

They make the cutest little sour gummie worms. Yum.

Oh. my. heck.

So ridiculously good!  Enjoy!

Signature

PIN THIS TO SAVE FOR LATER

Homemade Fruit Snacks Out of Zucchini