For all you motorcycle enthusiasts out there with little tykes in the house, how about upgrading those basic wooden ABC blocks with a quick trip out to the garage recycling bin?
As promised, here’s my favorite version of the make-your-own-blocks project that I featured yesterday. And truthfully, this color scheme was the first one I imagined once I decided to make these blocks. There was something about the shape of those empty metal cans in my recycling bin that reminded me of the exhaust pipes of a Harley.
And so the wheels started turning … and I scoured for chrome paint … and then I found something even better:
Buying a roll of this amazing stuff was technically a cheat for Thrive projects, but a certain grandpa sent a roll our way as part of Christmas. (Thank you!)
I used the same simple process from this post to easily turn empty food cans into colorfully, eco-friendly toys with some serious moxy.
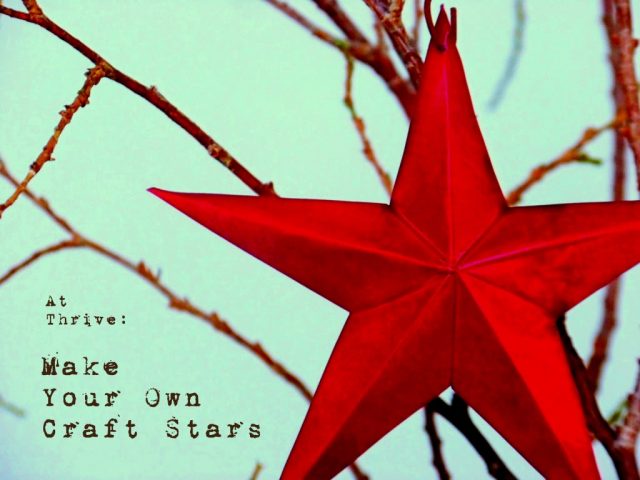
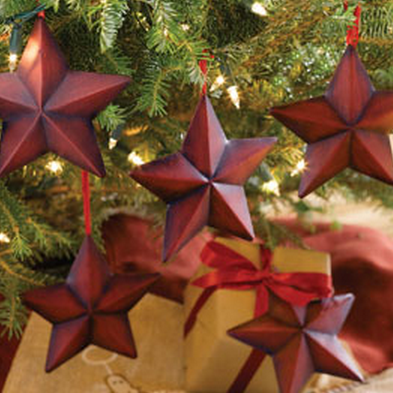
Recognize that star? A little diamond-plate vinyl applied over my disposable baking sheet stars yielded some matching ornaments that makes me wish my entire tree was covered with biker stars and a leather studded tree skirt.
As always, this project is perfect for rocking what ya got: house paint, spray paint, craft paint … whatever. And even though I fell in love with the diamond-plate vinyl, regular chrome spray paint looked amazing, too. Personalized details like the letters and flame decals can be applied with a stencil …
Special thanks to Dave and the staff at Golden Spike Harley-Davidson for letting me get up close and personal with the inspiration for this project! Your selection, gear and customer service rocks. Check them out here.
Not your average wooden blocks kids, these Thrive-friendly can blocks get a serious make-over courtesy of some soap, paint and a generous dose of awesome.
Why make these?
Because my kids do this …
every time I hit a case lot sale.
And the problem (other than the fact that it created another mess to clean up) is that cans are heavy. Miserably heavy—especially when that tower tumbles over and enchilada sauce takes out a piggy toe. Or pumpkin puree drops on a thumb.
And then of course there’s the dents and dings and the missing wrappers and mystery meals …
… that make me really, really grumpy when the kids drag out the cans.
So after years of headaches, injuries and swearing, it finally occurred to me to just give them their own dang cans to play with. And I decided that if I was going to go through the hassle of saving and washing and priming and painting several dozen soup-sauce-fruit-veggie-tuna cans, these were going to be the biggest, baddest, coolest looking blocks you’ve ever seen.
And after a week of off-and-on painting …
and hands that look like this because I wasn’t smart enough to wear gloves …
I gotta say:
Mission Accomplished.
Want to make your own?
This project is as easy as they come.
All you’ll need is:
Rock what ya got: house paint, spray paint, craft paint … whatever.
Putting these together is a cinch:
Just PRIME, PAINT and SEAL the outside and inside of the cans. (Two coats of color is best).
Done.
But the fun part is in the details …
… Learning …
… Favorite sports team … or rivalry sports teams—ha! …
… Colors to match your kids’ favorite beat-up well-loved toys …
… Names …
… Or some serious Harley-inspired attitude:
(For more pictures of the Harley blocks, click here)
And since I started making these, the ideas keep coming.
How cute would these be in
ANIMAL PRINTS or POLKA DOTS or PAINTED SHAPES
like trains or planes or cars for all you artistic types?
Or what about cutting some of those cute VINYL SHAPES or using STICKERS to jazz them up even more?
Clean-up is easy: skip the dishwasher sterilize cycle and just wipe down with disinfecting wipes. (Great project for kids while they’re watching TV.)
Storing is easy too: find an old box, drawer or dollar store bin to keep these corralled. Done.
1. The more sizes you have, the better. Here’s what I had on hand:
Formula, tuna and tall spaghetti cans would be great to add, too.
2. Inspect each can for sharp edges or snags, then flatten with needle-nose pliers. For pull top cans, don’t even try to flatten the lip … doesn’t work. Trust me. Instead, cut a piece of craft foam, cardboard, etc. and glue it to the lip. Paint as usual.
3. Prime these babies. No really … prime. These will be knocked down a melllllion times and you don’t want paint chipping off on the first play date or ending up in little mouths. Same goes for a sealant. Two coats wouldn’t hurt, either. (I skipped these two important steps on some of my first cans and have since repainted. Bleh.)
4. Craft and house paint will work fine, just be prepared for more coats. I used craft paint for my orange blocks since that’s all I had and loved how they turned out, but it required six coats to get the color coverage even. Don’t let that discourage you, though. Craft paint dries very fast and I managed to get all of my coats done in one day.
5. This is a several day project. The coats of primer, paint and sealant spread over four days to allow the coats to dry well. But again, don’t let that be a deterrent. This project was a lot like making bread: it takes awhile, but most of it’s waiting. I only spent 5 minutes of painting twice a day so it wasn’t a heavy time draw.
6. If you’re going to stencil letters or designs over the base coat before sealing, wait a couple of days first. I stenciled the next day and, even with low-tack vinyl, some of the paint peeled off. On the next batch, I let the paint dry two full days before stenciling and had no problems. Just make sure to remove your vinyl/stencil, etc. immediately after you paint.
7. If you like the metal look of the cans, you still need to seal them with a protective coating.
8. If you need extra cans, spread the word to family and friends. I sent out a quick Facebook message asking for empty cans and ended up with a couple dozen within a few days.
Begin by removing any border from the pans and smoothing them out as much as possible.
(This was as good as I could get my pans and they turned out fine.)
Print out a star to use as a template for cutting and tracing. I found my image here.
Adhere your template with a small piece of double-stick tape …
… then trace along all the lines using a ball point pen and a ruler. Yes, you need the ruler.
When you remove your template it should look like this:
Carefully cut around your star leaving an 1/8” border all the way around …
… tapering the border near the points …
… and snipping up to the tracing line on the inside points of the star.
Fold the star over and go over all of the trace lines with the lid of the pen to make the lines both easier to see and bend.
To finish the edges, place the ruler just below a trace line. Starting at tips and working towards the center, carefully lift up along the border …
… and fold it over the ruler lip.
Remove the ruler and press the border down first with your fingers …
… then smooth completely with the pen lid.
The shape of the star is a series of mountain and valley folds.
Starting from the center, fold the short lines in between the points downward to make valley creases.
To shape the points, push up from the back of the star along the center seam, working from the center out.
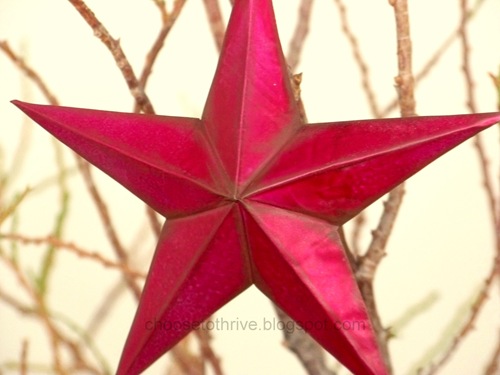
When you’re done, your star should look like this:
To make the ornament hole, gently twist a small eye screw in one of the points.
You can leave your stars plain …
… or hit them with a coat of primer and spray paint for a smooth, seamless finish …
… or sponge on a coat or two of craft or house paint for rustic, weathered look …
… or rock out your favorite dollar store nail polish for a little bit of BLING.
My genius six-year-old actually came up with the nail polish idea. She snuck off with one of the stars and returned a few minutes later with this little beauty:
Love, love, love all of the paint options! Have fun picking your favorite!
1. What if I don’t have any disposable baking sheets lying around? Will aluminum foil work?
Not really. See?
I tried several different thicknesses and it never was stiff enough to hold it’s shape well. The star above was with eight layers which is about the most you can cut without the layers separating horribly. You really do need the stiffer material.
2. Is there a shape or pan size you recommend?
I used old cake pans like these to make my stars since it was all I had.
But, if you are going to buy pans to make this project, I’d recommend using a disposable oven liner if you can find it. You get the most bang for buck with that size and have minimal waste.
The price is pretty cheap either way:
The dollar store carries pans like this, too. Just stay away from the deep-sided pans with heavy grooves in the bottom.
3. How big (or small) can you make these things?
The only real limit is the size of baking pan you can find–the oven liner pan will make a 12” x 12” star easily. On the small end, I wouldn’t go much smaller than 2-3” tall. Any smaller is too much of a pain to work with.
I made two sets of ornaments for my tree. Just for comparison, here they are next to a graham cracker box. The scale was perfect.
4. One last thing … print out your template 130-150% of what you want the finished size to be. The folding and dimension will make your finished star shorter/smaller than the template.
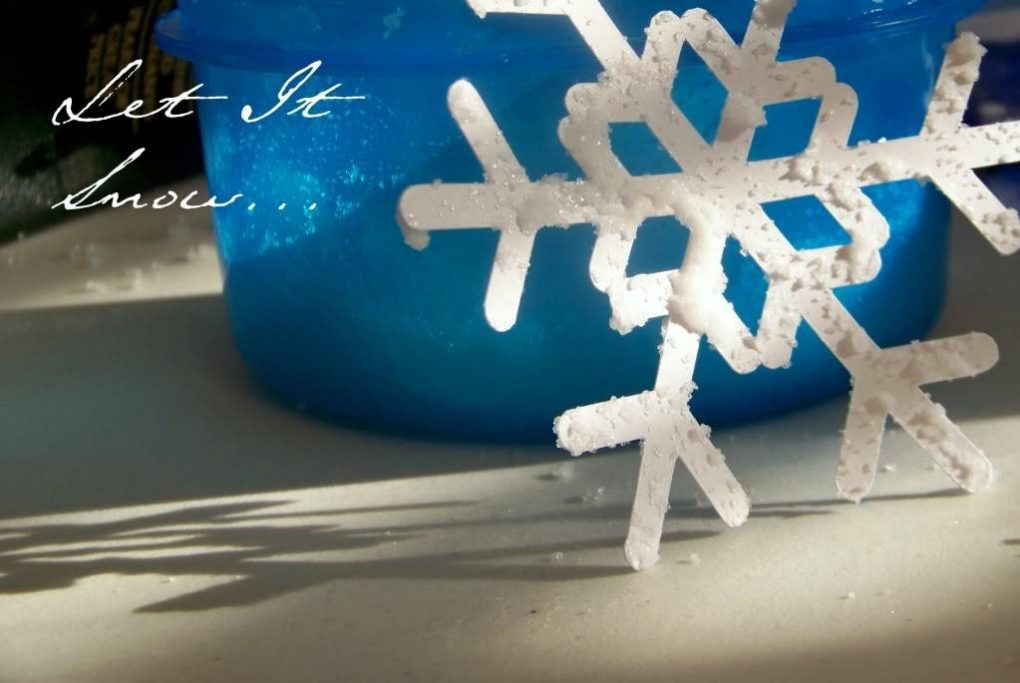
Happy Friday everyone! I’m so excited to guest blogging over at Ucreate with Kids, one of my favorite new blogs for fun projects to do with kiddos. Come stop by for a quick, easy and flat-out-free project to do with your kids on a lazy weekend or afternoon. Hope to see you there! Let It Snow!