The kitchen remodel continues!
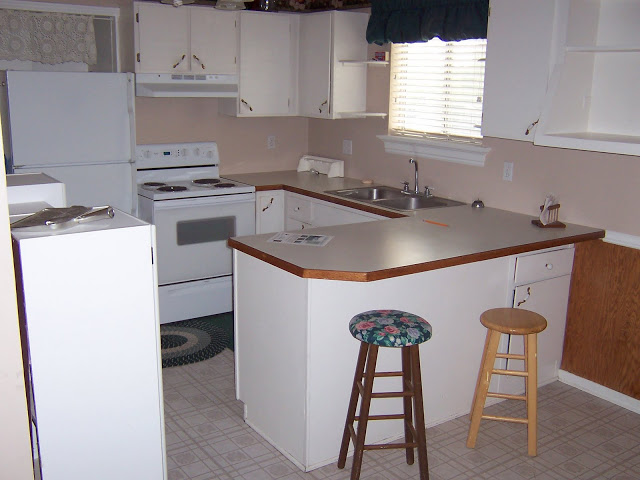
BEFORE
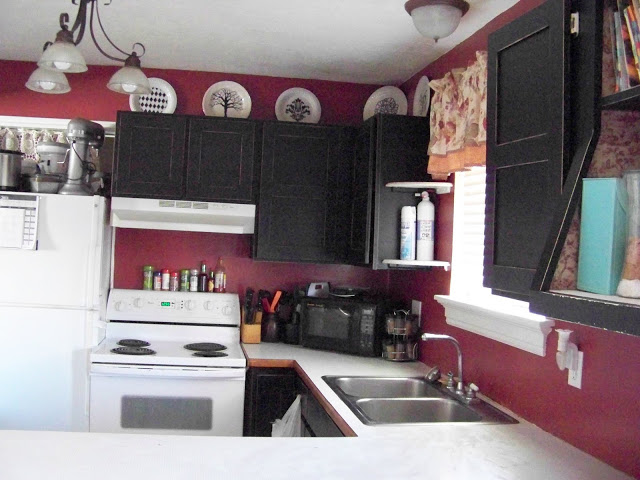
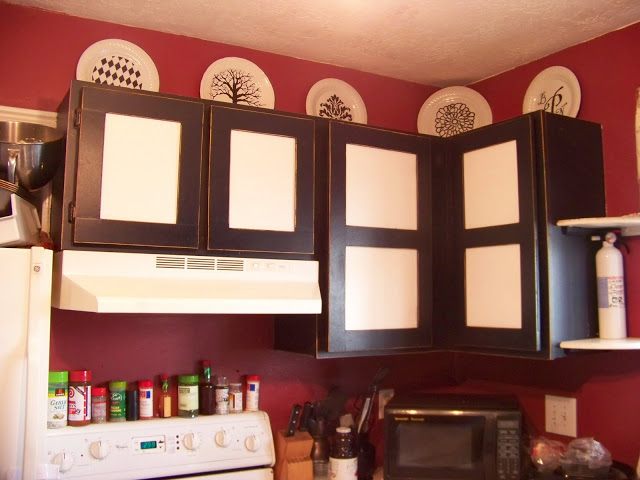
After a splash of color, painted fixtures, some repurposed decorations and some new picture frame cabinets the room now looks like this:
AFTER
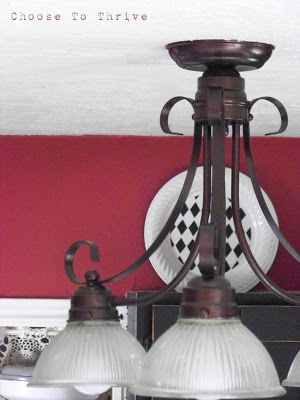
So far we’ve painted all the icky brass fixtures without removing them–yeah!
But the hands down best part of this room is the custom picture frame cabinets!
Want to make your own?
First: The Disclaimer
Ana White I am not.
Unfortunately I have no drafting skills, no working knowledge of Google Sketch and I stink at trying to use the draw tool in Microsoft Word. So, instead you’ll have to tag along while I walk you through this project old school style. Ideally I’d have enough scrap wood from four years ago to just make another frame door to show you. But since I don’t and spending money is a no-no, I’m going to do the next best thing and show you exactly how to building them … using cardboard.
I have not included exact dimensions since everyone’s cabinets will vary in size. What I have included is a few specific dimensions for the width of the frame pieces and then you can cut the length to fit your doors.
Make sense?
The good news is that this project is so easy to build, so customizable and so dirty cheap – as in about $7 per door cheap — that the whole tutorial-out-of-cardboard-without-exact-measurements won’t even phase you.
The bad news is that, as you’ll remember from this post, most of the “during” pictures STINK and were taken in 2007 before I had any idea what blogging was or how to take pictures.
Phew. Now on to building!
Materials
Cabinet Doors: 3/4” plywood or high-grade particle board
1 – 4’ x 8’ sheet will yield approximately 7 cabinet doors: 2 small doors for over frig or range and 5 standard doors.
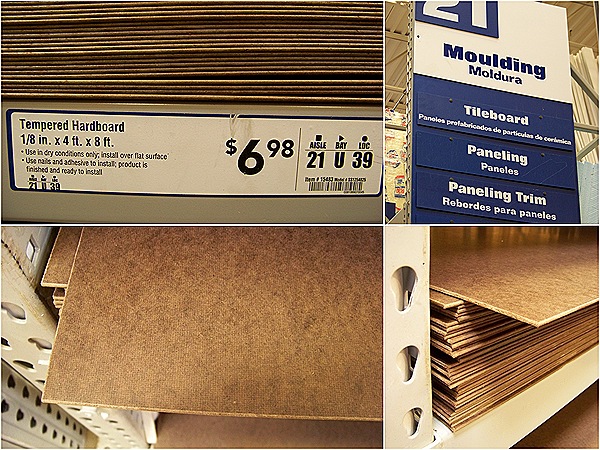
“Frames” For Each Door: 1/8” Masonite / Hardboard
Sold in 4’ x 8’ sheets for about $7 each. I found mine in the trim section.
And of course you’ll need:
* Wood Glue * 1” Finish Nails * Chop Saw * Sand paper
Prep Work
If You’re Using Existing, Flat-Front Cabinet Doors …
Remove cabinet doors and label, remove hardware, sand, wipe down and let dry.
(If you have flat front, laminate-covered doors, don’t try and build over top of them–the paint won’t stick very well. Go with new plywood ones.)
If You’re Making New Cabinet Doors …
Cut new doors from 3/4” plywood, sand, wipe down and let dry.
Frame Pieces
Do yourself a favor and have the Masonite board pre-cut at the hardware store in 2.25” x 8’ and 2.5” x 8’ strips. Have the last strip from the board be cut to 2” x 8’. These long strips can then be cut down to the exact length you need for each cabinet door.
Building The Frames!
There are three layers to these doors: plywood base, under frame and top frame.
The under frame pieces are 2.25” wide
The top frame pieces are 2.5” wide.
*****
Small “Single Frame” Doors
Attach the under frame to the base using 2.25” strips in a “U” shape.
Glue under frame pieces to the base making sure frame pieces are flush with the door edges.
Measure the inside area for the picture insert and make sure it fits. (This is the easiest time to do this step.)
Attach the 2.5” strips of the top frame across the top and bottom edge first, then along sides using wood glue.
(Sorry, forgot to remove the insert before taking this picture. No, don’t leave insert in while gluing.)
Use a 1” finish nail in each corner.
*********************************
Large “Double Frame” Doors
Attach the under frame to the base using 2.25” strips in an “E” shape using wood glue.
NOTE: The middle section of the “E” is only 2” wide. If you use a 2.25” piece, the top frame will not sit right.
Also make sure that the picture insert openings are on the opposite side of where the door hardware will be attached.
Measure the inside area for the picture inserts.
Attach the 2.5” strips of the top frame down the long outside edges first, then along top, middle and bottom of the door using wood glue.
Use a 1” finish nail in each corner and then center frame piece.
When glue has dried, sand all doors lightly, wipe down with a damp rag and let dry.
Painting
Paint doors with one coat of primer and two coats of semi- or high gloss paint. Distress edges lightly with sand paper to bring out the details of the frame and stain if desired. Finish with a coat or two of polyurethane.
(I skipped this step and have to do regular touch ups. Oops.)
Sand cabinet insides and sides, prime, paint, distress and seal as with the cabinet doors.
(Lousy photo of cabinets painted black inside and out to match the cabinet doors)
Reattach hardware, hang doors and
Voila!
Picture Frame Cabinet Doors for $7 each
and a whole new look for your kitchen!
ASSECORIZING!
Not that the classic look doesn’t rock, but here’s what you can do with these cute, framed-out bad boys and some cheapie $0.50 poster board:
GALLERY STYLE
(very first gallery cabinets – regular digital prints taped to poster board)
– or –
TISSUE PAPER / FABRIC / WRAPPING PAPER
 (tissue paper attached to poster board with spray adhesive – made to match my Easter tree)
– or –
HOT TRENDS
(poster board + old house paint. Loved the look, but hate that I’m a lousy hand painter. Total CRAFT FAIL—ha! I’ll probably try this look again using vinyl and my silhouette machine.)
– or –
HOLIDAY / VINTAGE
 (poster board + computer printed images from Graphics Fairy)
– or even a –
BULLETIN BOARD DOOR
(poster board + old VHS tape hot glued in place)
And can’t you just imagine inserts covered with
BURLAP? STENCILED BURLAP?
Or maybe even
UPHOLSTERED and TUFTED FABRIC?
What about
SHEET METAL or CHALKBOARD PAINT?
I know. It’s crazy.
I kinda want a whole wardrobe for my cabinet doors now and it is such a good thing.
**********************************************************
A few THRIVE hints to save you some headaches
* I don’t have glass fronts in my doors and it’s no big deal. I love seeing the texture of the inserts up close and like being able to add 3-D touches. I’ve rarely had a problem with splatters or kid schmeer ruining inserts. And when the inserts start to show their wear, I just grab another .50 piece of poster board and make new ones. (You can also tape a piece of acetate or clear cellophane to each insert if you’d like them to be wipe-able).
* If you do want to add glass or Plexiglas to your frames, using 3/16” Masonite will allow enough room for the insert and 1/8” glass/Plexiglas.
* For the bottom cabinets, skip the under frame all together and just build the top frame straight to the base. That way the bottom doors will have the same look and feel as the framed doors without the hassle of the real thing.
*Make sure the openings for the inserts are on the opposite side of the hinges or you won’t be able to get pictures in or out.
* To save even more money, I decorate the front and back of each insert.
* In years past I’ve added vinyl lettering for holidays for a fun touch.
* To help me keep track of which insert goes where, I lettered my cabinets and then mark the bottom corner of each insert with the corresponding letter and which direction it goes. When I forget that step, I may or may not end up with an insert with a pattern going the wrong direction.
So there you go!
Hope you have fun making my crazy cheap, super simple picture frame cabinets! Please leave a comment or drop me an email if you have any questions.
Linking up to:



31 Comments
I love the pennants!!!
Amazing!!! Thank you so much!!!
those are so cute ! what a great idea !!
I really really love this–especially to dress up older flat cabinet doors. You may not be Ana (we can't all be her, right?), but your tutorials are very clear. Now I need to go help pick up an entire box of flashcards and card games that my 3-year old just accidentally dumped into a scrambled mess on the floor…how's your day going?
I hate my cabinet doors. Um, I think I will be making new ones!
I am sending this link to my RV blog. this would so work in an RV…. I LOVE THIS!!
Evielynne
Thank You Thank You Thank You!!!!!!! ;D I had pretty much figured it out, just needed dimansions and what you used for the ply. I totally love the versatility of this project! I drool over those magazine layouts where others decorate their kitchens for the holidays…I just always have too much going on on the counters to add anything more…But this creates a place for me to decorate! I'll have to wait a little while to get this done..but when I do I'll post the before and afters! 😉 Yay!!!
These are amazing! Great post.
Just a quick note to let you know that a link to this post will be placed on CraftCrave today [28 Apr 01:00am GMT]. Thanks, Maria
LOL! You are halarious! Im not sure who Ana White is but YOU rock!
I LOVE your post and Love your blog!
I would LOVE to have you link up to my Whassup Wednesday Par-Tay! And I have a party button you can grab and put on your blog so your friends can come too:) You have a good chance at being featured!
If you are NOT already a Follower of Elements Interiors….HELLEEERRRR!
Click that Google Follow button and YOU will be ENTERED in my
"Its a SURPRISE!" GIVEAWAY to be announced EVERY MONDAY! Yeppers! You read it right,
a Winner EVERY MONDAY!!! With GREAT Goodies you wont want to miss!!
Hope to see ya at Whassup Wednesday!!!
*ENTER LINKY PAR-TAY Here! *
xoxokara
Im FOLLOWING YOU!
*ENTER LINKY PAR-TAY Here! *
xoxokara
Oh WOW u totally ROCK!!!! I am so in love with ur cabinets! I am going to totally copy those 🙂 U should send a link to Ana White, these r AMAzing!!!
WOW! What a cool idea!
Looks like a big project but well worth the efforts! I LOVE that you can change it up with the seasons or mood.
FABULOUS!
AMAZING!!!! I love it! Following from a link party!!!
This is an amazing idea. They turned out great and the possibilities are endless.
Ruth
I love how versatile this is!!
Wow, those doors are fabulous! I've never seen anything like them!
I've been waiting for this tutorial. I am featurign this at somedaycrafts.blogspot.com.
That is a wonderful idea — all the different options are great! Never a dull moment in your kitchen, eh?1 Thank you for sharing… I am now a follower! 🙂
how many strips of each size do you have them cut?
I love your idea! Very awesome! 🙂 Nice work!
so fun! That's most genius kitchen idea EVER
Great job! Very clever!!!!
I love how versatile those are! Great job, and great fun!
Your cabinets look great and $7/door is amazing! Good job!
Good Job we are also in same business we provide custom building products for local builders and homeowners. Our products are antique doors, cabinet doors, carriage doors, closet doors, custom doors, etc.
Thank you so much for posting this! I've been searching for ages to find a 'frame' cabinet door tutorial & your instructions are very clear. I cannot wait to get started on making doors for an old boring ikea bookcase I have. This will also stop arguments as it's interchangeable (my boyfriend is a fuss-pot!) and great for the holidays & keeping up with current trends! Thank you again, I hope to post a few photos once I've completed it.
If you glue down all four 2.5" pieces, how do you slide in the picture for changes?
Such a nice and cute blog. Actually I want to visit this site over and over again that's the effect of this cool blog to me!-glass doors–
I came to ask the same question Michelle did. I'm not quite seeing where the pictures slide in and out.
The first layer of strips is narrower than the second,which creates space for the pictures, like in a picture frame. the first layer only has three sides. The second layer sits on the ends only on one of the sides, thus creating an opening under the strip. I hope that helps. Look over Nike's picture tutorial. It took me a couple of times before I really understood how it all goes together. Good luck!!
This is just what I was looking for! Thanks for posting this (years ago!). I bought a cubical storage shelf to store my craft supplies and it looks a little busy in our lounge… (Our house is all in one… Living/Dining,oh, and there's the kitchen 5 steps away!). So looking around for some way to 'door' the cubes I found your blog! Awesome! This is such a fantastic idea and I love that you can change the pics! Never get bored again! =) Tarsha. PS: I look forward to shuffling through your other posts!