Tag

Recycle

Browsing

Make 4th of July pillows from t-shirts and old stuffed animal filling from THRIVE

So … summer.

It’s time to actually spruce up the ‘ol front porch for the 4th.

Turns out, though, I’m fresh out of décor for the 4th of July or porches in general.

And as usual, my budget is zero dollars and zero cents.

That means I’m left with whatever I can make out of my classy craft stash of old, stained shirts and trashy I’ve-been-through-six-kids stuffed animals.

Nice.

But with a little creative cutting, sewing and repurposing, I still managed to come up with:

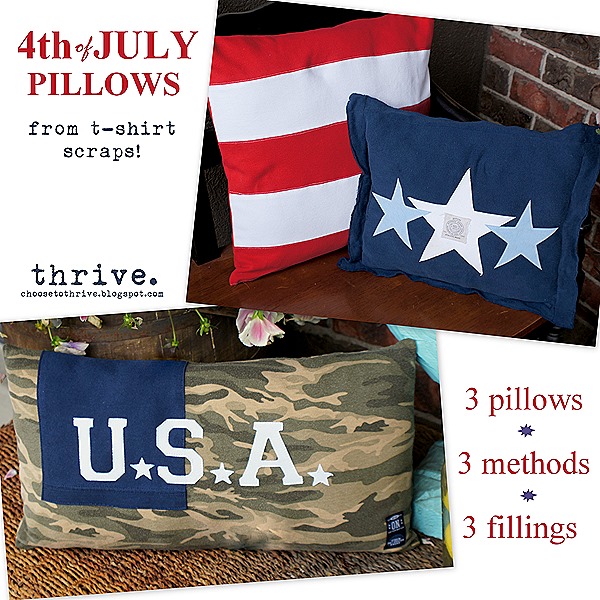
3  pillows + 3 ways + 3 stuffing types

4th of July pillows8

As always I hope you can take this idea and Rock What Ya Got and make your own version without a run to the store.

#1 – Striped Pillow with zippered close + old throw pillow

Make 4th of July pillows from t-shirts and old stuffed animal filling from THRIVE

I grabbed two stained polo shirts, pieced together wide stripes for the front  and added a solid (red) piece for the back. Stained fabric? No biggie. Use the back side … no one cares or will notice. I added some top stitching for extra awesome points along the stripes, a zipper at the bottom and slid in an old throw pillow to finish. Done and done.

#2 – Blue Star pillow with button closure + fiberfill stuffing

Make 4th of July pillows from t-shirts and old stuffed animal filling from THRIVE

I ironed Heat’n’bond ultra to the back of some scraps and then cut stars on my Silhouette machine (hand cutting works great, too). Shapes were ironed on and top stitched for again—extra awesome points. Because I’m lazy I loved the wide hem on the bottom of the shirt, I used that look to finish the pillow. Fronts and backs were pinned together right sides OUT and then stitched completely shut.  How’d I get the stuffing in? Easy! I just flipped the pillow over (to the old front of the shirt) and inserted the stuffing through the three buttons that ran down from the neckline. (Yup, I totally left them attached to save time.) Once the pillow was stuffed, I buttoned the shirt back together, flipped it over and voila! Finished pillow with a sneaky closure.

#3 – Camo U.S.A. pillow + old stuffed animal fluff

Make 4th of July pillows from t-shirts and old stuffed animal filling from THRIVE

Oops, I did it again. I pulled a few ratty stuffed animals out of the ‘toss’ pile and pulled out all the stuffing to add to this pillow.  So sick of still having Easter plush around the house. Those clearance isle Easter Bunnies that are falling apart need to go bye-bye. I cut the letters on my Silhouette CAMEO, but again, scissors work great, too. The side seems were already in place from the shirt and the top/bottom edges were machine stitched closed in two seconds flat. I left a small opening along the bottom to stuff the pillow and whip stitched it closed.

So there you go – 4th of July flair no matter what you have on hand!

Now go grab those fabric scraps. Slip cover an old throw pillow or two. Use the buttons on a t-shirt for a quick closure. Put the stuffing in those unused stuffed animals to work.

Bet you come up with something flat-out-free and fabulous!

Make 4th of July pillows from t-shirts and old stuffed animal filling from THRIVE

Faux Sleeves-001


Holy easy project, Batman.

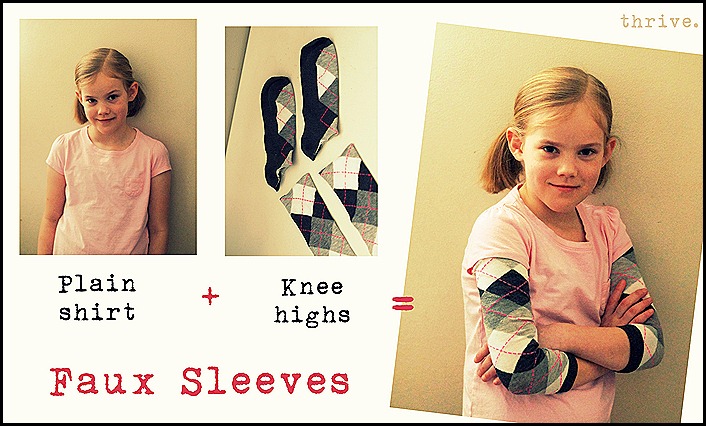
This was such a fun no-brainer—a trifecta, really, of circumstances that yielded kid #3 something like 50 new shirt combos:

#1 – it’s dang cold outside

#2 – baby girl has lots of these in her closetMake faux sleeves from baby legs or knee highs - choosetothrive.blogspot.com

#3 – I’ve got a bunch of these left over from past projects:

Make faux sleeves from baby legs or knee highs - choosetothrive.blogspot.com

Women’s knee highs, Target; Leg warmers, Pick Your Plum

Voila!

Faux-Layered Awesomeness in two seconds flat.

This shirt can be worn plain. And sometimes plain is fine.

Make faux sleeves from baby legs or knee highs - choosetothrive.blogspot.com

But sometimes plain gets the boot with a funky 3/4 ruffle or striped, full-length sleeve.

Faux Sleeves from Thrive

Just slip socks or leg warmers on all the way up to the shoulder and you’re set.

You can attach your new sleeves with a zig zag stitch/serger  to make them permanent or just wear them opera glove style depending on your fashion fancy. Go for a more polished look by wearing the faux sleeves with the finished edge showing or keep it super casual with the raw edge exposed.

Make faux sleeves from baby legs or knee highs - choosetothrive.blogspot.com

Here’s another example:

most days this is just a plain black shirt.

Make faux sleeves from baby legs or knee highs - choosetothrive.blogspot.com

But add some faux sleeves and you’ve got a holiday wardrobe in seconds.

See?

Make faux sleeves from baby legs or knee highs - choosetothrive.blogspot.com

Make faux sleeves from baby legs or knee highs - choosetothrive.blogspot.com

Make faux sleeves from baby legs or knee highs - choosetothrive.blogspot.com

So …

Go hack up some socks or drag out those old leg warmers

and stay warm (and cute) this winter!

Make faux sleeves from baby legs or knee highs - choosetothrive.blogspot.com

Make Hats & Mittens from old sweaters - choosetothrive.blogspot.com

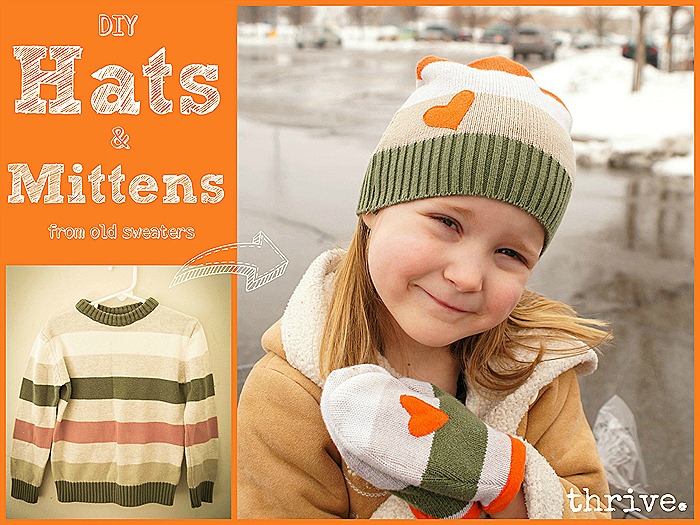
Remember this little sweater that became a cardigan?Make mittens & hats out of old sweaters - choosetothrive.blogspot.com

Well it’s too small for kid #6 and has a few stains here and there which makes passing it down to younger kids a no-go.

Time to trash that striped number, right?

Wait! Don’t toss that!


With a little Edward Scissorhands love, that sweater or cardigan can yield mittens and hats —even with those pesky stains.

(Good thing, too, since winter in Utah this year has been a little like living on the ice planet Hoth. Add to that six kids who keep jumping head-first into snow drifts and I’m having a hard time keeping enough dry hats and mittens around.)

*Cue the back ups.*

Chop off the sleeves and nix any trim or zippers. Open plain sweaters up along a side seam.

sweaters to hats

Use a hat for your guide  and make sure you have enough material to cut twice the length of your hat + side seam allowance.

Make mittens & hats out of old sweaters - choosetothrive.blogspot.com

Cut the extra fabric away and fold in half with right sides together.

Cut around hat leaving room for a seam allowance.

Make mittens & hats out of old sweaters - choosetothrive.blogspot.com

Stitch around the top and serge or zig zag the raw edges.

Make mittens & hats from old sweaters - choosetothrive.blogspot.com

And those stains? Yeah, totally covered them with some scrap t-shirt fabric. Just stitched in place.

Make mittens & hats from old sweaters - choosetothrive.blogspot.com

I got one kids size hat out of this 5T sweater. Adult sizes would easily yield a hat from both the front and back pieces.

So don’t stop there!

What about those sleeves? Or any extra sweater material?

When I opened up the sleeves, I realized I had enough material for another hat.

SONY DSC

Trim up the arm and scrap pieces to even rectangles.  Measure from the border and trim pieces 1/2” longer than the height of your finished hat.

Make mittens & hats out of old sweaters - choosetothrive.blogspot.com

Fold each piece in half and round the raw edge at the top to match the curve of your hat piece …

Make mittens & hats from old sweaters - choosetothrive.blogspot.com

… so that it looks like this.

SONY DSC

Then just pin and stitch together. Serge or zig zag edges.

Make Mittens and hats from old sweaters.16

Done and done, right?

Nope.

There’s still left over material from the tops of the sleeves. What about that?

SONY DSC

Mittens!

SONY DSC

That same t-shirt scrap kicked out two more little hearts while the folded sleeve edge made some quick and easy seam binding for the cuffs.

Make mittens & hats from old sweaters - choosetothrive.blogspot.com

So …

Trash-bound sweater?

Make mittens & hats from old sweaters - choosetothrive.blogspot.com

It’s What-Not-To-Toss This Weekend!
Oh … and one more thing.

On behalf of all Utah residents:

Make mittens out of old sweaters - choosetothrive.blogspot.com

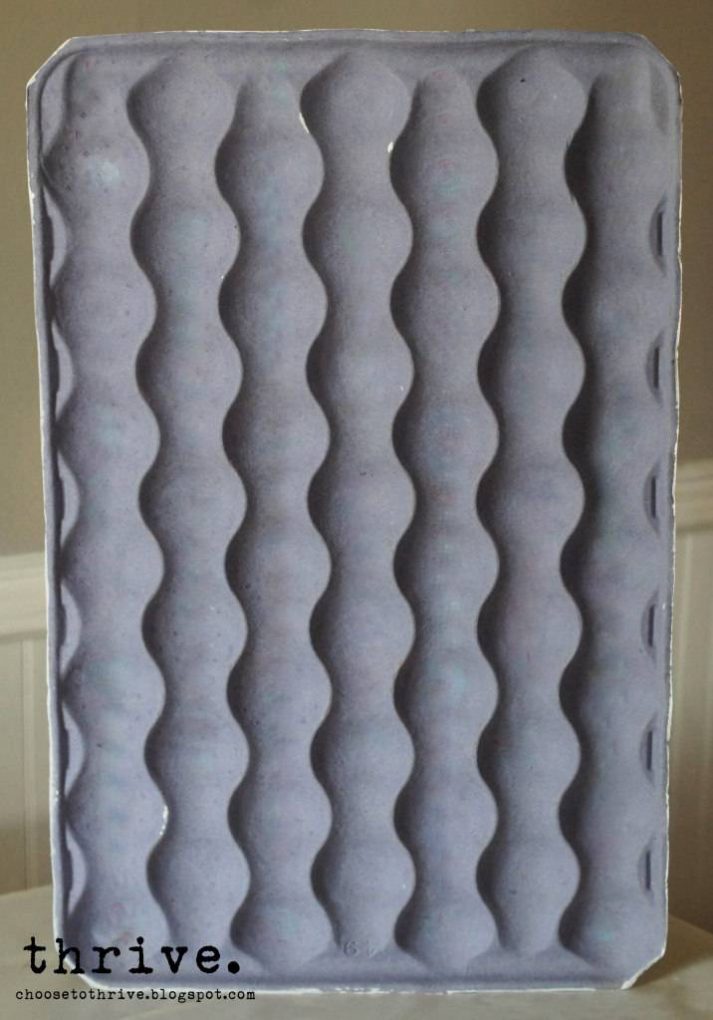
(Originally shared as a guest post on Ucreate Kids here.) Holy cow … Halloween is just around the corner. That means me and my six kiddos have been on the look out for everyday items to repurpose for Halloween. This weekend we hit the mother load … in the produce isle. Turns out with some paint and glue, you can turn an apple tray into something frightfully fun.

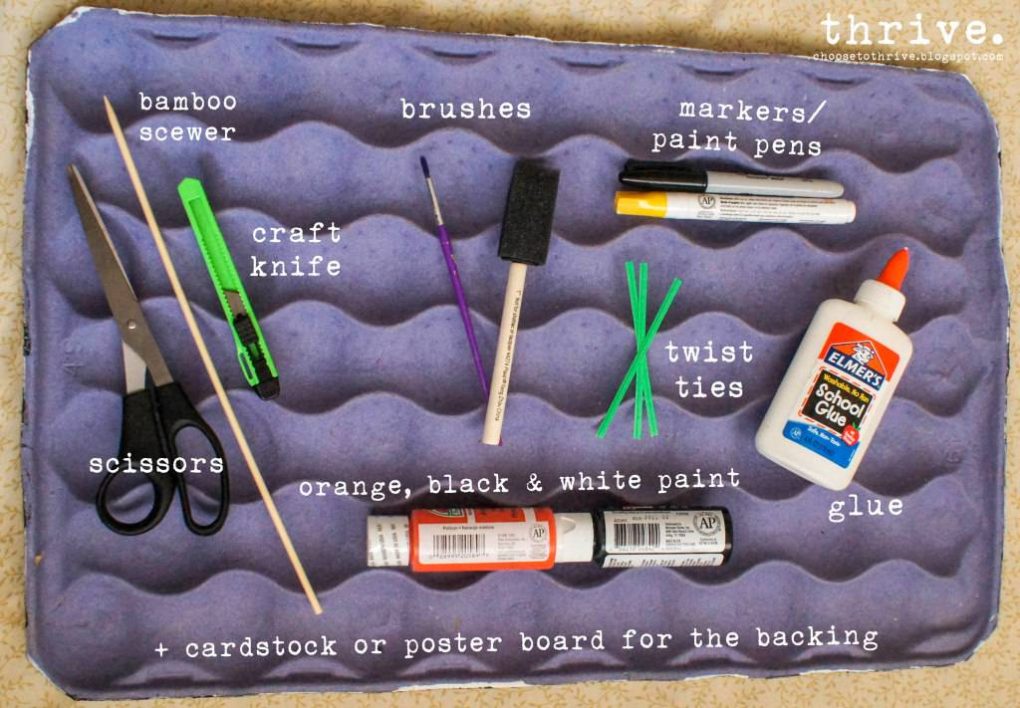
Frightfully fun for flat-out free! You can use this at home or in a classroom as just a calendar or filled with little treats to open each day. Want to make one with your kids, too? For this project you’ll need a cardboard apple tray from the produce section +

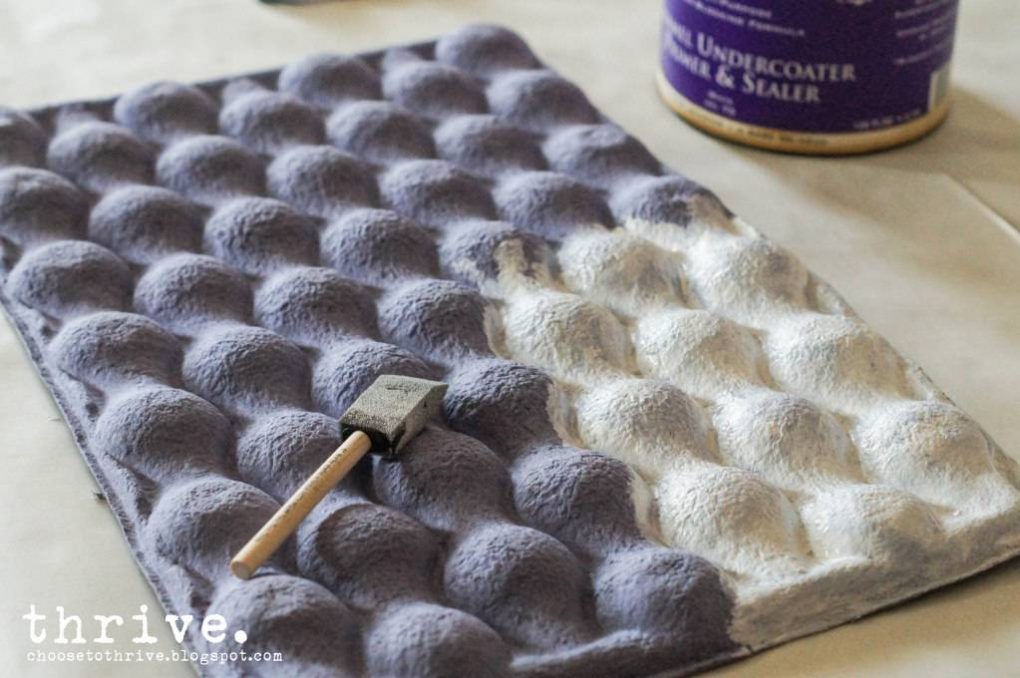
(Produce trays are usually free from your grocery store – just ask the produce guy to grab you one.) As always I hope you’ll rock-what-ya-got and adapt this project to whatever supplies you have on hand so that you can make this for free or dirt cheap. Prime the tray with a cheapy sponge brush and whatever white paint you have on hand: craft paint, house paint, plain ‘ol primer. Just skip the spray paint – the paper tray is crazy porous and sucks it all up.

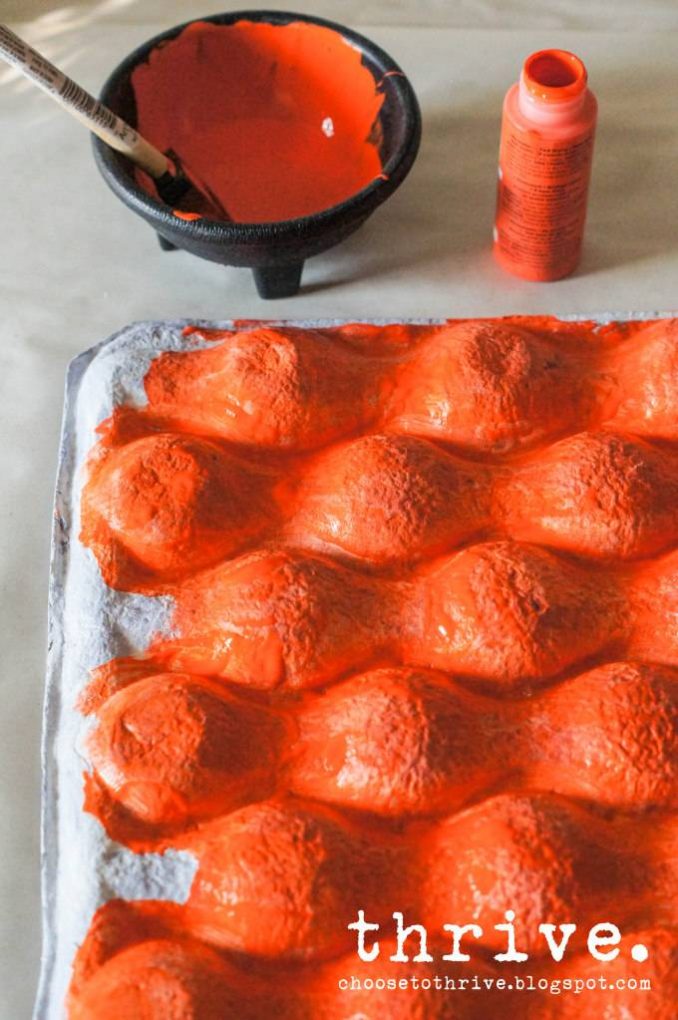
Add a coat of orange paint …

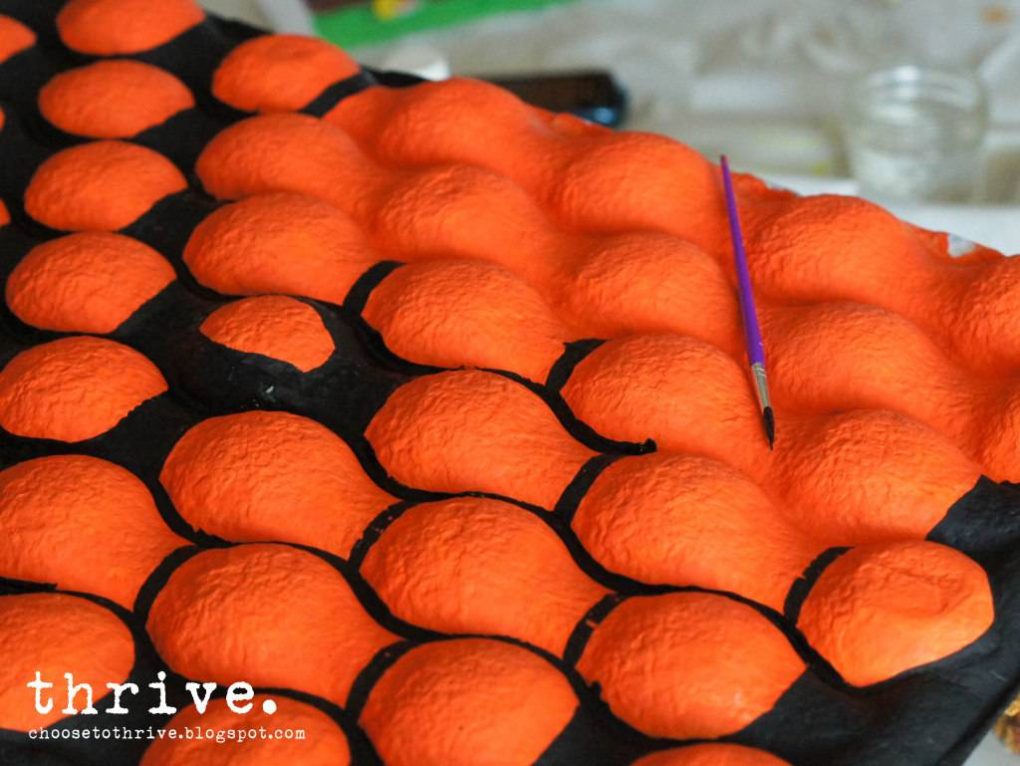
… and then carefully paint the edges and creases black with a small paint brush.

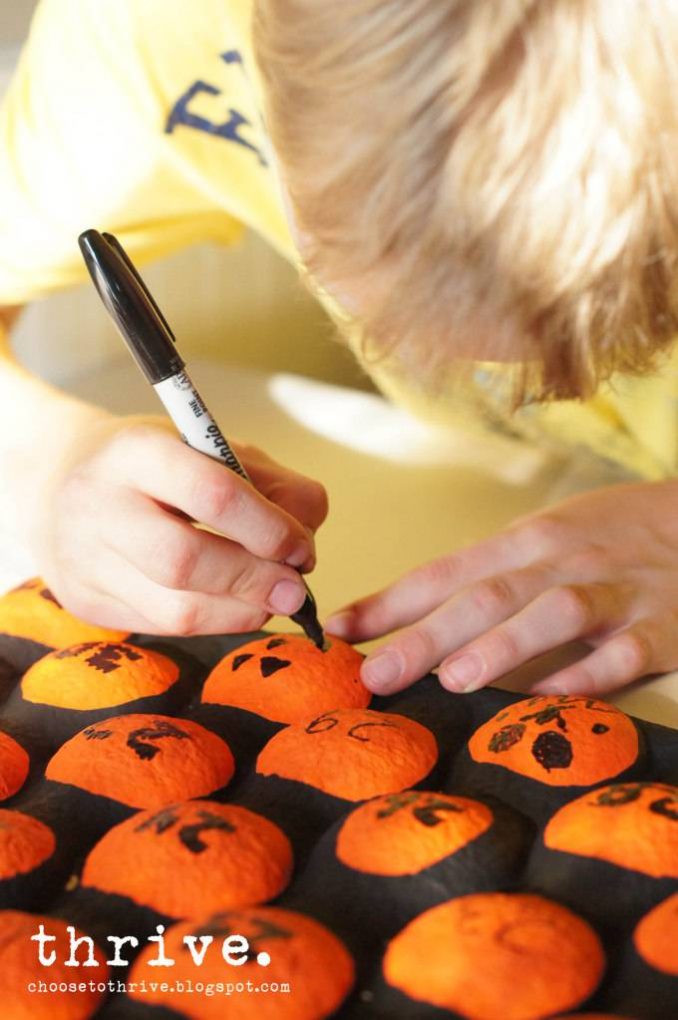
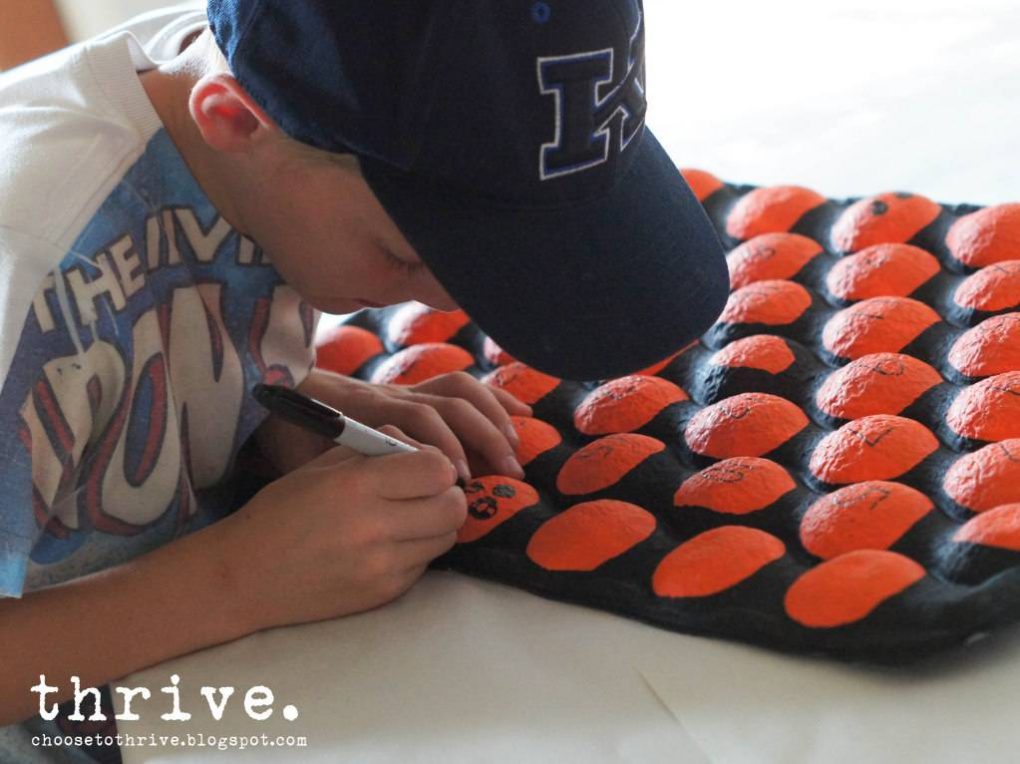
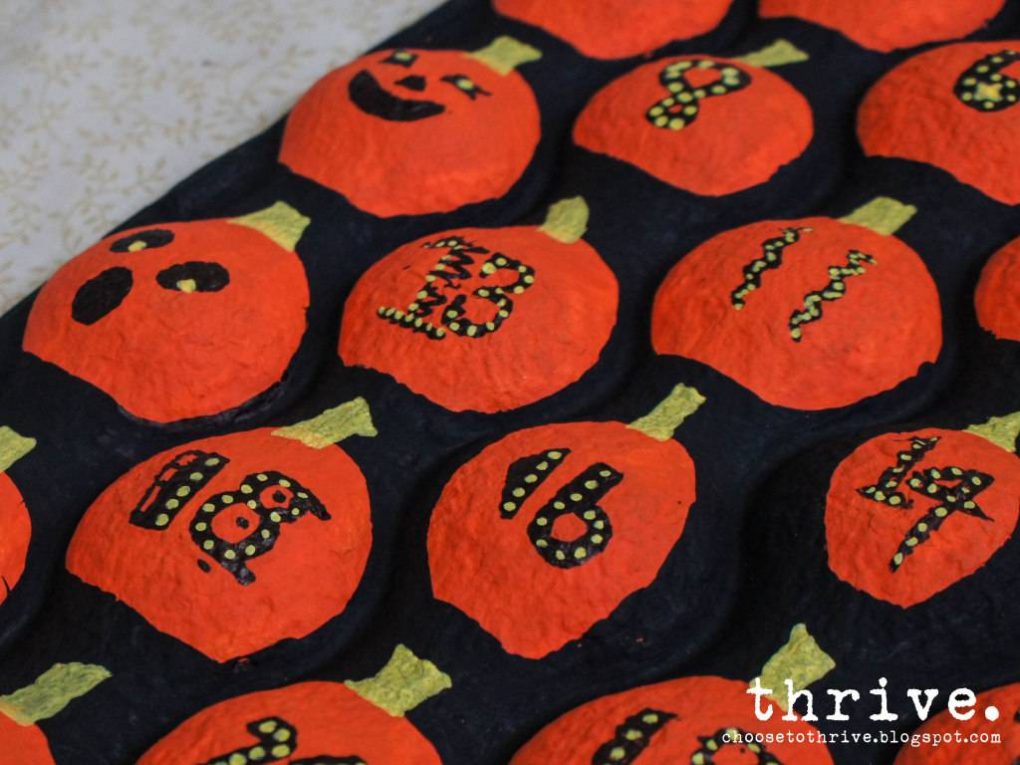
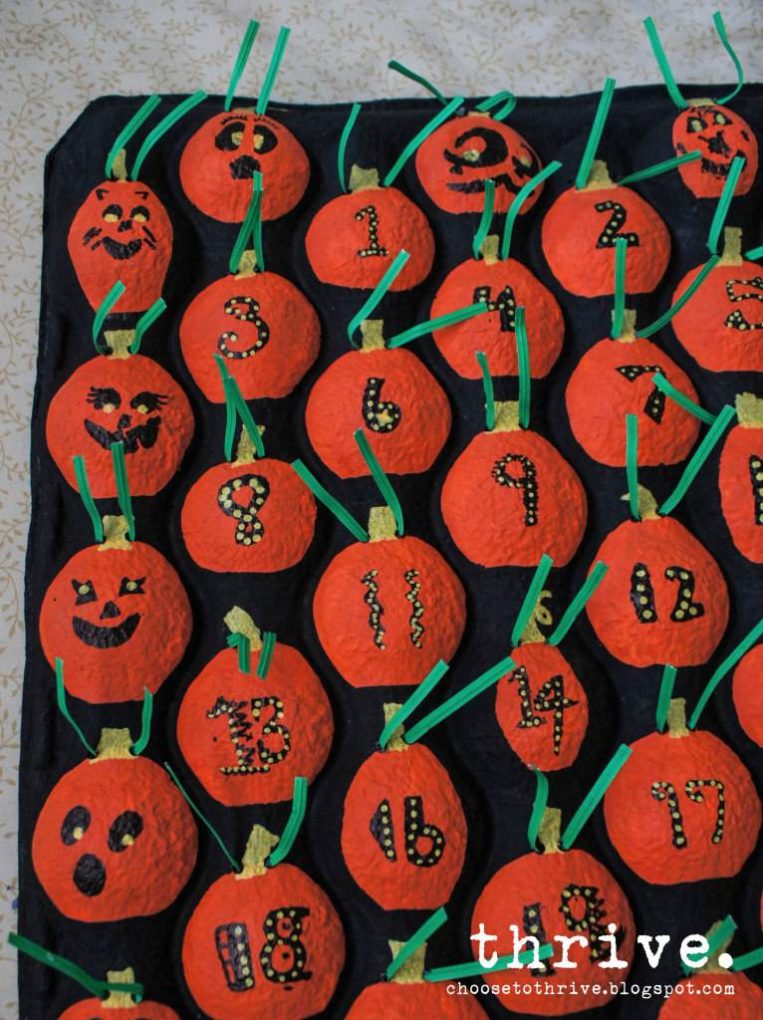
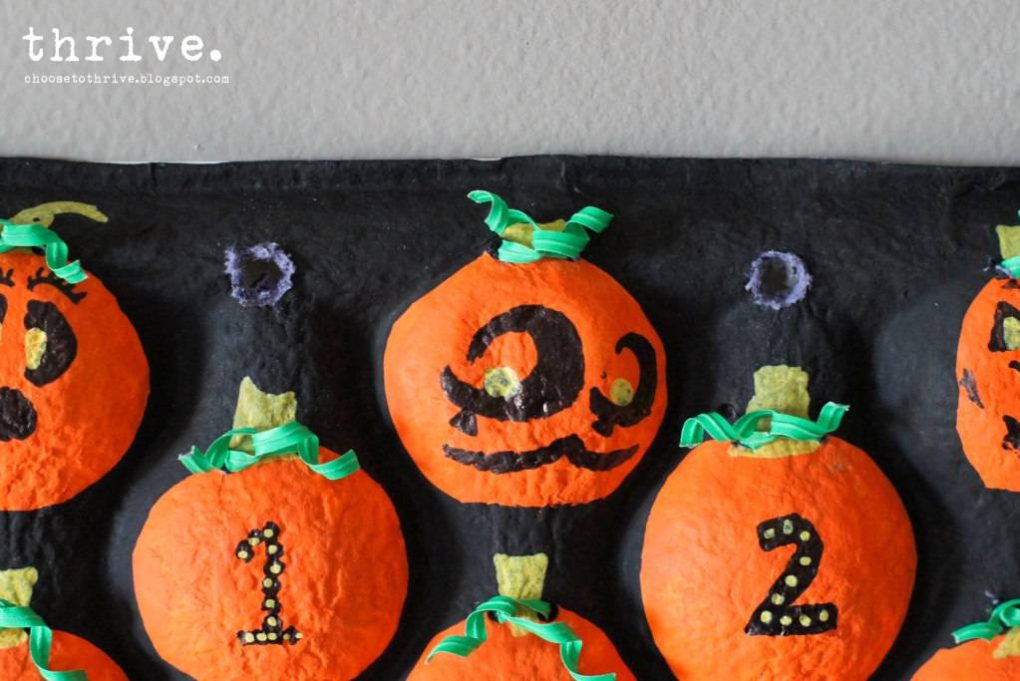
Add stems and calendar numbers with a Sharpie and paint marker.

(I marked the numbers first and let my kids do the decorating.)

The remaining pumpkins on the sides can be dressed up with jack-o-lantern faces or left plain.

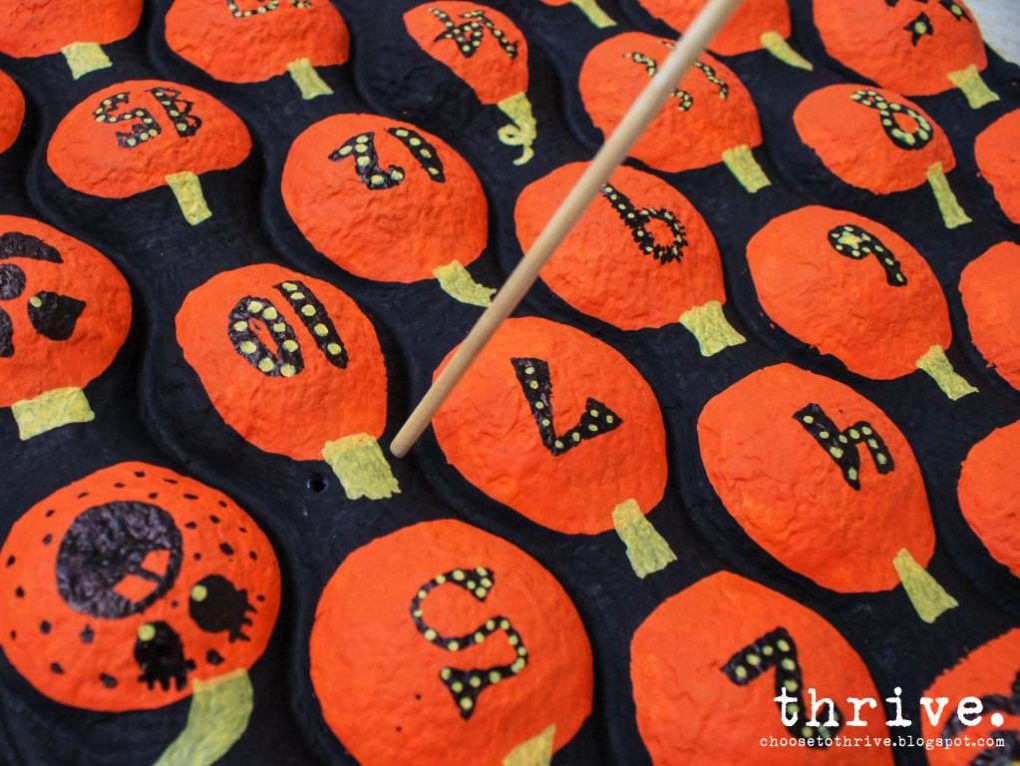
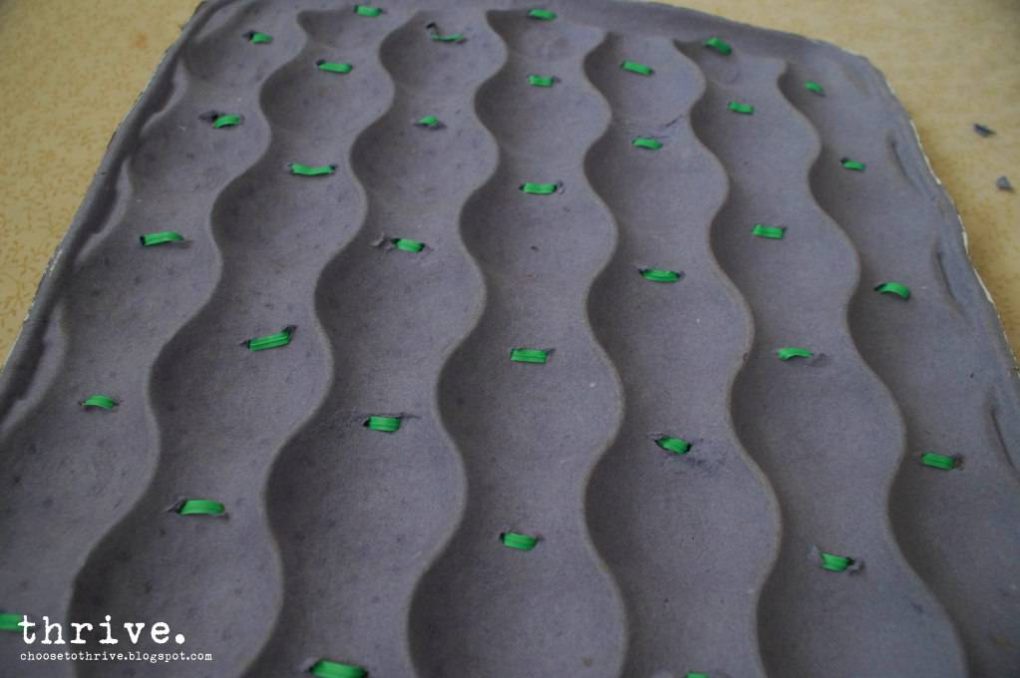
Have a grown up punch two small holes on each side of the stems with a bamboo skewer …

… and thread twisty ties from behind …

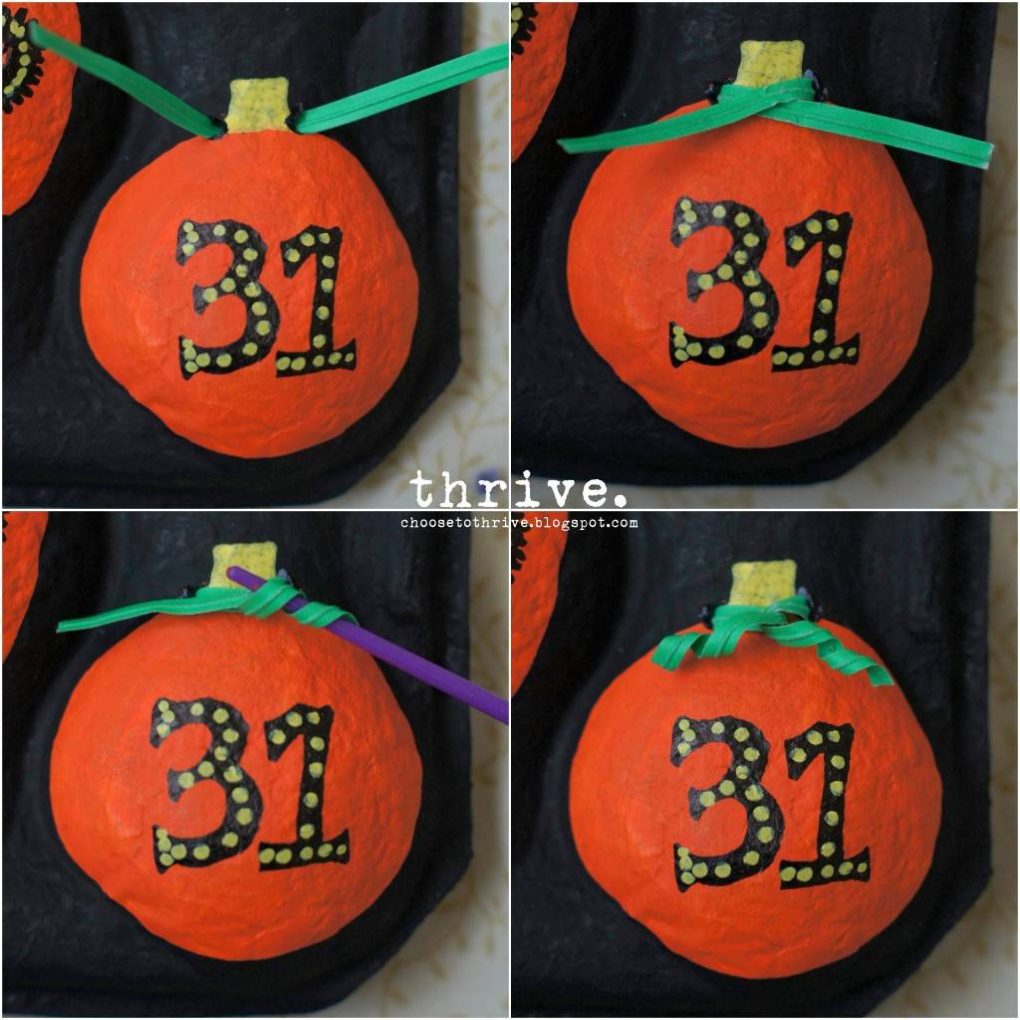
… so that your calendar looks a little something like this:

Tame those unruly twisty ties with a bamboo skewer or paint brush.

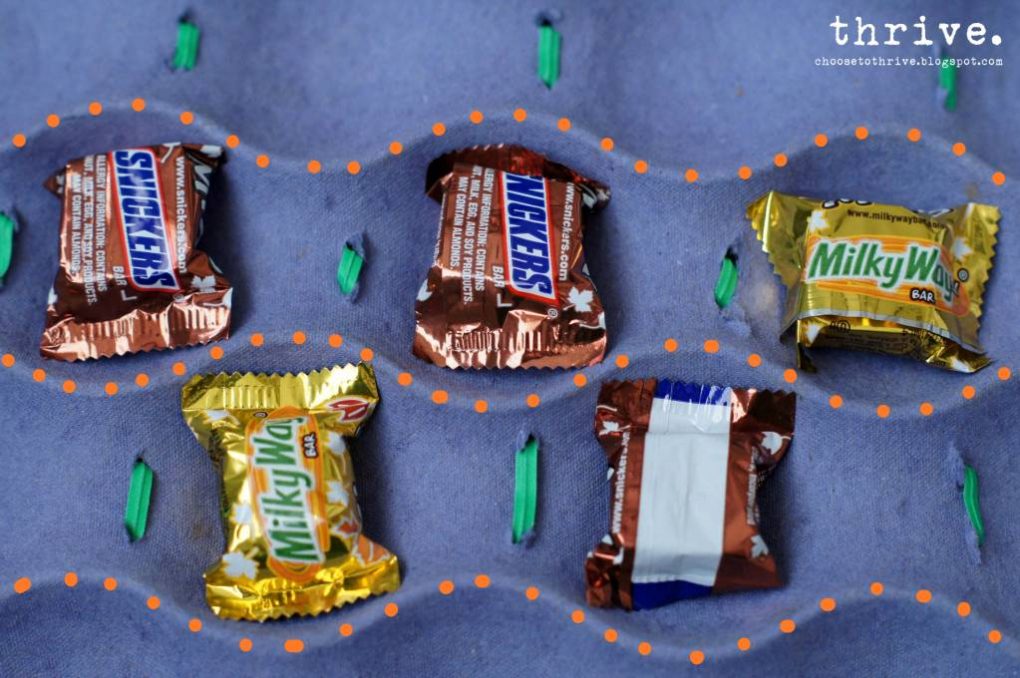
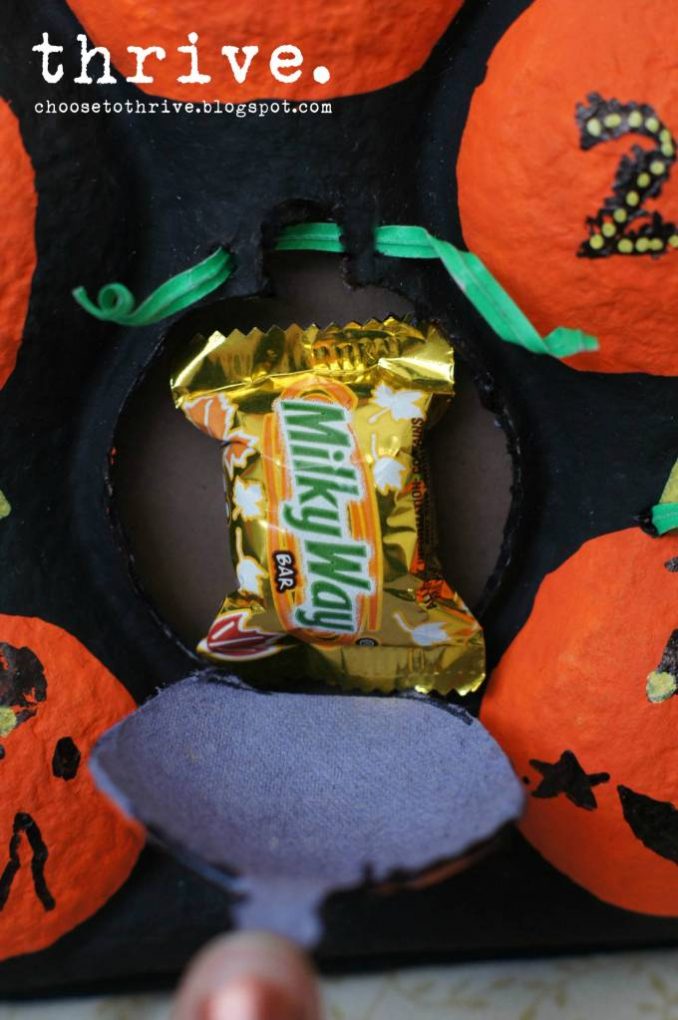
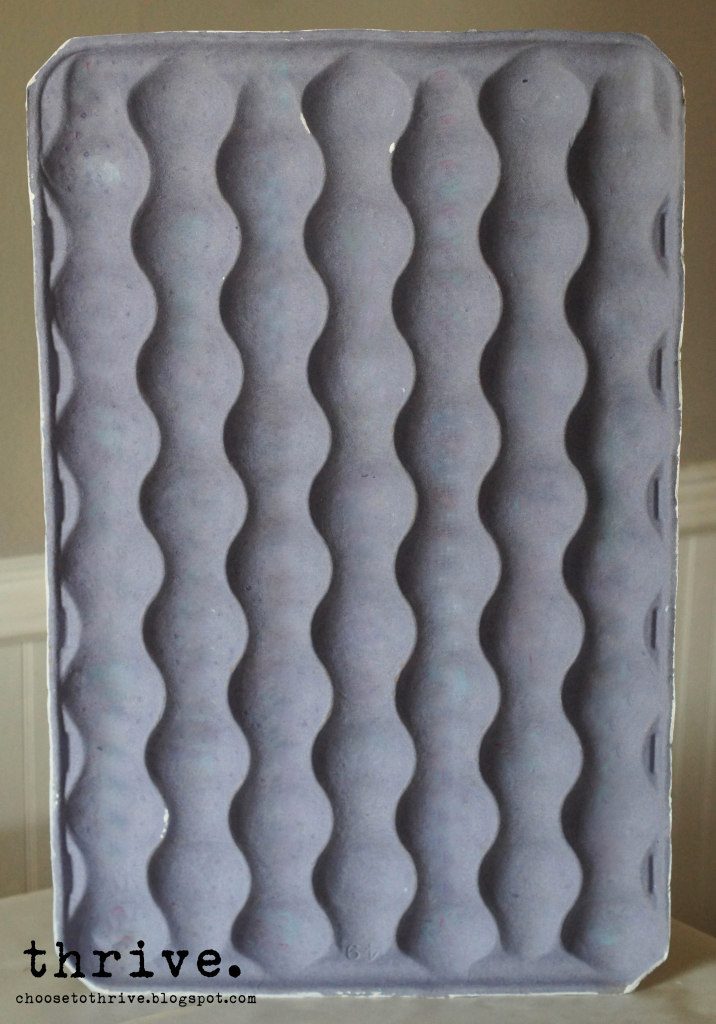
Time to add the treats! Flip the tray over and add some small treats, toys or stickers to each pumpkin back. Then carefully add school glue along the ridges (orange dots below) and sides of the tray …

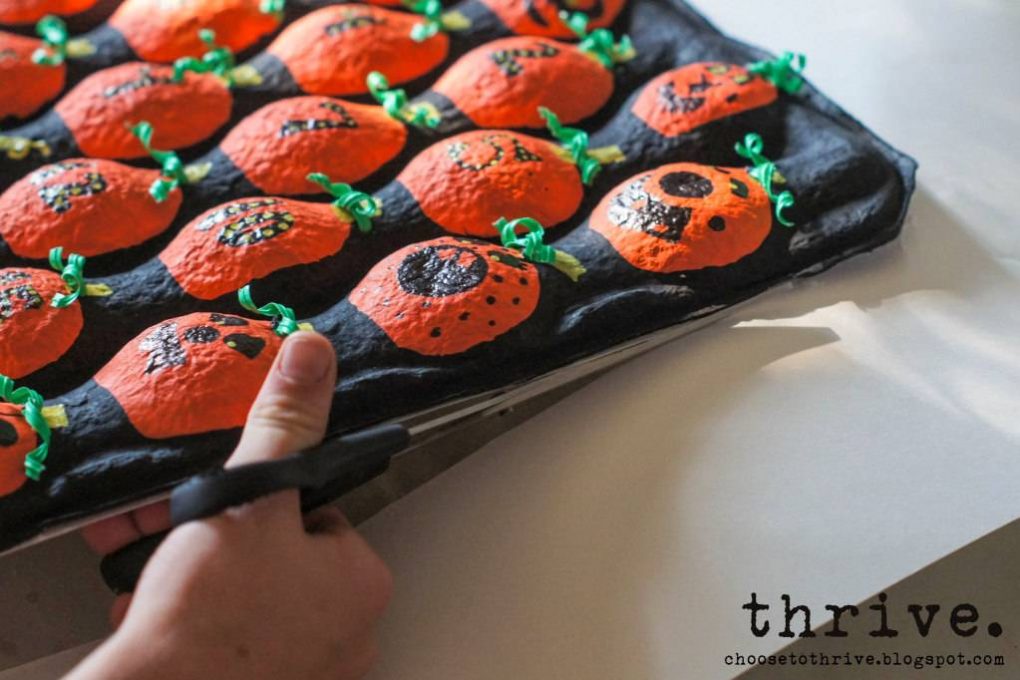
… lay the backing poster board or cardstock over top and gently weight the whole thing down for an hour. When dry, gently turn tray back over and cut away any extra paper or poster board from the back.

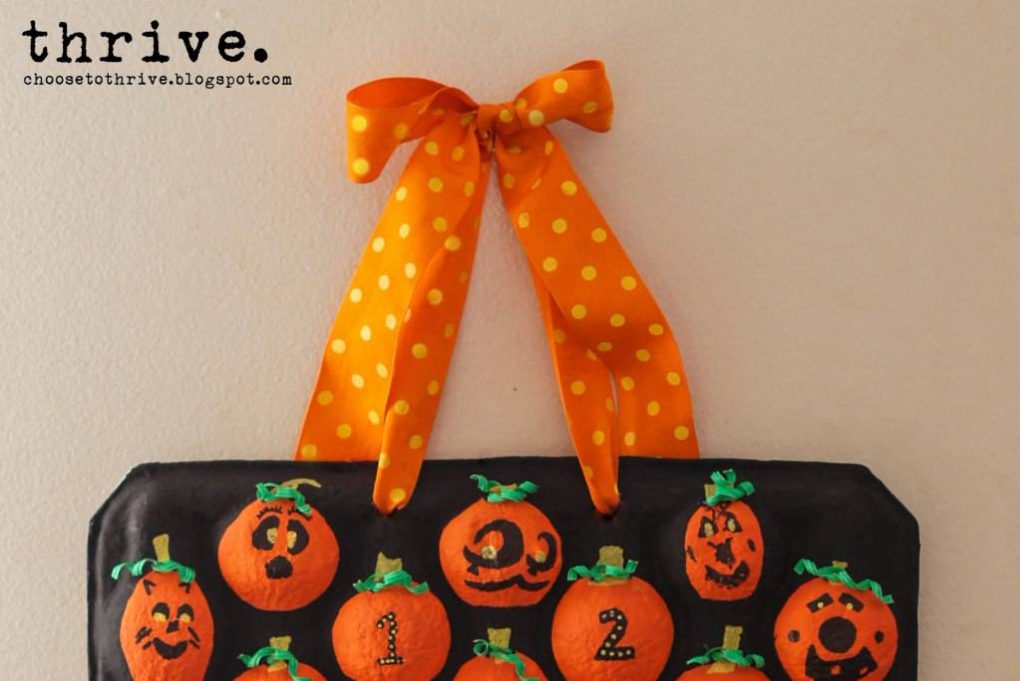
Punch two holes in the top with scissors and thread through some snazzy ribbon.

Yup, snazzy.

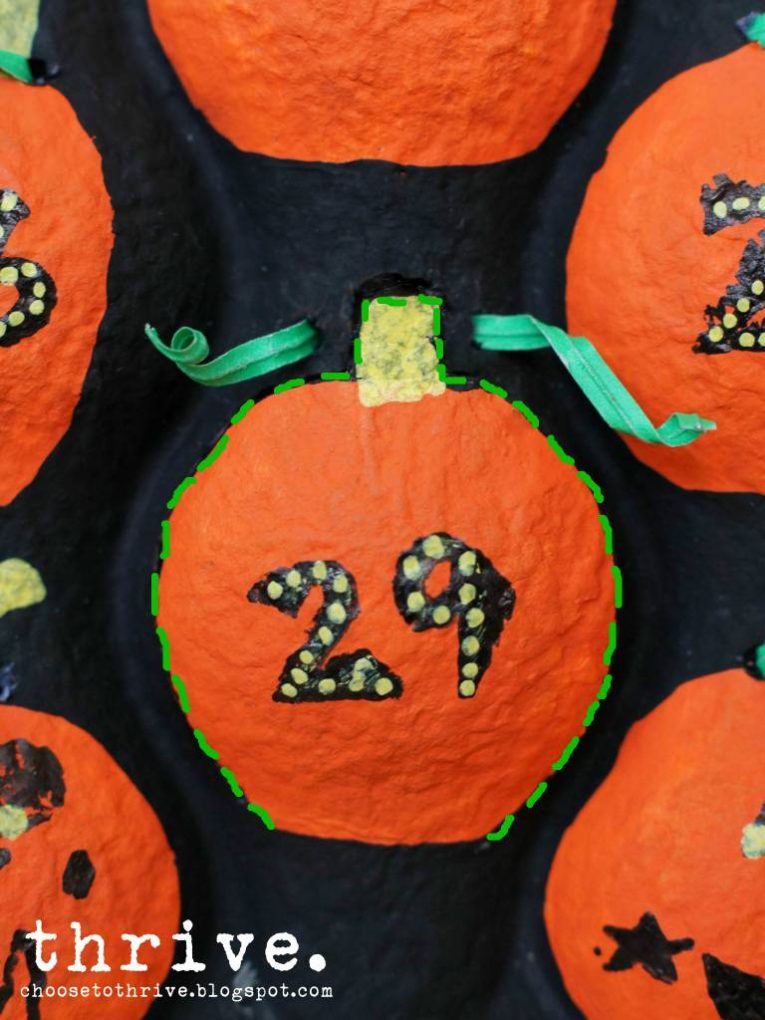
Your calendar is ready to be displayed! Starting on October 1st, you can “carve” each day’s pumpkin and enjoy a little treat one of two ways: 1) turn the calendar over and carefully remove the candy from behind — OR — 2) gently untie the twisty tie, carefully cut around the pumpkin and stem …

… open each pumpkin like a little clam shell and enjoy your yummy treats.

Retwist to close the pumpkin and you’re ready for the next day. (Of course you could cut all 31 pumpkin shapes ahead of time and just retie the little twisty ties, but I chose not to. I don’t trust my little ones to stay out of the treats. 🙂 So there you go – two ways to “carve” a Halloween Advent!   And if you’re looking for more fun projects like the ones below, check out Thrive’s holiday tutorial page.

How many of you have wound up with one of those freakishly large calculators or remotes from the dollar store? Kid #2 proudly came home with the calculator version and it lasted all of a day before it cracked in half on the first drop.

100_7929

Time to toss that bad boy, huh?

Wait! Don’t toss that!

The outer shell may be toast, but the buttons can live on.


100_7931

A few left-over peel-n-stick magnet strips and scissors later …

DSC03470

… we wound up with some fun, practically free frig magnets.

DSC03474

And man have the kids had fun doing math problems on the frig this week.

DSC03505

And while petty and childish, I’ll admit that it was fun last night to skunk my snarky nine-year-old who declared that he “pretty much knows everything about math, mom” with a simple problem using negative numbers.

DSC03500

Um, Kid … –25 + 54 does not equal 1, nor is the square root of anything involved.

And so that no one’s left out, anyone without a freakishly large calculator could just buy a new one for $1 and cannibalize it to make their own, cheap magnets. A small screw driver is all you need to open it up to get the numbers out, unless of course you’d like to just drop kick it a few times instead.

Anywho …

Overly Large Gimmicky Calculator or Remote?

April 2012 BLOG1

It’s What Not To Toss This Weekend!

And hey, what else could you do with calculator, remote or even keyboard keys?

Make push pins? Embellish cards? Art? Let me know.

How many of you are stocking up on Halloween candy?

20e59d96ecd7f4b5_halloween_candy_aisle_1_2_1

It’s the usual drill of buying bags, emptying treats into a bowl by the front door and then recycling the empty bags, right?

candy11

Wait! Don’t Toss That!

100_4921

Those bags got the candy to your house just fine – why not put them to use to round up candy from the neighbors, too?

Just cut handles from whatever you’ve got on hand — fabric scraps, ribbon, VHS tape, curling ribbon, whatever – and tape them in place with duct or packing tape.

100_4910

And that’s it. No buying treat bags. No bulky plastic pumpkins to store.

100_4905

And when this little princess is done with her treats, everything gets recycled or reused—no waste, no extra cost.

100_4896

Love that.

Candy bags?

October 2011 BLOG3-5

 It’s What Not To Toss this weekend!

Linking up to:

Skip To My LouCraft-O-ManiacC.R.A.F.T. *  Stories of AtoZ, Tip JunkieSugar BeeToday’s Creative BlogSassy SitesMy Uncommon Slice of Suburbia * Someday CraftsLil LunaWe Are That FamilyBlue Cricket DesignsThe Thrifty Home, * House of Hepworths, *Tidy MomWhipperberryKojo DesignsChic On A Shoestring, Momma’s Kinda Crafty, *Tatertots & Jello, Be Different Act NormalFunky Junk Interiors * I Heart NaptimeUnder The Table and Dreaming,