Tag

painting

Browsing

(Originally shared as a guest post on Ucreate Kids here.) Holy cow … Halloween is just around the corner. That means me and my six kiddos have been on the look out for everyday items to repurpose for Halloween. This weekend we hit the mother load … in the produce isle. Turns out with some paint and glue, you can turn an apple tray into something frightfully fun.

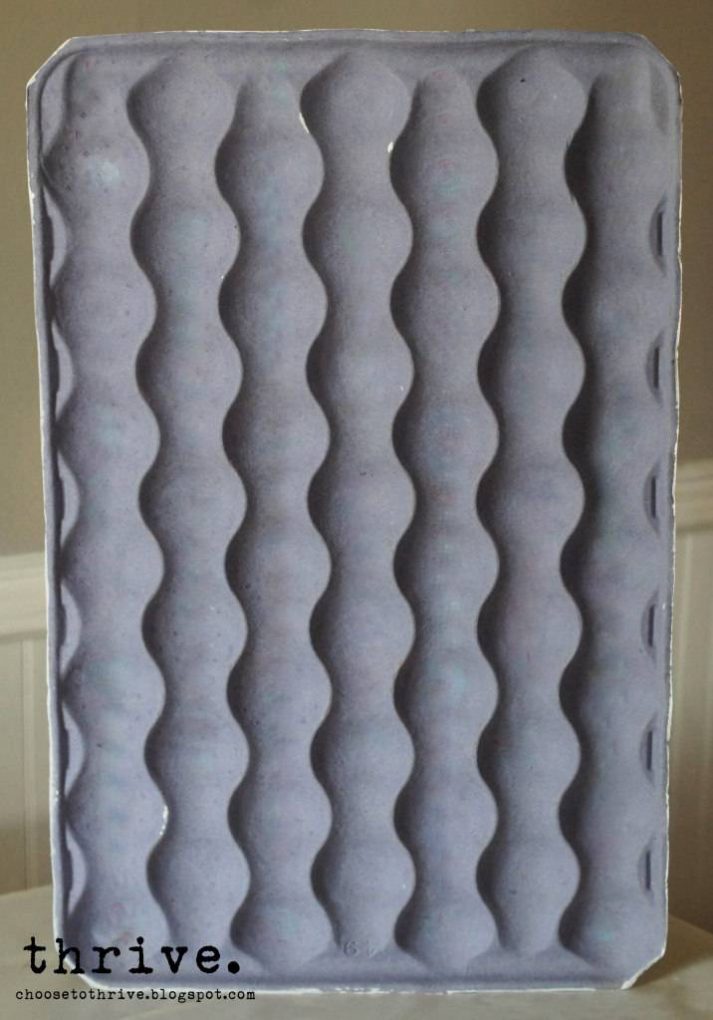
Frightfully fun for flat-out free! You can use this at home or in a classroom as just a calendar or filled with little treats to open each day. Want to make one with your kids, too? For this project you’ll need a cardboard apple tray from the produce section +

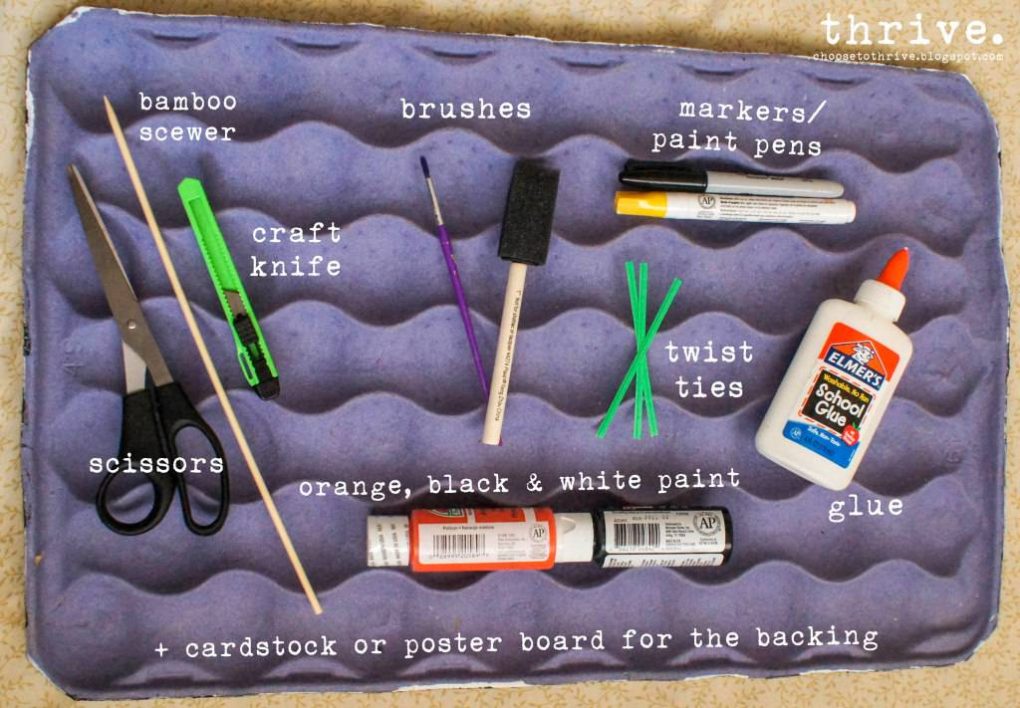
(Produce trays are usually free from your grocery store – just ask the produce guy to grab you one.) As always I hope you’ll rock-what-ya-got and adapt this project to whatever supplies you have on hand so that you can make this for free or dirt cheap. Prime the tray with a cheapy sponge brush and whatever white paint you have on hand: craft paint, house paint, plain ‘ol primer. Just skip the spray paint – the paper tray is crazy porous and sucks it all up.

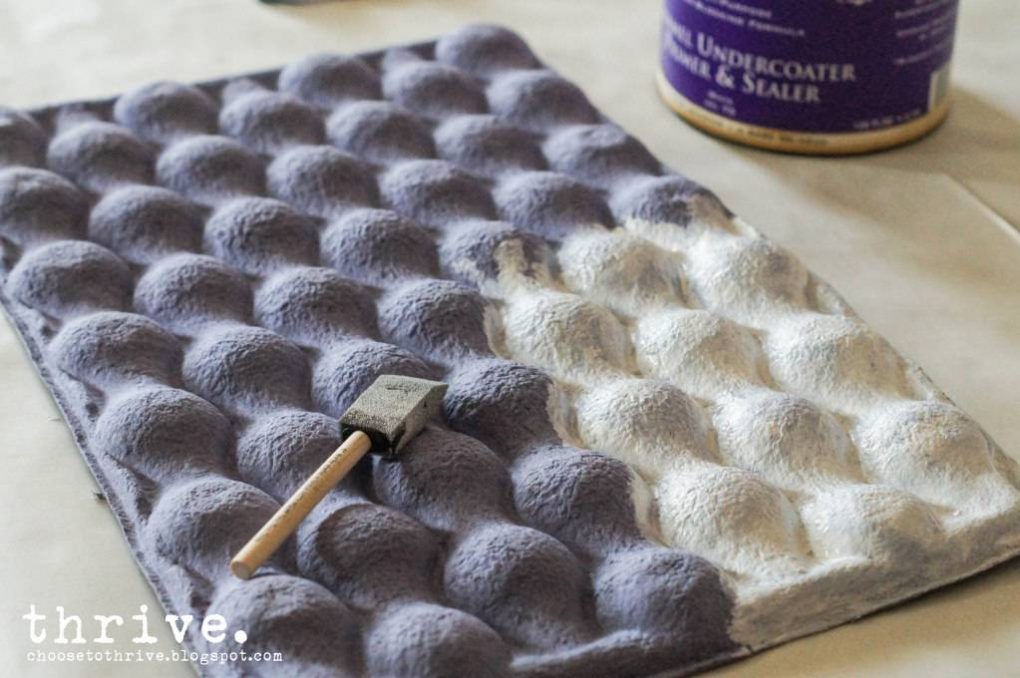
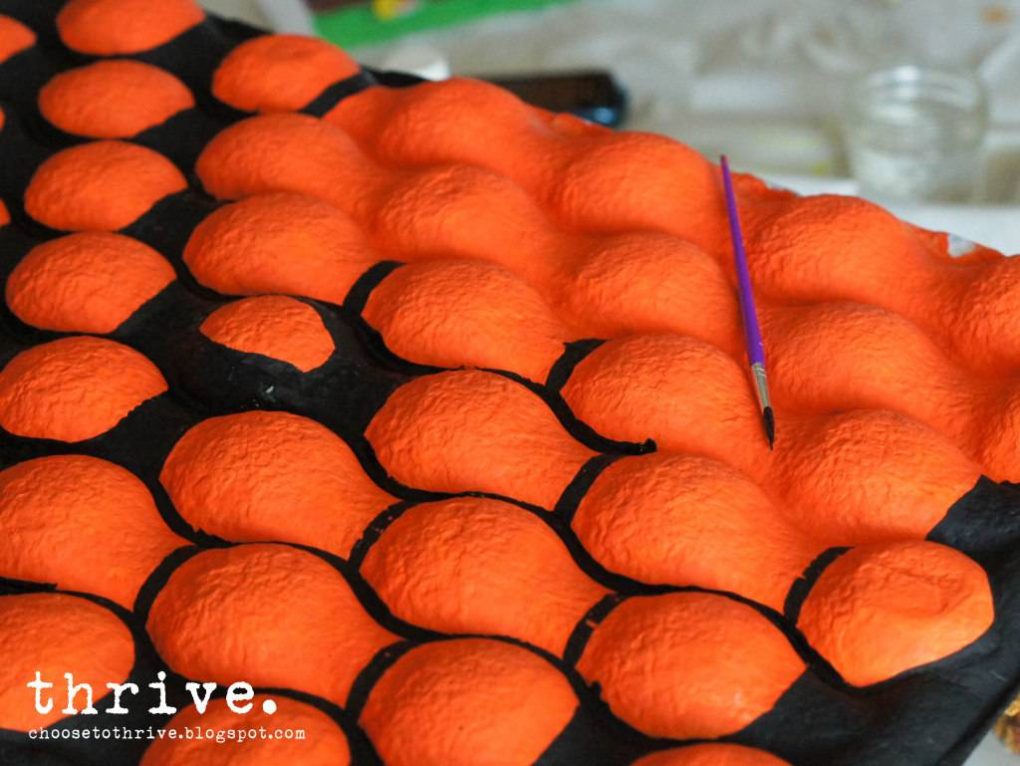
Add a coat of orange paint …

… and then carefully paint the edges and creases black with a small paint brush.

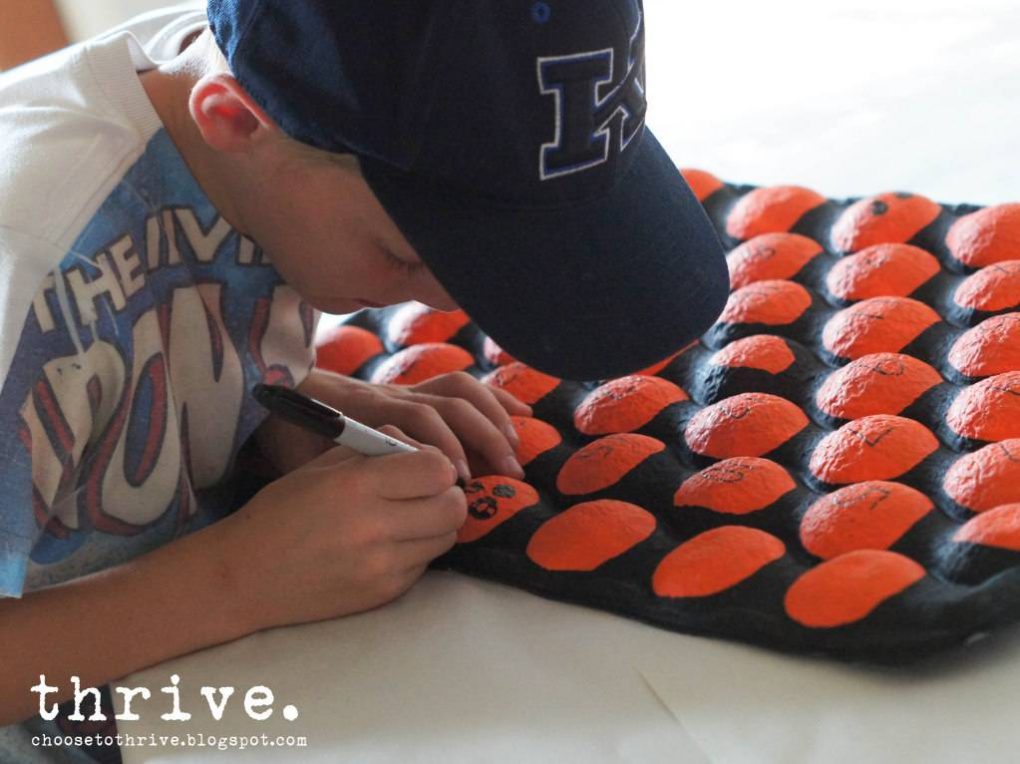
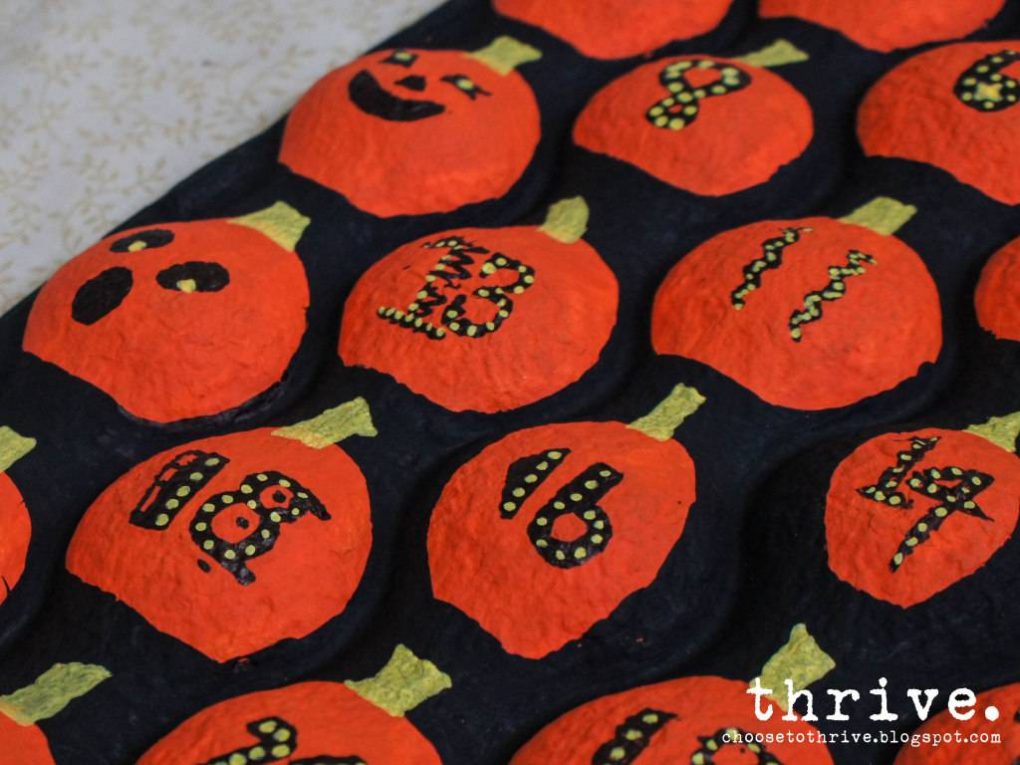
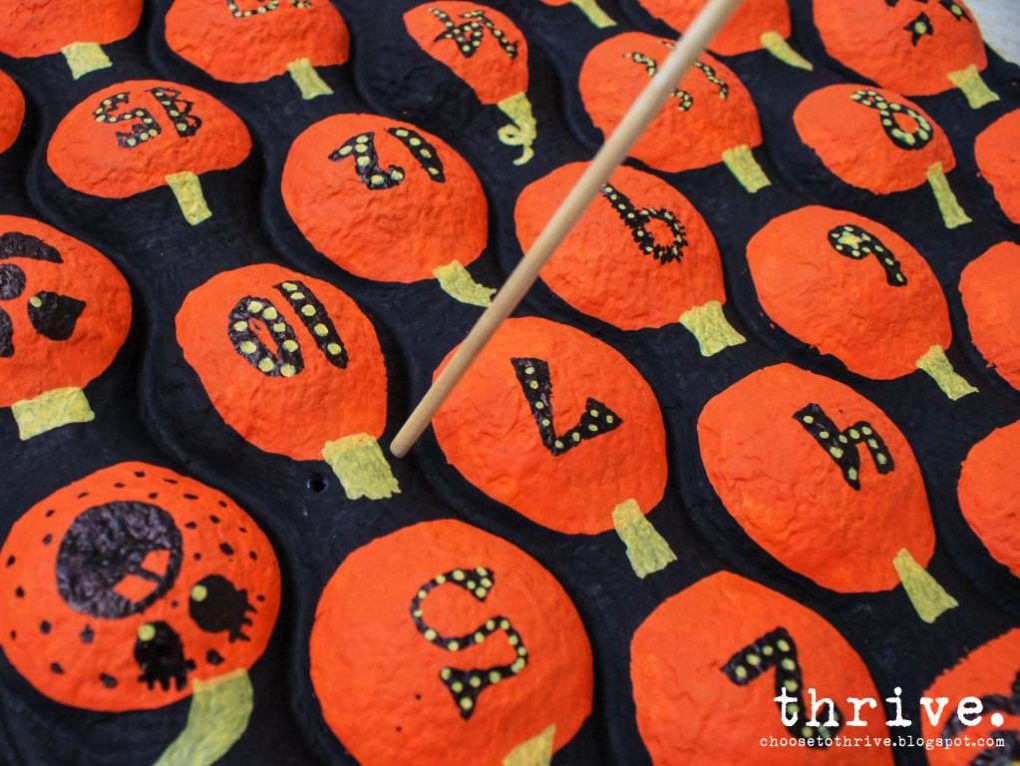
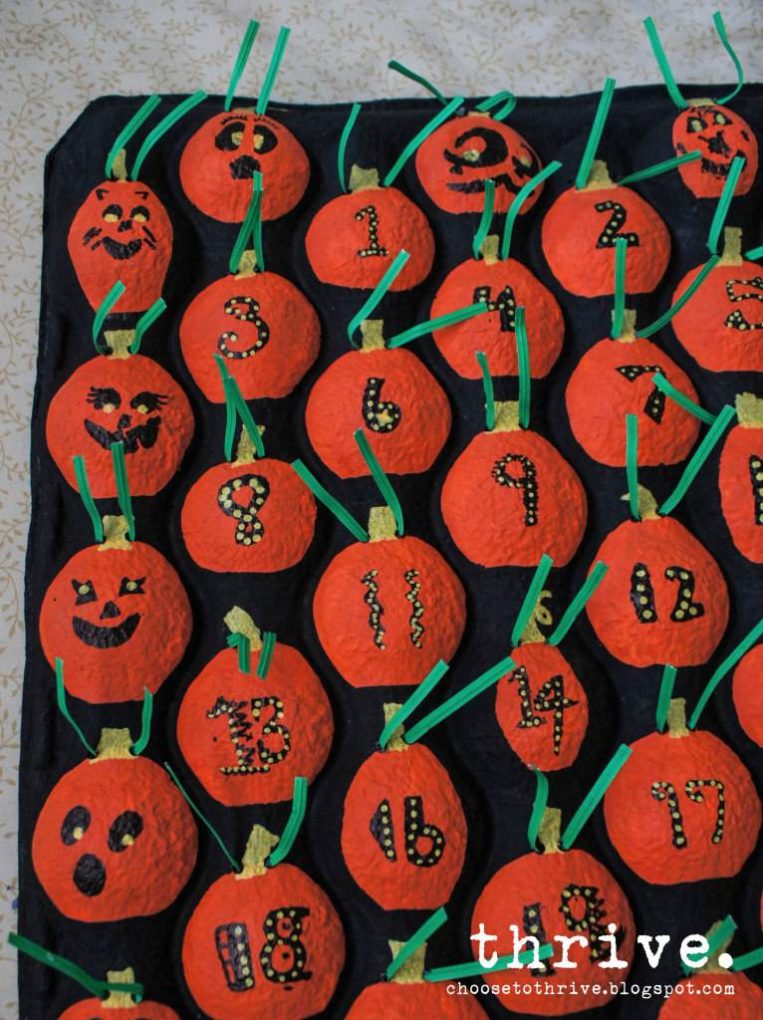
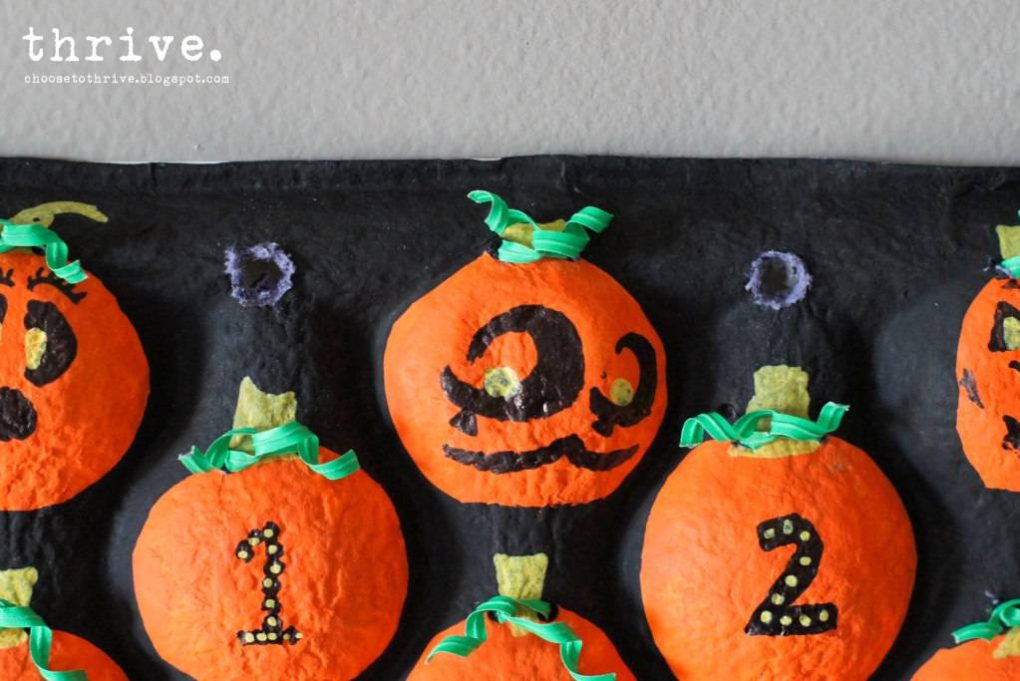
Add stems and calendar numbers with a Sharpie and paint marker.

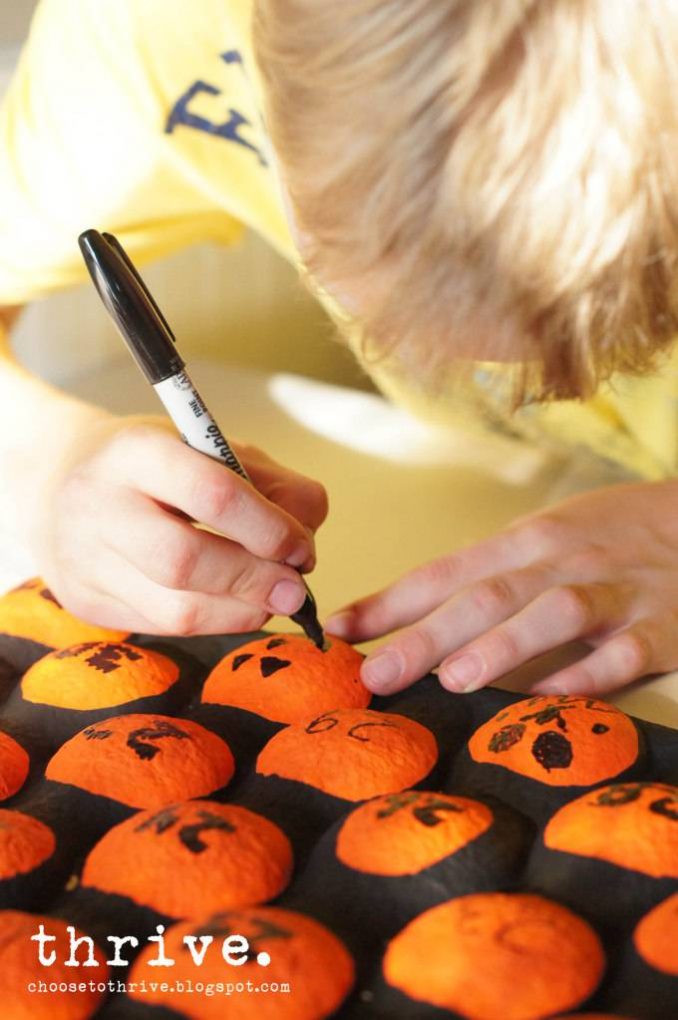
(I marked the numbers first and let my kids do the decorating.)

The remaining pumpkins on the sides can be dressed up with jack-o-lantern faces or left plain.

Have a grown up punch two small holes on each side of the stems with a bamboo skewer …

… and thread twisty ties from behind …

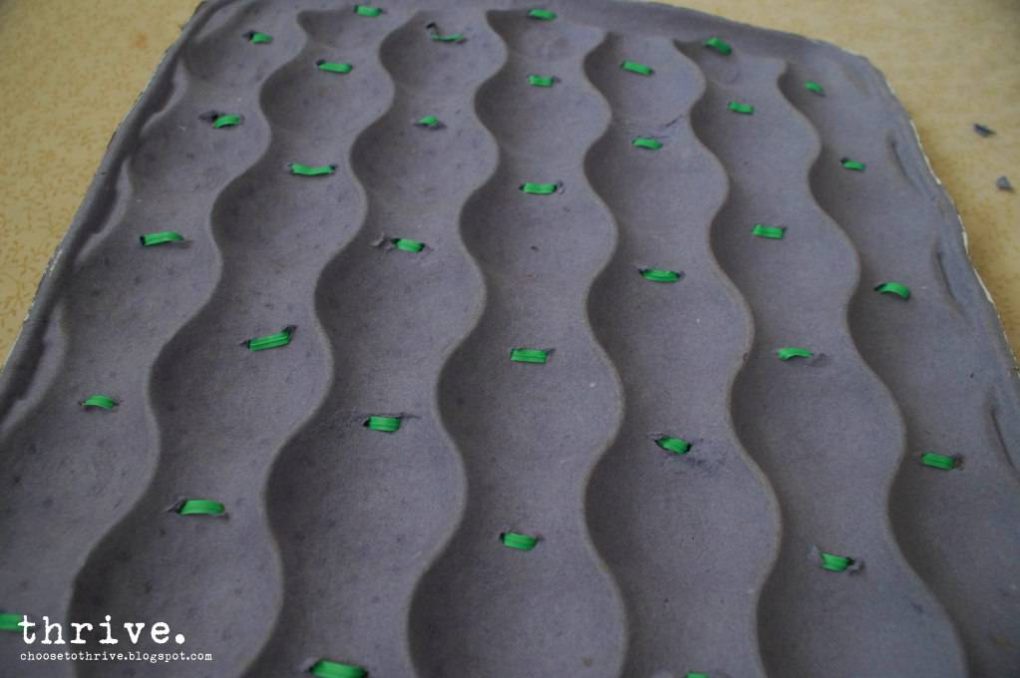
… so that your calendar looks a little something like this:

Tame those unruly twisty ties with a bamboo skewer or paint brush.

Time to add the treats! Flip the tray over and add some small treats, toys or stickers to each pumpkin back. Then carefully add school glue along the ridges (orange dots below) and sides of the tray …

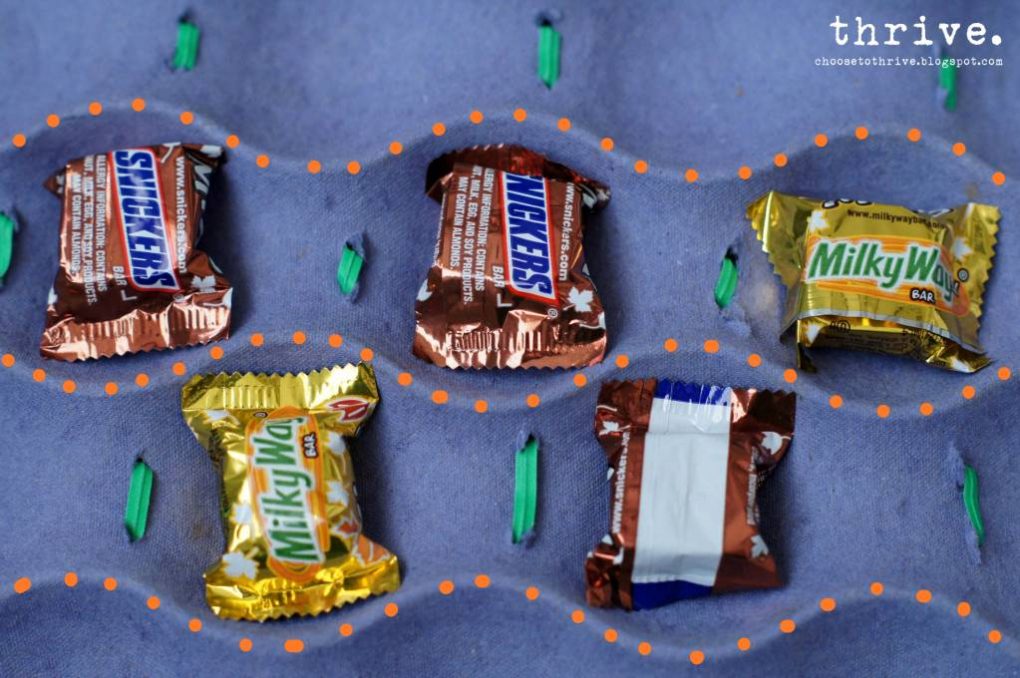
… lay the backing poster board or cardstock over top and gently weight the whole thing down for an hour. When dry, gently turn tray back over and cut away any extra paper or poster board from the back.

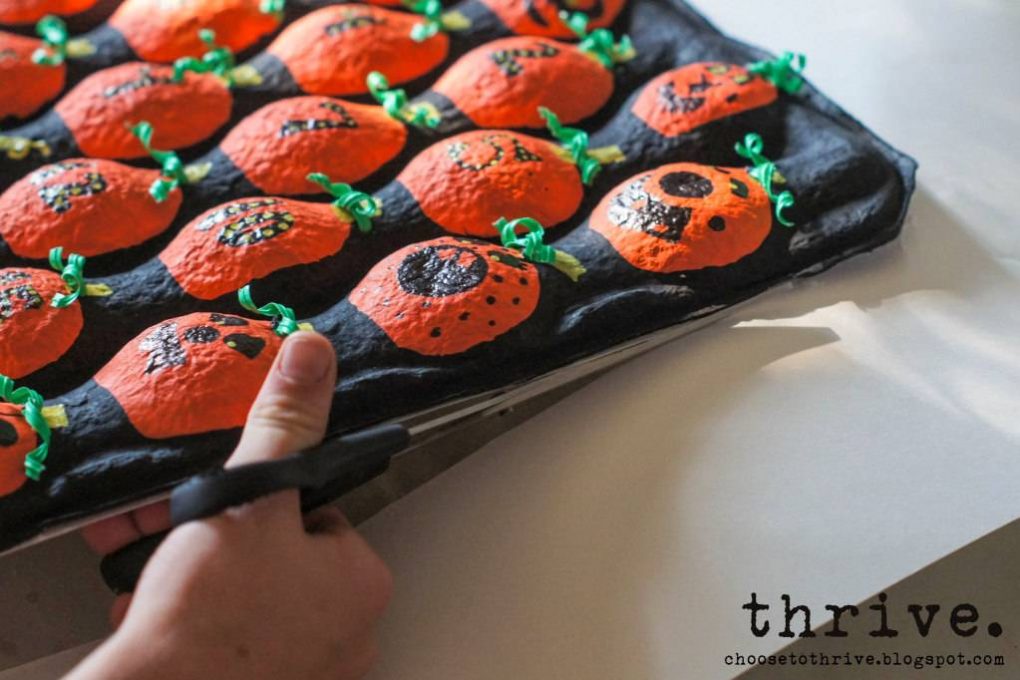
Punch two holes in the top with scissors and thread through some snazzy ribbon.

Yup, snazzy.

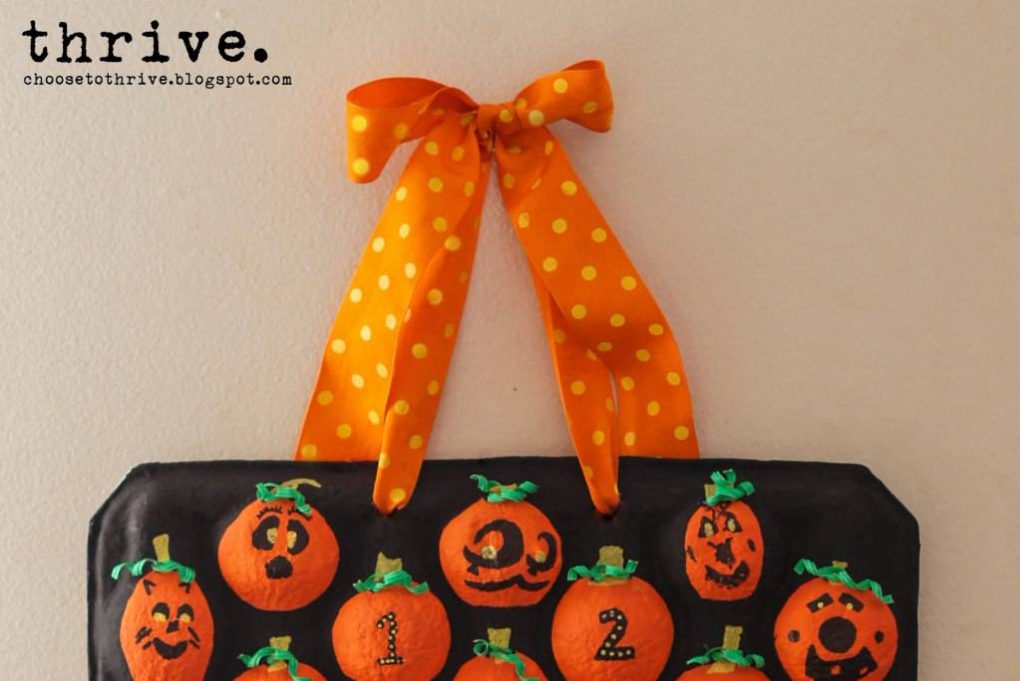
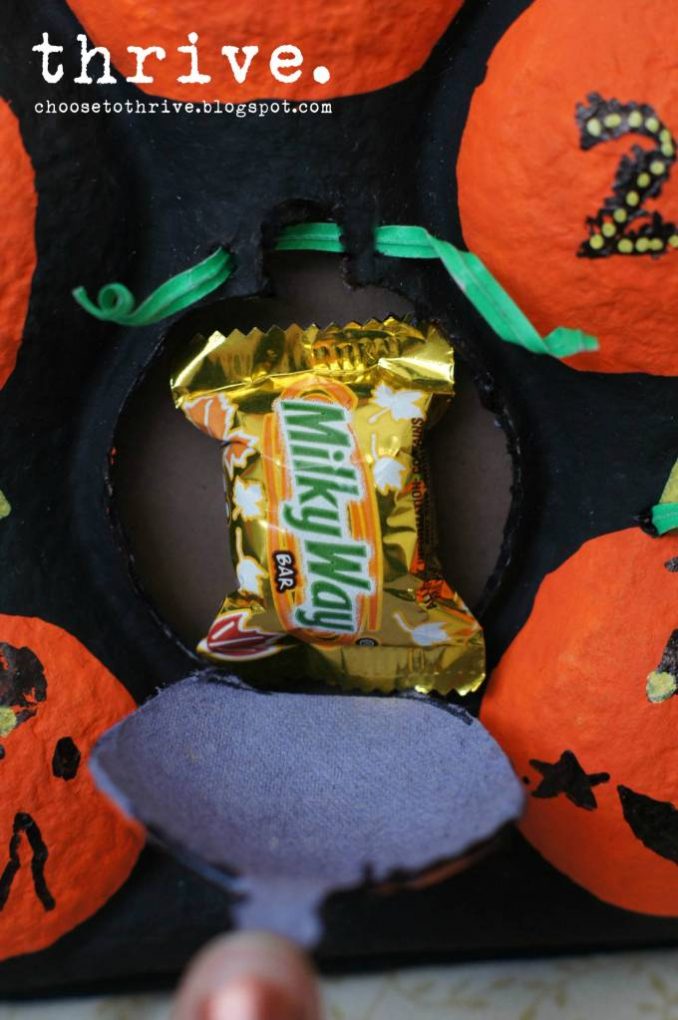
Your calendar is ready to be displayed! Starting on October 1st, you can “carve” each day’s pumpkin and enjoy a little treat one of two ways: 1) turn the calendar over and carefully remove the candy from behind — OR — 2) gently untie the twisty tie, carefully cut around the pumpkin and stem …

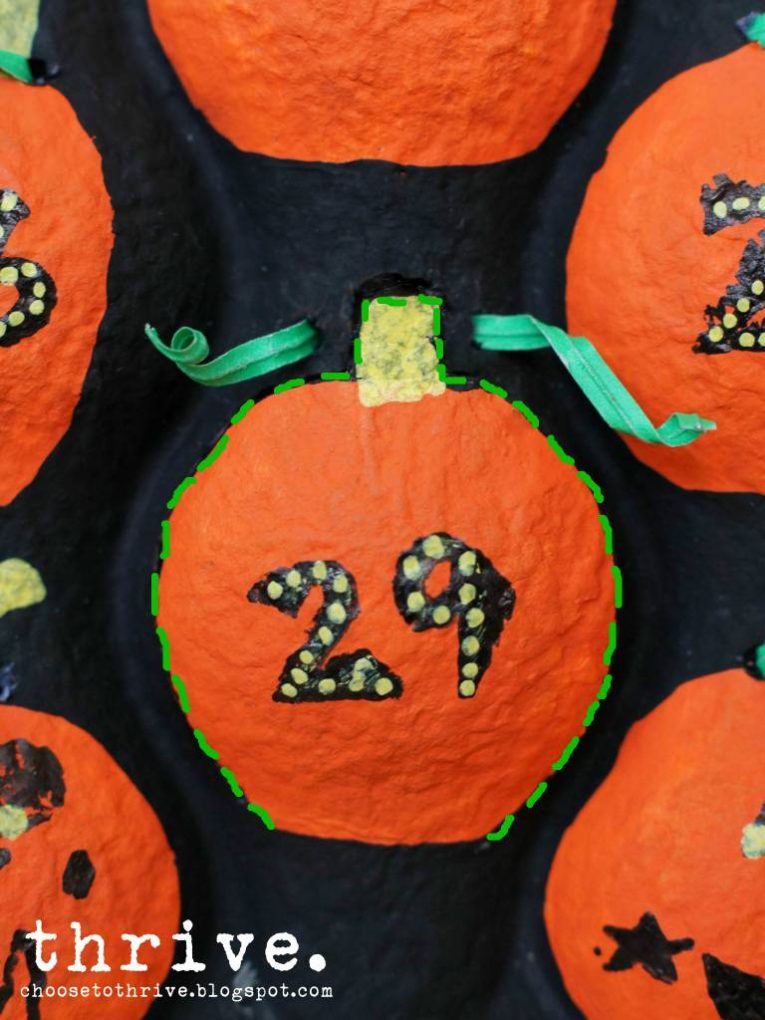
… open each pumpkin like a little clam shell and enjoy your yummy treats.

Retwist to close the pumpkin and you’re ready for the next day. (Of course you could cut all 31 pumpkin shapes ahead of time and just retie the little twisty ties, but I chose not to. I don’t trust my little ones to stay out of the treats. 🙂 So there you go – two ways to “carve” a Halloween Advent!   And if you’re looking for more fun projects like the ones below, check out Thrive’s holiday tutorial page.

fail

Thanks for your kind comments on my door painting fail – so glad I’m not the only one who’s screwed up a DIY project.

And I’ll give a quick disclaimer right now: painting your floors can look AWESOME and is a great solution for a cheap face lift until you can replace flooring outright.

However … however, if you rush this project, you’ll screw it up royally and probably wish you had taken help from a professional house painter. Guess which route I took?

Yeah.


After horribly trashing the floor around the door with not one, but two spray painting fiascos, I couldn’t take it anymore and wisely plunged into tackling the floor. I mean, come on … really? How long could you greet friends at the door with a floor that looked like that?

100_3744-1

But at the same time … finish one project, woman, and then move on.

The entry floor was covered with the same peel-n-stick vinyl tiles that we have in the kitchen.  The original linoleum was a dark, heavy 70’s brown, so the white vinyl was a big improvement. But just like the kitchen floor, these tiles were 10 years old and seriously showing their wear.  This is freshly scrubbed.

DSC03401

See? It never looks clean. And that was before several layers of spray paint over spray.

So after a quick wipe down, that floor got two coats of oil based primer.

100_8262

Seriously, oil based primer is the greatest stuff ever. I was giddy with how much better it all ready looked.  I let that dry for a couple days and then rolled on a coat of white semi-gloss paint (what I had on hand).

And then …yup,  you guessed it … I went stupid again.

Instead of letting that paint dry for 2-3 days minimum before taping over it, I waited a mere 18 24 hours until it felt dry and started taping away. Laying out the grid was easy …

100_8266

… I just followed the lines of the vinyl tiles.

100_8267

Then I rollered on a second coat of white semi-gloss paint over the entire floor to help seal the tape edges  so that the  next layer of brown paint wouldn’t seep under the tape.  Again, only waited a day and then charged ahead with the brown. I rolled on two coats using the same paint I used on the front door.  I waited a day, and then started carefully pulling up the tape. And at first, it looked wicked awesome.

DSC00162-1

But on the second square something really, really bad started to happen: the paint under the tape started coming up. Everywhere. In huge pieces.

DSC03829

Oh, snap.

I wanted to cry … really, really cry.

But I didn’t, because Mr. Thrive wasn’t thrilled about the huge door mess that had created the floor mess that was now a painted floor mess. And I was determined to save this project and actually finish a project for once. So I lightly sanded down the worst of the edges and and carefully started touching up the peeled off areas in each square. (Thankfully just the white semi-gloss lifted and not the primer underneath.) And while not perfect, I was relieved to see that with some patience, it was completely fixable.

Phew.

But … but … after finishing my touch ups, I left the paint tray on the stairs and went upstairs for a minute … and my three year old daughter saw the very full paint tray just sitting there and wanted to help momma with the painting … and she tried to pick it up to go down the stairs and paint … and dropped the heavy tray … and watched all of that white paint land on the carpeted stairs and splatter across the newly painted floor … and then probably panicked that momma would be mad and promptly ran back up the stairs, tracking big paint foot prints on all the steps that hadn’t been covered by the paint to start.

And anytime you have a 1/3 of a gallon land on your floor, you know there’s not a snowballs chance that it’s coming out.

DSC01146

That’s when I cried.

For a full five minutes I lost it and cried like a baby.

But then I took a deep breath … and hugged my baby girl and apologized to her for yelling and being mad when I was the one who left the paint out … and I put my big girl pants on and started to hustle.

Because it was two o’clock in the afternoon … and Mr. Thrive was going to be home at seven … and I didn’t want him to have to walk into that kind of mess … or stress over how on earth we’d pay not only for new flooring in the entryway, but also for the stairs.  So I scraped as much of the paint out of the carpet as I could … and wiped all the excess paint off the floor … and took a few quick, crappy pictures to blackmail my children with as my mind raced as to how on earth I was going to fix this mess. (Edited to add: yes, yes I was having flashbacks to this moment.)

DSC01142

Oh, and did I mention that we had company coming in from out a state in just two weeks?

The floor I knew could be repainted. Again.

But the stairs? The only thing I could think off was to rip the carpet off the bottom tread and hurry down to Lowe’s and see if  could match it. I knew I couldn’t get it installed before Mr. Thrive got home, but I was hoping that having the replacement stuff already ordered would soften the blow. So I grabbed a hammer and a pair of pliers and started yanking.

DSC01209

Holy cow. We vacuum and sweep twice a day and that’s how much dirt was under the carpet and pad. It’s probably ten years worth … but still. Ewwww.

I was completely grossed out … and even more worried about what to do … but the reality was that I couldn’t afford new carpet—even a small amount of replacement carpet – so the choice was to live with the huge paint stains on the carpet plus one naked tread at the bottom –or- figure out a way to rock-what-ya-got.

And so I took a deep breath … and then another … and then made an executive decision. And I started yanking and pulling and ripping until all of the carpet going upstairs was gone and I was left with this:

floor

And suddenly I had not only an unfinished door and an unfinished floor, but was now waist deep in a stair project.

And that’s where things got interesting. Back in a bit.