How many of you are stocking up on Halloween candy?
It’s the usual drill of buying bags, emptying treats into a bowl by the front door and then recycling the empty bags, right?
Wait! Don’t Toss That!
Those bags got the candy to your house just fine – why not put them to use to round up candy from the neighbors, too?
Just cut handles from whatever you’ve got on hand — fabric scraps, ribbon, VHS tape, curling ribbon, whatever – and tape them in place with duct or packing tape.
And that’s it. No buying treat bags. No bulky plastic pumpkins to store.
And when this little princess is done with her treats, everything gets recycled or reused—no waste, no extra cost.
I can’t wait for warm weather to arrive so I can bust out my extensive collection of retired Old Navy flag t-shirts and plaster the back of my suburban with every God Bless America / Don’t Mess With Texas / These Colors Don’t Run / Land of the FREE because of the BRAVE bumper sticker I can find.
Because I love it all:the red-white-and-blue everything … the patriotic music … the hometown parades with a million little flags waving … watching veterans of all ages march behind a color guard … the sense of community as friends and neighbors light fireworks in driveways or gather for a big display … and that extra lump in my throat every time I see a soldier in uniform or hear the roar of fighters overhead.
And this year those feelings are hitting me twice as hard because those soldiers our family pray for each night now have a familiar face among their ranks—my amazing sister who returns home to her family on Saturday after months away training.
So in honor of her return, those flags for the front of the house are coming out now, baby … the kids are all getting {new} flag t-shirts … extra sparklers are going into that shopping cart … and I’m plotting how to turn all of my favorite summer desserts-salads-pastas-sandwiches-bbq-drinks into platefuls of patriotic deliciousness.
So I proudly present the first recipe to get into the holiday spirit:
Star-Spangled S’mores
done four ways of course to keep my picky half dozen happy.
And before you start—I know, I know, I know.
S’mores are the perfect summer dessert and don’t need any tweaking.
But if you happen to have some left over white candy melts … and food coloring … and designer marshmallows … and an afternoon to kill with a certain I’ve-only-been-out-of-school-for-two-weeks-and-am-already-bored-ten-year-old, you start playing around.
No. 1: Graham crackers + Hershey bars + Kraft Jet-Puffed Star Marshmallows
Behold the open-faced goodness. Perfect for rocking S’mores Indoors.
Or c’mon–how cute are these marshmallow kabobs?
Yum.
No. 2: Short bread cookies + tinted candy melts + regular marshmallows
No need to add any extra chocolate to these lovelies.
Begin by removing any border from the pans and smoothing them out as much as possible.
(This was as good as I could get my pans and they turned out fine.)
Print out a star to use as a template for cutting and tracing. I found my image here.
Adhere your template with a small piece of double-stick tape …
… then trace along all the lines using a ball point pen and a ruler. Yes, you need the ruler.
When you remove your template it should look like this:
Carefully cut around your star leaving an 1/8” border all the way around …
… tapering the border near the points …
… and snipping up to the tracing line on the inside points of the star.
Fold the star over and go over all of the trace lines with the lid of the pen to make the lines both easier to see and bend.
To finish the edges, place the ruler just below a trace line. Starting at tips and working towards the center, carefully lift up along the border …
… and fold it over the ruler lip.
Remove the ruler and press the border down first with your fingers …
… then smooth completely with the pen lid.
The shape of the star is a series of mountain and valley folds.
Starting from the center, fold the short lines in between the points downward to make valley creases.
To shape the points, push up from the back of the star along the center seam, working from the center out.
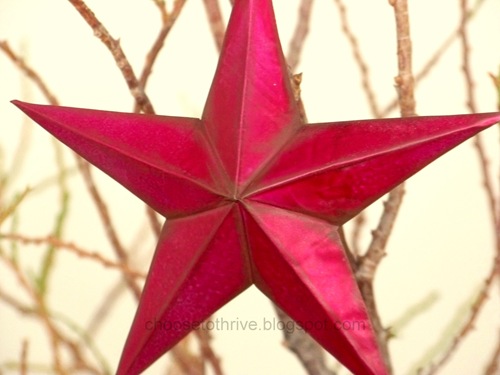
When you’re done, your star should look like this:
To make the ornament hole, gently twist a small eye screw in one of the points.
You can leave your stars plain …
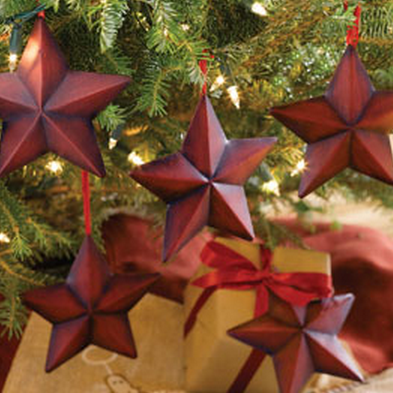
… or hit them with a coat of primer and spray paint for a smooth, seamless finish …
… or sponge on a coat or two of craft or house paint for rustic, weathered look …
… or rock out your favorite dollar store nail polish for a little bit of BLING.
My genius six-year-old actually came up with the nail polish idea. She snuck off with one of the stars and returned a few minutes later with this little beauty:
Love, love, love all of the paint options! Have fun picking your favorite!
1. What if I don’t have any disposable baking sheets lying around? Will aluminum foil work?
Not really. See?
I tried several different thicknesses and it never was stiff enough to hold it’s shape well. The star above was with eight layers which is about the most you can cut without the layers separating horribly. You really do need the stiffer material.
2. Is there a shape or pan size you recommend?
I used old cake pans like these to make my stars since it was all I had.
But, if you are going to buy pans to make this project, I’d recommend using a disposable oven liner if you can find it. You get the most bang for buck with that size and have minimal waste.
The price is pretty cheap either way:
The dollar store carries pans like this, too. Just stay away from the deep-sided pans with heavy grooves in the bottom.
3. How big (or small) can you make these things?
The only real limit is the size of baking pan you can find–the oven liner pan will make a 12” x 12” star easily. On the small end, I wouldn’t go much smaller than 2-3” tall. Any smaller is too much of a pain to work with.
I made two sets of ornaments for my tree. Just for comparison, here they are next to a graham cracker box. The scale was perfect.
4. One last thing … print out your template 130-150% of what you want the finished size to be. The folding and dimension will make your finished star shorter/smaller than the template.