By sheer necessity, I shop with my Dirty Half Dozen kiddos all the time. The nutso thing is that most of the time I actually enjoy it and secretly get a kick out of the jaw-drops and horrified looks that come with it.
I figured out early on that asking young kids to sit or walk quietly for thirty or forty minutes with nothing to do worked as well as trying to sit through church without a seriously stocked diaper bag. I wouldn’t even dream of making it through Sunday meetings without activities for the kids, so why did I expect my kids to sit still in a store (especially when they were surrounded with “bright” and “shiny” and “sugary.”)
The key for my kids, especially the littles, is to give them something to do. If they’re busy helping, they’re less likely to get you kicked out of a store. At our house, that means project time.
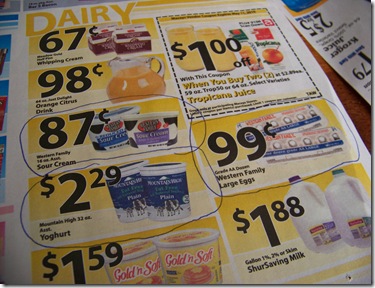
Go through the grocery ads with your kids and let them circle items from your list.
This is a good chance to talk about why you do (or do not) buy certain items: (sour cream for $1.99 is a rip-off, eating donuts for dinner is not a great idea, Dad doesn’t laugh when we buy him food he’s allergic to .…)
Then let them cut out everything circled in the ads.
It’s great practice for little hands and makes me feel better that they’re getting preschool-esque motor skill practice.
Praise them for their work, even if it looks more like Edward Scissorhands. The more they practice, the better they’ll get.
Then let them go crazy with the glue stick.
If you’re shopping at more than one store, have more than one list.
Let them write the name of the store, the quantities, etc. on their list—anything that helps them practice writing.
Again, chicken scratch is fine. They’ll love doing do something so grown up and will be very proud of themselves.
See?
Finally, shop! My kids love going shopping with their own lists and stay much more focused when they’re helping.
Kid #4 thinks he’s the pretty much the coolest four-year-old out there for finding the $4/1 corn and loading it up in the cart.
A few other tips …
* Make sure each kid has their own list. Even my 19 mo. old gets cranky if she doesn’t have something to hold. Hers usually has random pictures, but it keeps her happy. After the pictures are cut out from the ads, we divvy them up among the kids and let them get gluing.
* There’s usually items I need that aren’t pictured in the ads. I will either download clip art of the item or take a picture and save them in a word document. I’ll print of the images I need for my list that week and let the kids cut them out.
* This concept works with older kids, too—just shift the focus away from cut-n-paste and more towards math or spelling skills. I dictate the list to my seven and nine year olds for a sneaky way to work on spelling. Then they have specific jobs at the store: which apples are the cheapest per pound? which size can is the better deal? What’s final price after the coupon discount?
* Another fun adaption for older kids is to use monopoly or play money. Give the kids enough play money in an envelope to match your budget and have them “pay” you for each item that goes in the cart. When ever they ask for treats or extras not on the list, they can see how much money they do or do not have left. My kids whine less and sometimes even *gasp* work together to figure out a cheap treat that everyone can share.
* The only thing NOT to do is try and take pictures of your kids using their lists. This will bring out their evil inner weirdo (below). And if you try on the next trip to get pictures again, bad, bad things will happen. Leave the camera at home –trust me on this one.
Now go get those kids cutting, pasting and drawing!
HAPPY Shopping!
***********************
Linking up to
