As promised, here’s the first of two no-cost kitchen projects I’ve completed so far.
I showed you my picture frame cabinet re-do yesterday and love how they turned out. When the pictures are up in the frames, I like to have the area above the cabinets plain so that all the focus is on the pictures.

But there are times when I like to leave the cabinets plain, too.
And when the cabinets are plain, the above space looks pretty bare. So I’ve been looking for something around the house that I could repurpose and use above the cabinets when frames weren’t in use—something that could easily be removed whenever I wanted to go pack to the pictures.
So I looked and looked and finally found what I was looking for in my own kitchen: plates.
Plain ‘ol white plates actually.

In the odd-shaped, open cabinet was my glassware and the $7 set of “good plates” from a Target after-Christmas clearance sale from 10 years ago.
I never used them since the kids always seemed to break one whenever I brought them down … and there wasn’t enough to use when company came over because of the whole kids-breaking-them thing … and they were just sitting there collecting dust anyway …
so I put them to work.

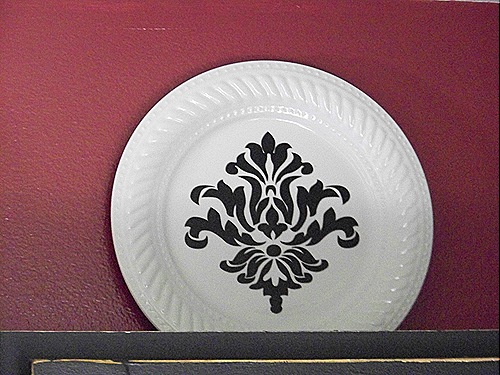
The plates got a good wash and then a vinyl design cut on my Silhouette (although you can cut these by hand with an exacto knife, too).
The best part is that I can swap out the designs any time I need to. For now I used a bunch of different designs that I happened to like plus a monogram for me and Mr. Thrive.

But I could peel them off and put up new designs for holidays, too.
I don’t have any plate stands (working on that), so I just set them up on the cabinet top and leaned them against the wall. Baring a major earthquake, it works just fine.
Ahhhhh.
I love the extra punch of color and design above the plain cabinets.

And when I’m in the mood to put the pictures back up for birthdays in April, the plates can come down in two seconds and hang out on a shelf until they’re needed again.
Have fun shopping around the house!
****************************************************************
Linking up to:


15 Comments
What a fab idea-love the vinyl on white plates -gives that added punch above the cabinets!!
I love the tree design one! Great solution. No spending is the best!
I really like how you used a different design for each plate!
Love the plates Nike! I really need to invest in one of those fancy-cutting machines! LOL
That looks great . Gosh one of these days I will cave in and get a Silhouette… or get lucky and win one before my willpower wears out
I am liking the plates a lot!
Absolutely a great use of what you have. They are beautiful.
I've been drooling over the Silhouette for a couple months now, and you have officially convinced me: I NEED one! This is going on my Christmas/Birthday/Easter/Groundhog Day list!
PS: What I forgot to say is: Those plates are spectacular! Great job 🙂
Those plates look great. You can glue and/or nail a long, skinny piece of wood (1/4 round molding or a furring strip) to the top of the cabinet about 2 inches from the back wall. The bottom of the plates are stopped by the wood trim. Alternatively, if you wanted to hang them on the wall, you can make plate hangers from paper clips and rubber bands a'la the Tightwad Gazette (someone did a tutorial here: http://fluffyflowers.typepad.com/fluffy_flowers/tutorials/). As always, you are awesome!! I'm a fan :).
Those are so cute! I love the tree one! The area above my cabinets is bare and I've always wanted to add something I just can't decide what!
These are great and I love your blog. I love how creative you are – and how you use the make do concept – or should I say "rock what you got!" Thanks for visiting my blog and leaving a comment. I love finding new blogs that way.
Me again. I received some blog awards recently and was asked to find 15 blogs that I recently discovered that I love and you are one of them. Check out creativetryals.blogspot.com to get your awards.
Again – I love how you "rock what you got". I hope it is okay if I spread your saying around Canada. I will give the proper credit of course and tell people to check out your blog!
I love your ideas! I just found your blog today – so I have to ask…do you have a post somewhere about how you did your pictures on your cabinets? I love that idea to spruce up and add some interest to cabinets. Not to mention keep some favorite memories where you can enjoy them and trade them often.
@Katskreations – Here's the link to the picture frame cabinet tutorial: http://choosetothrive.blogspot.com/2011/04/7-picture-frame-cabinet-door-tutorial.html