I’m so excited to announce a new feature on THRIVE–
What Not To Toss Weekends
—a chance to show how a little TLC can save everyday items from ending up in the trash.
And in honor of Clothing Refashion Week at The CSI Project, this week’s WNTT project is a victory for mom’s of toddlers everywhere.
I sadly present:
Pink Nail Polish
vs.
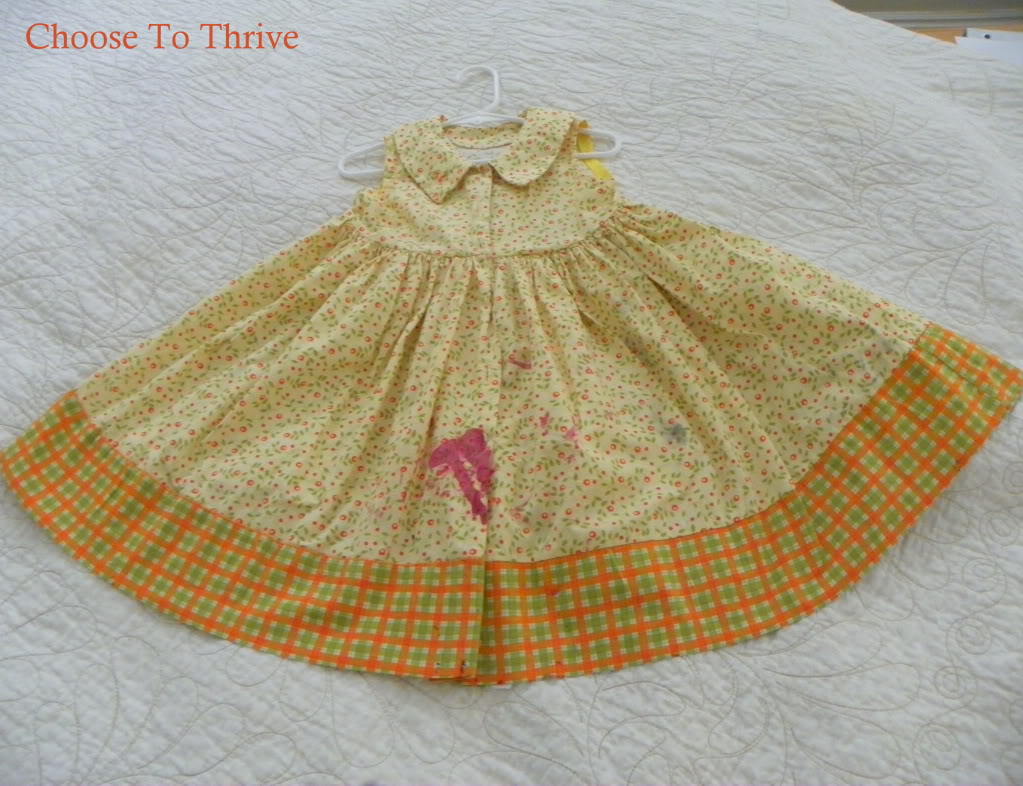
The-Favorite-Made-By-Grandma-Dress

Ahhhh. Nice and inconspicuous. Grandma L’s gonna kill me.

Totally time to toss, right?
Wait! Don’t toss that!
This skirt can be saved as well as most FULL, GATHERED skirt/dresses with spots, stains, or even rips.
You’ll only need the basics for this project:
Scissors, Rotary Trimmer, Seam Ripper
Remove the skirt from the bodice or waistband using a seam ripper.

Open a side seam and remove any left-over gathering stitching from the waistband so that the fabric lays open. Iron flat if needed.

Cut away the stained area(s) using a rotary cutter and mat …

Sew skirt pieces back together along the side seems and zigzag/overlock/serge raw edges to prevent fraying.

Your finished skirt piece should look like this:

With the destroyed section removed, the finishing is easy.
To Reassemble Using The Existing Bodice or Waistband:
Stitch along the top skirt edge with a basting stitch, gather the skirt fabric to match the width of the original bodice/waistband and sew everything back together. Easy, done.
To Make A New Skirt (Method I used):
You could add any type of a waistband, but I went the ultra easy route and added a simple elastic waistband. The top skirt edge was folded over 1/4” and then another 1” and stitched in place to make a casing for the elastic.

(Need help making an elastic waistband? Click HERE)
The elastic for the waistband was reclaimed from an old pair of leggings …

…threaded through the casing using a safety pin and stitched in place.
In 30 minutes that nail polish and ink-stained dress is good as new and back in the closet.

And just for fun, I cut circles from the stained scraps and made some fabric yo-yos …

… and added them to a matching shirt using this technique HERE.

(Need help making yo-yo’s? I learned how HERE.)
So go pull that stained skirt out of the trash or fabric stash and start trimming. In no time you’ll have a cute new skirt and “clothing save” that so deserves a gold star on the Mom Chart.
Destroyed Dress?

It’s What Not To Toss this weekend!
Linking Up To:


14 Comments
You rock!! I definitely would have tossed this one! (and sadly have to admit that I have done so with similar items in the past….) Thanks for the inspiration!!
Awesome!!
You saved it and gave it a beautiful new life!!
You are seriously amazing, I am continually amazed at your creativity!
Genius! I will never be able to throw anything away again. haha…
Way too cute!
Love it!
WOW! Way to go!! I hope to have those sewing skills eventually. Looks totally adorable!
Now that was clever! Yet another idea to steal, thanks!
So awesome!
Nice job! I always love reusing where I can. Thanks for the inspiration. I love your blog!
I may have to go ruin a few dresses, just so I have an excuse to make this!
Seriously girl, you always astound me. I thought of you when I tossed a pair of completely thrashed maternity pants the other day…'should I save the waistband? Should I? CAN I just throw such good elastic out with the pants?' Eventually I decided to just throw the whole darn thing out since I haven't sewn anything in MONTHS, i'm nursing Ollach the glutton and need to save my energy for packing and moving (eek!). But I thought it'd tickle you to know that I have a fight with my inner thrive every time I throw ANYTHING away. 🙂
So happy I found your site! 🙂 No more tossed clothes saving me $$$. Thank you for your hard work.
This such a great idea, I teach 9th graders how re-use clothes and turn them into something else as part of a fashion class I will defiantly use this one this year! Thank you for sharing!