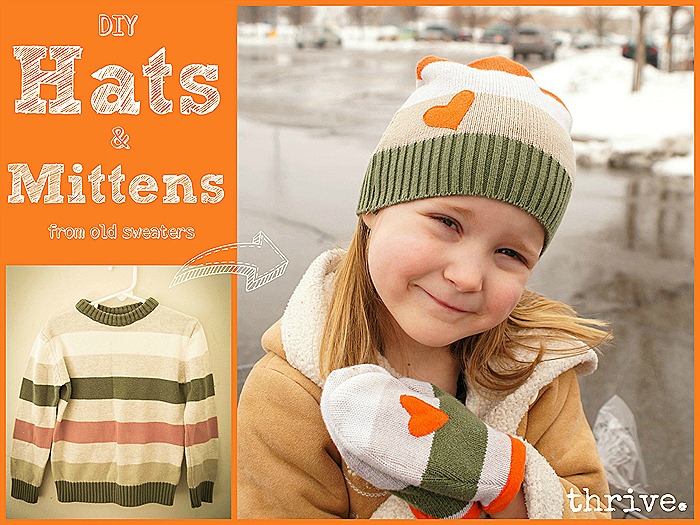
Remember this little sweater that became a cardigan?
Well it’s too small for kid #6 and has a few stains here and there which makes passing it down to younger kids a no-go.
Time to trash that striped number, right?
Wait! Don’t toss that!
With a little Edward Scissorhands love, that sweater or cardigan can yield mittens and hats —even with those pesky stains.
(Good thing, too, since winter in Utah this year has been a little like living on the ice planet Hoth. Add to that six kids who keep jumping head-first into snow drifts and I’m having a hard time keeping enough dry hats and mittens around.)
*Cue the back ups.*
Chop off the sleeves and nix any trim or zippers. Open plain sweaters up along a side seam.
Use a hat for your guide and make sure you have enough material to cut twice the length of your hat + side seam allowance.
Cut the extra fabric away and fold in half with right sides together.
Cut around hat leaving room for a seam allowance.
Stitch around the top and serge or zig zag the raw edges.
And those stains? Yeah, totally covered them with some scrap t-shirt fabric. Just stitched in place.
I got one kids size hat out of this 5T sweater. Adult sizes would easily yield a hat from both the front and back pieces.
So don’t stop there!
What about those sleeves? Or any extra sweater material?
When I opened up the sleeves, I realized I had enough material for another hat.
Trim up the arm and scrap pieces to even rectangles. Measure from the border and trim pieces 1/2” longer than the height of your finished hat.
Fold each piece in half and round the raw edge at the top to match the curve of your hat piece …
… so that it looks like this.
Then just pin and stitch together. Serge or zig zag edges.
Done and done, right?
Nope.
There’s still left over material from the tops of the sleeves. What about that?
Mittens!
That same t-shirt scrap kicked out two more little hearts while the folded sleeve edge made some quick and easy seam binding for the cuffs.
So …
Trash-bound sweater?
It’s What-Not-To-Toss This Weekend!
Oh … and one more thing.
On behalf of all Utah residents:


9 Comments
This is such a sweet idea!
This a great idea. I am featuring this at somedaycrafts.blogspot.com.
Nike, you are so creative! That is a fantastic idea, and the hats & mittens turned out soooo cute!
Wow! I would never had thought of getting a hat from the sleeves. You did a great job, thank you for posting the tutorial. I'm headed to my garage sale pile; its yucky in MI too.
Another great project! Love 'em, Nike!
Like you, I hate to throw anything away. I started with 2 sweaters to make 2 pillows, but couldn't just throw the sleeves away. I turned the sleeves from one sweater into mittens and the sleeves from the other sweater into gift bags. Here's my sweater sleeve mittens: http://organized31.blogspot.com/2013/01/repurposed-sweater-valentines-pillow.html
As always adorable and inspiring.
I seriously love your rock-what-ya-got approach to life. Thank you for all the inspiration (and I'm not just talking about craft ideas). You really are inspiring. PS, I love your note to winter – made me smile!!
Great idea looking for a sweater