Tag

craft

Browsing

It never ceases to amaze me how a relatively boring corner of the house can be completely transformed with a simple hanging décor.

With my love for using flowers to give a fresh look to my home, coupled with spotting a barren wall that felt like it needed something, I immediately got working on creating a simple hanging flower holder.

What I ended up making, was so simple yet charming that it gave me that satisfying feeling after my little experimentation was over.

So this is how I made my super simple DIY hanging flower holder.

What you need?

What you need for your hanging flower holder

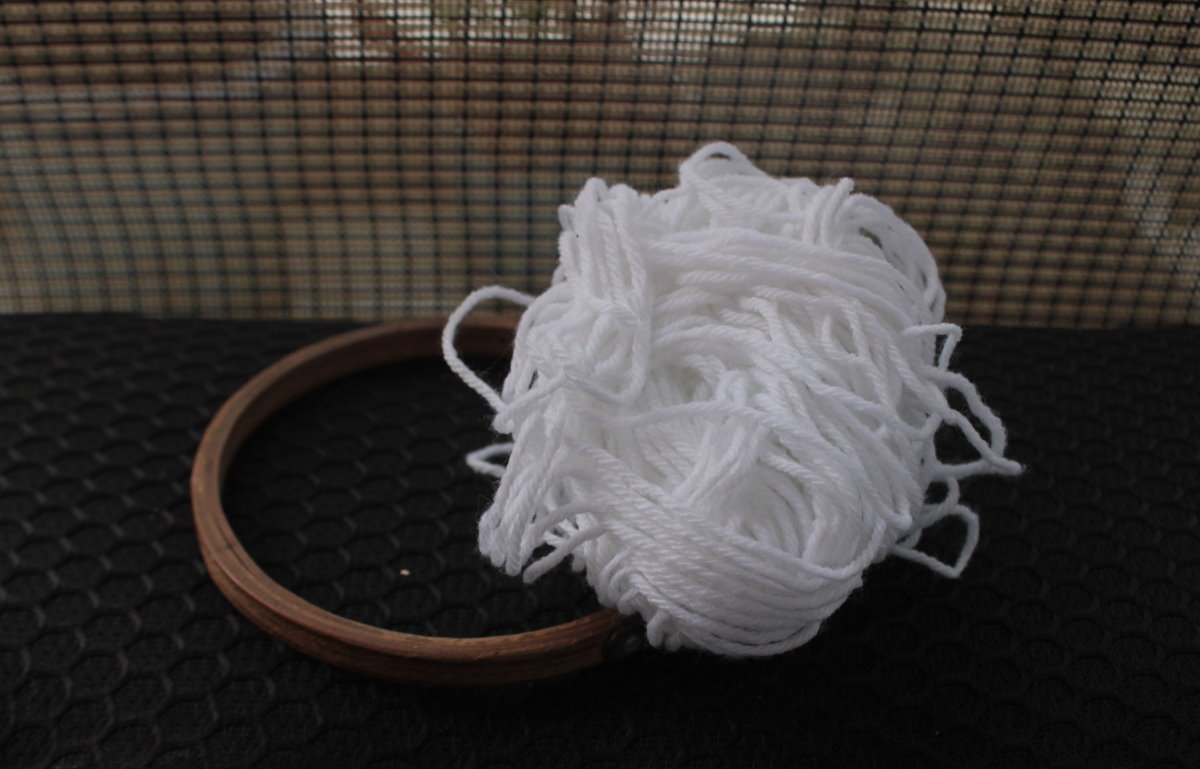
You just need two items for this beautiful hanging flower holder, both of which were sitting happily in my arts and crafts drawer:

  1. Embroidery hoop
  2. Yarn or jute rope

Note that I had white yarn leftover from another project and hence I used that. You can use any color you like and it really changes the look especially depending upon the flower you plan to use in the end.

Also note that I used an embroidery hoop as that is what I found in my house. You can use any circular object as long as it fits the final purpose of this project.

Steps to create the hanging flower holder

Step 1:

Take the embroidery hoop and separate the inner and outer part. For this craft we will only be needing the inner smaller part.

Step 2:

Make a knot around the smaller hoop and start wrapping the hoop with the yarn until the whole wooden portion is covered.

Step 3:

Start wrapping the yarn around the diameter of the hoop, making sure to go above and under to create crisscrossing loops.

Step 4:

At the top, tie a piece of yarn to create a loop so that you can hang the piece of décor.

Simple DIY Hanging Flower Holder Final Image 1

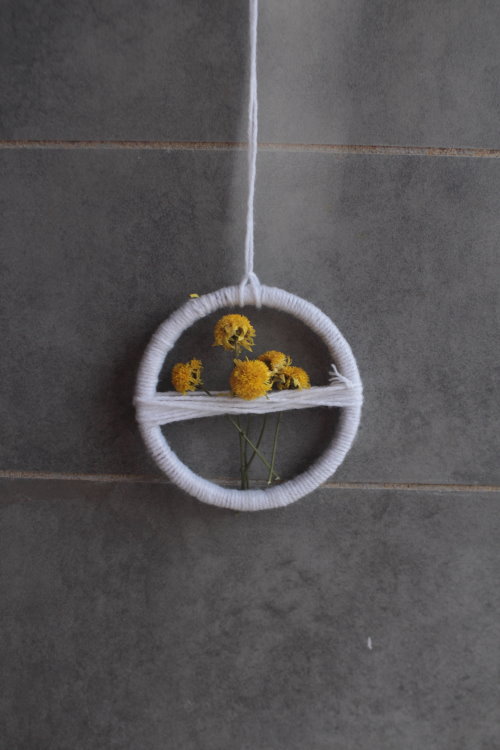
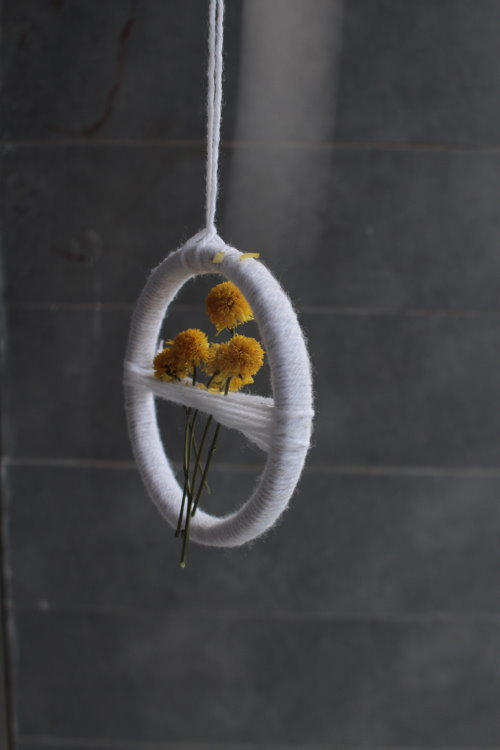
For the final step, put some dry or fresh flowers through the crisscrossed loops. And that is it! Hang it somewhere high and watch it spin around!

Simple DIY Hanging Flower Holder Final Image 2

Final thoughts

This really is as simple as it gets with DIY crafts. Please do try it and let me know how it went.

I am now off to get some more flowers. I plan on changing the flowers regularly. That way the wall will always look fresh and colorful.

I also plan to hang paper flowers that I have seen in various craft shops. Maybe I will even make my own paper flowers. Looks like a new project is coming up soon.

Also one final note. It’s not necessary to hang just flowers with the hanging flower holder that we created. Simply use your imagination and you can actually add anything you desire giving the look that you want for your wall and corners of your house.

metal stars

Anyone else in love with the metal stars all over craft stores, decor catalogs and blog land?

I have one—just one—in my house and have been pining for more, especially for holiday decorating.

When I saw these on the At Home America website, I loved everything about them but the price:

Stars from At Home America

$3 each? Really?

Since spending money is a no-no in my house right now, there was only one thing to do:

Grab an old disposable baking pan and get to work.

And the result?

metal stars for ornaments

Adorable metal stars for ornaments, gift tags and decor straight from the recycling bin.

Easy, fast and FREE with no sharp edges or points.

Want to make your own?

For this project you’ll need:

star.29

… and …

star.53

… and …

star.54

As always, I hope you’ll Rock What Ya Got and make this project work for you using what you have on hand already.

********************************************************

Begin by removing any border from the pans and smoothing them out as much as possible.

star.1(This was as good as I could get my pans and they turned out fine.)

Print out a star to use as a template for cutting and tracing.  I found my image here.

Adhere your template with a small piece of double-stick tape …

star.3

… then trace along all the lines using a ball point pen and a ruler.  Yes, you need the ruler.

star.9

When you remove your template it should look like this:

star.34

Carefully cut around your star leaving an 1/8” border all the way around …

star.28

… tapering the border near the points …

… and snipping up to the tracing line on the inside points of the star.

Fold the star over and go over all of the trace lines with the lid of the pen to make the lines both easier to see and bend.

star.35

To finish the edges, place the ruler just below a trace line. Starting at tips and working towards the center, carefully lift up along the border …

star.25

… and fold it over the ruler lip.

star.30

Remove the ruler and press the border down first with your fingers …

star.2

… then smooth completely with the pen lid.

The shape of the star is a series of mountain and valley folds.

Starting from the center, fold the short lines in between the points downward to make valley creases.

star.40

To shape the points, push up from the back of the star along the center seam, working from the center out.

star.43

When you’re done, your star should look like this:

star.42

To make the ornament hole, gently twist a small eye screw in one of the points.

star.8

You can leave your stars plain …

star.39

…  or hit them with a coat of primer and spray paint for a smooth, seamless finish …

star.7

… or sponge on a coat or two of craft or house paint for rustic, weathered look …

star.50

… or rock out your favorite dollar store nail polish for a little bit of BLING.

star.4

My genius six-year-old actually came up with the nail polish idea.  She snuck off with one of the stars and returned a few minutes later with this little beauty:

star.37

Love, love, love all of the paint options!  Have fun picking your favorite!

**********************************************************

A few THRIVE tips to save you some headaches:

1. What if I don’t have any disposable baking sheets lying around? Will aluminum foil work?

Not really. See?

star.44

I tried several different thicknesses and it never was stiff enough to hold it’s shape well.  The star above was with eight layers which is about the most you can cut without the layers separating horribly.  You really do need the stiffer material.

2.  Is there a shape or pan size you recommend?

I used old cake pans like these to make my stars since it was all I had.

star

But, if you are going to buy pans to make this project, I’d recommend using a disposable oven liner if you can find it. You get the most bang for buck with that size and have minimal waste.

100_1730

The price is pretty cheap either way:

star.1

The dollar store carries pans like this, too. Just stay away from the deep-sided pans with heavy grooves in the bottom.

3. How big (or small) can you make these things?

The only real limit is the size of baking pan you can find–the oven liner pan will make a 12” x 12” star easily. On the small end, I wouldn’t go much smaller than 2-3” tall.  Any smaller is too much of a pain to work with.

I made two sets of ornaments for my tree.  Just for comparison, here they are next to a graham cracker box.  The scale was perfect.

star.38

4.  One last thing … print out your template 130-150% of what you want the finished size to be.  The folding and dimension will make your finished star shorter/smaller than the template.

*******************************************************

Wishing you and your family happy holiday decorating!

star.36