Category

Home and DIY Projects

Category

Hi again from Washington!

We’re loving the site seeing and family visits, but that trip home is just around the corner. And come Saturday, we’ll be breaking out our el cheapo Thrive-friendly travel games to keep those kids entertained all 14 hours.

But instead of spending money on travel games at the store, I cheated (and you can too!)

Want to make your own?

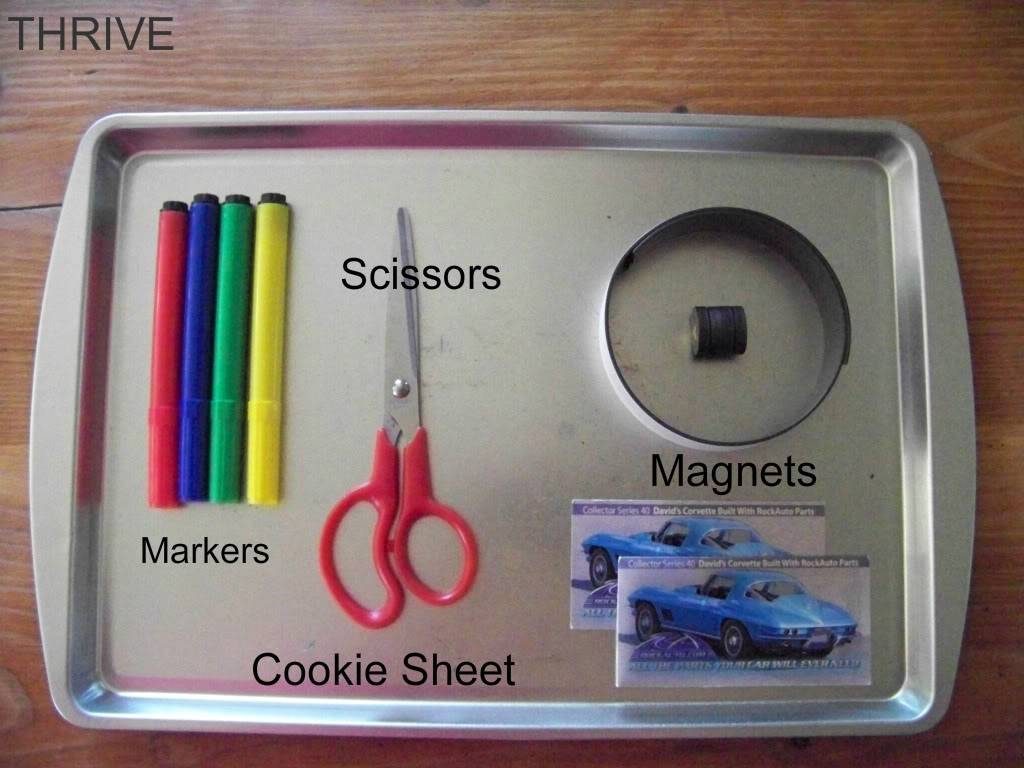
For these travel games you’ll need:

And a quick copy/paste from google of your favorite board games. I printed mine out back to back and then laminated them for good measure.

This is so stinkin’ easy.

You can use any magnets you have on hand–circles, magnetic tape or even the cheapie magnets that come with the phone book–to both hold the game boards in place and make the game pieces.

See?

Chutes and ladders + magnetic tape game pieces + regular dice instead of a spinner. The lip of the cookie sheet keeps the dice from rolling away.

Yahtzee is easy with laminated sheets, markers and dice.

Connect Four + circle magnets.

Monopoly with magnet tape used for markers …

… and houses and hotels.

Money is recorded on paper and real estate / community chest cards are kept in check with little pig tail rubber bands.

And everything stays neat and tidy in a little coupon organizer or zip lock bag.

And the best part (besides being practically free) is how quick clean up is: boards and games pieces store easily on the cookie sheet …

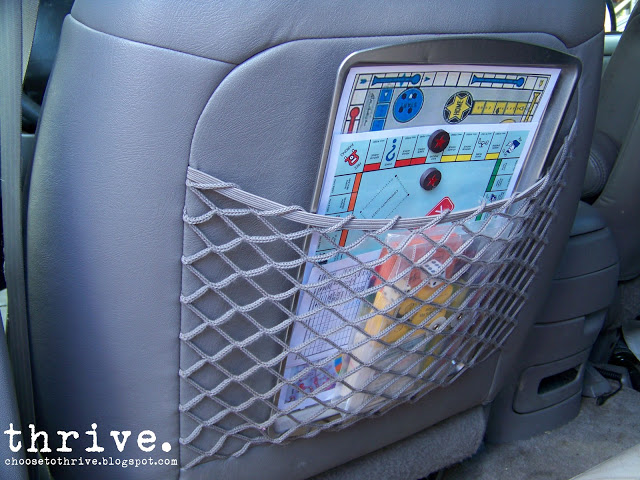
… and everything fits easily in the back of the seat.

Done and done.

So have fun making your own travel games for road trips or just around time.

Wish us fun on the drive home!

Happy Monday everyone! I’m so excited to be blogging from my hometown in Washington following a 13 hour drive Saturday with our Dirty Half Dozen.

And thanks to a little planning, the trip was actually … awesome.  The kids did great, we made good time and even managed to save enough money on travel snacks to be able to afford gas for the trip home–ha!

So this week I’ll be sharing some THRIVE friendly tips for surviving those summer road trips without breaking the bank or loosing your mind.  And as always, you should be able to pull together these easy snack ideas without a run to the store

Today’s feature: 3 easy snacks for the road or camp ground.

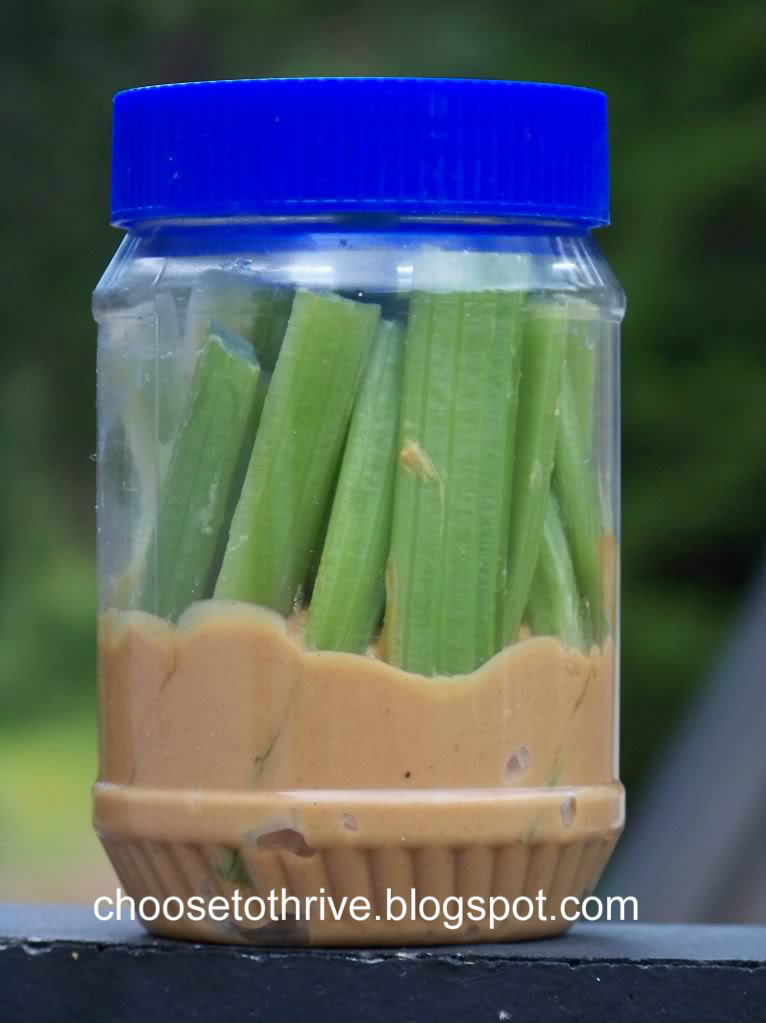
1) Empty peanut butter jar + celery sticks

celery sicks

Finally a way to have p.b. and celery without the mess. Fill an empty jar with an inch or two of peanut butter and then fill with celery sticks. Kids get a yummy snack without sticky fingers and the car stays free of kid schmeer.

2) Empty sour cream container + empty baby food jar

Carrot Road Trip Snacks

A quick way to pull off carrots and dressing without the dragging the jar along or buying those expensive to-go dressing singles.

3) Empty 32 oz. yogurt container + single serving yoplait

Easy peasy fruit slices and dip. So yummy straight from the cooler at a camp site or rest stop.

Delish.

Apple

So there you go–easy straight-from-the-recycling-bin solutions for eating well on the road.

I’ll be back on Wednesday with some great ideas for keeping the kids entertained.

~ Nike

PIN THIS TO SAVE FOR LATER

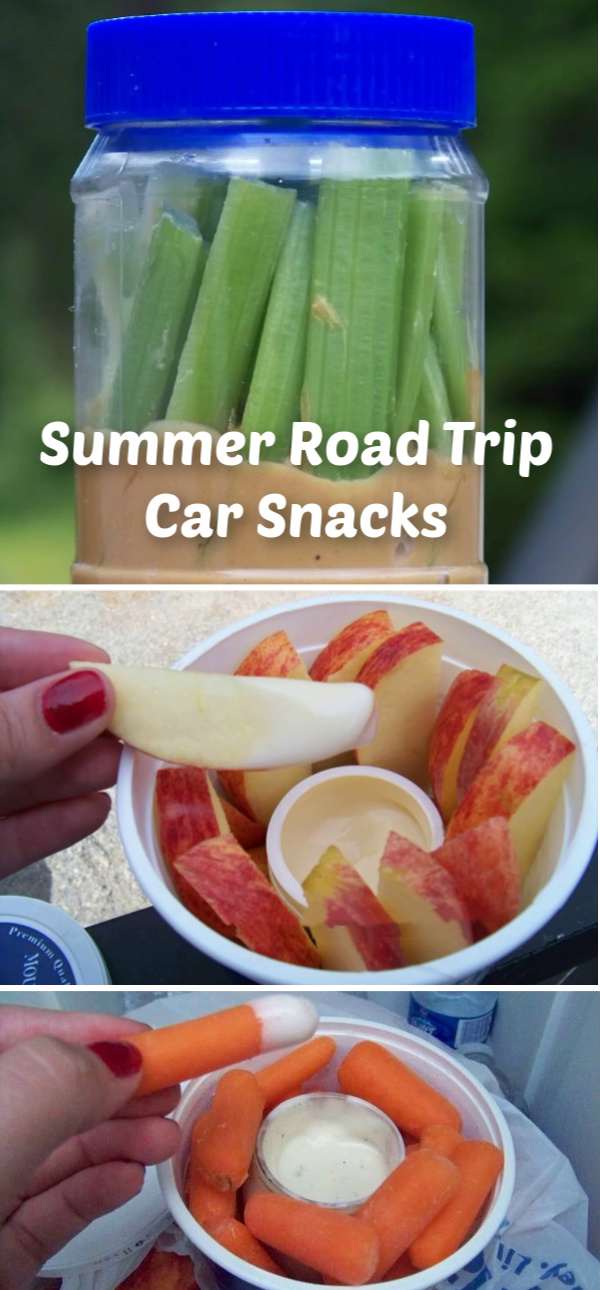
Summer Road Trip Car Snacks

My son came home from scouts the other day with this make-your-own-kite-from-a-grocery-bag masterpiece.

herbs.2

It probably was supposed to have Native American pictures on it, but my son decided to decorate it instead with the really-cool-super-powerful-monster-dragon-thing from his Yu-Gi-Oh cards. Or something.

The new kite lasted all of 12 hours before it was stepped on, slipped on and already forgotten.

Paper to recycling bin, string to the trash, right?

Wait! Don’t toss that!

The string and paper can both live on as part of two easy gardening projects.

For starters, that paper sack can skip the recycling bin and head straight for the compost pile. It makes a great addition of brown matter that will make a better compost than kitchen scraps alone.

And the string? 

I couldn’t wait to combine it with some empty cans from the recycling bin and some left over craft moss to make cute planters just like these ones from Once Wed.

herbs.1

These string-wrapped planters gave my basil, lemon balm, parsley, rosemary and oregano a cute upgrade from the plain ‘ol nursery planters. And I’m loving the scent and convenience of having fresh herbs on my front porch.

herbs.3

(I used twine to finish some of the planters after I used up all the string. No biggie. Rock what ya got, right?)

The original tutorial for these planters can be found here.

Left Over String?

May 2011 BLOG23

It’s What Not To Toss this weekend!Signature

100_2140

Happy Tuesday everyone! I’m back with those new 4th of July t-shirts I mentioned here.
I love me some flag tees a la Old Navy, Aeropostale and Walmart—they’re cute, cheap and an easy way to get into festive mood.  But even at $4 or $5  a pop, I’m still staring down $30-40 to deck all eight of us out in new shirts. And right now I’m hanging onto every penny so that we can spend 15 magical hours in the car to go visit grandparents next month.

No problem.

I happen to have several massive totes full of destroyed-stained-faded-ripped clothing to work with. And with some help of my trusty 1941 Singer Featherweight sewing machine I was able to turn this hot mess …

shirt.8

… into this.

shirt.7

Three cute flag tees and vintage one to boot for absolutely NADA out of pocket.

And you could make any patriotic combo using whatever is in your stash bin—combos like:

1) Shirt + scraps + straight stitch sewing

shirt.6

2) Stained shirt + cheapy $1 Walmart flag that’s been ripped off + craft paint / vinyl stencil

shirt.2

(The ink stain was so dark that I sponged white craft paint on first to cover it and then stitched the flag over top. This was the only shirt where the hair spray trick didn’t work – boo.)

3) Stained shirt + strategic stenciling + great vintage inspiration

shirt.3

(The snake was cut on my Silhouette, the font is JSL Ancient.)

Stains were covered using vinyl (or freezer paper) and stenciled with house paint from our kitchen remodel – ha! The inspiration was this awesome flag from the Revolutionary War.
dont.tread

(Source)

My son changed up the saying on his shirt to make it “cooler.” Whatever.

4) Plain shirt + scraps + snaps

shirt.4

This shirt came together with scraps sewn on white felt and attached with snaps just like these interchangeable shirts here. Looks great with these clippies, too!

shirt.5

Ah … festive flag tees for the kids without touching my bank account (plus some stash busting, too!) Now all I need is a watermelon and some fireworks and I’m ready for the weekend.

Happy Almost 4th of July!

Signature

Linking up to:

trashtotreasureCategorically_CraftingHOHtidy.momWB wwatttandj

firework.9

Ya know that 4th of July kick I’ve been on?

Yup … still there.

I’ve been watching for fun holiday clippies for my girls to go with their new flag tees (more on those later). And while there are so many cute flower-corker-ribbon-tulle clippies out there, I was looking for a bit of a change.

Enter the Firework Clippie.

fireworks.4

Cute and shabby and oh-so easy to switch up for any holiday or outfit.

Want to make your own?

You’ll need your nicest, faded-out Sundance shirt, old-for-painting-only white polo and ratty Superman shirt.

firework.1

Or whatever.  🙂   Rock What Ya Got, right?

And you can make these in minutes.

Cut red, white and blue shirts in 0.5” x 4” lengths. Stack 12 strips together and tack together in the center with a few stitches.

firework.5

Tie a 3” strip around the middle and glue in your clip.

firework.6

Easy. Quick. Done.

fireworks.7

Firework clippies perfect for those hometown parades, pancake breakfasts and firework displays.

Happy Crafting!

Signature

Linking up to:

thecsiproject.com-logo-150 tidy.momWBwwatttandj

I have a love/hate relationship with little girls’ dresses:

dress.11

love the adorable high waist and full skirts that twirl perfectly.

hate that those cute skirts get too short and the bodice too tight with a good growth spurt.

Time to toss, donate or hand-down, right?

Wait! Don’t toss that!

Those skirts can last a few more months on your little girl with the help of a seam ripper and some fabric scraps.

To save this too-short, 18-24 month dress and make it work for my 5T little girl,  I removed the skirt and all the fluffy layers of tulle from the bodice using a seam ripper.

dress.13

For simple, lightweight fabrics all you need to do is add a simple elastic waistband by rolling the top hem and making a casing.

But since mine had multiple layers that would be too bulky for a rolled casing …

100_1012

… I decided to make a casing out of a left-over sheet and attach it to the top of the skirt.

dress.42

It was easy after that to open the casing, thread through some reclaimed elastic and stitch the waistband closed.

dress.43

Start to finish was less than 30 minutes.

And the end result?

100_1140

A cute summer skirt for my 5T girl with enough length on it to last her through next summer.

So go dig those outgrown dresses out of the donate pile and have a second look.

Outgrown Dress?

dress.44

It’s What Not To Toss this weekend.


Signature

I’ll admit it: I’m a 4th of July nut.

I can’t wait for warm weather to arrive so I can bust out my extensive collection of retired Old Navy flag t-shirts and plaster the back of my suburban with every God Bless America / Don’t Mess With Texas / These Colors Don’t Run / Land of the FREE because of the BRAVE bumper sticker I can find.

Because I love it all: the red-white-and-blue everything … the patriotic music … the hometown parades with a million little flags waving … watching veterans of all ages march behind a color guard … the sense of community as friends and neighbors light fireworks in driveways or gather for a big display … and that extra lump in my throat every time I see a soldier in uniform or hear the roar of fighters overhead.

And this year those feelings are hitting me twice as hard because those soldiers our family pray for each night now have a familiar face among their ranks—my amazing sister who returns home to her family on Saturday after months away training. 

169846_179347512094766_100000585552065_519400_6257958_o

So in honor of her return, those flags for the front of the house are coming out now, baby … the kids are all getting {new} flag t-shirts … extra sparklers are going into that shopping cart … and I’m plotting how to turn all of my favorite summer desserts-salads-pastas-sandwiches-bbq-drinks into platefuls of patriotic deliciousness. 

So I proudly present the first recipe to get into the holiday spirit:

Star-Spangled S’mores

done four ways of course to keep my picky half dozen happy.

And before you start—I know, I know, I know

S’mores are the perfect summer dessert and don’t need any tweaking.

But if you happen to have some left over white candy melts … and food coloring … and designer marshmallows … and an afternoon to kill with a certain I’ve-only-been-out-of-school-for-two-weeks-and-am-already-bored-ten-year-old, you start playing around.

No. 1: Graham crackers + Hershey bars + Kraft Jet-Puffed Star Marshmallows

Behold the open-faced goodness. Perfect for rocking S’mores Indoors.

Or c’mon–how cute are these marshmallow kabobs?

Yum.

No. 2: Short bread cookies + tinted candy melts + regular marshmallows

No need to add any extra chocolate to these lovelies.

No. 3: Graham crackers + tinted candy melts + regular marshmallows

Dee-lish.  And finally …

No. 4: Graham crackers + tinted candy melts + 3rd grade art skills + regular marshmallows

Awesome with or without extra Hershey bars.

See?

Yup.  Really good.

So there you go …

Star-Spangled S’mores four way new ways. Enjoy!

 photo shirt1.jpg

Here’s the project from my guest post on The CSI Project a few weeks back:

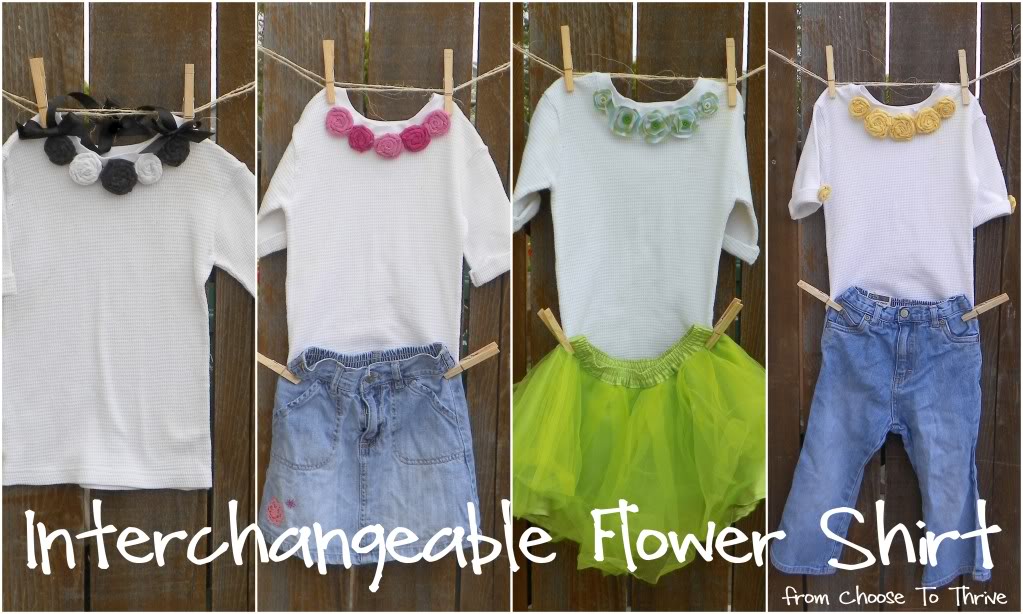
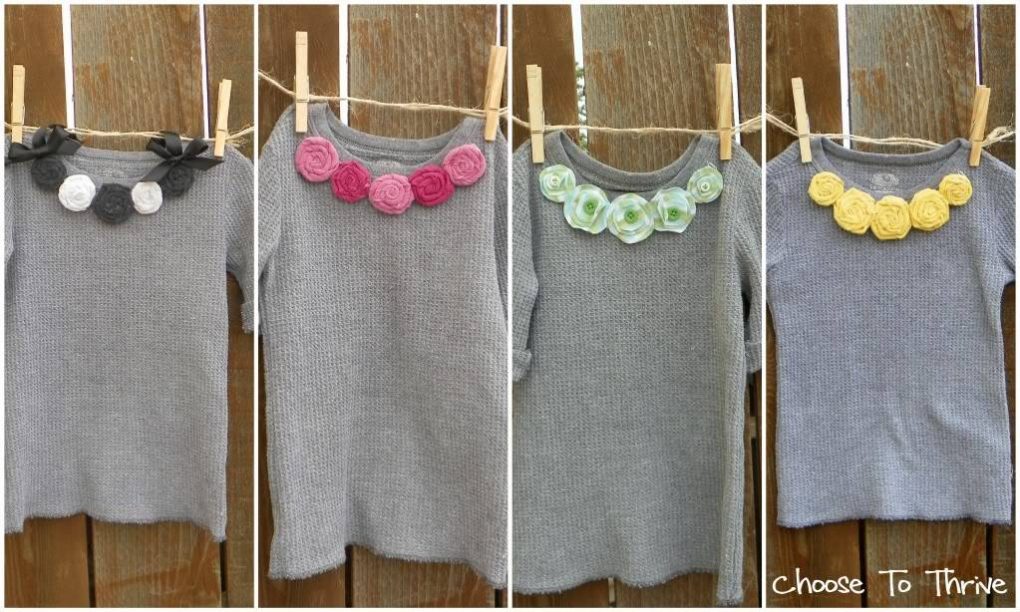
So now that warm weather has finally arrived, I emptied out my kids’ summer clothes bins and realized my little girl had outgrown all her shirts. No biggie. It’s time for a project!

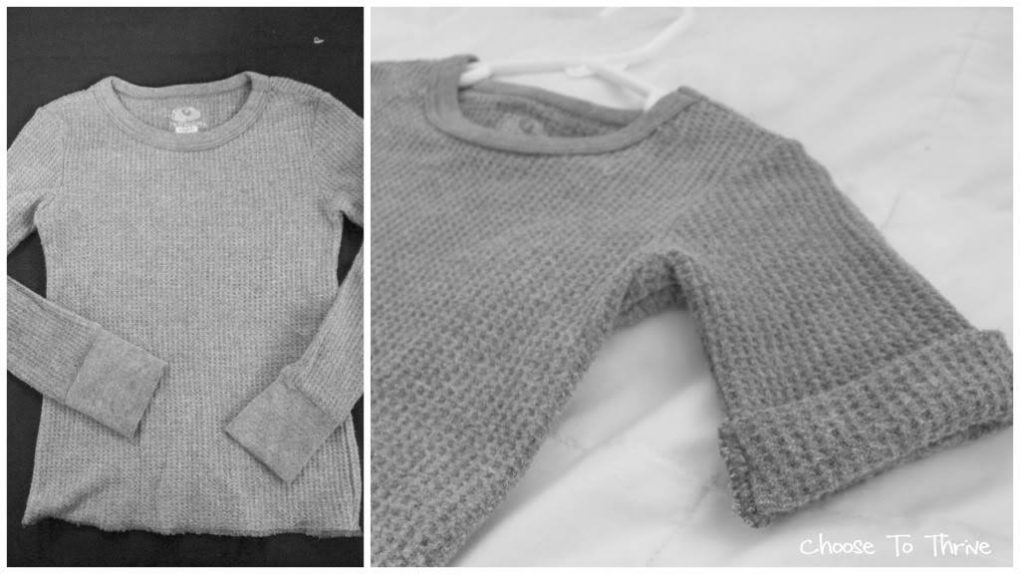
Two boys long underwear shirts (one grey and one white) from my son got a quick trim to make a more feminine 3/4 length sleeve. The raw edges were rolled and tacked in place.

 photo shirt26.jpg

 And while my daughter loved her new shirts and I loved having two new staples to mix and match with her pants and skirts, they just looked so … plain … and there was still only two of them.

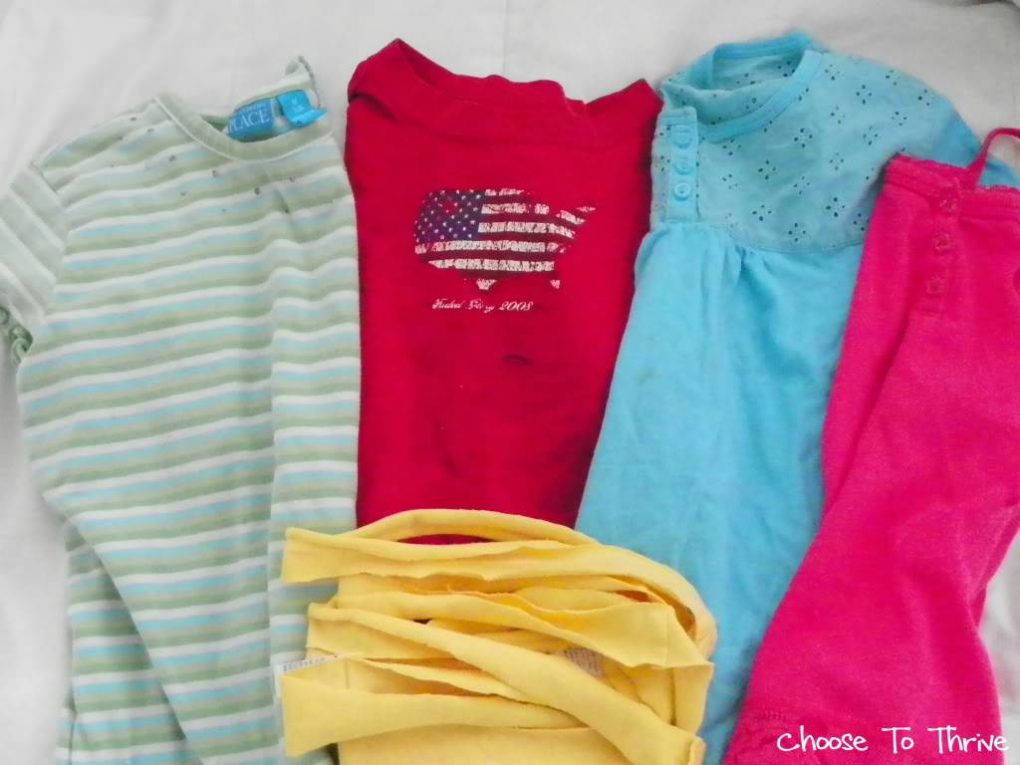
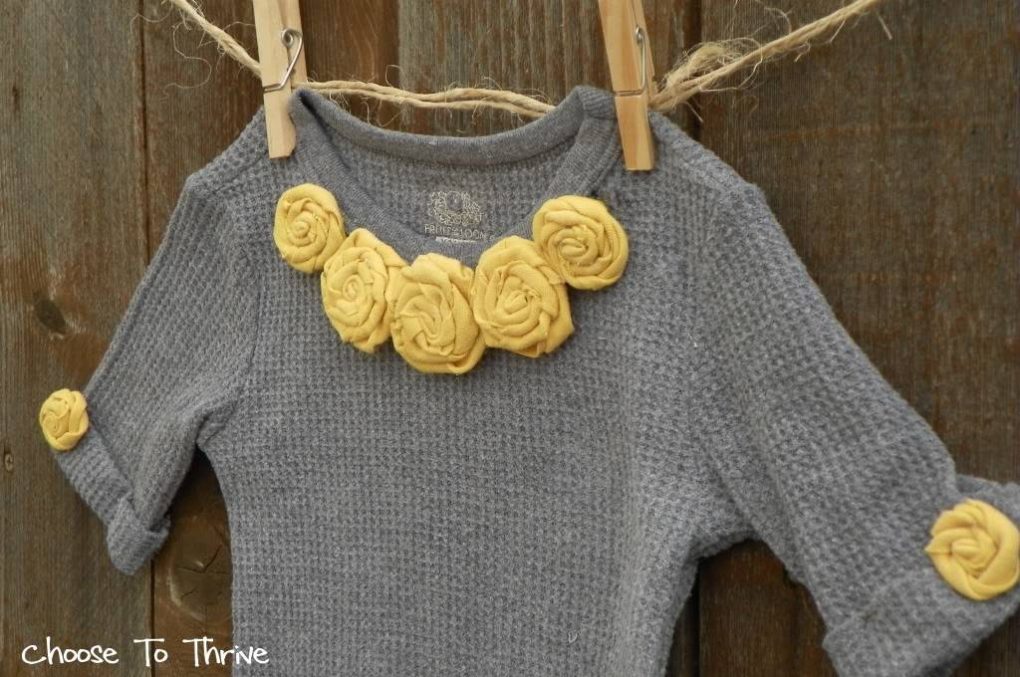
But after a quick look through my fabric stash, I decided that some worn out t-shirts and some snaps could help me TOTALLY FAKE a larger t-shirt wardrobe.

 photo shirt3.jpg

You ready?

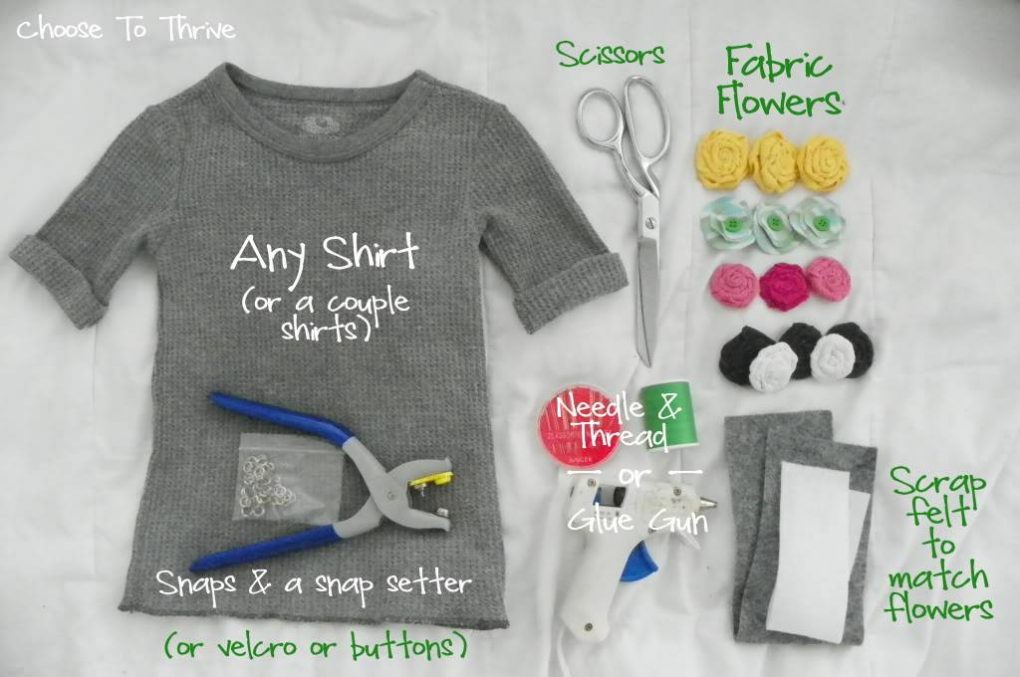
For this project you’ll need:

 photo shirt4.jpg

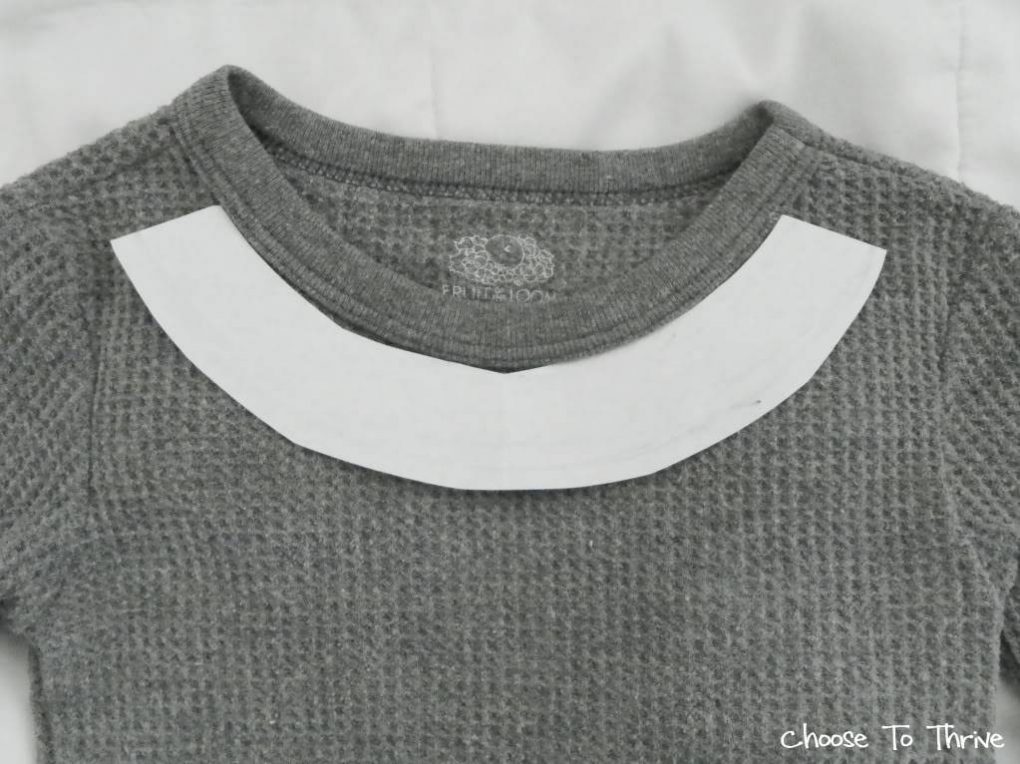
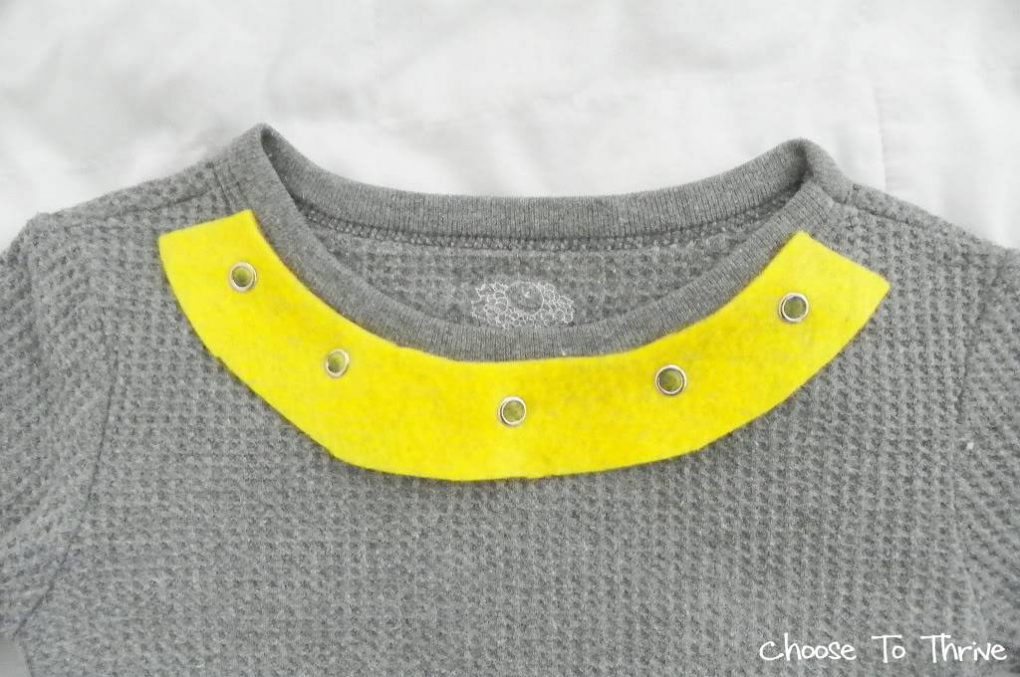
Make a 1” wide paper pattern in a smile shape to match the neckline of your shirt.

 photo shirt5.jpg

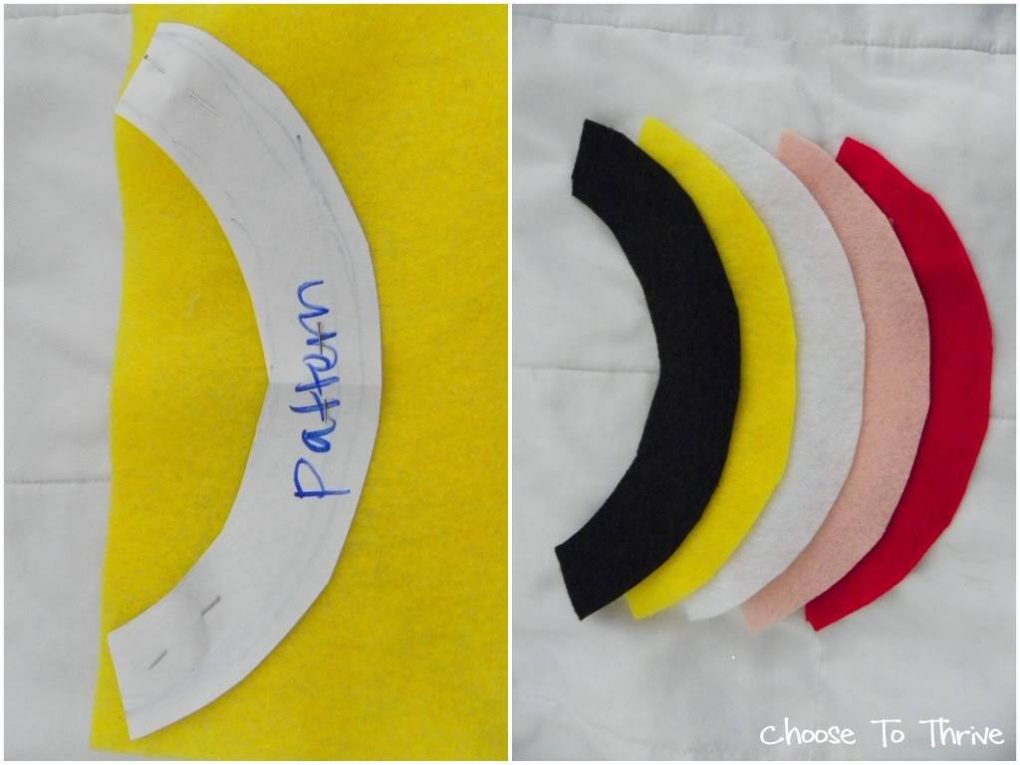
Pin pattern to felt and cut out. Make one for each set of flowers. Set aside.

 photo shirt6.jpg

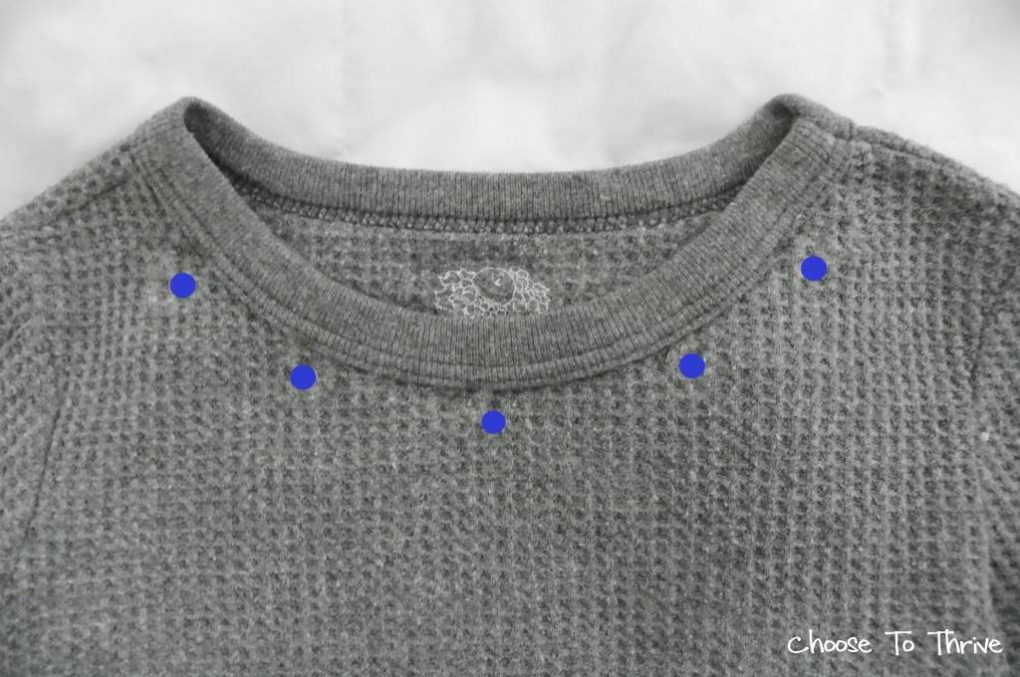
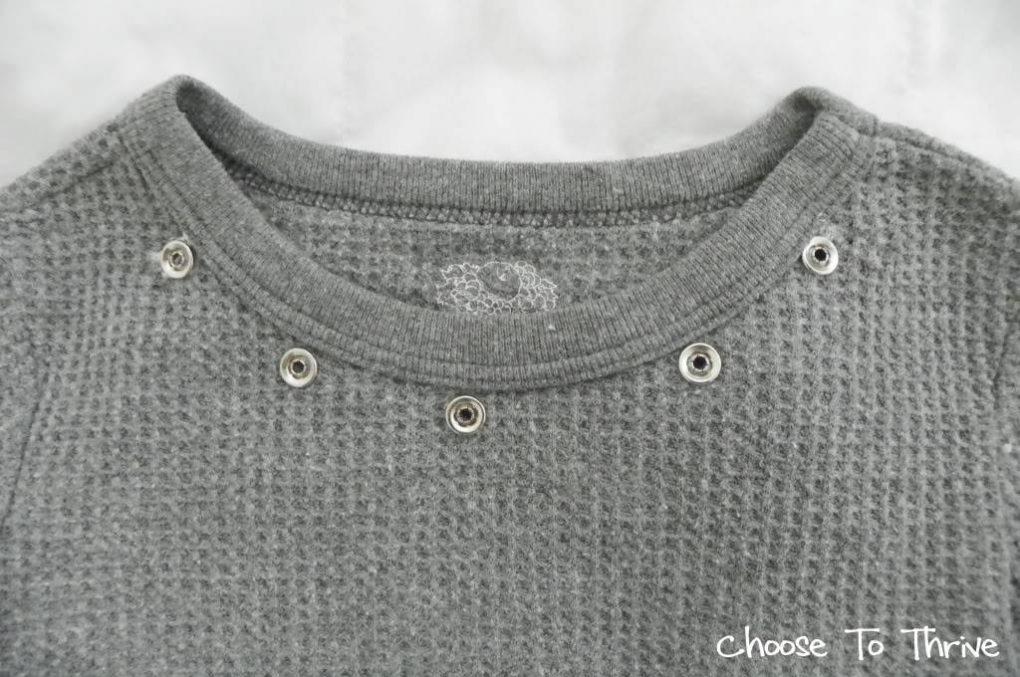
Mark spacing for 5 snaps with a marker just below the neckline …

 photo shirt7.jpg

… and attach snaps using a snap setter or hammer.

 photo shirt8.jpg

(Need help setting snaps? I learned how to HERE.)

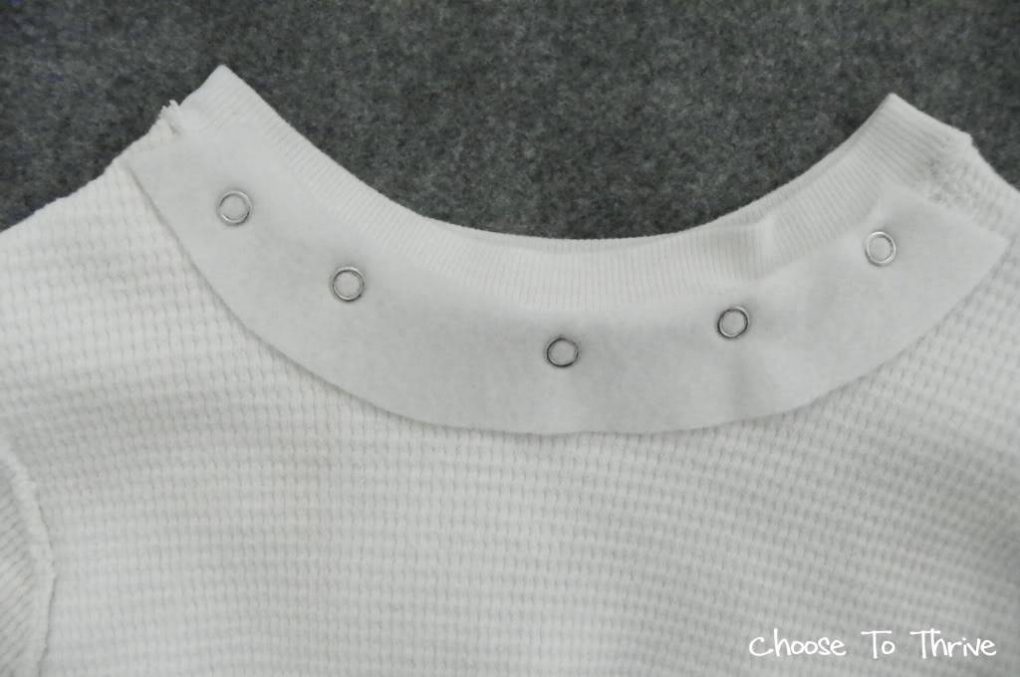
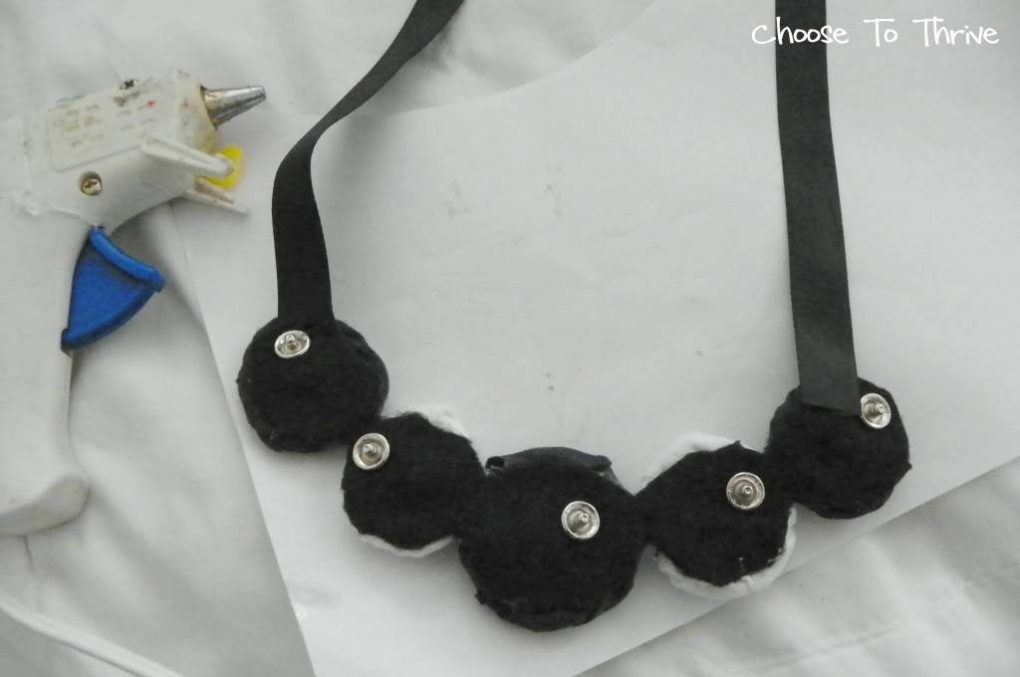
{And a little tip here: if you’re worried about the snaps tearing through the fabric, cut an extra “smile” shape out of felt the same color of the shirt and pin it on the inside of the neckline before adding your snaps like I did with this white shirt. This will help reinforce the fabric and prevent tearing when the flower collars are snapped on and off.}

 photo shirt28.jpg

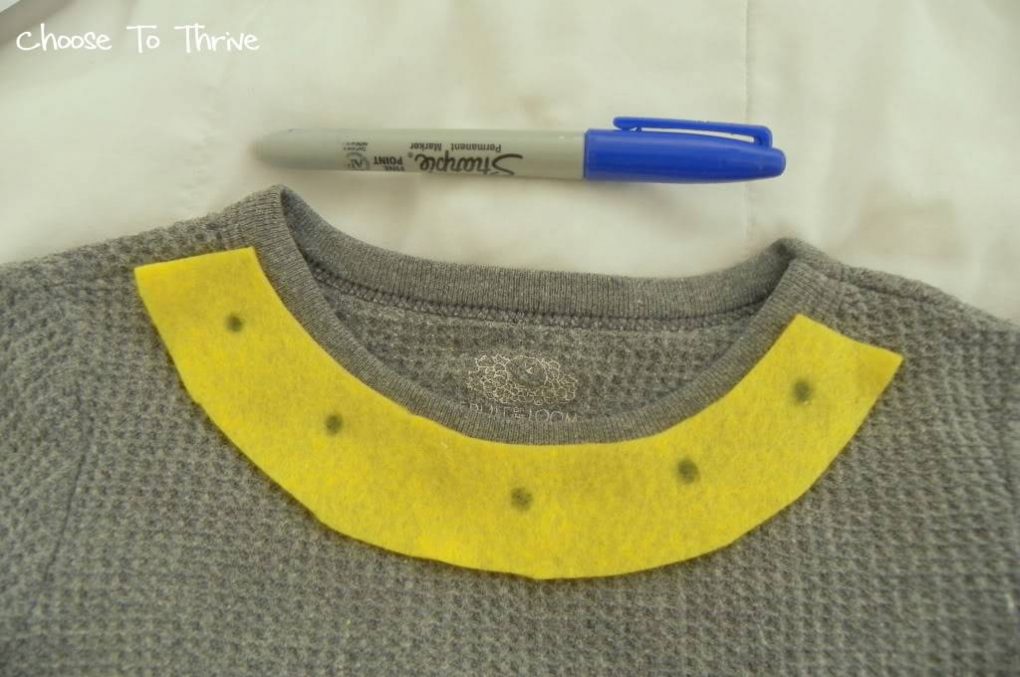
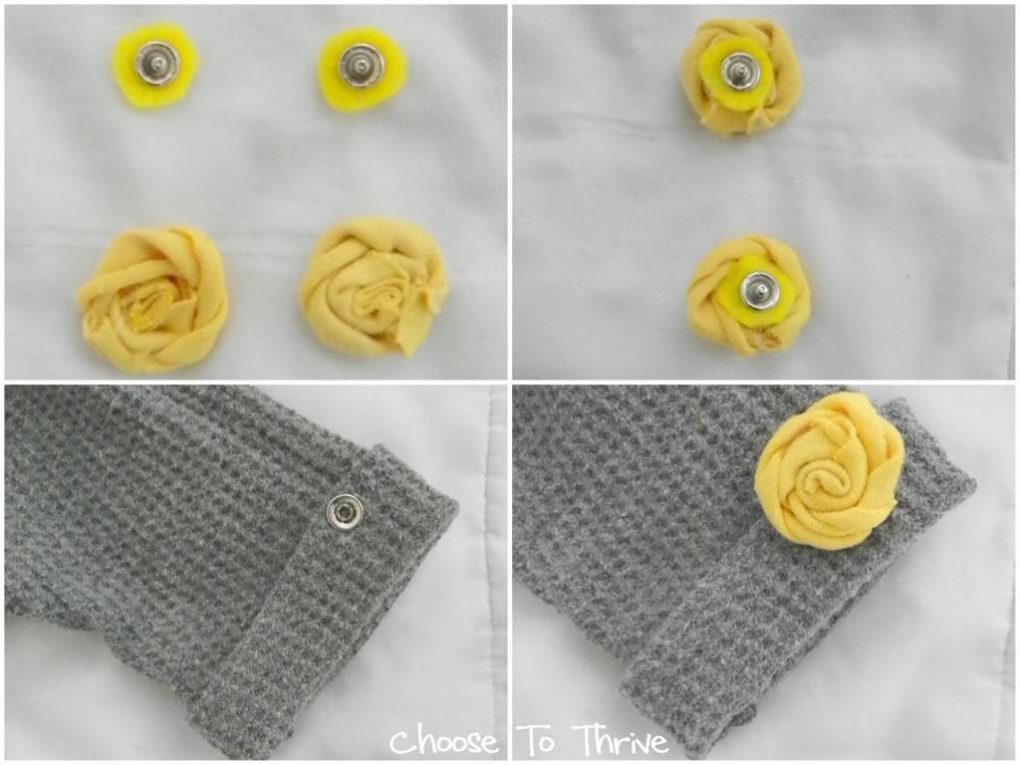
Lay your felt piece along the neckline and mark where you feel the snaps underneath …

 photo shirt9.jpg

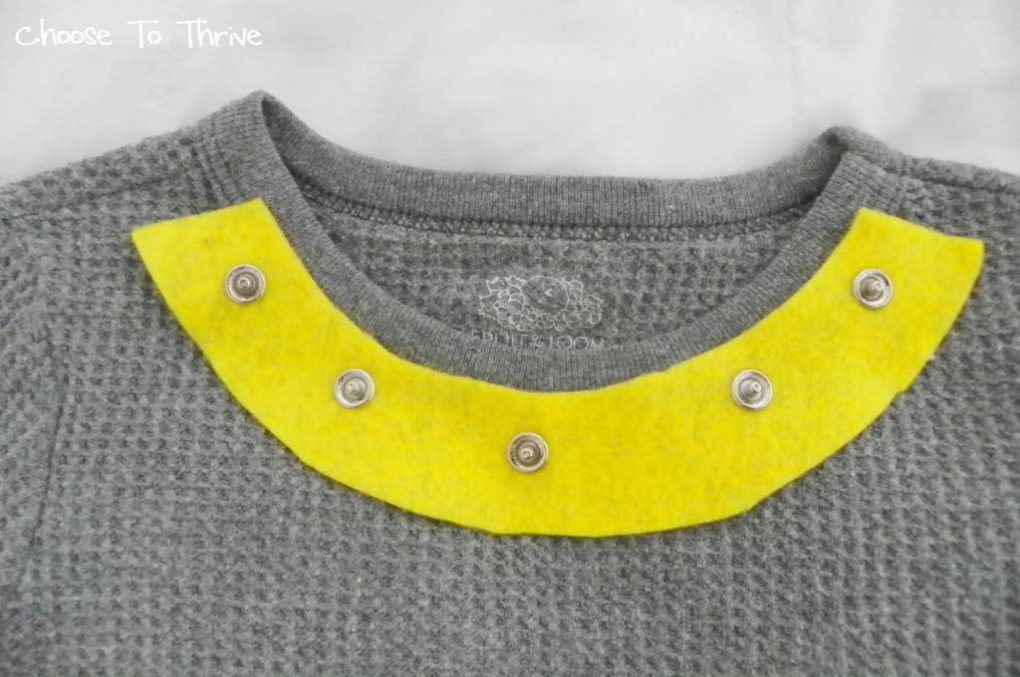
… and attach the other side of the snaps so that it looks like this.

 photo shirt11.jpg

Flip the felt piece over and snap it into place.

 photo shirt12.jpg

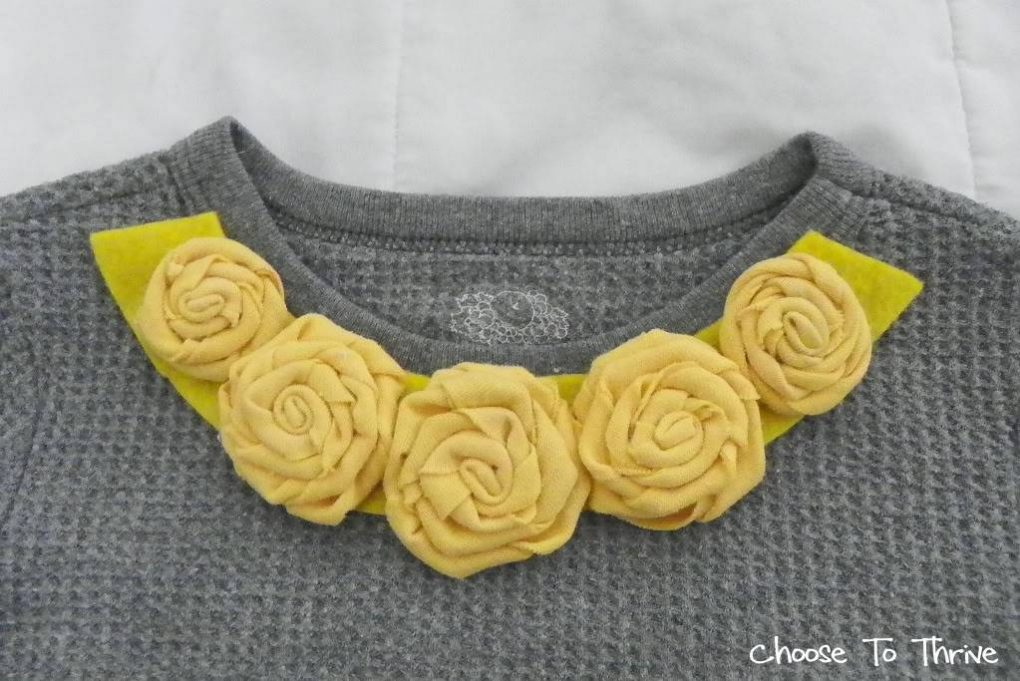
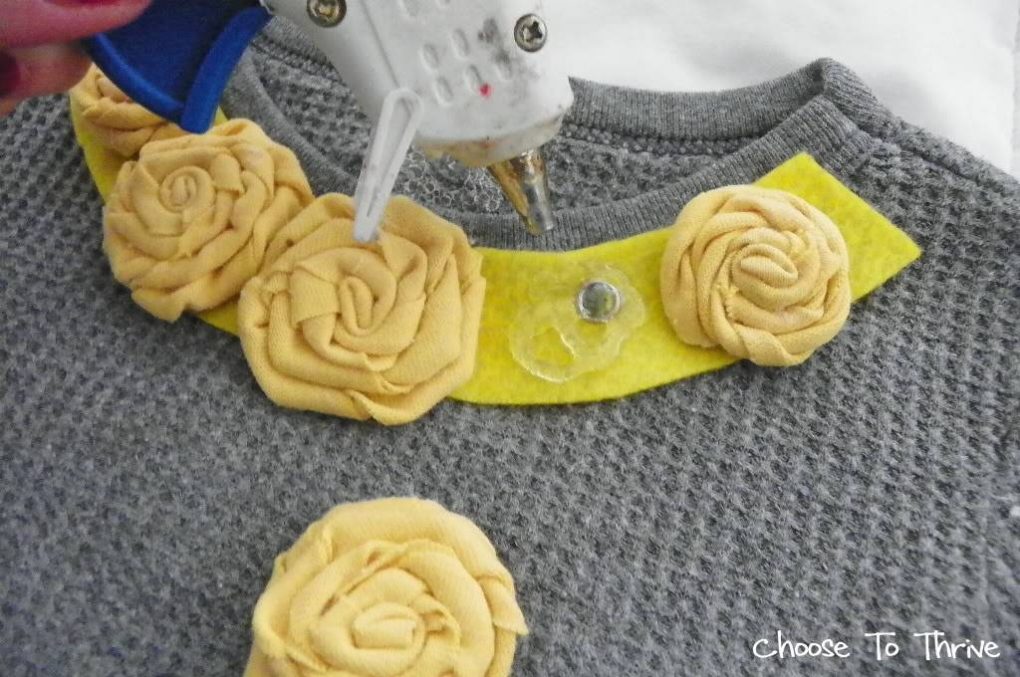
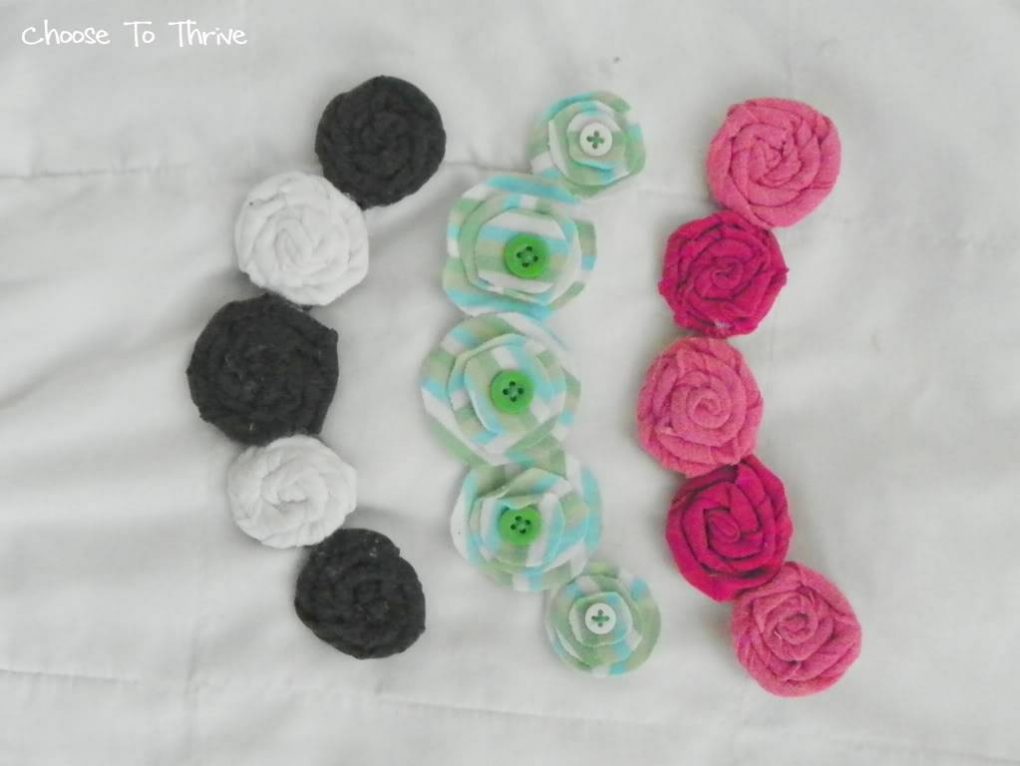
Arrange your flowers where you’d like them …

 photo shirt13.jpg

… and attach with hot glue or thread.

 photo shirt14.jpg

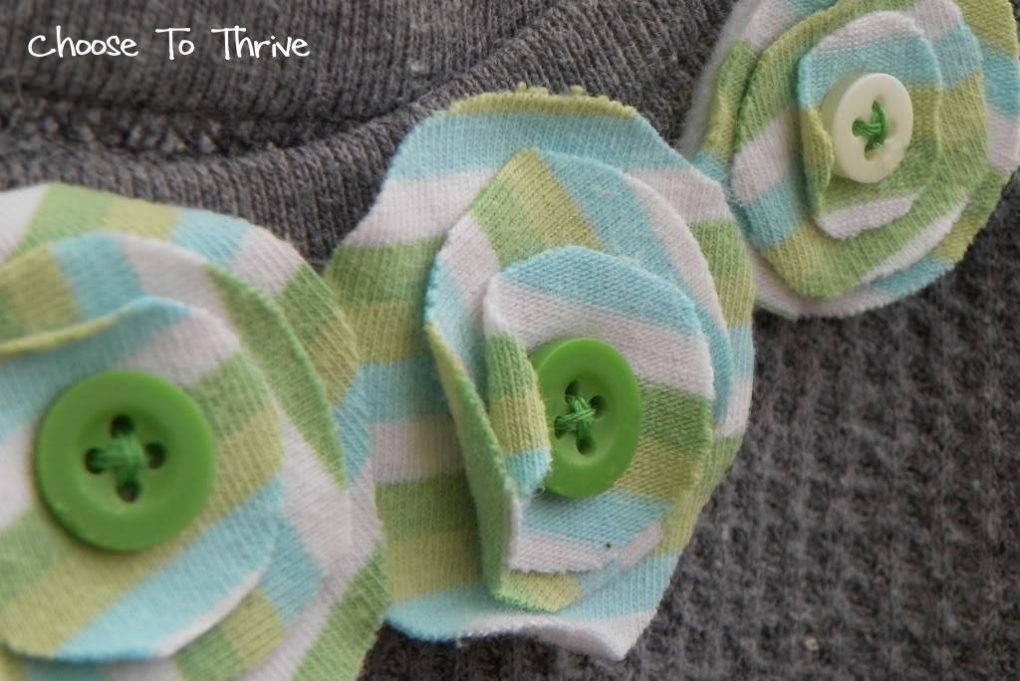
(Need help making rosettes? I learned how to HERE.)

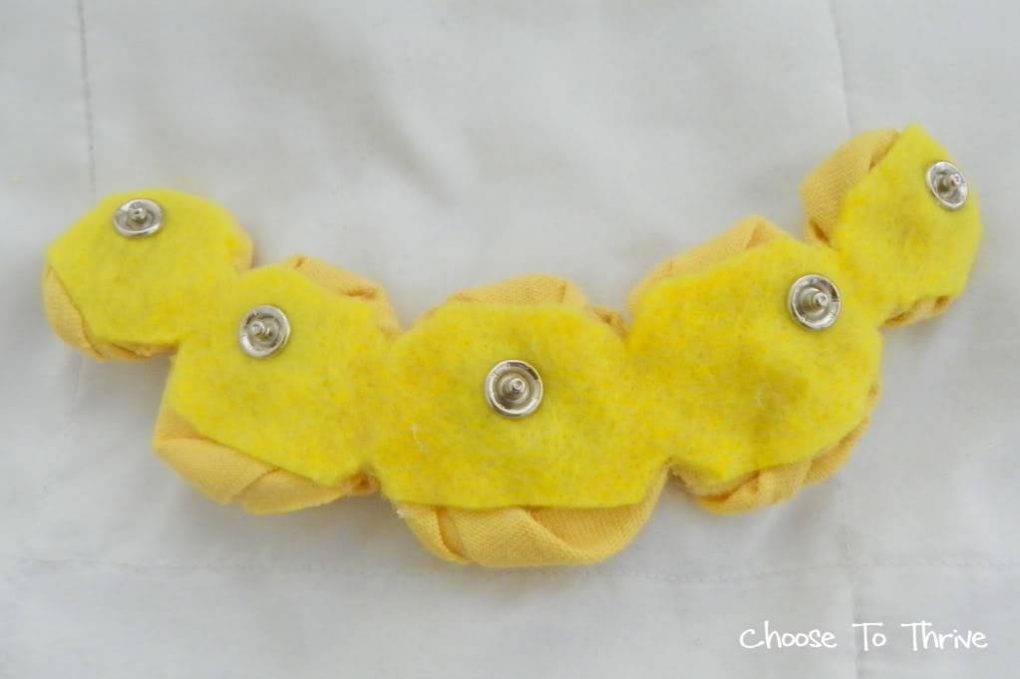
After glue has set, carefully unsnap the flower collar and trim away excess felt.

 photo shirt15.jpg

And that’s it …

 photo shirt16.jpg

Now lather, rinse and repeat for as many different flowers and colors as you’d like!

 photo shirt18.jpg

And you can add all sorts of fun twists to this basic idea!

Try adding snaps and flowers to the sleeves …

 photo shirt21.jpg
 photo shirt22b.jpg

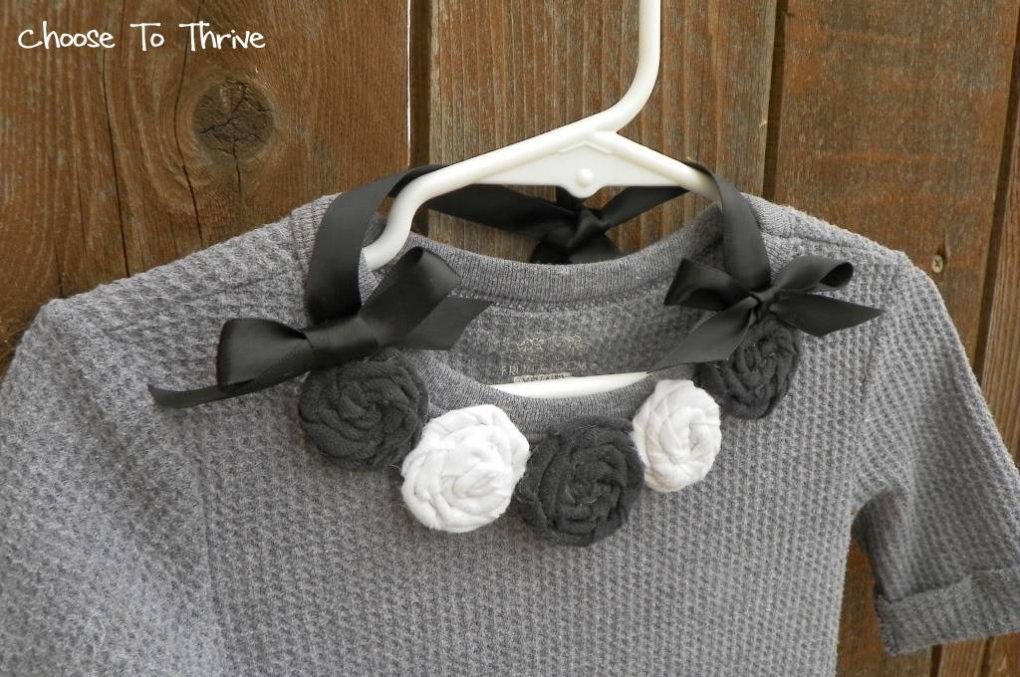
… or ribbons and bows to each end for a pretty faux bib necklace.

 photo shirt23.jpg
 photo shirt20.jpg

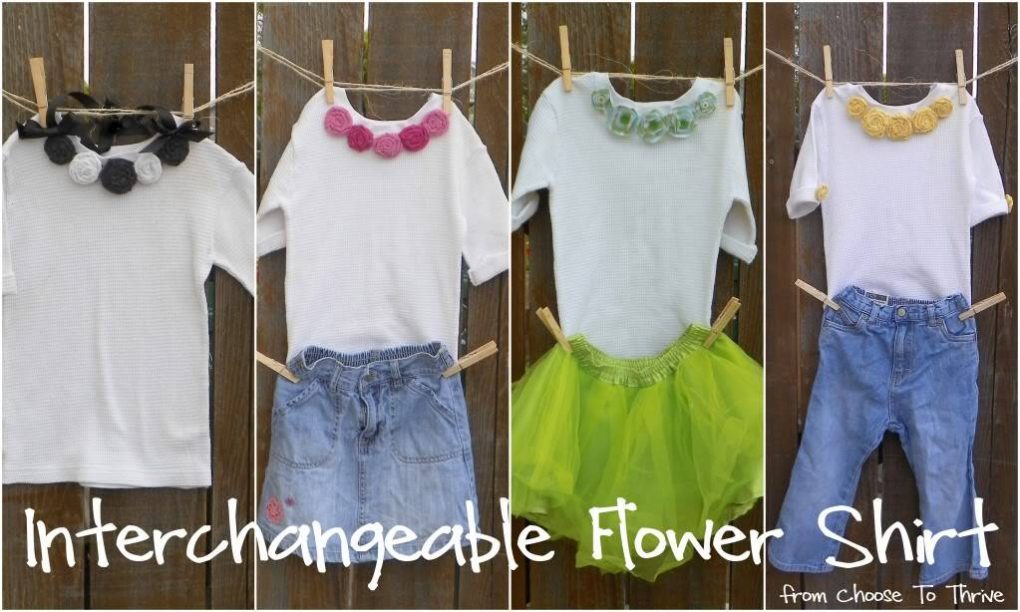
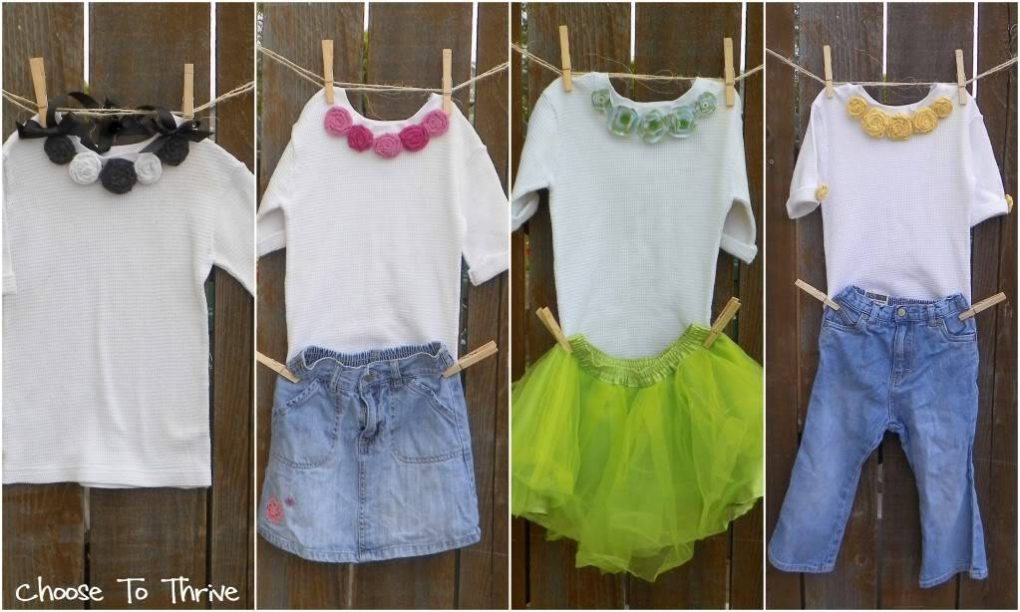
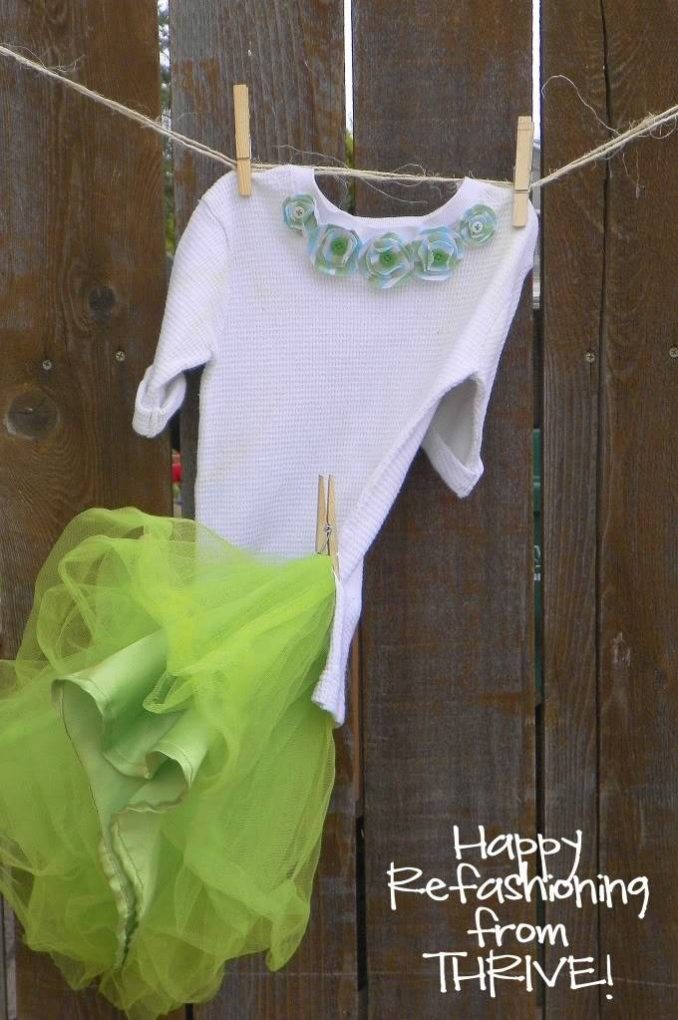
And just like that, those 2 plain refashioned shirts turned into 8 different looks (and I’m already plotting for more!)

 photo shirt29.jpg
 photo shirt30.jpg

And besides being versatile, those sweet little flowers can come off for meal time, play outside or even laundering. Love that.

 photo shirt31.jpg

Hope everyone has fun getting ready for summer!


 photo shirt32.jpg

Who knew picking paint would be this big of deal?

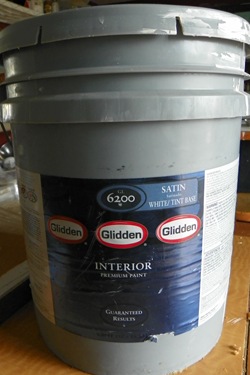
After a couple go-rounds of mixing paint this week I’ve decided that the paint I found at the recycling center won’t work.

100_1498

It’s a pretty color, but very, very light and heavy on the yellow end of the beige spectrum.  I tried mixing different amounts of my gunmetal black paint to see if I could find a grey I liked (which was the favorite reader color by the way) and never could.

paint.1

It’s kind of hard to see in that picture, but the yellow cast is pretty heavy and looked almost sickly. All the shades of grey looked sun-faded or like they had that awful indoor-gross-yellow light on them.

Not good.

I also realized that it was a satin finish and I couldn’t find any more 5 gallon paint buckets in satin finish to mix in to try and stretch it. (Thanks to those of you who recommended not mixing finishes—so right you were). Add to that my realization that a half 5 gallon bucket wasn’t going to be enough and it was time to take the paint back to the recycling center.

And in one of those tender mercies sort of ways, there were two practically full 5 gallon buckets just before I got there in nice, pretty shades of … beige.

Ha!

But at least it’s on the soft tan end of the spectrum rather than the sickly yellow.

100_1764

And thankfully both of them are the same finish which means I should have plenty to finish the whole upstairs.

100_1761-1

The only slight downer is that it’s eggshell finish instead of a satin or semi-gloss and I worry about wear and tear from sticky kid prints that need to be wiped from walls all . the . time. Hopefully having extra paint left over will help.

As far as color, I’m going for grey again as a first choice and beige as the back up. And the good news is that Mr. Thrive is coming around to the grey kitchen idea … slowly. I had always figured that we’d have to do one color for the whole upstairs because of our open-ish floor plan. But it looks like there might be an easy way to break up the miles long, formerly red wall so that we could potentially do one color in the kitchen and another shade for the rest of the upstairs.

wall.4

wall.5

So the plan for this week:

1. Get paint mixed, decided on and actually on the walls.

2. Finish sanding the acres of bead board and get priming done.

3. Start watching Craigslist and Freecycle for remnant wood and/or trim to use to break up the kitchen and living room.

4. Get left over sheet of bead board to use for the new kitchen back splash cut down.

4. Send ornery new camera to the repair shop (*gulp*) and see how well I can blog for the next month using still images from a video camera. Wish me luck on that one …

And what do you think about using eggshell finish paint?

Will it hold up?

Any tips to keep it from showing wear quickly?

Thank you!

Signature

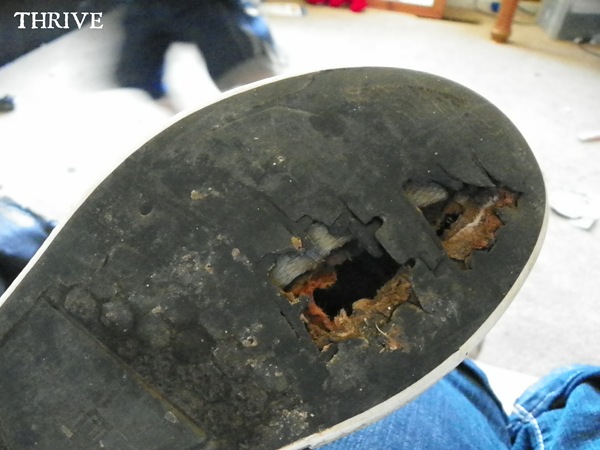
Today’s post is brought to you by my ten-year-old son who managed to put not one, but two holes in his cheapie just-for-the-summer shoes that I bought two weeks ago.

wntt2.1

Really kid? Not even a month of wear?

Just as I started into Mom Lectures 15 & 18: Money Does Not Grown On Trees and You Need To Take Better Care Of Your Stuff, Kid 1 interrupted to suggest we just fix the shoes with duct tape.

Duct tape?

My initial reaction was HECK NO, kid.

Taping shoes together has to bring thrifty to a new low (and not in a good way). But just as I was coming up with the reasons why duct tape would never work, I stopped short and did a 180.

Because thanks to Myth Busters and time to kill to during my hospital stay with kid 6, I know that duct tape can actually do anything.

You can make sailboats that actually sail. And cannons that fire actual cannon balls. And patch sinking boats while you’re in them on the water.

And that’s before you even get into the whole wallet-purse-prom-dress-out-of-duct-tape craze.

gal_tape_prom_01

Image from NYDailyNews.com

So I said yes … and cut a few patches out of cardboard to level out the bottom of the shoe where the holes were … and added a bajillion (or four) layers of the brightest duct tape we had in the house …

WNTT2.2

… and just like that—Kid 1 was back to having dry feet.  Well, dry ugly feet.

wntt2.6

After seeing how the purple looked, my son decided he wanted to change the brown canvas to black “just like the cool kids.” Whatever that means.

So he gave Sharpies a whirl and ended up with two busted pens and shoes that were still brown. Awesome.

wntt2.5

But since I was experimenting with mixing house paint in the middle of all this, he asked if he could use some, too.

Sure. Why not.

So off came the classy decorative duct tape trim and out came a foam brush.

wnnt2.5

Worked pretty well. The paint dried nicely and wasn’t stiff at all. Apparently Olympic Premium Indoor Latex paint in satin finish is the way to go here people.

And as for Kid 1, he’s ridiculously proud of his sad little house-painted-duct-taped wonders, proudly showing them off at Walmart today while I kept checking to make sure no one was getting a cell photo of us for thepeopleofwalmart.com – ha!

wntt2.4

And despite how conflicted I feel about these things, he’s gotten compliments on them from other kids who think they’re so cool!

WNTT2.3

And maybe it’s a good thing that his shoes gave out so fast so that he could start a wave of duct tape art that rocks fifth grade like no body’s business. (And it saves me $10-$20 bucks for at least a few more weeks. 🙂

So…

Shoes With Holes?

wntt2.7

They’re what not to toss this weekend.

Signature