Category

Christmas

Category

metal stars

Anyone else in love with the metal stars all over craft stores, decor catalogs and blog land?

I have one—just one—in my house and have been pining for more, especially for holiday decorating.

When I saw these on the At Home America website, I loved everything about them but the price:
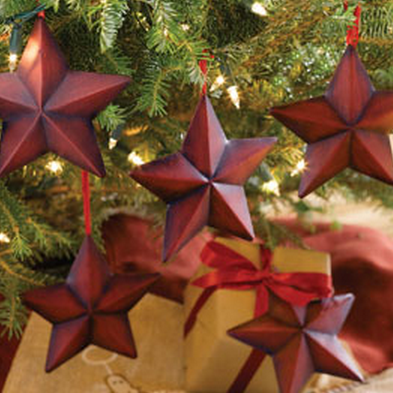
Stars from At Home America

$3 each? Really?

Since spending money is a no-no in my house right now, there was only one thing to do:

Grab an old disposable baking pan and get to work.

And the result?
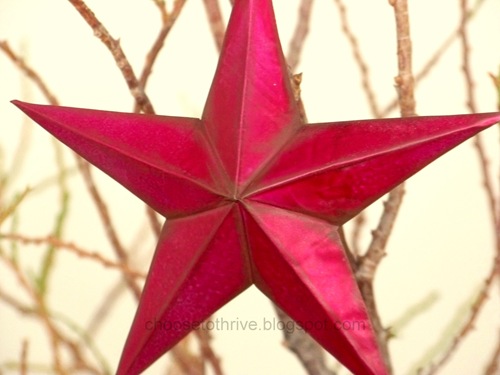
metal stars for ornaments

Adorable metal stars for ornaments, gift tags and decor straight from the recycling bin.

Easy, fast and FREE with no sharp edges or points.

Want to make your own?

For this project you’ll need:

star.29

… and …

star.53

… and …

star.54

As always, I hope you’ll Rock What Ya Got and make this project work for you using what you have on hand already.

********************************************************

Begin by removing any border from the pans and smoothing them out as much as possible.

star.1(This was as good as I could get my pans and they turned out fine.)

Print out a star to use as a template for cutting and tracing.  I found my image here.

Adhere your template with a small piece of double-stick tape …

star.3

… then trace along all the lines using a ball point pen and a ruler.  Yes, you need the ruler.

star.9

When you remove your template it should look like this:

star.34

Carefully cut around your star leaving an 1/8” border all the way around …

star.28

… tapering the border near the points …

… and snipping up to the tracing line on the inside points of the star.

Fold the star over and go over all of the trace lines with the lid of the pen to make the lines both easier to see and bend.

star.35

To finish the edges, place the ruler just below a trace line. Starting at tips and working towards the center, carefully lift up along the border …

star.25

… and fold it over the ruler lip.

star.30

Remove the ruler and press the border down first with your fingers …

star.2

… then smooth completely with the pen lid.

The shape of the star is a series of mountain and valley folds.

Starting from the center, fold the short lines in between the points downward to make valley creases.

star.40

To shape the points, push up from the back of the star along the center seam, working from the center out.

star.43

When you’re done, your star should look like this:

star.42

To make the ornament hole, gently twist a small eye screw in one of the points.

star.8

You can leave your stars plain …

star.39

…  or hit them with a coat of primer and spray paint for a smooth, seamless finish …

star.7

… or sponge on a coat or two of craft or house paint for rustic, weathered look …

star.50

… or rock out your favorite dollar store nail polish for a little bit of BLING.

star.4

My genius six-year-old actually came up with the nail polish idea.  She snuck off with one of the stars and returned a few minutes later with this little beauty:

star.37

Love, love, love all of the paint options!  Have fun picking your favorite!

**********************************************************

A few THRIVE tips to save you some headaches:

1. What if I don’t have any disposable baking sheets lying around? Will aluminum foil work?

Not really. See?

star.44

I tried several different thicknesses and it never was stiff enough to hold it’s shape well.  The star above was with eight layers which is about the most you can cut without the layers separating horribly.  You really do need the stiffer material.

2.  Is there a shape or pan size you recommend?

I used old cake pans like these to make my stars since it was all I had.

star

But, if you are going to buy pans to make this project, I’d recommend using a disposable oven liner if you can find it. You get the most bang for buck with that size and have minimal waste.

100_1730

The price is pretty cheap either way:

star.1

The dollar store carries pans like this, too. Just stay away from the deep-sided pans with heavy grooves in the bottom.

3. How big (or small) can you make these things?

The only real limit is the size of baking pan you can find–the oven liner pan will make a 12” x 12” star easily. On the small end, I wouldn’t go much smaller than 2-3” tall.  Any smaller is too much of a pain to work with.

I made two sets of ornaments for my tree.  Just for comparison, here they are next to a graham cracker box.  The scale was perfect.

star.38

4.  One last thing … print out your template 130-150% of what you want the finished size to be.  The folding and dimension will make your finished star shorter/smaller than the template.

*******************************************************

Wishing you and your family happy holiday decorating!

star.36

banner

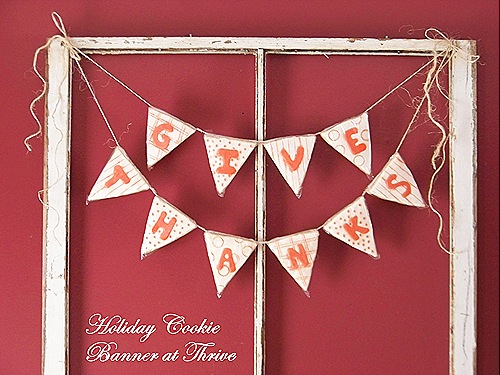
Inspired by all the cute holiday banners floating around out in Blog Land, this delicious version does double-duty as holiday decor and a treat for your guest to take home with them.

Soft and thick sugar cookies stand in for the traditional fabric and paper pennants, while the royal icing gets a festive upgrade with fun “tattooed” patterns.

banner.3

Best of all, this was simple and easy to make using items from the pantry that I already had on hand, so FREE!

(Just a note: There are pictures from two different batches so please ignore the differences of colors.)

Want to make your own?

For this project you’ll need:

banner.12

(For the cookies and icing, use your favorite sugar cookie and royal icing recipes.)

To make the pennants, I cut out a simple template using my nicest junk mail and a pair of blunt-nose scissors from the kids’ pencil box.  The size doesn’t really matter as long as it will fit in a sandwich-size plastic zipper bag.

I used my mom’s sugar cookie recipe and rolled it out almost a half inch thick for a super-soft cookie.  Trace and cut out your pennants using a butter knife …

banner.16

… smoothing out any rough edges and baking until just barely golden on the edges.

When completely cool, pipe the letter outlines and around the edge of the cookie with royal icing …

banner.15

… then flood the inside with more icing …

banner.14

… and smooth out with a butter knife. And don’t worry if your letters look a little bit like blobs (mine did).  Simply scrape away any problem spots with a knife.

Let set for 5-10 minutes and then lightly score decorations in the frosting with a thin knife, cap lid or other interesting shape.

For the “tattoo” color,  add a drop of food color to a plate with a teaspoon of water and mix …

banner.18

… then dip your cap or drag a knife through the color and then through the icing for subtle “tattooed” designs.

banner.28

No worries if you goof … just blot away color with a paper towel.

Let background icing set before filling the letters carefully with another color.

banner.23

Let finished cookies set for a few hours to fully dry.  Really.  Do not rush this.

To assembly the banner, cut the tops off enough zipper bags to cover your letters …

banner.25

… insert each letter …

banner.26

… carefully turn over and pull excess plastic taut, taping in place.

banner.8

Cut a generous length of ribbon/twine/rope, etc. and place above cookie …

banner.13

…tucking the loose plastic into a neat triangle-ish shape …

banner.9

…folding over the twine and taping in place. The twine should rest along the top edge of the cookie pennant and be able to slide easily.

To help the banner hang better and keep the cookies more securely attached, attach an extra strip of tape to the top corners so that the twine lays flat across the top and doesn’t pull up at the ends.

banner.6

Attach the rest of the letters the same way in reverse order or your banner will read backwards.

banner.24

To keep the cookies from bunching together, wrap a piece of tape between each pennant.

banner.4

And for the fun part, hang your awesome cookie banner proudly during the celebration …

banner.27

… and then slide the cookies off the twine to send home with guests for a fun good-bye treat.

banner.30

And that’s it!  Easy, delicious, unique, FREE!

And how cute would this cookie banner look for Christmas? New Years? A birthday party? Welcome home party?

I’m already plotting.

***************************************************

A few THRIVE tips to save you some headaches:

1) Do not rush the drying on the icing or bad, bad things will happen.  Oh, and double-check the order on those letters.  If you mess up either of these important steps, you end up with this lovely mess.

banner.20

Yes, this was my afternoon yesterday.

2) If you totally mess up a cookie, don’t freak. Just scrape off the icing and frost again.  I ended up doing that on all of mine after “skipping” tip #1.

banner.22

3) Help out the flavor of your royal icing substantially by subbing out the vanilla extract for a stronger flavor.  I love almond, but orange, butter or lemon would be great, too.

4)  Cut out a few extra pennants. You may end up needing them – I did.

5) I have really dark walls so I purposely went for light colors and simple patterns.  But this would look great with dark, rich colors and bold patterns.  How great would olive green and brown pennants look with cream or dark yellow letters?

***************************************************

Wishing everyone a warm and safe holiday weekend!

banner.31 

Linking up to the wonderful showcases on my sidebar, including:

Visit thecsiproject.com

One of the challenges of trying to get dollar-free during the holidays is that some of my favorite traditions just don’t work.  Case in point: sending out photo cards to family every year … no way to get around buying the photos and the cards.  And to date, I haven’t met a photo developer who’s willing to trade or barter or toss out a freebie.

Until today.

Please meet my new BFF, Shutterfly.

And thanks to their incredible offer (more on that later), our traditional Walmart Walk of Shame Christmas pictures will be going out again this year so that everyone can take one look at our family and realize just how good they’re doing.

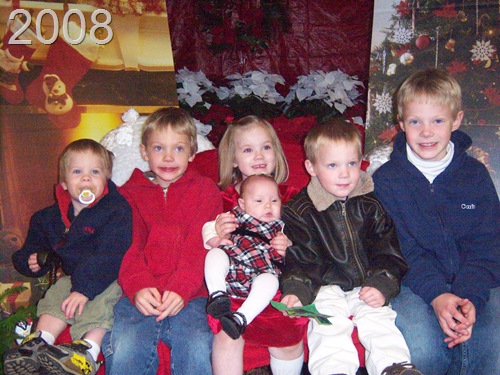
Because here’s the deal: I have six, small, loud children who don’t do the picture thing well… and family pictures are something of a joke … and so a few years ago I found myself a week away from Christmas, browsing the holiday stuff at Walmart when I did the unthinkable.  I honestly, truly snapped a quick picture of my kids in the store and called it good.

Think I’m kidding?

100_3388

That’s my crew in front smiling in the Walmart BBQ Clearance area / North Pole merchandising area.

And the next year I did it again … just down to Walmart we went, to stand in front of boxes of Christmas trees and snap away.

100_1442

Classy stuff people, classy stuff.

Walmart offered trick-or-treating again this year and I managed to get this:

100_0213

And until this morning, I was thinking that this may be the money shot for Christmas cards this year, kids.

The only problem is that the Shutterfly cards are beautiful—as in to die for beautiful—so Christmas in the seasonal isle just isn’t going to cut it.  I want to do better, try harder … even go for something more warm and classy … like a family picture in Electronics.  Ha!

With 700+ designs, It’s going to take me weeks to decide between:

STATIONERYCARD_5x7-23046-2407-MERCHLARGE_FRONT-v1281039723000112300

… the elegance of the monogram …

PHOTOCARD-103-361-MERCHLARGE_FRONT-v125210396000067482

… or the bird & brown combo that I’m so into right now …

STATIONERYCARD_5x7-23046-2372-MERCHLARGE_FRONT-v128103885300099082

… or something fun and vibrant …

STATIONERYCARD_5x7-23052-2740-MERCHLARGE_FRONT-v128104005600081309

… or a declaration of faith ….

And for the kids’ neighborhood cookie party ….

STATIONERYCARD_A2-24047-2675-MERCHLARGE_FRONT-v128096229800058199

… I’m really feelin’ the Frosty vibe.

And I love, LOVE, that all you have to do is upload your pictures, pick your style and DONE.  A few days later these beauties will be in your box. I’ve ordered from Shutterfly before and love how quick and painless it always is. And really, anything that keeps me from dragging my dirty half dozen into a store makes my Awesome List.  Besides, the colors always turn out great and the quality rocks.

But here’s the best part:

(*squeal*)

All you amazing blog ladies can get 50 holiday cards free, too.

Serious.

Check it out here.

So there you go.  Merry FREE Christmas to me … and you!

Happy Shopping!

*********************************************************

FTC Disclaimer: I score 50 free Christmas cards for writing this post and couldn’t be happier. But free isn’t worth it if it’s crap, so my recommendation is based on my past, very awesome experiences with Shutterfly and my excitement to hook my amazing readers up with the same bit of holiday loot.