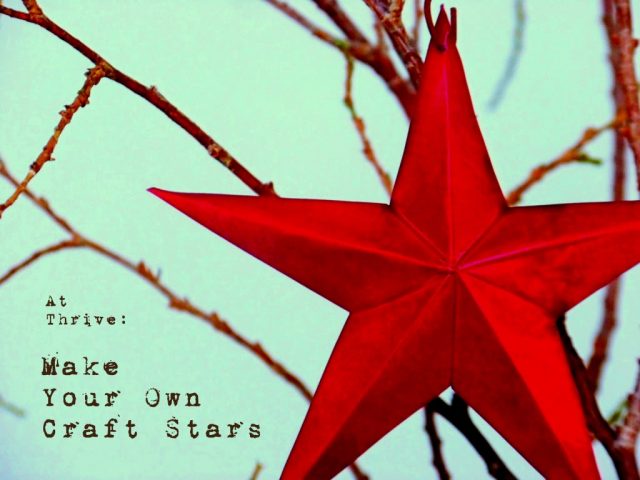
Anyone else in love with the metal stars all over craft stores, decor catalogs and blog land?
I have one—just one—in my house and have been pining for more, especially for holiday decorating.
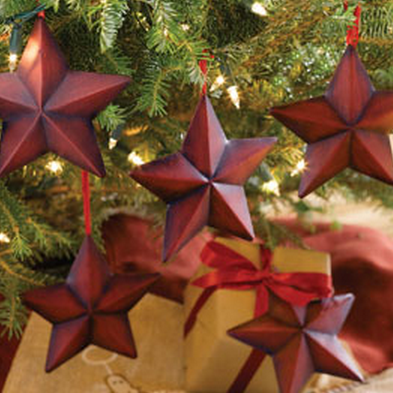
When I saw these on the At Home America website, I loved everything about them but the price:

$3 each? Really?
Since spending money is a no-no in my house right now, there was only one thing to do:
Grab an old disposable baking pan and get to work.
And the result?

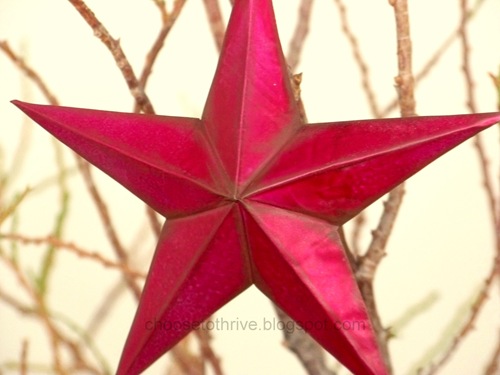
Adorable metal stars for ornaments, gift tags and decor straight from the recycling bin.
Easy, fast and FREE with no sharp edges or points.
Want to make your own?
For this project you’ll need:
… and …
… and …
As always, I hope you’ll Rock What Ya Got and make this project work for you using what you have on hand already.
********************************************************
Begin by removing any border from the pans and smoothing them out as much as possible.
Print out a star to use as a template for cutting and tracing. I found my image here.
Adhere your template with a small piece of double-stick tape …
… then trace along all the lines using a ball point pen and a ruler. Yes, you need the ruler.
When you remove your template it should look like this:
Carefully cut around your star leaving an 1/8” border all the way around …
… tapering the border near the points …

… and snipping up to the tracing line on the inside points of the star.
Fold the star over and go over all of the trace lines with the lid of the pen to make the lines both easier to see and bend.
To finish the edges, place the ruler just below a trace line. Starting at tips and working towards the center, carefully lift up along the border …
… and fold it over the ruler lip.
Remove the ruler and press the border down first with your fingers …
… then smooth completely with the pen lid.
The shape of the star is a series of mountain and valley folds.
Starting from the center, fold the short lines in between the points downward to make valley creases.
To shape the points, push up from the back of the star along the center seam, working from the center out.
When you’re done, your star should look like this:
To make the ornament hole, gently twist a small eye screw in one of the points.
You can leave your stars plain …
… or hit them with a coat of primer and spray paint for a smooth, seamless finish …
… or sponge on a coat or two of craft or house paint for rustic, weathered look …
… or rock out your favorite dollar store nail polish for a little bit of BLING.
My genius six-year-old actually came up with the nail polish idea. She snuck off with one of the stars and returned a few minutes later with this little beauty:
Love, love, love all of the paint options! Have fun picking your favorite!
**********************************************************
A few THRIVE tips to save you some headaches:
1. What if I don’t have any disposable baking sheets lying around? Will aluminum foil work?
Not really. See?
I tried several different thicknesses and it never was stiff enough to hold it’s shape well. The star above was with eight layers which is about the most you can cut without the layers separating horribly. You really do need the stiffer material.
2. Is there a shape or pan size you recommend?
I used old cake pans like these to make my stars since it was all I had.
But, if you are going to buy pans to make this project, I’d recommend using a disposable oven liner if you can find it. You get the most bang for buck with that size and have minimal waste.
The price is pretty cheap either way:
The dollar store carries pans like this, too. Just stay away from the deep-sided pans with heavy grooves in the bottom.
3. How big (or small) can you make these things?
The only real limit is the size of baking pan you can find–the oven liner pan will make a 12” x 12” star easily. On the small end, I wouldn’t go much smaller than 2-3” tall. Any smaller is too much of a pain to work with.
I made two sets of ornaments for my tree. Just for comparison, here they are next to a graham cracker box. The scale was perfect.
4. One last thing … print out your template 130-150% of what you want the finished size to be. The folding and dimension will make your finished star shorter/smaller than the template.
*******************************************************
Wishing you and your family happy holiday decorating!


102 Comments
Wow. Really. Wow. These look awesome!! I talked about you and your bd bucket planter on my tiny blog. Thanks so much for the inspiration!!
This is such a great idea! I love the nail polish one:)
These are great and your tutorial with tips is greatly appreciated.
Wow, I cannot believe how cute these are. I think we'll make some of these.
Genius!!
YOU ARE AMAZING!!! These are so fabulous!!!
LOVE IT! this is such a fabulous idea! you are really good at this!!!!
This is awesome! I am featuring this at somedaycrafts.blogspot.com.
WOW- great idea!!
THIS IS THE COOLEST TUTORIAL EVER! (Ok, well not ever as I have a few ones on my blog but I digres…)But really, this one is ten shades of awesome. I can't wait to try it.
Now if only my printer was working.
Wow, what an awesome idea. I'm looking for some inexpensive ornaments for my tree since it is looking a bit sparse. I think I'll do something like this.
Impressive! I wish I had the patience and the creativity for this kind of wicked smart crafting!!!!!!
Great idea! Love that you used some old baking pans — you would never guess!
I made some stars out of paper with a tutorial. I love your pan idea!!!! Good tutorial too!
Yeah this is pretty much the coolest thing ever. I would love it if you linked it up to my Handmade Holiday Gift Ideas party! 🙂
Amie
http://kittycatsandairplanes.blogspot.com/2010/11/holiday-gift-ideas.html
awesome!
That is so cool. I have pondering on ways to make those craft stars too…you did all the work for me!! Thanks for the tutorial!! 🙂
ok – you're my new hero! I love the texture and am crazy for stars! Will be making many of these tomorrow! THANK YOU!!
I'm bookmarking this for Christmas presents next year. So pretty!
The rustic looking one rocks my world. Love it!
You are so creative. This is great! I'm following you now.
Katie
Wow – fabulous!! So clever!! Love the nailpolish "paint" too!!! Going to bookmark this one… 🙂
Love your metal stars! This is totally do able and a money saver to boot. They look great, you clever woman. Win, win and win!
Wow! These are seriously amazing! I'd love for you to link up to my Thrifty Thursday if you have a chance.
http://htbhome.blogspot.com/2010/12/thrifty-thursday-chapstick-lotionbar.html
Great project!! Very impressive results! I'm posting about this at dollar store crafts on Saturday: http://dollarstorecrafts.com/?p=8747
Very fun! Will be bookmarking this page and trying this out soon
Brilliant! Pocket Full of Posies sent me this link…I am floored…what a great idea! I am a new follower too!
Holly
504 Main
Heather from Dollar Store Crafts pointed me in your direction, and BOY am I glad she did! This project is coated in awesome sauce (as my Teen Queen would say)!!!!! I may not get any done for Christmas, but the Fourth of July is looking pretty good! Thank you for sharing
I can't wait to make some stars! You totally rock!
What a great post! Thanks for linking up at tatertotsandjello!
I'd love for you to check out my blog! and maybe give some bloggin' love!
http://vintagewannabee.blogspot.com/
Mucho love,
Nichelle
P.S. i'd love for you to come party with me {bring your stars} to TALENT TUESDAY!
Those are GENIUS!! I absolutely love them. I love the rustic one you did with house paint. But I also love the bright pink one. And the glitter one. 🙂
♥ Amber
Silver Lining
Wow…. thanks for this!! Thanks too for all the extra tips… it's always nice when you are saved the pain of having the tin foil foil you. 🙂
Great tutorial! Thanks for sharing this great idea with us.
Genius!!! I've wanted to make stars like this for the longest time but I could never figure out how. Now I know. Thanks!
Superb tutorial and unbelievably chic result! Thanks a bunch, now must go check out the rest of your blog. I agree, your 6 year old is a genius! Nice to meet you, Nike!
So cool and very clever! Love 'em!
Love this idea. The metal looks great as is or painted.
I came across your great blog via Lamb Around, I love stars and have many through out my home. This idea is so nifty!! I am thrilled to be your newest follower.
http://thetatteredtag.blogspot.com
OMG baking pans! What a great idea.
These are absolutely amazing! I love them. I can use them year round for decor, even for the 4th of July and hang them outside on my tree.
Thank you, thank you, thank you.
Easy and Cheap, my favorite two words 🙂
Wow! That is so awesome! I was just starting a tutorial about making 3-d stars out of paper, but I never would have thought of cake pans! I'm going to make the stars as part of a larger project for my website. When I do, I will definitely link back to you. Merry Christmas!!
Nike – Genius! Thanks so much for linking to the party – I greatly appreciate it! I featured these today – stop by and grab a featured button if you like. Hope you have a lovely week! ~ Stephanie Lynn
Great idea! Thanks for stopping by my blog – your Thanks bottles were great inspiration and I had many compliments on my version!
You have opened up a whole new world…imagine the possibilities!
Super – duper idea! Love it :0)
Oh my goodness, I love these so much. Who knew you could make those awesome stars that are everywhere out of dollar baking pans! Also, I loooooove the nail polish idea! Kudos to your kiddo. I featured you today on my favorite things 🙂
I squealed out loud when I saw this post!!! I have been coveting these stars too- but no $$ to spend on them….this I can do! thank you so much for sharing!
i loved this! thank you so much. mine came out fantastic and i never imagined i could make them myself. i linked you to my blog post about it at xokatrina.blogspot.com!
Found you on dollarstorecrafts.com. But forget Christmas! I'm going to make a large rustic one for my house for all year round! Love the idea and the price!
I LOVE these! Great tutorial too! Thanks for sharing with us at Sassy Sites! xoxo
You go girl!!! Those turned out AWESOME!! It looks kind of tedious, but not difficult. Great job! 🙂
these are so cute! today i was at dollar general and i found disposable cookie sheets 2 for a dollar with no imprint or anything on the bottom, i had to get some to try these!
oops i meant dollar tree
You're TOTALLY BRILLIANT! Amazing…I would never have thought that star came from that pan!
Amazing work.
Great idea! No disposable pans in my house at the moment, but I have cardstock… and foil… and a bit of glue… Time to experiment. =grin=
For those feeling brave enough, there's another source of aluminum: drink cans.
One thing to note ( I made a 3×3 star out of a soda can) is that the preportions will change a bit as the star gets smaller: using the template provided gave me a star with much longer points. (Looks pretty at the top of the mini christmas tree tho)
I came by way of LambAround and it was so worth the click! I love that this is uber inexpensive & looks completely doable (thank you for the pics! :>). And even better, I'm so jiving with how completely customizable (is that even a word?!) this sweet little project is!! :>
So I did this tutorial while hungover to take my mind off of my head. It took two tries, but the second one is PERFECTION. Thank you so much!!
p.s. The handle of scissors works really well to iron out the creases in the tin.
Stopping by and following your blog from Lamby's blog hop…
Have a happy holiday season!
Best,
Elizabeth
We had some aluminium laying around that had been cut from drink cans for a different craft project, and I used that because it would de-stash a little. The star project worked, but the metal was very stiff and I needed to pad it with a catalogue beneath for the pen lines to show. The OP is right that tinfoil bakeware probably is the best bet.
Really great idea! There is no way to tell that was a metal cake pan! Awesome idea.
I have made so many of these it's nuts. I have been using them to decorate gifts with the name tag. They are a big hit, and all credit where credit is due to you of course. My points don't come out as nice as your stars, but I am a nail-biter, so no nails. I have been priming mine, then brown with red on top for a rustic look. I will be trying some new colors after Christmas, I'm just trying to get them done. Thanks so much for this very cool idea! From one who loves to rock what they got to another-Merry Christmas!
SWEET! I love these stars and now I dont' have to pay a million dollars to get them! Awesome idea, thank you so much for sharing. Can I link it on my blog to show other's the awesome idea? let me know! Thanks 🙂
awesome idea,I just made one and it came out pretty nice.thanks a lot(i posted a picture of it on my blog if you want to see it)
How sturdy are they? Do you have to throw them away after a season?
Amazing! Do you have a degree in engineering or something because that took some serious thought!!
Loved it!
consider me your newest fan!!!!
HOLY COW! These are incredible and just made the "must make" list!
This is a wonderful idea from such a simple material. I love how you think! Can't wait to try it. ~Lori
Thanks for this great idea!
Loved it and blogged all about you.
http://ibrakeforgaragesales.blogspot.com/2011/05/barn-stars-out-of-oven-roaster-pans-el.html
Super cute idea!!
I love dollar store crafts!
Just wanted to say I'm enjoying your blog and creativity. Finally got a chance to try something! Added my picture to TheIronCraft.blogspot.com group.
http://www.flickr.com/photos/58782363@N02/5909909112/in/pool-1525156@N25/
LOVE YOUR BLOG! Am a new follower 🙂
Very clever! I'm following you now. Don't want to miss any more great ideas!
Great project! I can't wait to give this a try! Thanks for the awesome tute!
You are so cool! How did you think of this?
Wow … I Love Love Love them…
I am so going to be busy making some for my tree.
You are one TALENTED LADY !!!!
Thxs for sharing
I love these! What a brilliant idea. I'm teaching them at our Super Saturday this week, and linked them all to your blog!
I am definitely making some of these! Great ideas, thanks so much!
p.s. I've got some old pie tins I'll use!
I am a follower and Love the star ornaments!
Connie Haack
letsgosew@yahoo.com
I like Thrive on Facebook!
Connie Haack
letsgosew@yahoo.com
I love the white one, it's perfect. Can you give us a little more detail on your method of sponging them to get the rustic appearance? I will try the soda cans and pie tins for smaller ones but they would be awesome out of copper sheets if you like copper that is. You can also "emboss" these with names, designs or whatever you like by using the same "scoring" method used for making them. Just remember to reverse any lettering if you do that.
I'm going to make a double sided one to use as a tree topper. Thanks so much for this great idea!
Those stars are so awesome. I'm gonna have to try making some.
Thanks for sharing!
What a wonderful idea! I saw similar cardboard stars in the shop and they were so expensive! Now I can make my own! Thanks so much!
I was doing this with the beer cans my husband keeps stacking up, but I wanted something bigger, So my wonderful husband suggested I go to the hardware store and purchase aluminum flashing for roofing, its 10 inches tall and 7 ft long for only $8.00! So Im off to make some bigger stars for our home! THanks for the fold over edge tip…I will definitely incorporate that next time!
This is so cool! I can't wait to try it!
Great idea!! I just made these the first two didnt work well had to get the hang of it…lol I am wondering on your curly or spiral hangers. Did you buy those or make them? If so how did you make them?
Thanks for the detailed instructions. And kudos to your genius 6 year old.
Awesome Idea! I'm definitely gonna give this a try. Thanks for the great idea!
MIND = BLOWN right now!! I'm on this project for sure! My decor throughout my house is sortof country/primitive, so these would be PERFECT to make in coordinating colors & have hanging all year round! And of course I'm going to do some hot pink/silver glittery ones for the CHristmas tree! [We have a 2yr old & 5yr old, both girls, & our new theme for Christmas starting this year is hot pink & silver – poor daddy haha ;)] CraftGossip.com posted this link on their Facebook today! And I'm glad they did!!
Super! Love it, repinned it! Thanks for sharing this!
Can i just say you are fantastic!?! So clever and resourceful and with such a great outlook. I am digging in my cupboard as i write! Thank you!
I love this idea !!! I put my own twist on it.. I use old cardboard such as cereal boxes, soda cartons or any thinner cardboard boxes. Then I covered mine with contact paper. Turn out wonderful.. making some with the grandkids next weekend!!
Thank you – made these for a school craft fair out of oven protectors (got 7 small stars and 7 large stars for $3.99), painted with red, black or white craft paint and put glitter on. They look fabulous!
Made these with aluminum cans, and it worked great. Just cut out a flat sheet from the can, and follow directions above. You can get 2 stars that are about 3 inches from tip to tip. Love this craft. Thank you!!!
OMG! That is amazing! I love this! We're getting ready to move and I know what decor additions are going to be made now. Thank you for sharing this. 🙂
Ashley @ Forgetful Momma
http://forgetfulmomma.com
LOVE YOUR PRETTY PROJECT.
THANKS FOR SHARING..
ITS WOW !!
Waiting to receive more..
I'm the person who spent big money on buying stars from my local craft store! I found this tutorial on Pinterest just now. This tutorial is VERY well written, lots of great pictures, easy to follow, simple tools we all have around the house and I'm glad you added little side remarks such as needing a ruler and what kind of pan to use vs. tin foil. I'm looking forward to making some stars! Thanks so much for sharing your project! Sandra
Thank you for sharing
Barn Star
love your ideas. thanks for letting me share need some pans.