27 Results

thrift

Search

Ever notice how the threat of company stopping by can motivate you to finish those someday projects?

Well this week’s visitors finally got me outside to make over our curb-side travesty of a mailbox.

Oh sheesh this thing is bad.

100_3122

I mean swinging-from-the-ugly-tree bad.

100_3120

Just check out that chipped paint, rusted top, peeling house numbers and seriously thrashed post. Our neighbors must hate us.

100_3121

But since Katie proved that spray paint and sanding can save anything, I figured a mailbox make over was worth a shot.

I mean really … could the thing look any worse?

I removed the peeling, reflective house numbers with Goo Gone and then scrubbed away the residue with a little soap and steel wool.

100_3123

Next is was the fine sand paper + damp cloth wipe down + coat of primer routine.

Aug 2011 BLOG1-4

Finally two coats of high gloss spray paint on both the box and post + a day to dry …

100_3250

… and my neighbors are speaking to me once again.

100_3297

And thanks to my handy-dandy Silhouette machine, I was able to cut out new house numbers to replace those awful reflective ones.

Since I’m not thrilled about showing my address on the ‘ol blog, so I’ll show you the photoshopped version using the same Porcelain font and ivory vinyl that I did use.

mail.7

Ah, dignity …

mail.3

… how I’ve missed you.

mail.8

*Swoon*

The paint, primer and vinyl were all zero out-of-pocket supplies for me since I had them on hand, but the cost from the store is dirt cheap:

Walmart cheapy spray paint primer – $0.99

Walmart cheapy high gloss spray paint – $0.99

Scrap vinyl or contact paper – $1.00

So whether you’re rockin’ what ya got for paint or buying this from scratch, $0-$3 bucks for a total curb-side face lift ain’t bad at all.

See?

mail.5mail.2mail.6

Enjoy your weekend and go show that mailbox some love!

Linking up to:

Skip To My LouCraft-O-ManiacC.R.A.F.T., The DIY ShowOff *  Stories of AtoZ, Tip JunkieSugar BeeToday’s Creative BlogSassy SitesMy Uncommon Slice of Suburbia * Someday CraftsLil LunaWe Are That FamilyBlue Cricket DesignsThe Thrifty Home, * House of Hepworths, *Remodelaholic FridayTidy MomWhipperberryKojo DesignsChic On A Shoestring, Momma’s Kinda Crafty, *Tatertots & Jello,  Be Different Act NormalFunky Junk Interiors * I Heart NaptimeUnder The Table and Dreaming

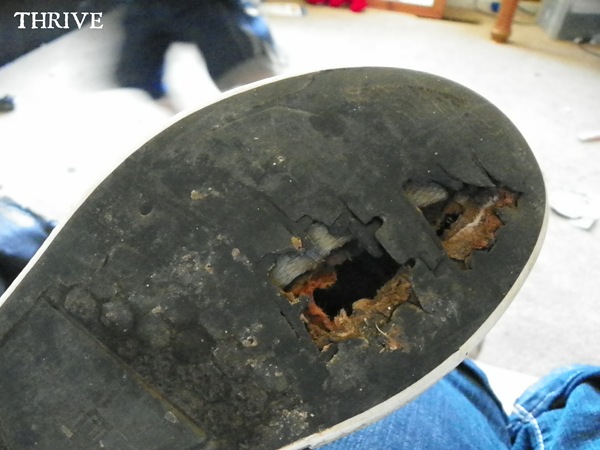
Today’s post is brought to you by my ten-year-old son who managed to put not one, but two holes in his cheapie just-for-the-summer shoes that I bought two weeks ago.

wntt2.1

Really kid? Not even a month of wear?

Just as I started into Mom Lectures 15 & 18: Money Does Not Grown On Trees and You Need To Take Better Care Of Your Stuff, Kid 1 interrupted to suggest we just fix the shoes with duct tape.

Duct tape?

My initial reaction was HECK NO, kid.

Taping shoes together has to bring thrifty to a new low (and not in a good way). But just as I was coming up with the reasons why duct tape would never work, I stopped short and did a 180.
Because thanks to Myth Busters and time to kill to during my hospital stay with kid 6, I know that duct tape can actually do anything.
You can make sailboats that actually sail. And cannons that fire actual cannon balls. And patch sinking boats while you’re in them on the water.

And that’s before you even get into the whole wallet-purse-prom-dress-out-of-duct-tape craze.

gal_tape_prom_01

Image from NYDailyNews.com

So I said yes … and cut a few patches out of cardboard to level out the bottom of the shoe where the holes were … and added a bajillion (or four) layers of the brightest duct tape we had in the house …

WNTT2.2

… and just like that—Kid 1 was back to having dry feet.  Well, dry ugly feet.
wntt2.6

After seeing how the purple looked, my son decided he wanted to change the brown canvas to black “just like the cool kids.” Whatever that means.

So he gave Sharpies a whirl and ended up with two busted pens and shoes that were still brown. Awesome.

wntt2.5

But since I was experimenting with mixing house paint in the middle of all this, he asked if he could use some, too.

Sure. Why not.

So off came the classy decorative duct tape trim and out came a foam brush.

wnnt2.5

Worked pretty well. The paint dried nicely and wasn’t stiff at all. Apparently Olympic Premium Indoor Latex paint in satin finish is the way to go here people.

And as for Kid 1, he’s ridiculously proud of his sad little house-painted-duct-taped wonders, proudly showing them off at Walmart today while I kept checking to make sure no one was getting a cell photo of us for thepeopleofwalmart.com – ha!

wntt2.4

And despite how conflicted I feel about these things, he’s gotten compliments on them from other kids who think they’re so cool!

WNTT2.3

And maybe it’s a good thing that his shoes gave out so fast so that he could start a wave of duct tape art that rocks fifth grade like no body’s business. (And it saves me $10-$20 bucks for at least a few more weeks. 🙂

So…

Shoes With Holes?

wntt2.7

They’re what not to toss this weekend.

Signature

 photo eggs4.jpg

So it hit me this morning that Easter is only three weeks away and I have nothing Spring or Easter-ish up around the house.

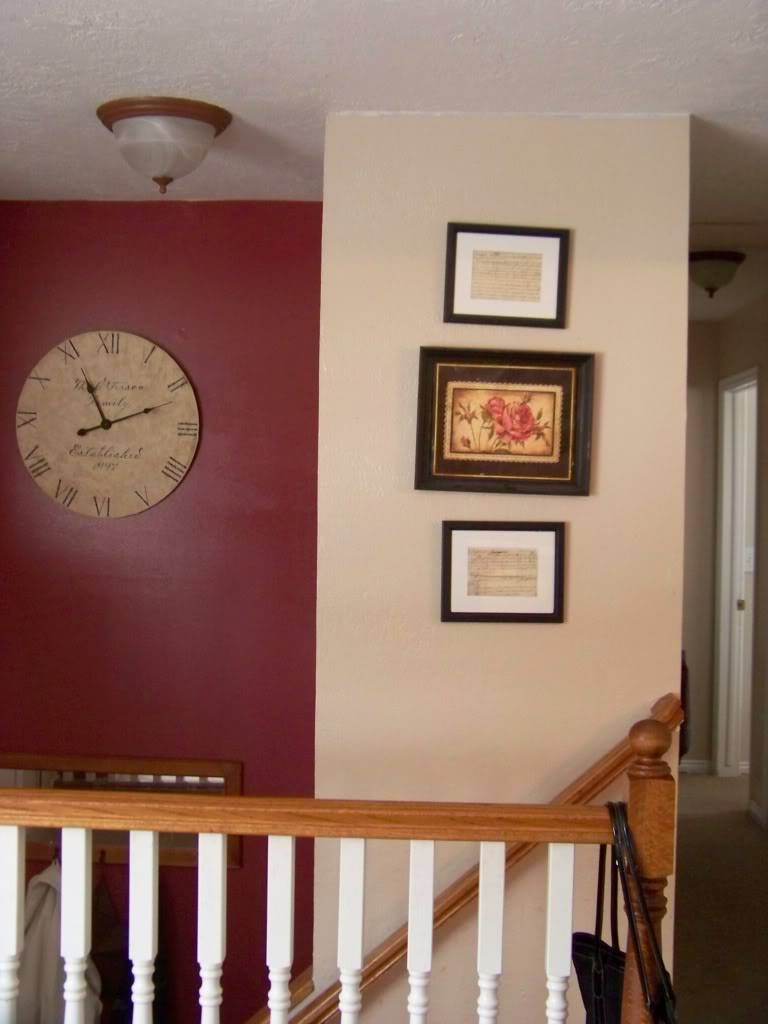
In some ways, this is nothing new. I gave up trying to lighten up years ago after I realized that all of my pastel decor violently clashed with my new overly red upstairs.

But this morning I decided that I don’t care.

The snow every-other-day thing is getting me down and I need some color in my house. Plus, I figure there’s got to be ways to make “light” play nice with all the dark colors in my house.

So in true THRIVE style, I riffled around the house to see what I could find for inspiration and came up with Easter candy. Lots and lots of Easter candy.

Ahem.

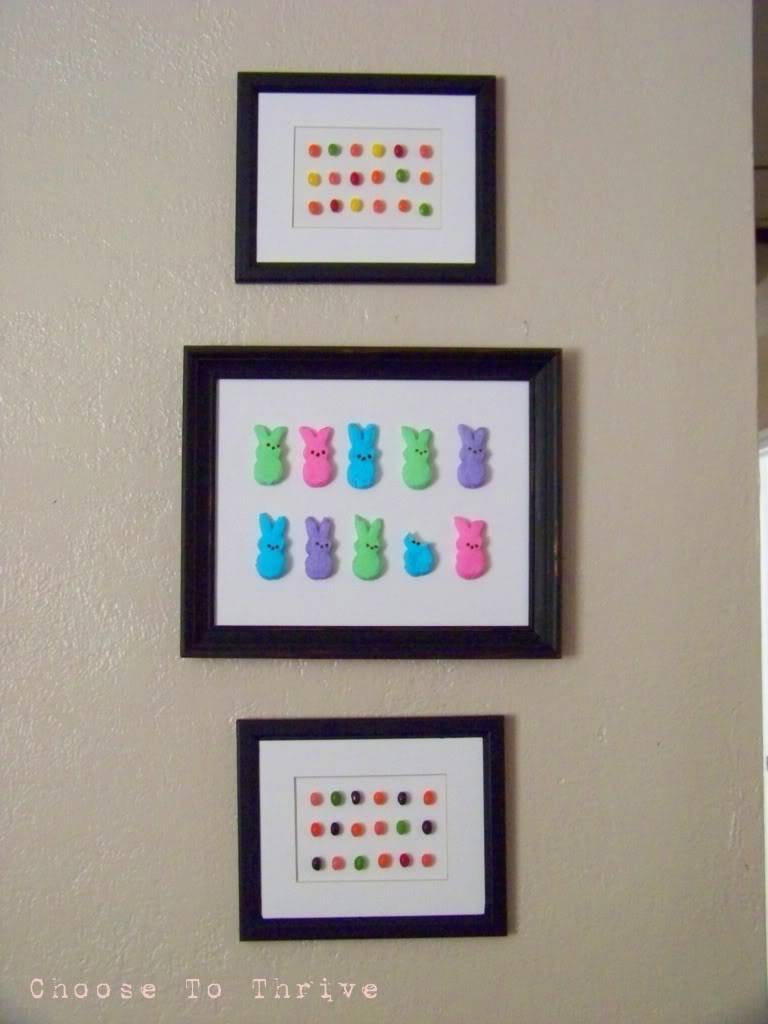
So I broke open those adorable PEEP bunny packages and sorted the jelly beans and wound up with Easter specimen art cute enough to eat.

 photo eggs7.jpg

And the best part was that this project came together in under ten minutes.

Want to make your own?

I really wanted to make these with shadow boxes like all the other cute specimen art floating around blogland.  But I didn’t have any, so I cheated and Rocked What I Got.

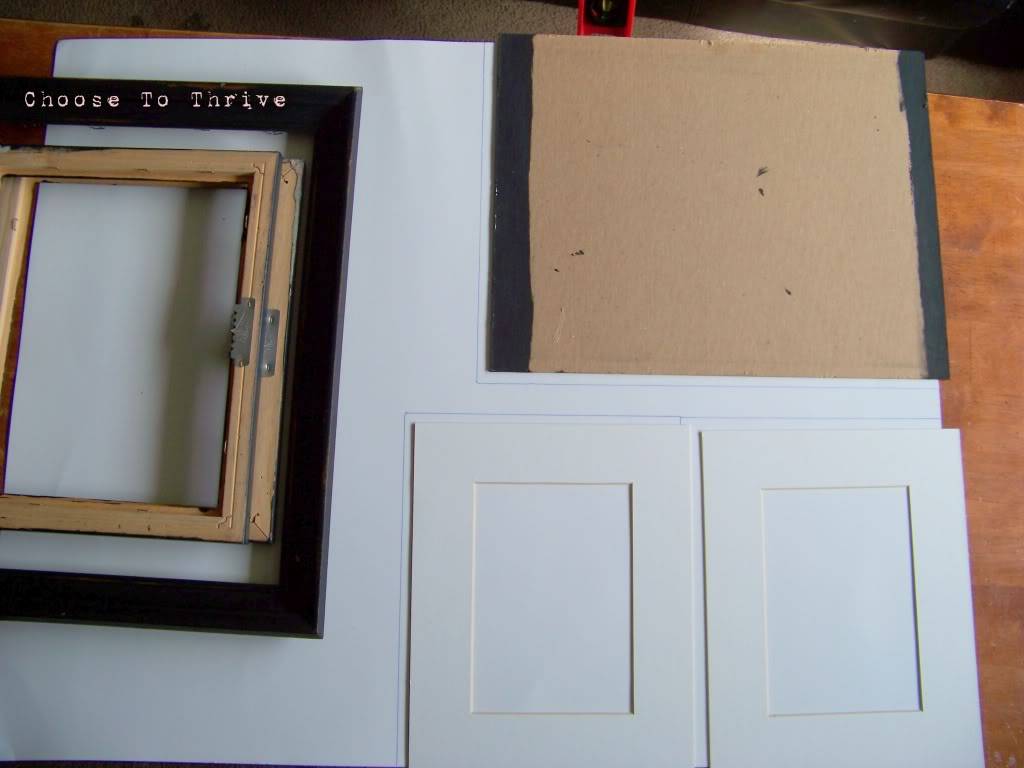
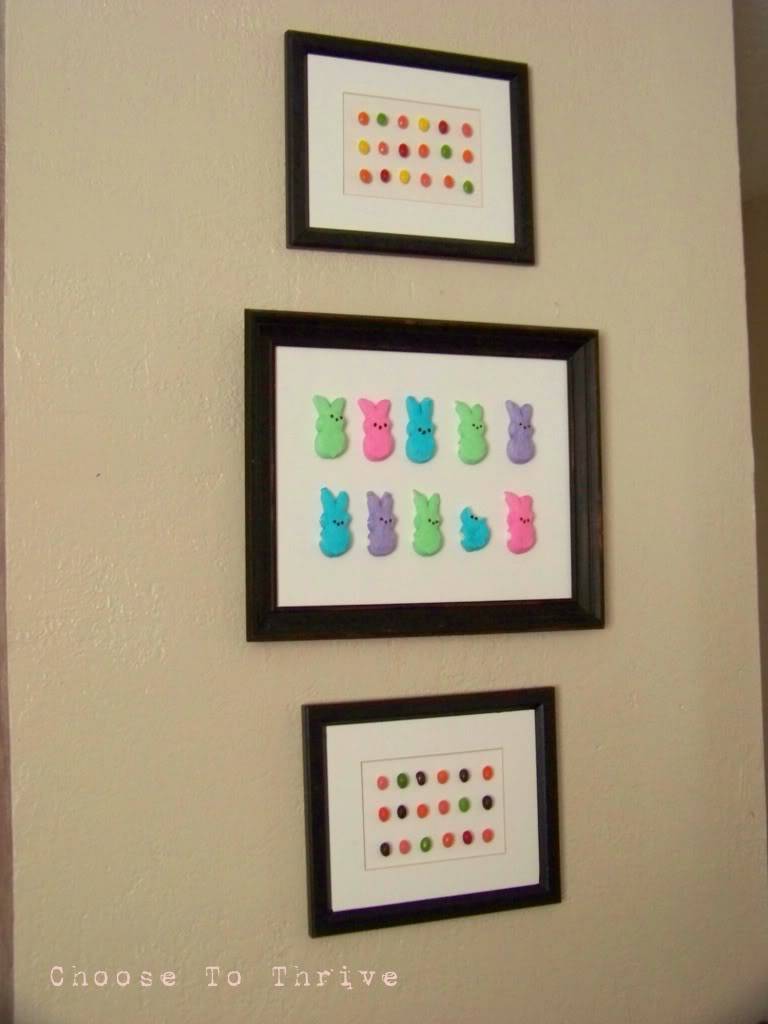
I grabbed three frames from my living room …

 photo eggs8.jpg

… popped out the glass and cut white poster board to fit the frames.

 photo eggs9.jpg

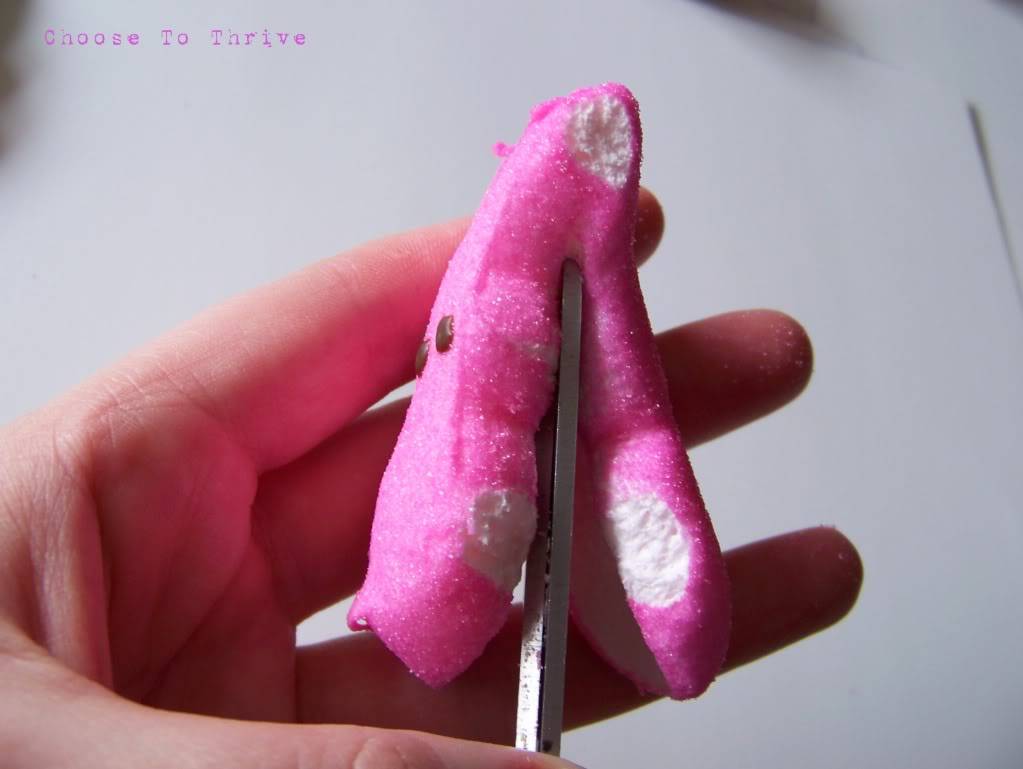
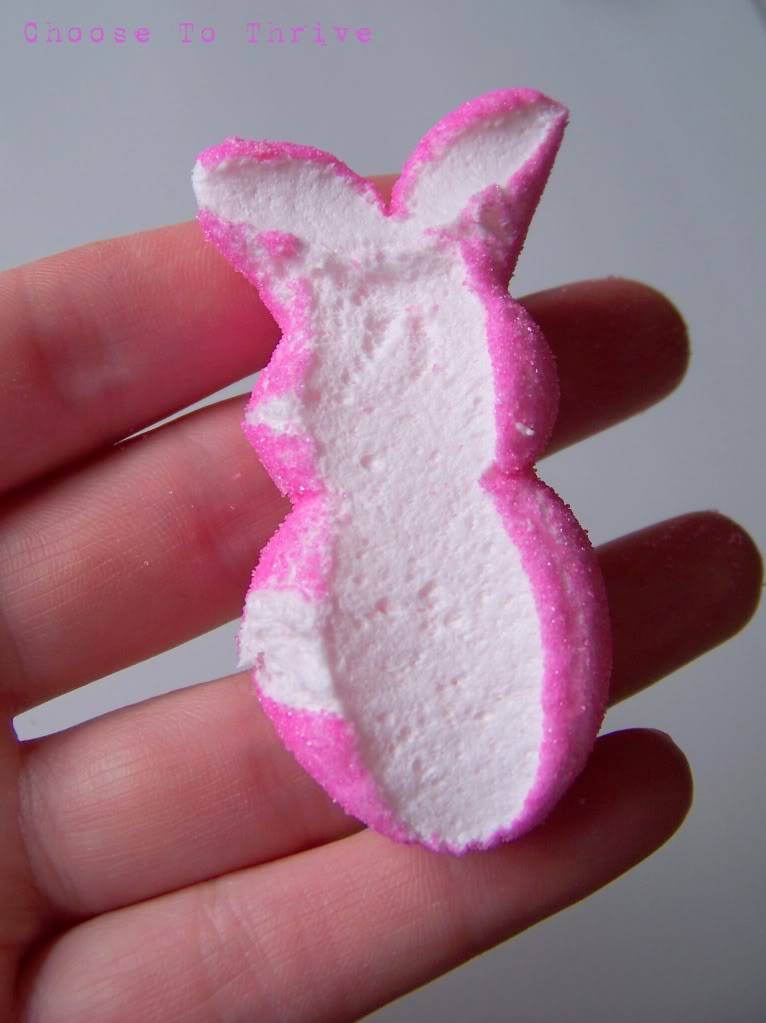
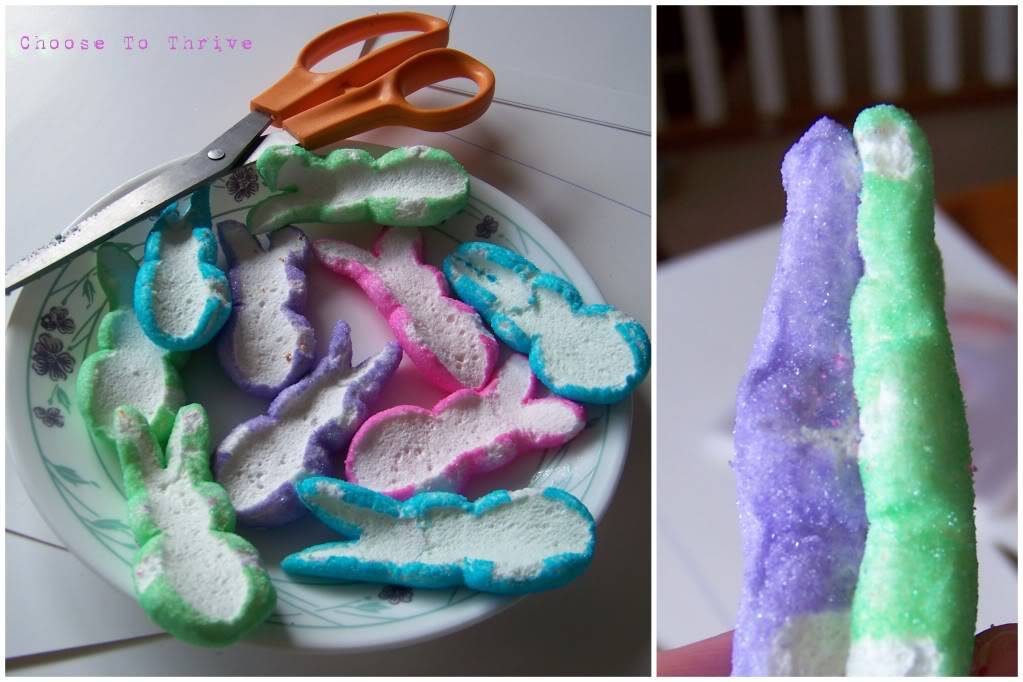
To make the PEEPS display, I cut each bunny in half using an old pair of scissors.

 photo eggs18.jpg
 photo eggs11.jpg

Using a knife, even with non-stick cooking spray is a nightmare. Please don’t ask me how I know this.

Arrange the bunnies how you’d like and then gently, but firmly press to the poster board. The marshmallow is plenty sticky to hold those bad boys in place without any extra glue.

 photo eggs13.jpg

Measuring is also a good thing. I eyeballed it and was a little off. Oh well.

Just to be safe, I let my PEEP art sit for an hour to make sure it was good and attached before popping it back in the frame and hanging.

And as for the little blue bunny on the bottom row, I couldn’t resist. 🙂

 photo eggs5.jpg

And as for all of those unused bunny halves …

 photo March2011BLOG6.jpg

… my kids created their own lovely hybrid PEEPS to munch on for lunch snack. Thoughtful ones my kids are.

The jelly bean art came together just as easily.

 photo eggs14.jpg

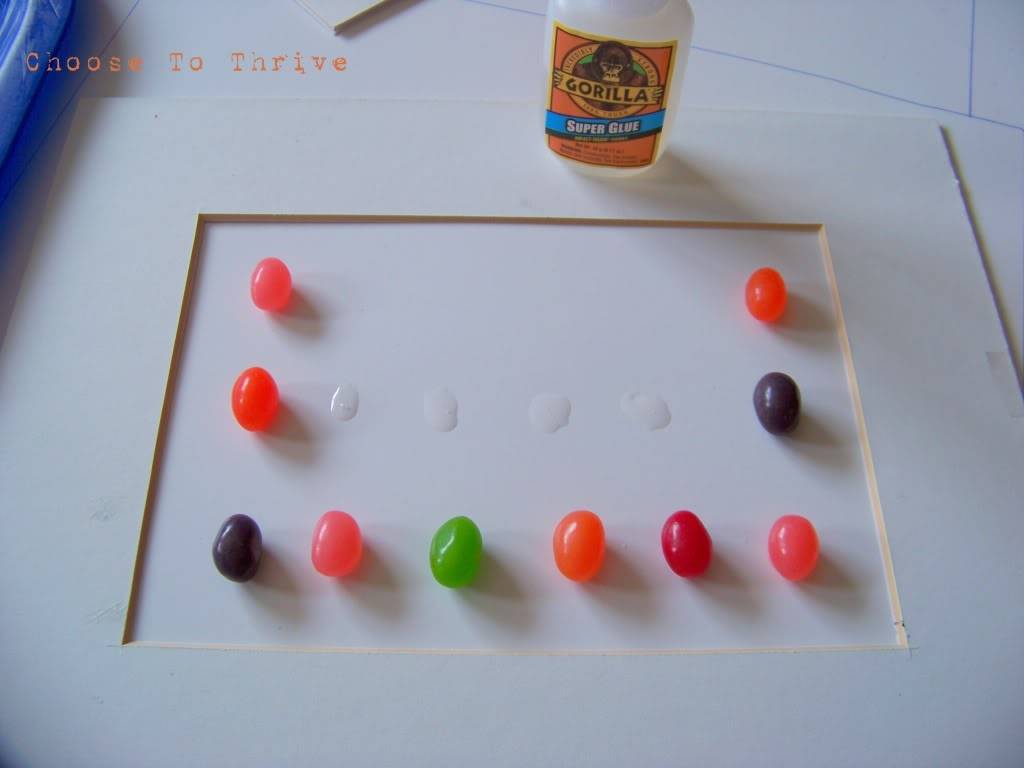
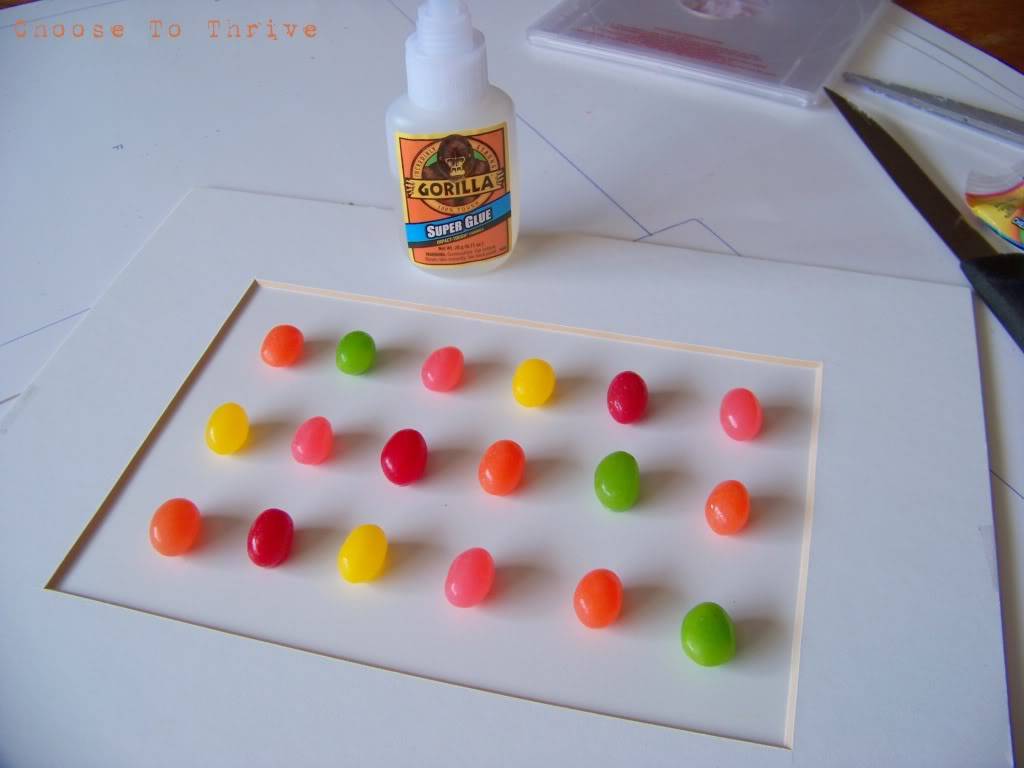
I tried cutting them in half to see if they’d stick to the poster board on their own as well, but it’s a pain to carefully cut through each one without fracturing the outer shell. No biggie. They’re small enough anyway that it worked out fine to use them whole.

A generous dollop of Gorilla glue …

 photo eggs2.jpg

… done and done.

 photo eggs1.jpg

Just to be safe, I let these sit for an hour as well since I didn’t know how well the glue would adhere to the candy coating.

 photo eggs3.jpg

Worked like a charm.

Houston, we have Easter Art.

 photo eggs6.jpg

Ah, much better.

The house is already feeling more Spring-ish which is good since we’ve got more snow on the way. Lovely.

Featured on:

craft.gossip.feature  sdc_featured DIYlife

Linking up to:

 get-your-craft-on-300x84 SB_button_11 handmadepactTipMeTuesdayButtonsomeday.craftsbluecricket works.for.me.wednesdaypennypinchpartyHOHthecsiproject.com-logo-150

Happy Monday everyone!  Hope you had a great weekend.

I wanted to show you another project in our No-Money Remodel.  Our upstairs has a total mismatched collection of fixtures and ceiling fans. None of them are original and it sort of looks like an odd collection of Home Depot clearance sales and garage sale finds.

My least favorite were two, very brassy fixtures in the kitchen: the main, three bulb light and the ceiling fan.  I have searched through literally thousands of pictures going back to 2004 and these blurry shots from 2007 are the only ones I could find.

I’ve apparently tried really hard to keep the glaring brass out of every . single . picture or have cropped heavily.  Or maybe both.

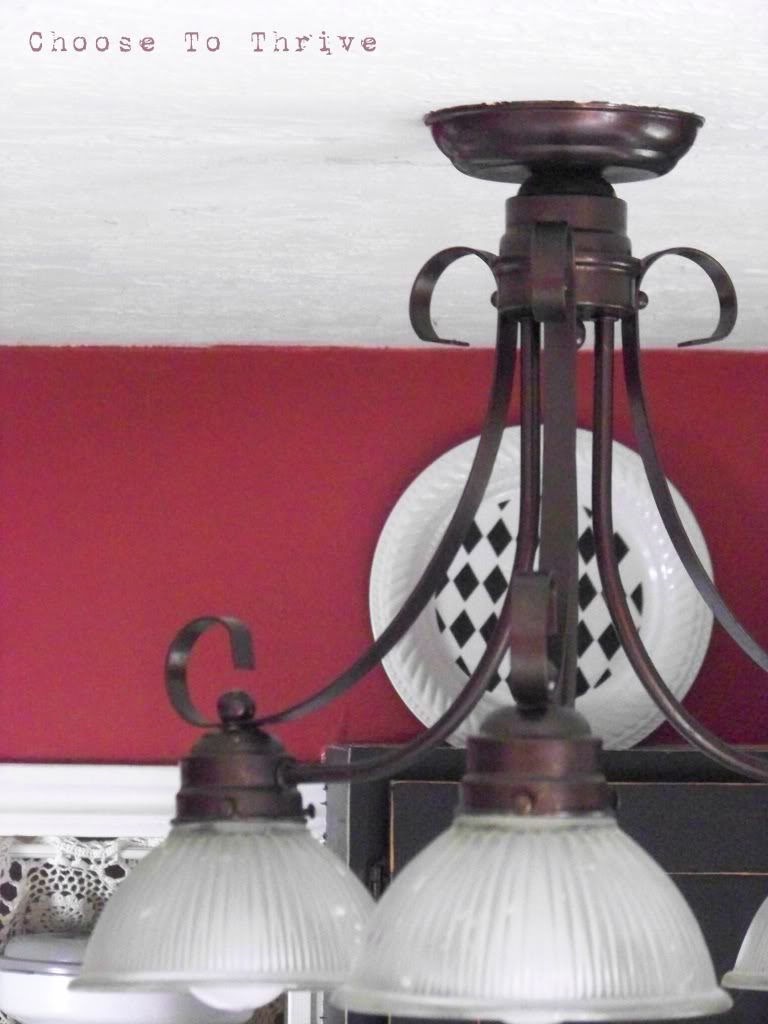
My decorator neighbor suggested painting both fixtures with a little bit of liquid magic:

black.bronze

Specifically Sophisticated Finishes paint by Triangle Crafts in Blackened Bronze. It’s a little larger than a bottle of craft paint and is usually found by the faux finish paints at craft stores.

I’ve used this stuff in the past to paint a little planter and cover an old utensil crock in my kitchen, but was nervous about using it for fixtures. However, since Decorator Girl has a straight-out-of-the-catalog house and I paint diaper boxes, I deferred to her judgment.

Because I’m lazy Because I didn’t think it was necessary, the only prep work I did was to clean both fixtures with soap and water. No primer, no sanding, nothing. And since I didn’t have the electrical know-how to mess with removing either fixture, I just climbed up on a chair and got to work.

I started with the ceiling fan …

… covering the main fan housing with a thin coat of paint using a cheap-o foam brush. (I ended up doing three thin coats).

To paint the top of the fan without getting paint all over the ceiling, I stuck a meellion little pieces of frog tape around the base.

A pain in the neck, yes, but easier than having to remove the fan from the ceiling all together.

To paint the individual arms, I removed the bolts holding the arms to the housing …

… and then removed the small bolts holding the blades to the arms. Everything went into a ziplock bag to keep the kids from walking off with the parts.

The arms got a good wash down and then a first coat of paint. Just a heads up: it’s going to look terrible at first. I mean really, really terrible.

My first coat on both the fan housing and the arms looked awful and sent me into full oh-crap-I’d-better-figure-out-some-way-to-fix-this-before-Mr.Thrive-gets-home mode.  Thankfully, each coat looked better and five thin coats later, the arms looked awesome. And a little bit like lobsters.

Before reassembling the fan blades and arms, I dipped the heads of the screws in paint and let them dry for an hour …

… then carefully screwed them into position, touching up any scuffs with a quick dab of my brush.

On the opposite side of the blades, the tips of the screws got a quick dab of paint to get rid of that last little bit of brass …

… and all of the blades were reattached to the main housing after everything was dry.

Ahhhhh. So pretty.

The other fixture came together the same way: wash with soap and water, dry thoroughly and paint with a bunch of thin coats.

Painting the top of the fixture where it meets the ceiling was handled the same way as the fan.

So. much . better.

 (And I swear to you that this fixture really is clean. I’ve taken these pictures three times and dusted and cleaned obsessively and it still looks like there’s a bunch of dust from this angle. Bleh.)

Using the paint I had on hand made this a great no-cost project for me, but it’s pretty cheap even if you were to buy paint.  I think this bottle was $10 at Michael’s before the coupon discount. I’ve painted two fixtures, a utensil jar and a small planter so far and still have a third of a bottle left.

But hey, Rock What Ya Got.

Fixture re-dos like this would also work great with spray paint or another brand of specialty paint in your choice of colors.

So have fun checking around the house, checking your local recycling center or checking the online classifieds for free/cheap paint.

(And if you’ve painted your fixtures, I’d love to see them!)

**************************************************************

Linking up to:

beforeAndAfterButton

get-your-craft-on-300x84 handmadepacttrashtotreasuresomeday.crafts bluecricket works.for.me.wednesdaySugarSpice pennypinchpartychildmade_button_2_smallertidy.mom mkc_fantabulousfriday_png

100_8470

As promised, here’s the first of two no-cost kitchen projects I’ve completed so far.

I showed you my picture frame cabinet re-do yesterday and love how they turned out. When the pictures are up in the frames, I like to have the area above the cabinets plain so that all the focus is on the pictures.

But there are times when I like to leave the cabinets plain, too.

plain

And when the cabinets are plain, the above space looks pretty bare.  So I’ve been looking for something around the house that I could repurpose and use above the cabinets when frames weren’t in use—something that could easily be removed whenever I wanted to go pack to the pictures.

So I looked and looked and finally found what I was looking for in my own kitchen: plates.

Plain ‘ol white plates actually. 

In the odd-shaped, open cabinet was my glassware and the $7 set of “good plates” from a Target after-Christmas clearance sale from 10 years ago.

I never used them since the kids always seemed to break one whenever I brought them down … and there wasn’t enough to use when company came over because of the whole kids-breaking-them thing … and they were just sitting there collecting dust anyway …

so I put them to work.

Copy (2) of 100_8456
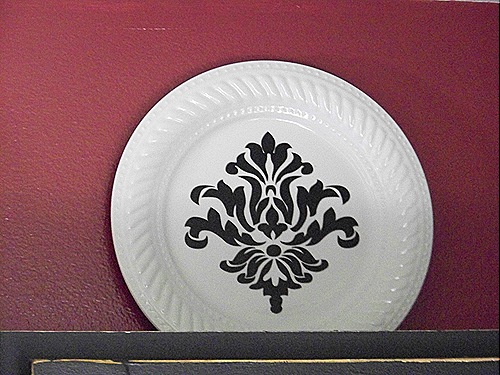
The plates got a good wash and then a vinyl design cut on my Silhouette (although you can cut these by hand with an exacto knife, too).

Blog Pics1

The best part is that I can swap out the designs any time I need to.  For now I used a bunch of different designs that I happened to like plus a monogram for me and Mr. Thrive.

Blog Pics

But I could peel them off and put up new designs for holidays, too.

I don’t have any plate stands (working on that), so I just set them up on the cabinet top and leaned them against the wall.  Baring a major earthquake, it works just fine.

Copy (2) of 100_8458

Ahhhhh.

I love the extra punch of color and design above the plain cabinets.

100_8468

And when I’m in the mood to put the pictures back up for birthdays in April, the plates can come down in two seconds and hang out on a shelf until they’re needed again.

Have fun shopping around the house!

Signature

****************************************************************

Linking up to:

beforeAndAfterButton

funkyjunk showandtellwwatttandjsunday.showcase

100_3389

This is my little boys’ closet in the aforementioned terribly finished basement.  Bleh.

100_1611

Every morning it’s the same jumble of socks, underwear and jammies haphazardly tossed on an ugly particle board shelf.

Originally I had white bins from the dollar store like Mr. Sock Bin below that worked great.  The only problem was that I bought the bins in 2004 and they finally wore out.

100_3402

And while it would only be $4 to run back  to the store and grab some new ones, the whole point of my challenge this year is to see if I can do with out.

My solution:
Make chicken cashew sandwiches on croissants for dinner.
A couple times.  Ahem.
No seriously.  Check it out:

100_0665

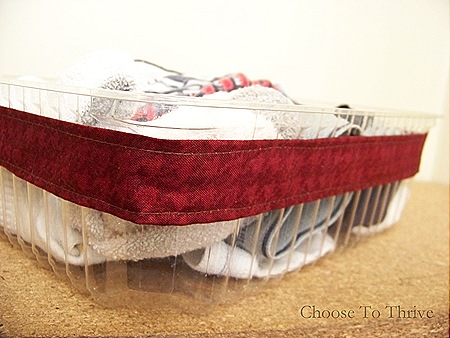
Those little bites of flaky goodness come in clear plastic containers that are perfect for wrangling clutter.

After washing and removing labels, I dressed my new “bins” up a bit by sewing quick fabric bands …

100_3374

… made from the left-over scraps from my boys’ new quilts (thank you Grandma L!)  Aren’t their quilts awesome?  I love the dinosaur scale machine quilting. *Swoon*

100_3400

I’ll probably add some cute little labels soon, but for now I’m loving how much cleaner the boys’ closet stays.  Now all those jammies …

100_3387

… and socks and undies …

100_3386

… have a tidy little space to call home.  (And no more mountain of clothes—phew!)

100_3393

Now if I can just find the perfect {free} paint to help the rest of the closet ….

Happy organizing!

*************************************************

Linking up to:

OrganizeItBasket2_thumb1

Does anyone else ever have this happen?

100_3266

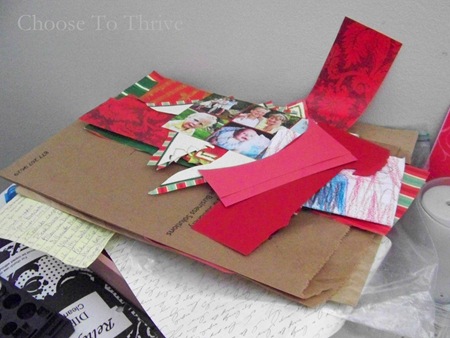
Scraps from left over projects or even projects that you’re not quite done with that need a place to hang out and not clutter up the place?

Yeah, me too.
I’ve tried putting paper scraps in boxes, bins, page protectors, etc., but it never works.  I usually end up with boxes and bins and page protectors full of paper that I’ve completely forgotten about … and never use … and then go buy more of that paper for my next project, only to find later.
Bleh.  No more.
The solution: over-the-door organizers!

100_3270

I stole this bad boy from my daughter’s room where it was sadly underused.  She, apparently, prefers to put put her tights/socks/undies/clippies in a giant pile on her floor. 

Two year olds.  Sheesh.
I love how well this works! There’s plenty of pockets for storage and I can see exactly what I have before I start anything.  

The top pockets hold adhesives and blades that I want to keep out of little hands.

JAN 2011 BLOG7

All of the scraps are kept tidy and in rainbow order, because I’m type A and OCD like that.

100_3275

The bottom, larger pockets are perfect for projects that I’m in the middle of and prefer not to leave all over the place …

100_3274

… wall art for my boys’ room, Valentine’s decorations, kitchen shelf tabs, those closet dividers that I’m still working on (I ran out of milk jugs and pie plates—ha!) and yes, even my first Christmas project of 2011 (coincidently left over from 2010).

And this would work for all those fabric or ribbon scraps, too.
Ah … much, much better.

100_3270

Have fun shopping around your house for clutter busters!

Signature

*********************************************

Linking up to:

OrganizeItBasket2_thumb1