Tag

Halloween

Browsing

SONY DSC

And it begins.

My daughter’s convinced that she needs an extensive Halloween wardrobe.

I’m convinced that it’s not gonna happen.

Luckily for her I have a closet full of  these ripped, stained and worn out gems.

SONY DSC

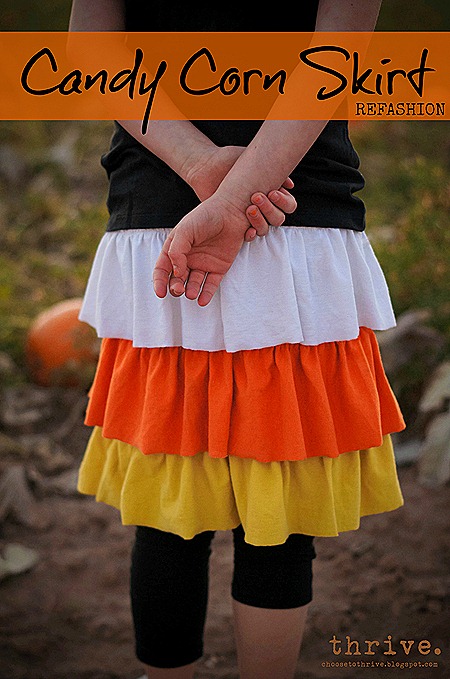
Toss in some thin elastic and scissors and I came up with this candy corn themed, ruffled skirt refashion in a single nap time.

SONY DSC

Ah, compromise.

And this has got to be one of the easiest sewing projects ever. Start with a white t-shirt that easily fits around your girl’s waist.

Collages3-001

When you flip the cut-off rectangle upside down, you see that you’ve got a handy-dandy skirt base with a pre-sewn waistband all ready to go. And since t-shirt fabric doesn’t have to be hemmed, that raw bottom edge doesn’t need any sewing at all.

SONY DSC

You’ll need to cut and piece together strips of white, orange and yellow t-shirt scraps to make the ruffles for each layer. The width is up to you and how long you want each layer. The length of all your pieced together strips for each color needs to be double the width of your t-shirt base.

SONY DSC

My t-shirt base was 15” wide so I made sure my strips totaled 30” long.  I stitched my scrap strips together to make three long loops of fabric …

SONY DSC

… and then ran a long basting stitch along the top edge of each one. I gently gathered each loop of fabric until they were the same width as my t-shirt base.

SONY DSC

(Make sure that any screen printing, stains, etc. are facing the inside of your ruffled layers!)

Pinning and attaching each ruffle layer to the t-shirt base was a quick and easy.

Candy Corn Skirt Refashion Choose To Thrive 10

And the best part was using that already-sewn bottom shirt edge as a casing for the elastic. Love that.

Candy Corn Skirt Refashion Choose To Thrive 11.jpg

The only thing left to do was sew the elastic ends together!

Sweet! Done and done!

In less than an hour I wound up with a cute t-shirt skirt refashion in time for Halloween that’s the cat’s meow. Um, apparently.

SONY DSC

And while I was cleaning up, I put those left-over scraps to good use.

I cut some rag ribbon for easy piggy tail love, Halloween treats, or whatever.

SONY DSC

So there you go!

I hope you take a look at your fabric stash and have fun whipping up something awesome during nap time!

SONY DSC

Featured on:

ucreate,jpg

Linking up to:
Make It Monday @ Brassy Apple

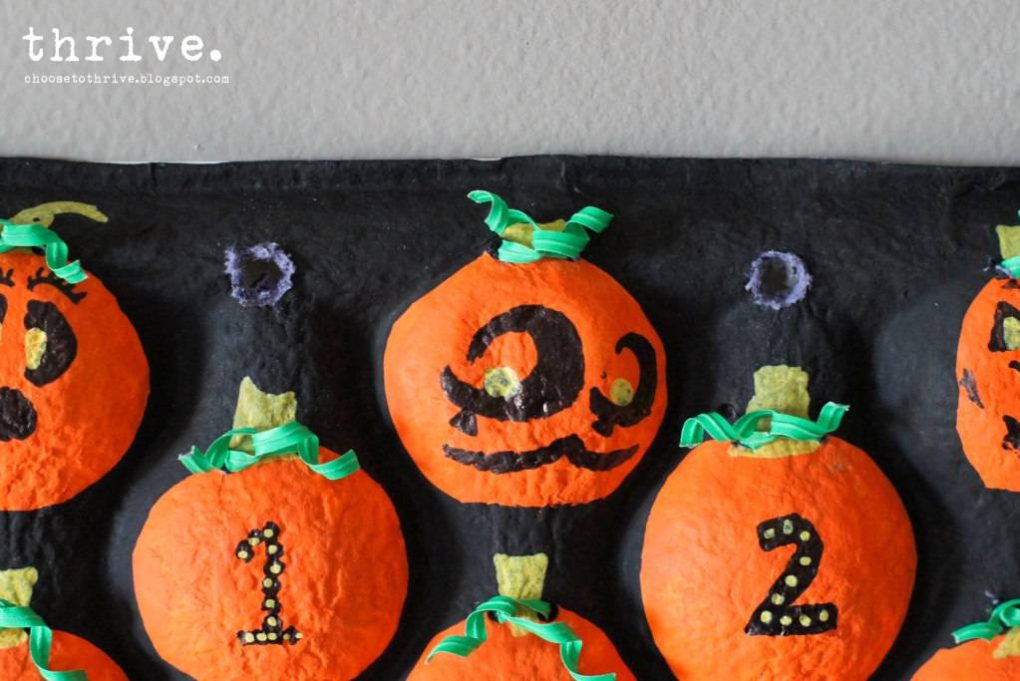
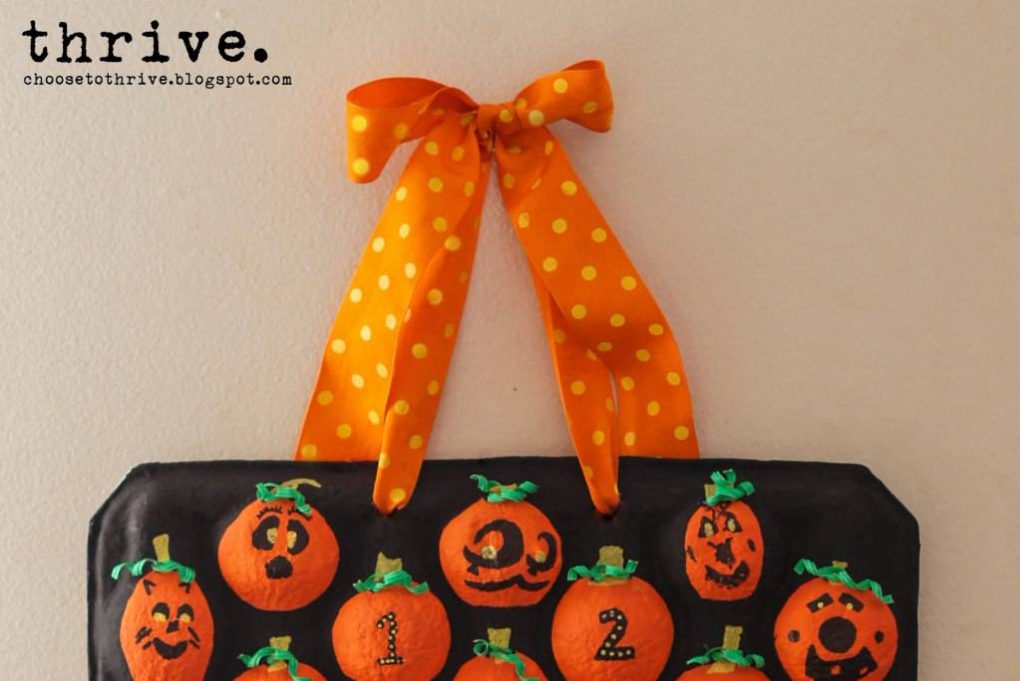
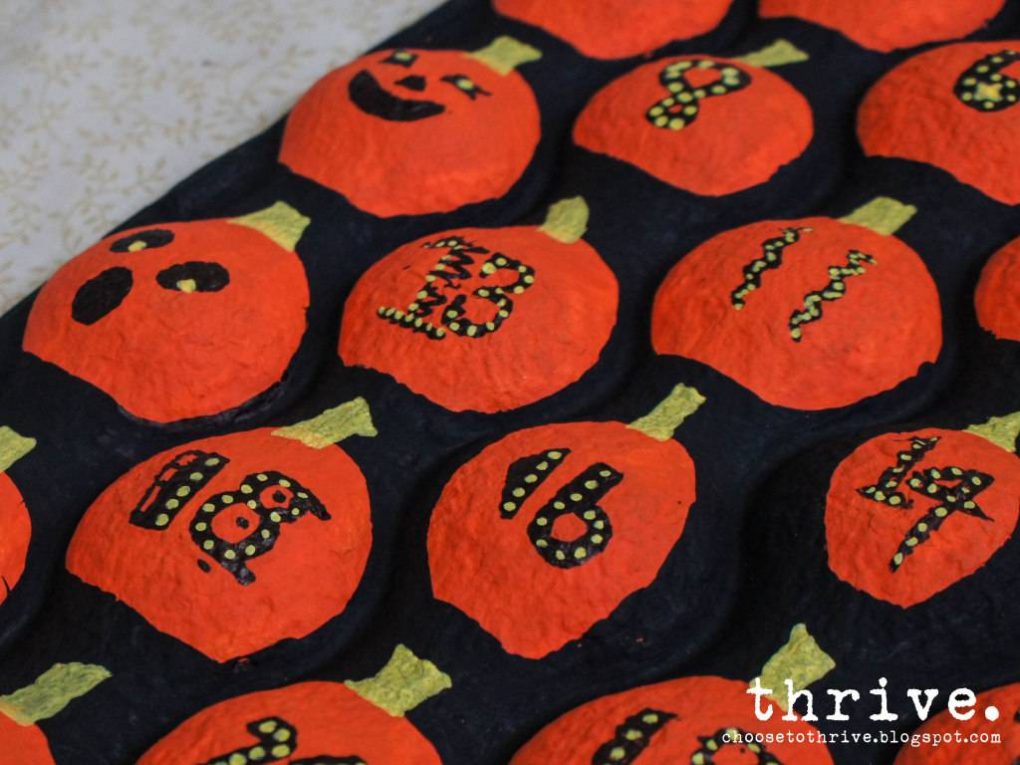
(Originally shared as a guest post on Ucreate Kids here.) Holy cow … Halloween is just around the corner. That means me and my six kiddos have been on the look out for everyday items to repurpose for Halloween. This weekend we hit the mother load … in the produce isle. Turns out with some paint and glue, you can turn an apple tray into something frightfully fun.

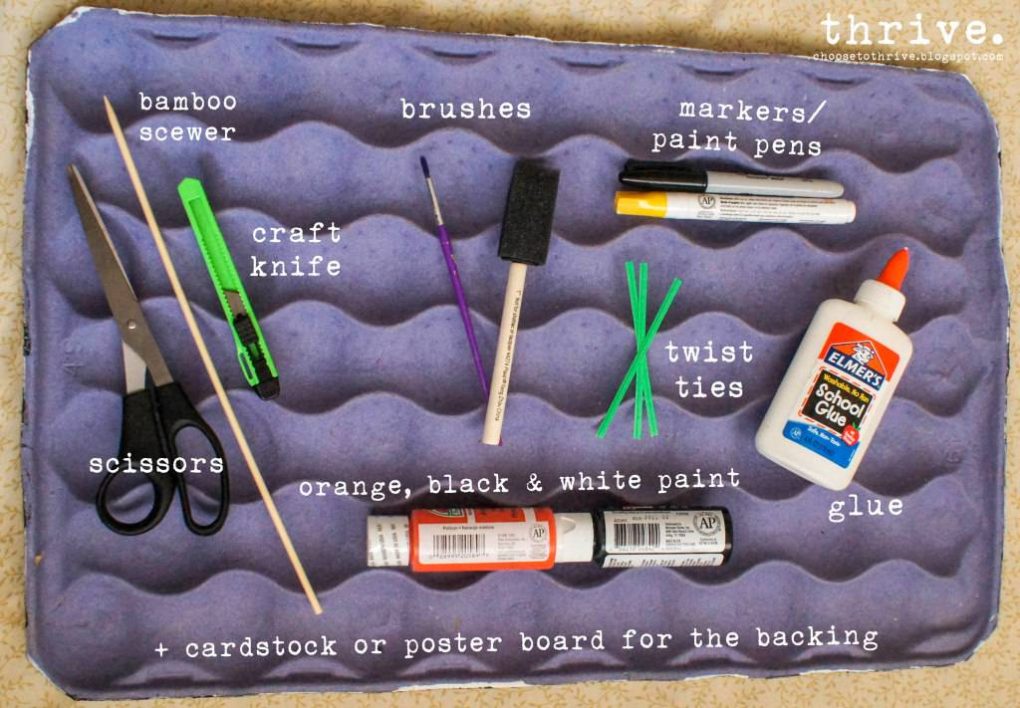
Frightfully fun for flat-out free! You can use this at home or in a classroom as just a calendar or filled with little treats to open each day. Want to make one with your kids, too? For this project you’ll need a cardboard apple tray from the produce section +

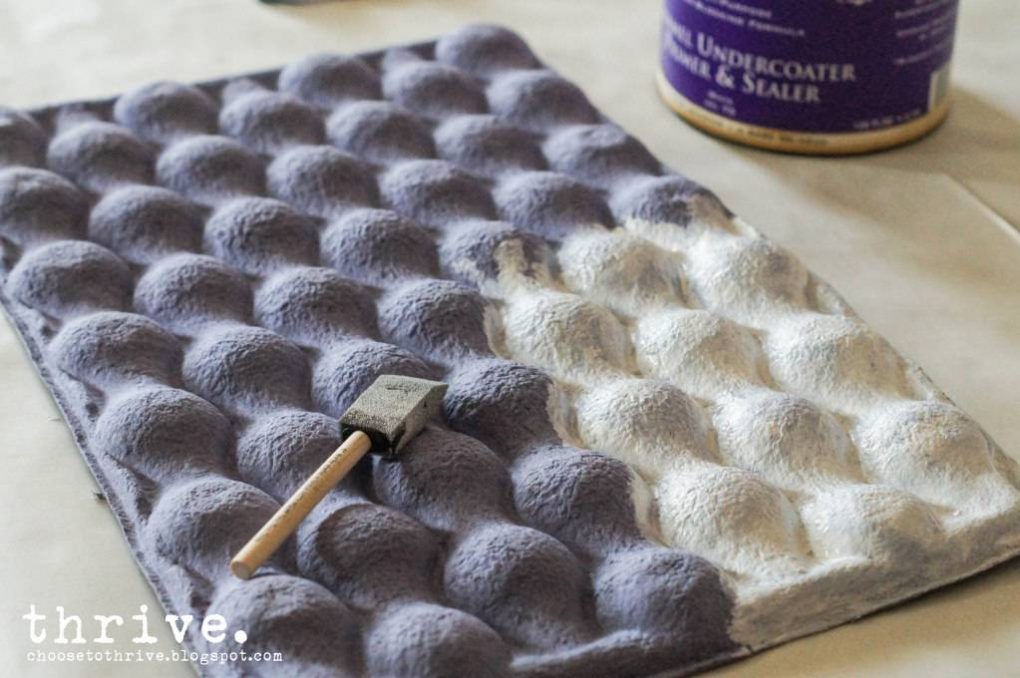
(Produce trays are usually free from your grocery store – just ask the produce guy to grab you one.) As always I hope you’ll rock-what-ya-got and adapt this project to whatever supplies you have on hand so that you can make this for free or dirt cheap. Prime the tray with a cheapy sponge brush and whatever white paint you have on hand: craft paint, house paint, plain ‘ol primer. Just skip the spray paint – the paper tray is crazy porous and sucks it all up.

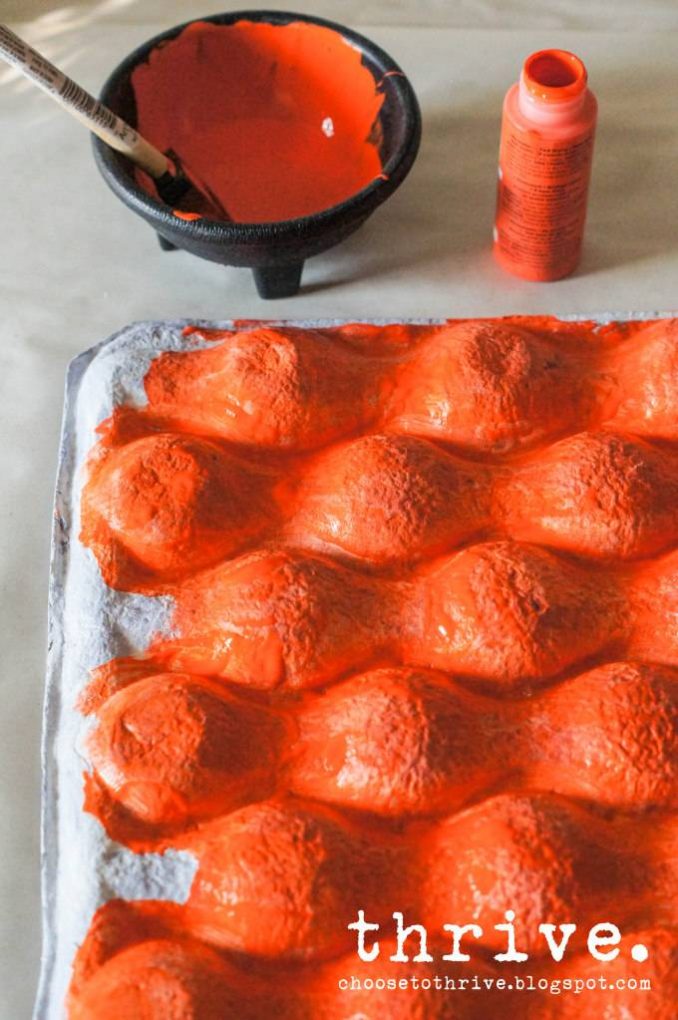
Add a coat of orange paint …

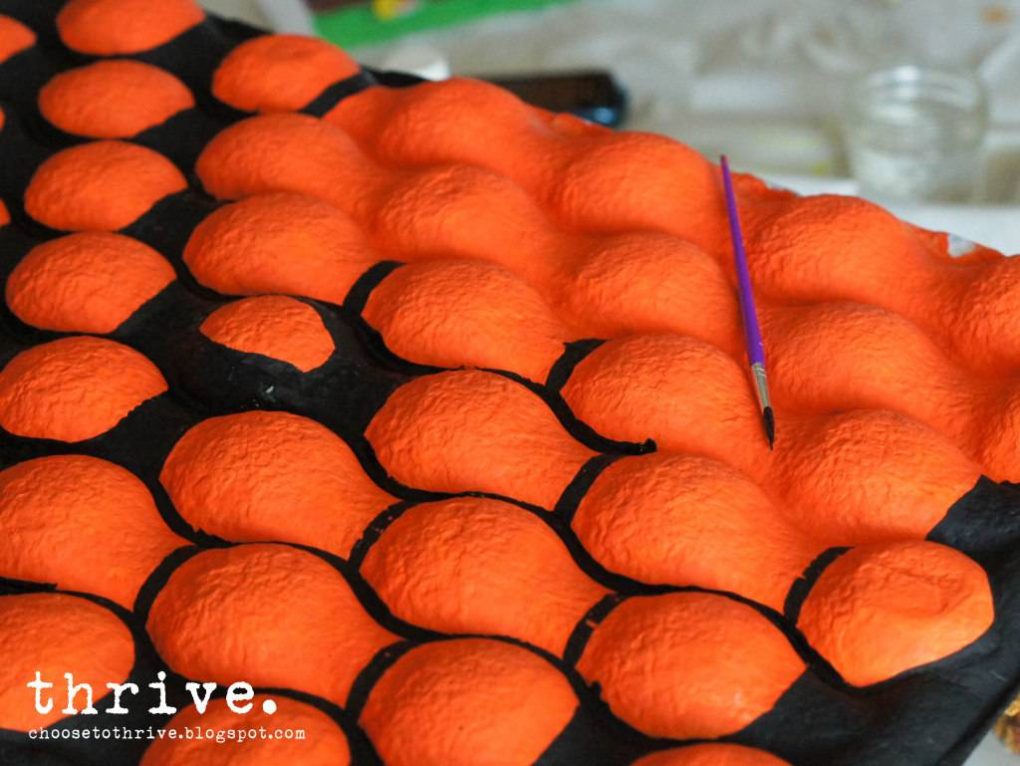
… and then carefully paint the edges and creases black with a small paint brush.

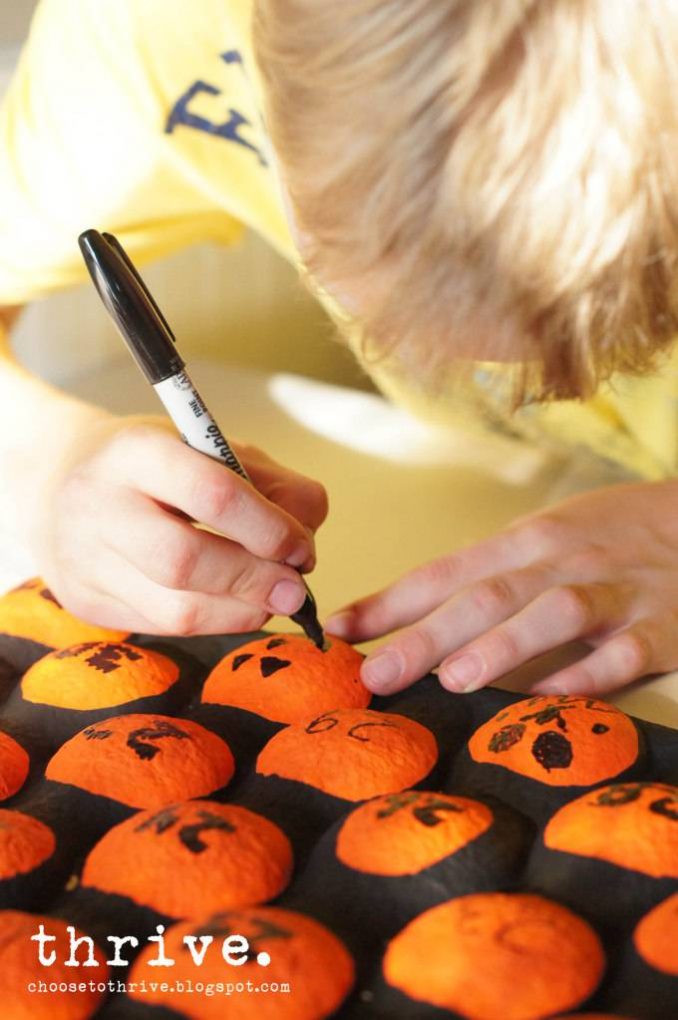
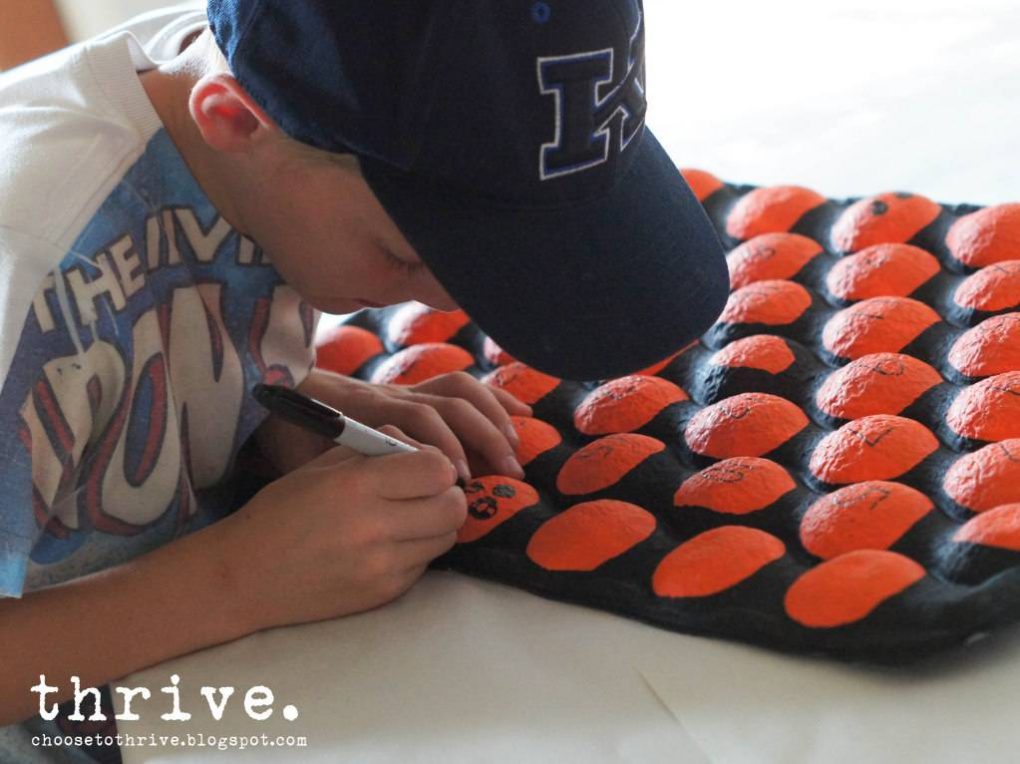
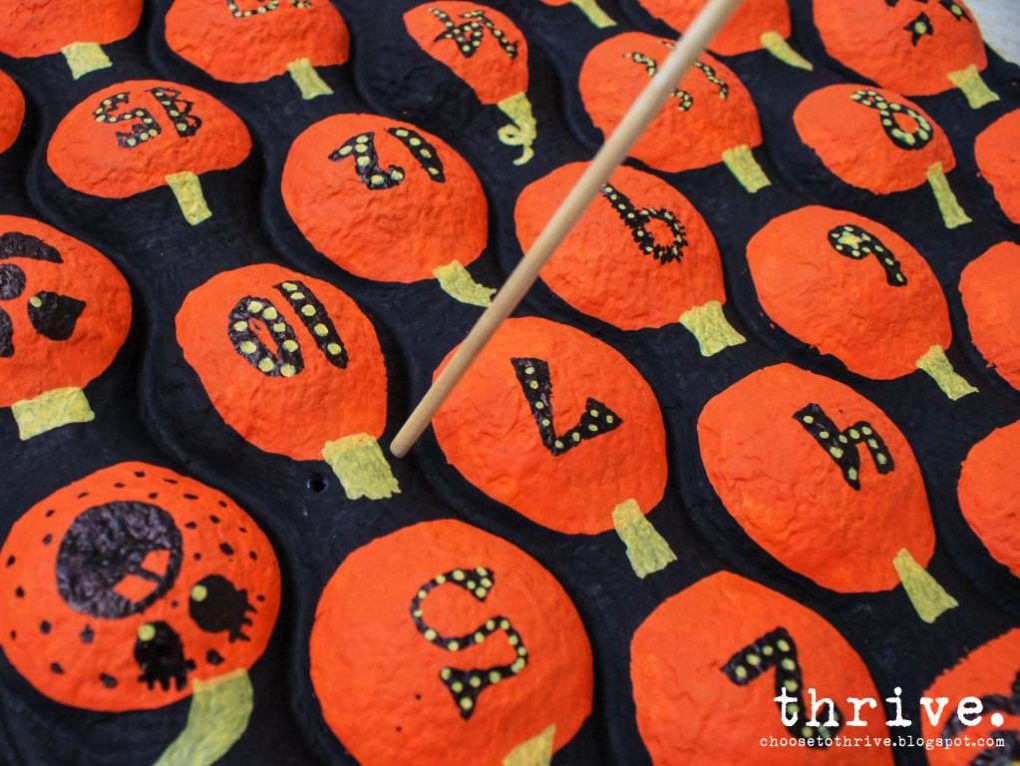
Add stems and calendar numbers with a Sharpie and paint marker.

(I marked the numbers first and let my kids do the decorating.)

The remaining pumpkins on the sides can be dressed up with jack-o-lantern faces or left plain.

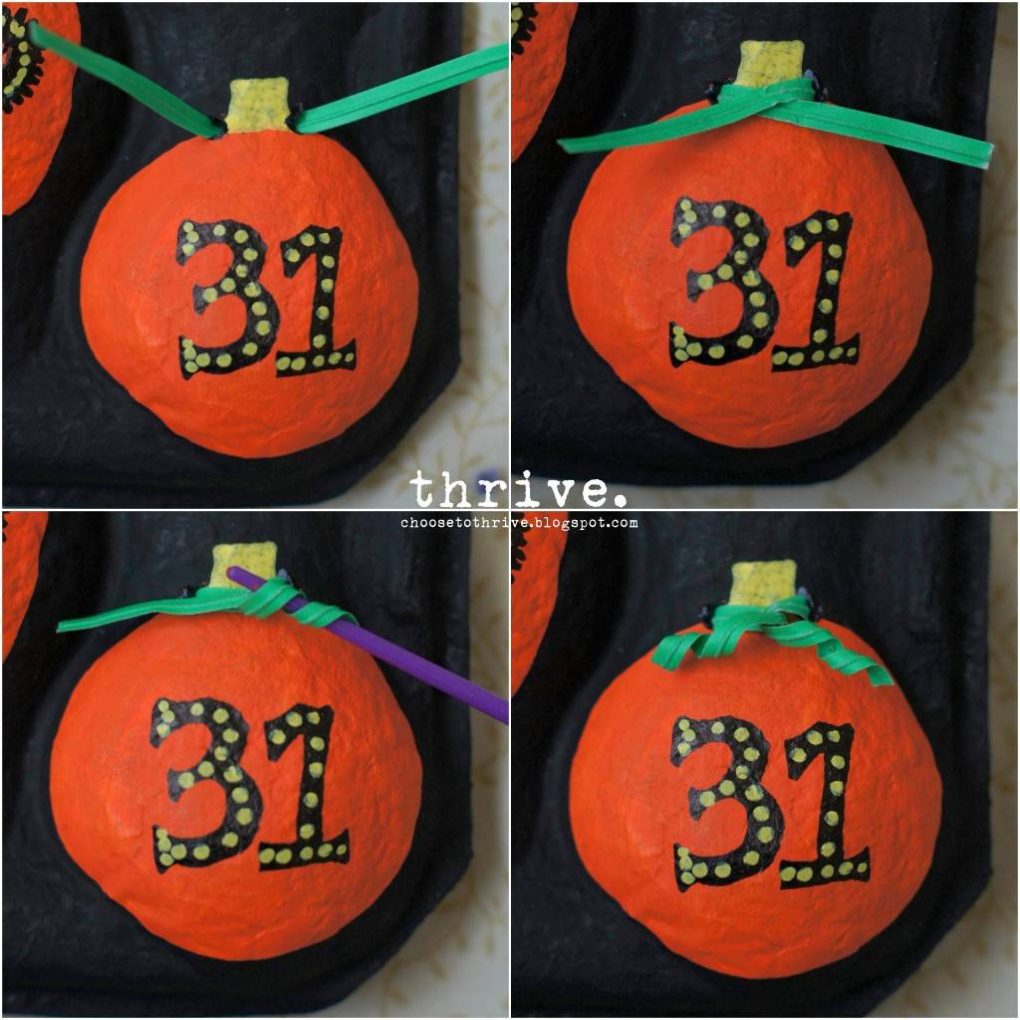
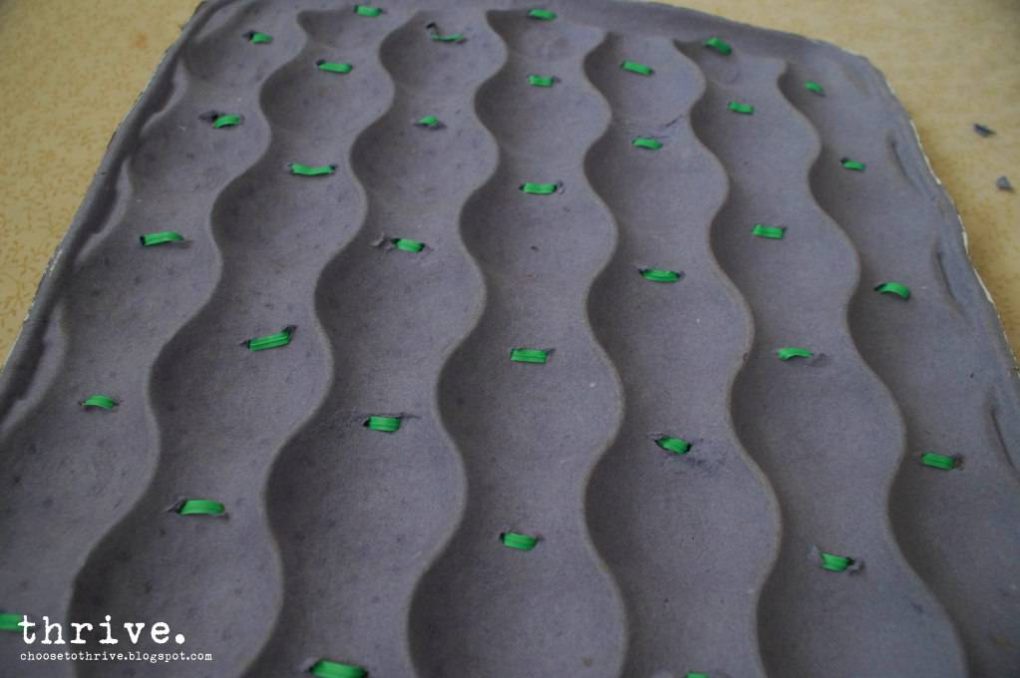
Have a grown up punch two small holes on each side of the stems with a bamboo skewer …

… and thread twisty ties from behind …

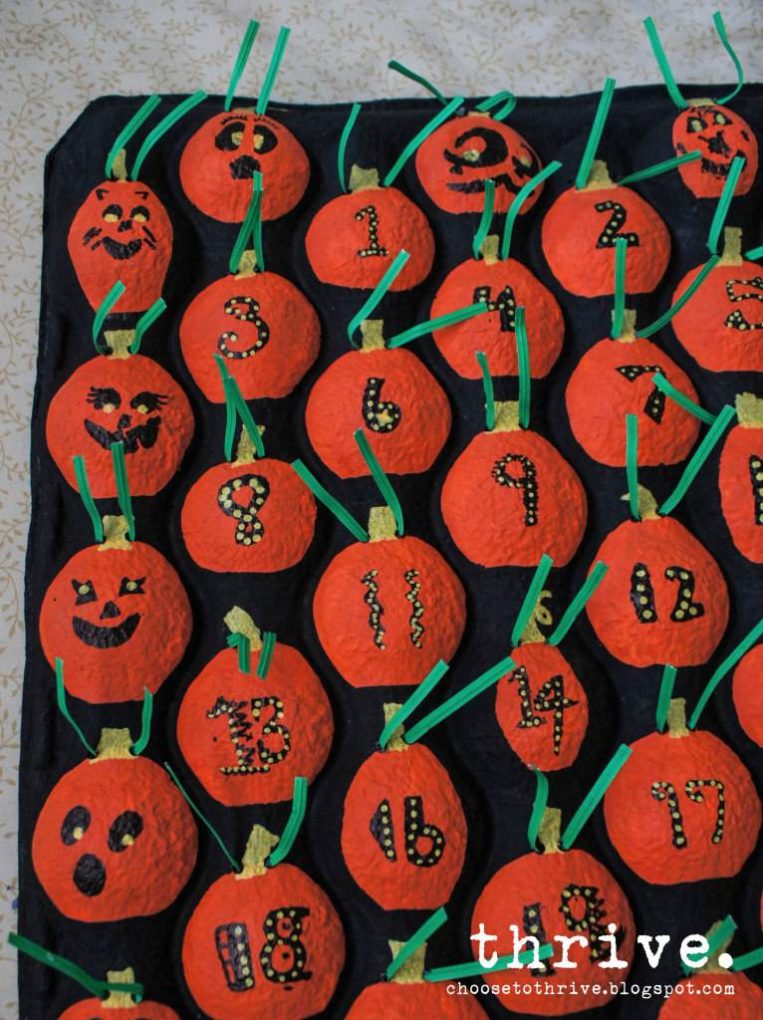
… so that your calendar looks a little something like this:

Tame those unruly twisty ties with a bamboo skewer or paint brush.

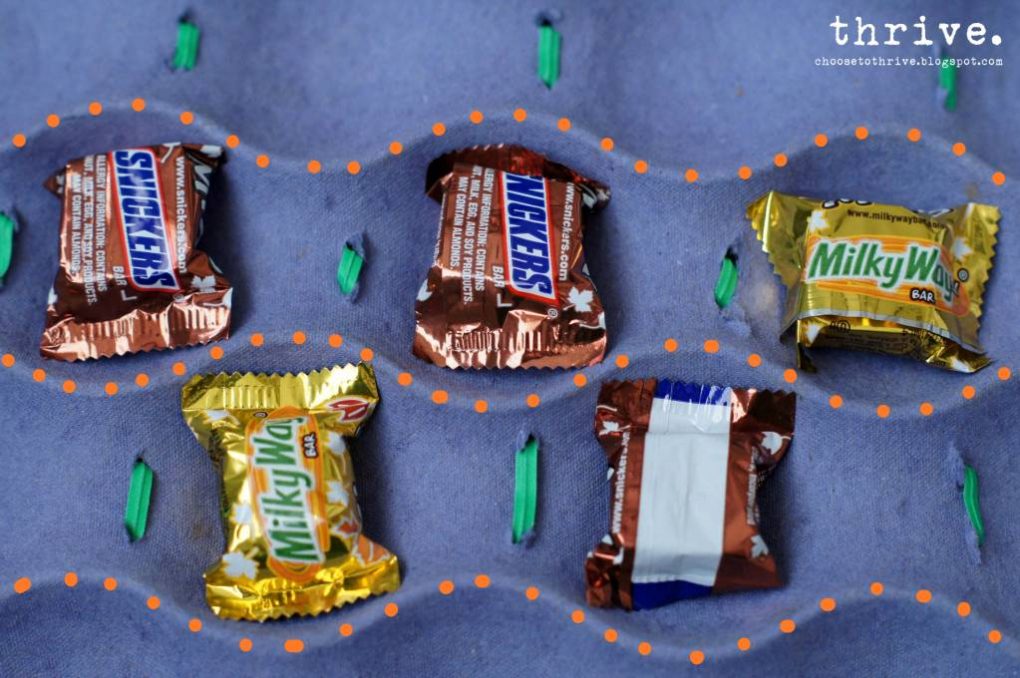
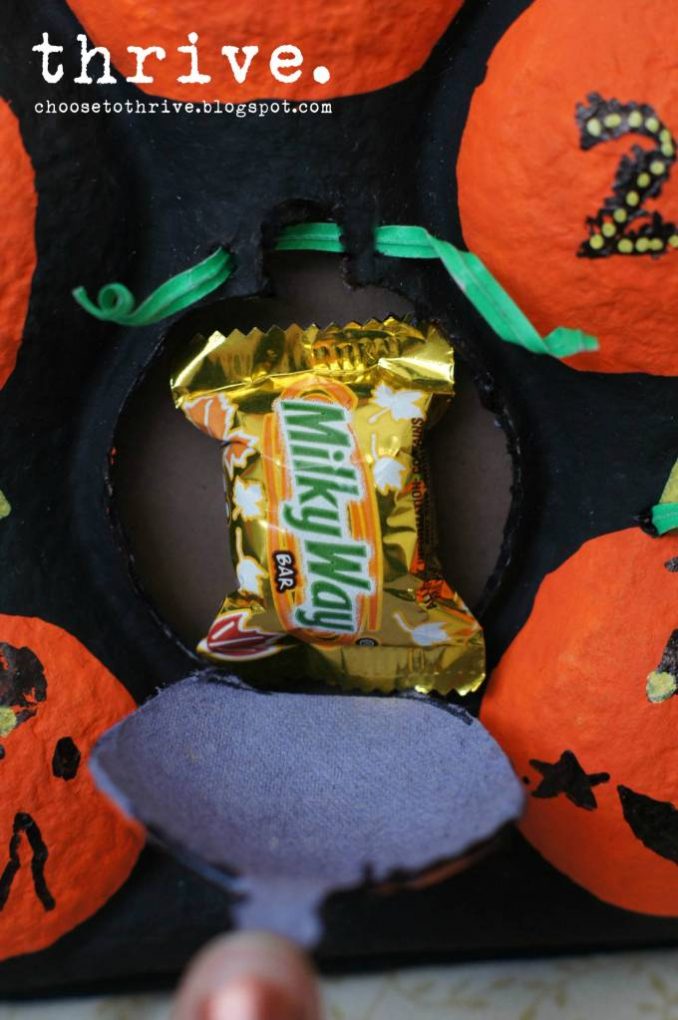
Time to add the treats! Flip the tray over and add some small treats, toys or stickers to each pumpkin back. Then carefully add school glue along the ridges (orange dots below) and sides of the tray …

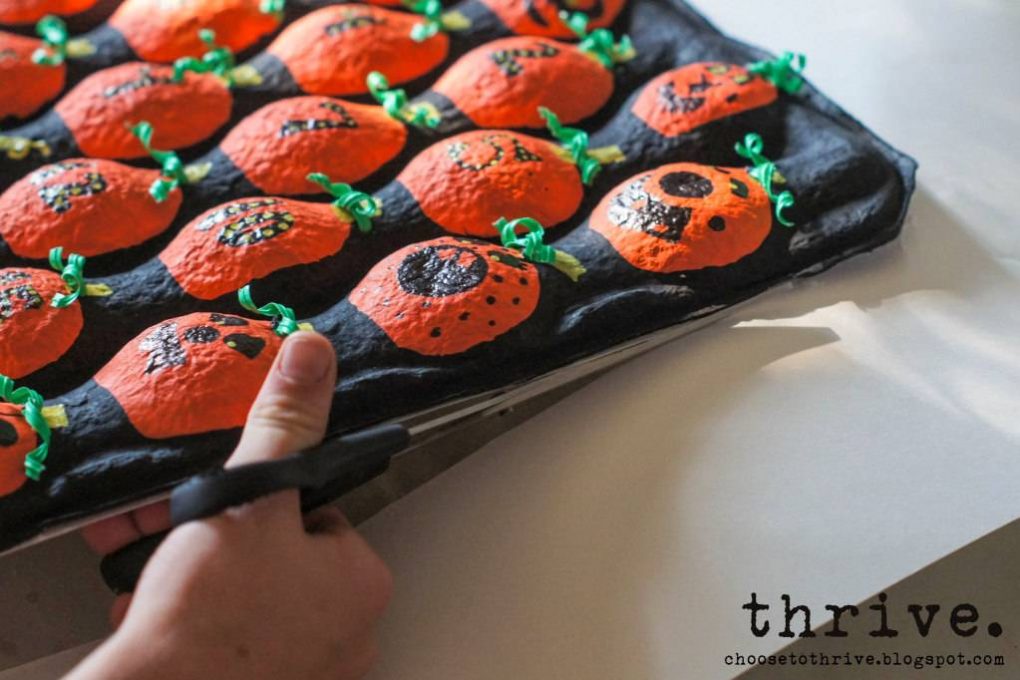
… lay the backing poster board or cardstock over top and gently weight the whole thing down for an hour. When dry, gently turn tray back over and cut away any extra paper or poster board from the back.

Punch two holes in the top with scissors and thread through some snazzy ribbon.

Yup, snazzy.

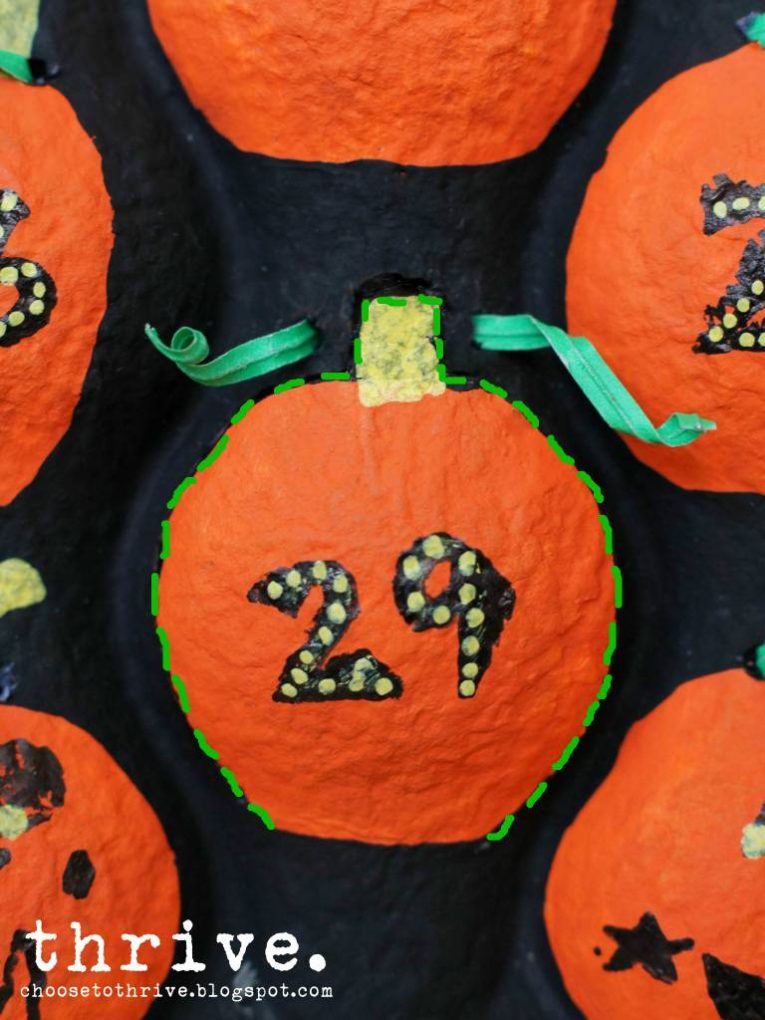
Your calendar is ready to be displayed! Starting on October 1st, you can “carve” each day’s pumpkin and enjoy a little treat one of two ways: 1) turn the calendar over and carefully remove the candy from behind — OR — 2) gently untie the twisty tie, carefully cut around the pumpkin and stem …

… open each pumpkin like a little clam shell and enjoy your yummy treats.

Retwist to close the pumpkin and you’re ready for the next day. (Of course you could cut all 31 pumpkin shapes ahead of time and just retie the little twisty ties, but I chose not to. I don’t trust my little ones to stay out of the treats. 🙂 So there you go – two ways to “carve” a Halloween Advent!   And if you’re looking for more fun projects like the ones below, check out Thrive’s holiday tutorial page.

How many of you are stocking up on Halloween candy?

20e59d96ecd7f4b5_halloween_candy_aisle_1_2_1

It’s the usual drill of buying bags, emptying treats into a bowl by the front door and then recycling the empty bags, right?

candy11

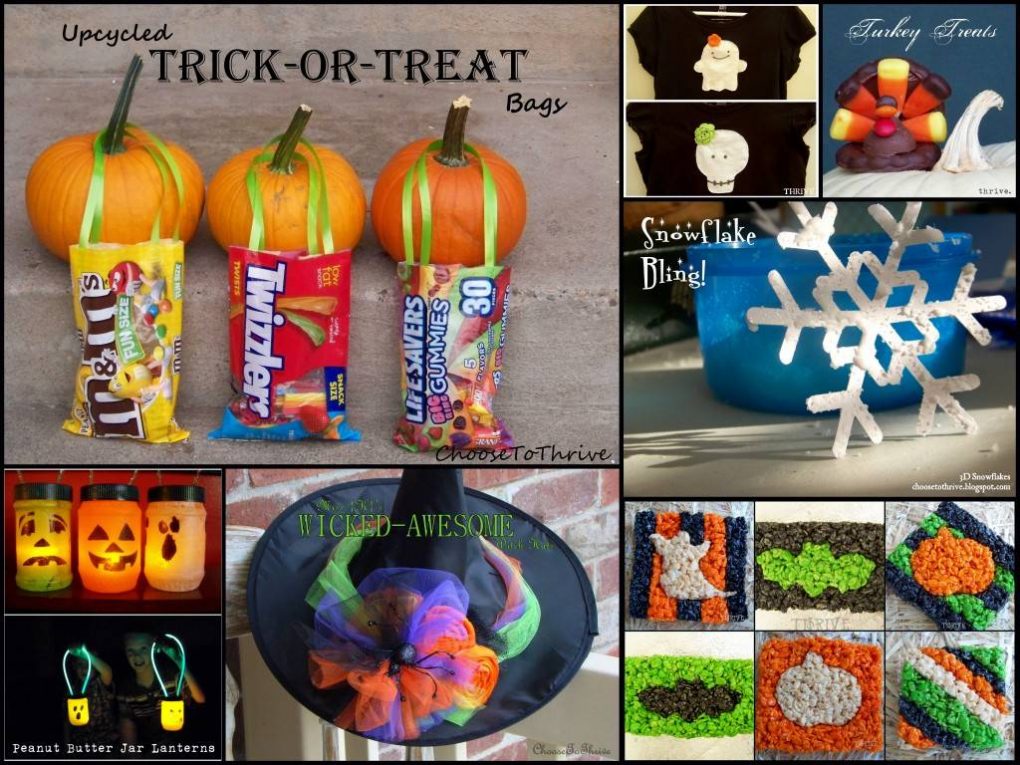
Wait! Don’t Toss That!

100_4921

Those bags got the candy to your house just fine – why not put them to use to round up candy from the neighbors, too?

Just cut handles from whatever you’ve got on hand — fabric scraps, ribbon, VHS tape, curling ribbon, whatever – and tape them in place with duct or packing tape.

100_4910

And that’s it. No buying treat bags. No bulky plastic pumpkins to store.

100_4905

And when this little princess is done with her treats, everything gets recycled or reused—no waste, no extra cost.

100_4896

Love that.

Candy bags?

October 2011 BLOG3-5

 It’s What Not To Toss this weekend!

Linking up to:
Skip To My LouCraft-O-ManiacC.R.A.F.T. *  Stories of AtoZ, Tip JunkieSugar BeeToday’s Creative BlogSassy SitesMy Uncommon Slice of Suburbia * Someday CraftsLil LunaWe Are That FamilyBlue Cricket DesignsThe Thrifty Home, * House of Hepworths, *Tidy MomWhipperberryKojo DesignsChic On A Shoestring, Momma’s Kinda Crafty, *Tatertots & Jello, Be Different Act NormalFunky Junk Interiors * I Heart NaptimeUnder The Table and Dreaming,

Chalk this quick little post up to impulse shopping at it’s finest. Sheesh.

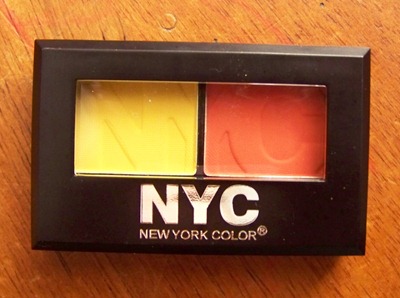
I was walking through Wal*Mart yesterday on my way to the toilet paper isle when this $2.24 wonder practically blinded me from cosmetics.

100_4945

Wow, that’s bright.

I am so, so not a make-up person — a minimalists at heart who skips make-up all together most days. But for some reason, the freakishly-bright-Halloween-hey-why-not mood came over me and into my cart it went. And while the kids where down for naps and I was supposed to be folding laundry had free time, I started playing around on my otherwise un-prepped and un-plucked eyes.

The result?

A little something I like to call  The Candy Corn Cat Eye

 October 2011 BLOG3

What do you think?  Kicky or creep?

Obviously I’m no 16-year-old YouTube make-up tutorial wiz, but for some reason I really enjoyed brushing wide strokes of garish color all over my eyelids with reckless abandon.

100_4970

And stepping outside my everyday routine makes me want to do other wild and crazy things today … like take my hair out of a clip, wax my upper lip and get some bangs-ha!

100_4965

Or maybe go someplace special with my all-dolled-up-self … like Target.

Ah, the power of make-up.

cat.1

So what are you doing for Halloween?

Do you dress up?

Do you do fun little things like wear funky socks, play with your make-up or drag out the black polish?

Discuss.

Linking up to:
DIY ShowOff Fall Festival, Skip To My LouCraft-O-ManiacC.R.A.F.T. *  Stories of AtoZ, Tip JunkieSugar BeeToday’s Creative BlogSassy SitesMy Uncommon Slice of Suburbia * Someday CraftsLil LunaWe Are That FamilyBlue Cricket DesignsThe Thrifty Home, * House of Hepworths, *Tidy MomWhipperberryKojo DesignsChic On A Shoestring, Momma’s Kinda Crafty, *Tatertots & Jello, Be Different Act NormalFunky Junk InteriorsI Heart NaptimeUnder The Table and Dreaming

100_4305-1

Another holiday, another chance to blow $5 on Halloween t-shirts at Old Navy or Target or Walmart or whatever.

But you know me—that’s $30 bucks I’d rather not shell out. Plus, I love the idea of making my own designs and using up my never-ending fabric stash.


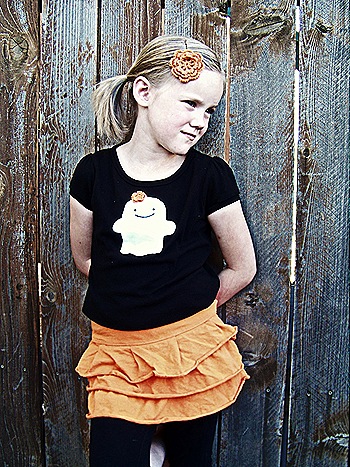
Besides, how could you not want to make your own when you have ridiculously cute crocheted flowers like these to work with?

shirt.2

I scored these beauties a few weeks ago at a bloggers meet-up from the awesome ladies at Riley Blake Designs. As soon as I saw them I knew they’d be perfect for Halloween sewing.

You’ll love how easy it is to make your own tees inspired by favorite prints, fabrics or clothes already in the closet—a perfectly coordinated outfit that comes together in 15 minutes flat.

Want to make your own?

To make this project you’ll need:

100_4209

As for the actual shirt designs, I looked no further than the RBD catalog and fell in love with this fun Halloween print.

riley blake

I loved the ghost and skeleton and made up a pattern to match. (Although I can’t wait to make the owl, spider and bat next!) And if I wasn’t in the middle of my THRIVE challenge, I would so be making matching skirts out of this fabric for both my girls.

*Swoon*

I used plain ‘ol shirts as the base, cut my Halloween shapes out of scrap t-shirt material and just straight stitched around the edge.

Sept 2011 BLOG3-1

And the best part is that you can use shirts that have existing designs. I just pinned right over top of this bird and stitched away—no interfacing, no fusible webbing, no ripping out a bunch of embroidery.

Sept 2011 BLOG3

I wanted the little faces to match the fabric as much as possible so I cut out the eyes and mouth with an craft knife, traced the design with my nicest glue BIC pen …

100_4261

… and then carefully painted over the pen marks using the only black paint I had on hand: interior latex satin paint.

100_4264(Yeah, wasn’t actually kidding about using house paint peeps. Rock What Ya Got., huh? 🙂

Flowers were hand switched in place after the paint was dry.

Sept 2011 BLOG3-3

L*O*V*E*

100_4362100_4360

Kid #3 loves hers and is already plotting which homemade tights to wear with her new Halloween digs tomorrow.

Sept 2011 BLOG3-5(Want to make your own tights? Click here.)

Right now she’s leaning towards skull/green flower shirt + black skirt + Dr. Gru tights + Wizard of Oz shoes.  Oh boy.

So there you go! Have fun making your own Halloween tees to match your favorite skirts, pants or fabric prints!

shirt.3

Linking up to:
Skip To My LouCraft-O-ManiacC.R.A.F.T*  Stories of AtoZ, Tip JunkieSugar BeeToday’s Creative BlogSassy SitesMy Uncommon Slice of Suburbia * Someday CraftsLil LunaWe Are That FamilyBlue Cricket DesignsThe Thrifty Home, * House of Hepworths, *Tidy MomWhipperberryKojo DesignsChic On A Shoestring, Momma’s Kinda Crafty, *Tatertots & Jello, Be Different Act Normal * I Heart NaptimeUnder The Table and Dreaming