Category

Kids

Category

Thank you so much for all the love you showed my good friend Brandi. Reading how much she’s touched each of you made me float.

***

As I sit here tonight, Thanksgiving is two weeks away.

Tonight I’m sharing the first of four holiday posts as my family and friends are getting ready for Turkey Day: Being GratefulDecorating Without DollarsDressed for the Occasion and Stuffed! (all about the food!).

This year in particular I’m making a deliberate decision to reclaim Thanksgiving as a holiday in it’s own right and not just the first day of Christmas. I want to linger on thankful, relish in blessings and openly rejoice for everything I have instead of what I think I need. When I’ve taken this approach in year’s past, I find I’m much less likely to be depressed by what we’re not spending on Christmas and recognize how rich and full my life is right now.

So to celebrate today’s theme of Being Grateful, I’m so excited to have another bloggy friend, Becky from Creatively Content, here from half way around the world to share a beautiful Thanksgiving tradition she enjoys with her family.  She writes that her theme for this season of her life is to ‘use what we have’, and I can tell you that her blog is a beautiful testament to just that.

becky

Becky is an American blog momma living with her husband and three beautiful children in western Turkey near the Greek border. I’m always inspired by Becky’s faith, grace and creativity as she builds a wonderfully unique life for her kids.  I hope you’ll love the Thanksgiving Mailbox that she’s sharing today as much as I do.

*************************************************************************************

Hi everyone at THRIVE! I’m Becky from Creatively Content.

Creatively Content - Mozilla Firefox 11112011 120507 AM.bmp

The Thanksgiving Mailbox started because my girlies and me were sitting around making envelopes out of an old magazine and they played mail for a LONG time, sending sweet love notes to everyone in the family.

DSC00789

So I thought it would be fun to have a Thanksgiving mailbox where we wrote notes every morning starting 2 weeks before thanksgiving of things we are grateful for and put them in our mailbox. We used heavy duty cardboard for the bottom and the sides and a cereal box to shape the middle and back.

November 8,2011

The stand came together using cardboard circles and toilet paper tubes.

DSC00820-1

And everything was held together using hot glue.

The kids tackled the decorating with strips of magazine pages + mod podge since my scrapbook paper supply is small and precious.

November 8,2011

The envelopes are stored on the back of the mailbox in a little pouch with 5 little cards for each of us in the family to write what we are thankful for. 

One special thing I added was that 5 envelopes have each of our families initials on it and so each of us will write (some with help) 😉 one thing we are grateful for about that person. 

DSC00808-1

On Thanksgiving day we will open up all the 14 envelopes and remember what we were grateful for and each have our own envelope to open and see all the special things our family has to be grateful for about us. (The kids will love to get their own mail!  We have one for Jesus, too. 

Thanks Nike for including me in your Thanksgiving posts and hope you come and stop by Creatively Content.

Happy Thanksgiving everyone!

    **********************************************************

You’re so welcome, Becky! I’m making one of your mailboxes for Family Home Evening with my Dirty Half Dozen.

I’ll hope you’ll stop by and say hi to Becky this week. Her corner of the world is literally thousands of miles from craft stores or fabric shops, yet she always finds amazing ways to use what she has and make do with what she doesn’t. Her blog is full of projects that celebrate the spirit of recognizing and being thankful for everything we do have in our lives.

Case in point:

No theatres to watch movies? Or too expensive to hit the theatre? No problem.

Becky just whipped up the coolest invite-the-neighborhood-over-and-watch-Toy-Story-2-kids-theatre.

November 2011 BLOG-4

No cool race car floor mat? No problem.

Becky made one on the floor using masking tape. Genius.

becky.5

No sewing machine? No problem.

Becky just whipped up this adorable tiered skirt for her daughter without one. Seriously.

becky.4

Thanks again Becky for sharing your Thanksgiving Mailbox with us!

******************************************************

And to all you out there in blogland…

… tell me …

what are you GRATEFUL for right now as you get ready for THANKGIVING?

(Can’t wait to show you part 2 of the THRIVE Thanksgiving series on holiday outfits. Like I mentioned at the end of Brandi’s post, this has been the happiest little accident ever.)

Share this:

After weeks of waiting, Fall decided to show up this weekend.

{About time. Sheesh.}

The only problem is that my little girl is awfully short on fall and winter clothes. So instead of heading to the store, I searched through my boys’ outgrown clothes and fabric stash to come up with new duds without spending a dime.

Here’s what I had to work with:

October 2011 BLOG2-4

a boring sweater, a couple ripped pairs of khakis and a stretched out camo henley.

Screams “girly,” huh?

#1 – Sweater to Cardigan

I started by removing the collar (1) and cutting down the center (2) to make a cardigan shell. (I put tape down first and then cut the sweater to prevent major fraying. I pulled the tape off carefully and gave the edges a quick zig zag.)

October 2011 BLOG2-8

I made the easiest seam binding ever (3) by cutting the bottom edge of a t-shirt below the seam – no need to fold or iron. The seam binding was pinned in place (4) and then stitched in place with a straight stitch.

I could have stopped right there, but wanted to add a little more frill. I played around with the look and chose the tight ruffles instead the loose folds.

October 2011 BLOG2-9

And those ruffles were a cinch to make: I cut 1” strips of t-shirt fabric and ran a gathering stitch down the middle. The ruffles were pinned on top of the binding and then stitched in place.

October 2011 BLOG2-12

The result was a cute little cardigan with plenty of ruffles and spunk.

#2 – Cargo Pants to Skirt

Next up with a simple skirt with using as much of the existing hems from two old pairs of my son’s cargo pants as possible.  The legs were cut off leaving the top part of the pants: waistband down to just below the front zipper. To make the skirt piece, I sewed pieces of two pairs of pant legs together with the seems out (1) and used a gathering stitch along the top to create just enough gather for the skirt piece to fit the pants(3).

 October 2011 BLOG2-3

The skirt piece was pinned to the pants (3) and stitched in place with a straight stitch for a shabby look (4). After a quick run through the wash, the seems softened up for the casual look I was after. (Of course you could always skip the rough look and keep those seems on the inside, too. )

Twenty minutes later I ended up with an upcycled skirt that just happened to match perfectly with that cardigan.

skirt

Maybe some of her brother’s rough ‘n’ tumble attitude came through in the fabric, eh?

#3 – Boys Henley to Girls Embellished Tee

The last refashion project started with this Old Navy camo henley. It was the right length, but too wide (1). I grabbed a shirt from my daughter and used it for a template, trimming away the extra fabric on the sides (2) and shortening the sleeves.

October 2011 BLOG2-10

  I sewed one long seem from the shirt cuff to the bottom hem with a zig zag stitch (3) and added some rosettes to the collar to soften the look (4).

And total cheater alert here: I hot glued the rosettes and then hand stitched them to the shirt. I know you’re not supposed to do that, but I was in a hurry and it worked fine. This shirt has gone through the washer and dryer over a dozen times and is holding up great.

This has to be one of my favorite girls shirts. Ever.

100_4935-1

100_4803-1

So …

take a look at your kids’ closets, out-grown clothes piles and fabric stash and see what you can whip up. 

What you’re ready to toss may just go …

October 2011 BLOG2-6 October 2011 BLOG2-7

October 2011 BLOG2-11

You might be surprised how many adorable upcycles /refashions you’ll come up with from seemingly nothing.

Linking up to:

Skip To My LouCraft-O-ManiacC.R.A.F.T. *  Stories of AtoZ, Tip JunkieSugar BeeToday’s Creative BlogSassy SitesMy Uncommon Slice of Suburbia * Someday CraftsLil LunaWe Are That FamilyBlue Cricket DesignsThe Thrifty Home, * House of Hepworths, *Tidy MomWhipperberryKojo DesignsChic On A Shoestring, Momma’s Kinda Crafty, *Tatertots & Jello, Be Different Act NormalFunky Junk Interiors * I Heart NaptimeUnder The Table and Dreaming

Thanks everyone for your patience this week while we got everything transferred over to the new system.(Thanks Jon & Eric!)  It’s soooo nice to be blogging on a computer that isn’t 8 years old.  Now back to the regularly scheduled programming. 🙂

***

I believe the children are the future. Teach them well and let them lead the way …

Sorry. 80’s tangent.

What I’m trying to say is:

When you find a girl with mad crafting skills, hand over the glue gun and get out of her way.

Check out this hat!

hat.17

I so wish I could claim credit for this awesome number, but the round of applause goes to this talented, 13-year-old rock star, Miss{K}.

miss k

Isn’t she sweet? I’m lucky enough to be neighbors with Miss{K} and her amazing mama Miss{A}.

When Miss{A} showed me these pictures, my jaw dropped. Seriously people … Miss{K} is 13 and she just “threw these together.” I asked Miss{A} if I could share the incredible hats that Miss{K} put together for a local Halloween craft festival they went to over the weekend.

I love this project since it can double as decor and a great costume. I’m not big into dressing up for Halloween any more, but I’d totally wear this all month if I had one.  Seriously … if you see me at the grocery store you’ve been warned. The other thing I love is that you could easily adapt these hats to Rock-What-Ya-Got and make your own version using items you already have on hand.

Multi-Colored Tulle Hat

hat.11

Miss {K} loosely wrapped orange, purple and green tulle around the brim and hot glued it in place. The tulle “flower” was made by tying regular bows out of the same colors of tulle and hot gluing them in place. Two rosettes were made from the 1”satin ribbon and tucked in beside the bows, a little scrap of black tulle stands in for a leaf, and a glitter spider adds the  final touch.

Black Widow Hat

hat.14

Same fun look with black and red glitter tulle using a braided band of tulle around the brim.

Purple Potion Hat

hat.15

Miss{K} glued the tulle in bunches around the brim, added a tulle bow and a finishing black glitter spider.

I totally want all three. For me.

*Swoon*

hat.12

Hopefully Miss{K}’s awesome hats will inspire you to make your version using items from around your house, Rock-What-Ya-Got-style. (Or even from the store, tulle and ribbon are pretty cheap).  I’m so planning on making one of these for me and my girls using what we have on hand: scrap t-shirts and ribbon in the same colors.

If you make one, send me an email or post it on Thrive’s facebook page—I’d love to see it!

Thanks again Miss{K} and Miss{A} for sharing your wicked-awesome hats!


Linking up to:

DIY Show Off Fall Festival, Skip To My LouCraft-O-ManiacC.R.A.F.T. *  Stories of AtoZ, Tip JunkieSugar BeeToday’s Creative BlogSassy SitesMy Uncommon Slice of Suburbia * Someday CraftsLil LunaWe Are That FamilyBlue Cricket DesignsThe Thrifty Home, * House of Hepworths, *Tidy MomWhipperberryKojo DesignsChic On A Shoestring, Momma’s Kinda Crafty, *Tatertots & Jello, Be Different Act Normal * I Heart NaptimeUnder The Table and Dreaming

These are my daughter’s church shoes. She’s going through a glitter phase right now.  A biiiggg, happy glitter phase.

100_4368

She’s got a red Wizard of Oz pair that look just as bad. Time to send those shoes over the rainbow straight to the trash, right?

100_4370

Wait! Don’t toss those!

With a little spray paint love, those shoes may just have a few heel clicks left in them.

Enter Krylon Glitter Blast spray paint. Or as I like to call it, the Oh-My-Heck-This-Stuff-Is-Expensive-And-Better-Work-Miracles spray paint.

glitterblast

(And no this isn’t a sponsored post. Bummer.)

I’ve seen the buzz all over blogland about this stuff and wondered if there was anyway it could save my girl’s shoes. 

I had serious reservations about buying a can since you guys know that spending money on crafts this year is a no-no in my house.  But I totally struck out at all FOUR of the thrift stores in my area … and I was staring down at least $12 for another cheapy Walmart pair with the same glitter ratio … so spending $6 after coupon {cough, choke} on a can of magic glitter might be the smart way to go after all.

So I did. And it worked!

A little painters tape around the inside and ribbons …

100_4376

… and a few squirts of paint over the whole thing …

… and a little black sharpie action on the vinyl bows …

… and voila!

100_4391

Rainbows appear, bird sing, shoes saved. I don’t think we’re in Kansas anymore, Toto.

Even though this paint is a little touchy to use, it still worked great. I loved how the shoes turned out and am so glad I gave it a try.

100_4393

I only bought one can to start since it was so pricey, but  I can’t wait to grab a can of the red and get those Dorothy shoes back to their yellow-brick-road best.  And I love that I still have lots of paint left and can touch up her shoes whenever I need to.

And for those of you without glitter shoes, this technique will work for any pair of shoes.

That means you can rock cheap shoe refashions for everyday use, Halloween costumes, or even school dances.

Here’s a few Man-Behind-The-Curtain tips to save you a few headaches:

1. Use a coupon. {Oh good heavens use a coupon.} My can was $6 after the coupon and is only half the size of a regular can of spray paint.

2. Use short bursts. Long sprays will clog your nozzle in two seconds flat.

3. Watch the pressure. This stuff has a nasty habit of getting too much pressure built up and oozing glitter paint out the top. To stop that from happening, pull up lightly on the spray button whenever you hear a hissing noise. This seems to release the pressure kind of like the valve on a pressure cooker. My friend warned me about the oozing problem and recommended the pulling-up-on-the-cap trick. Worked great.

4. Use two light coats for the best coverage. As I’ve gone back through these pics I’ve liked the coverage, but think the toe area could use a touch more paint. I’m going to give them a quick recoat this afternoon.

5. Be sure to use the clear coat sealant. The paint will wear off very quickly without it.

So there you go.

Scuffed up shoes?

Sept 2011 BLOG4-8

It’s What Not To Toss this weekend!

This week while my kids were off track, we drug out the food coloring, cookie cutters and went totally crazy with dessert staple.

100_4570

I mean holy-cow-that’s-a-lot-of-food-coloring crazy.

Behold the Extreme Home Makeover edition of the basic Kellogg’s Rice Krispy treat.

Sept 2011 BLOG4-5

*EEK*

I kinda love them.

The end result was crazy-bright, marshmallowy mash-ups that are so stinkin’ cute and not much harder to make than the original.

100_4584

The sky’s the limit here for the colors, patterns and shapes you could use. Here’s what we came up with:

Ghosts & Stripes


100_4593

Bats


100_4605

Pumpkins & Stripes


100_4589

Plain Stripes & Even Quilt Block Shapes (ha!)


Sept 2011 BLOG4-6

Mini Bites


100_4596

Once you get started it’s sorta hard to stop.

100_4568

Everyone knows how to make these so I’ll skip the full tutorial thing. However, there were a few tweaks I made to pull these off that I’ll pass along:

1. To get the color super saturated, you’ll need copious amounts of food coloring – like a full teaspoon of the Wilton jells for most colors. For the black, it’s more like a full jar … um, seriously.  (Try not to think about it … it’s only once a year. 🙂

First batch with 1/4 tsp. food coloring jell: too pastel-y

100_4523

Second batch with a generous 1 tsp. jell: much better

100_4524

2. The other trick to getting a solid color is to use half the amount of cereal the original recipe calls for. Here’s what I wound up doing:

100_4527

3. To make the stripes, cut long strips from solid blocks of color (like on the tray above) and mush them together.

Sept 2011 BLOG4-2

This worked much better than taking small clumps of each color and trying to form it by hand.

100_4602

4. Use a generous amount of non-stick coooking spray on the cookie cutters. You’re welcome.

5. Let the cereal cool for 10-15 minutes at room temperature before cutting. That way the cereal mix will be somewhat set, but easier to work with. Once your shapes are made, go ahead and refrigerate to set.

Have Fun!

100_4612

Happy Monday everyone! I’m so excited to be blogging from my hometown in Washington following a 13 hour drive Saturday with our Dirty Half Dozen.

And thanks to a little planning, the trip was actually … awesome.  The kids did great, we made good time and even managed to save enough money on travel snacks to be able to afford gas for the trip home–ha!

So this week I’ll be sharing some THRIVE friendly tips for surviving those summer road trips without breaking the bank or loosing your mind.  And as always, you should be able to pull together these easy snack ideas without a run to the store

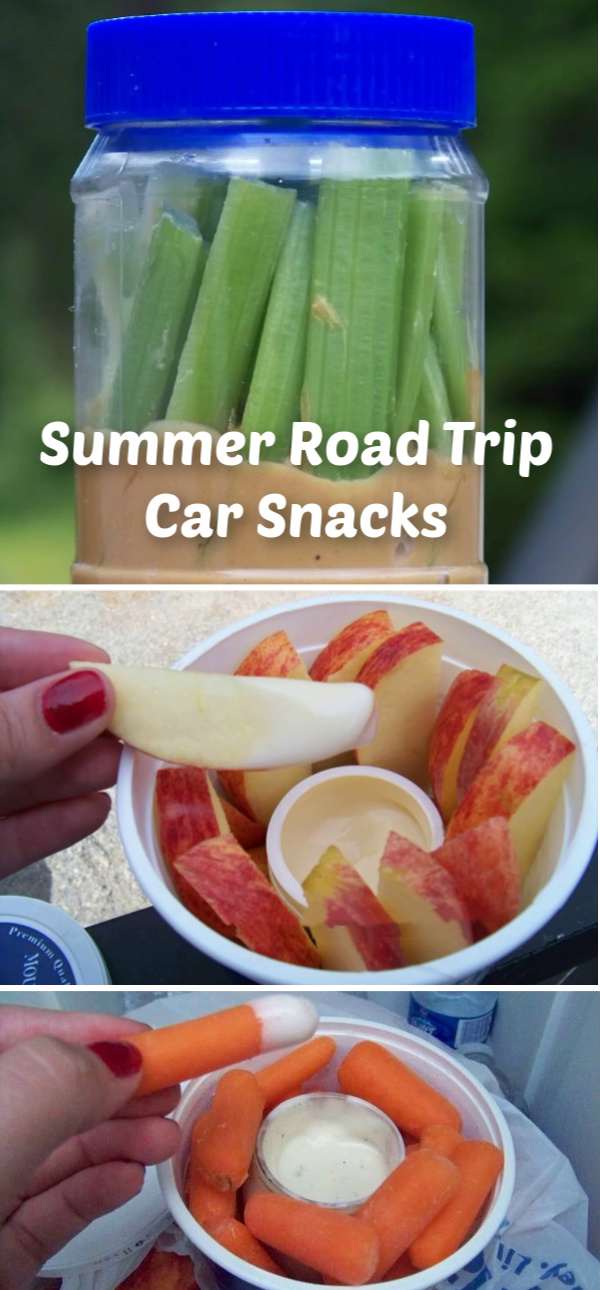
Today’s feature: 3 easy snacks for the road or camp ground.

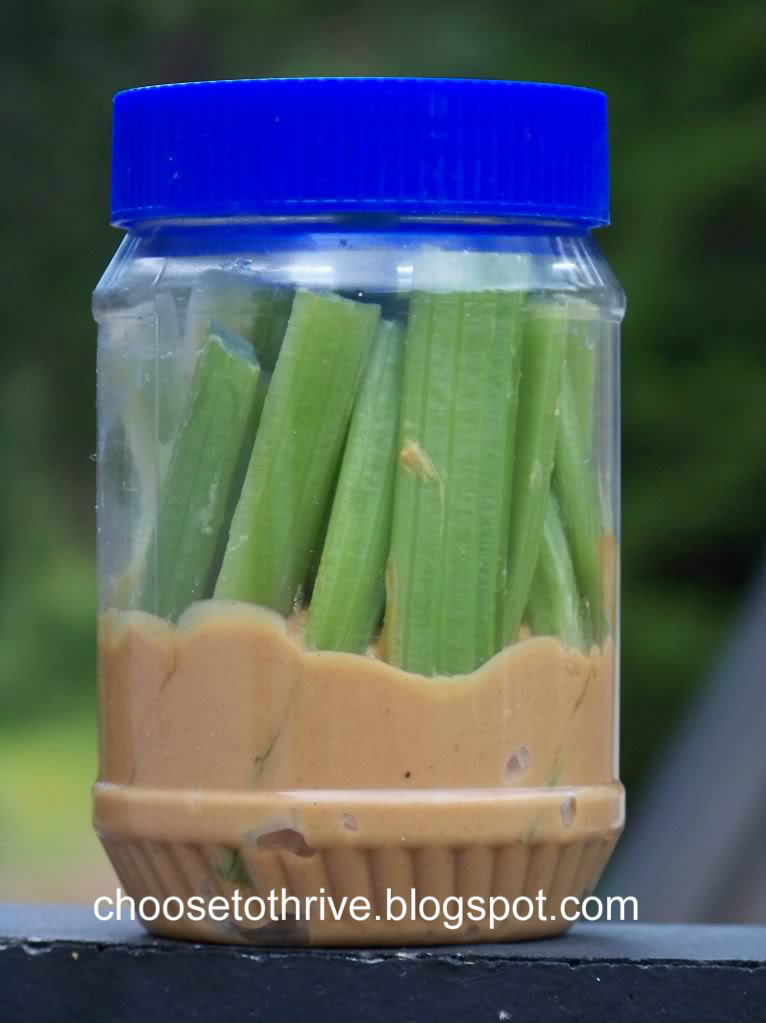
1) Empty peanut butter jar + celery sticks

celery sicks

Finally a way to have p.b. and celery without the mess. Fill an empty jar with an inch or two of peanut butter and then fill with celery sticks. Kids get a yummy snack without sticky fingers and the car stays free of kid schmeer.

2) Empty sour cream container + empty baby food jar

Carrot Road Trip Snacks

A quick way to pull off carrots and dressing without the dragging the jar along or buying those expensive to-go dressing singles.

3) Empty 32 oz. yogurt container + single serving yoplait

Easy peasy fruit slices and dip. So yummy straight from the cooler at a camp site or rest stop.

Delish.

Apple

So there you go–easy straight-from-the-recycling-bin solutions for eating well on the road.

I’ll be back on Wednesday with some great ideas for keeping the kids entertained.

~ Nike

PIN THIS TO SAVE FOR LATER

Summer Road Trip Car Snacks

firework.9

Ya know that 4th of July kick I’ve been on?

Yup … still there.

I’ve been watching for fun holiday clippies for my girls to go with their new flag tees (more on those later). And while there are so many cute flower-corker-ribbon-tulle clippies out there, I was looking for a bit of a change.

Enter the Firework Clippie.

fireworks.4

Cute and shabby and oh-so easy to switch up for any holiday or outfit.

Want to make your own?

You’ll need your nicest, faded-out Sundance shirt, old-for-painting-only white polo and ratty Superman shirt.

firework.1

Or whatever.  🙂   Rock What Ya Got, right?

And you can make these in minutes.

Cut red, white and blue shirts in 0.5” x 4” lengths. Stack 12 strips together and tack together in the center with a few stitches.

firework.5

Tie a 3” strip around the middle and glue in your clip.

firework.6

Easy. Quick. Done.

fireworks.7

Firework clippies perfect for those hometown parades, pancake breakfasts and firework displays.

Happy Crafting!

Signature

Linking up to:

thecsiproject.com-logo-150 tidy.momWBwwatttandj

I have a love/hate relationship with little girls’ dresses:

dress.11

love the adorable high waist and full skirts that twirl perfectly.

hate that those cute skirts get too short and the bodice too tight with a good growth spurt.

Time to toss, donate or hand-down, right?

Wait! Don’t toss that!

Those skirts can last a few more months on your little girl with the help of a seam ripper and some fabric scraps.

To save this too-short, 18-24 month dress and make it work for my 5T little girl,  I removed the skirt and all the fluffy layers of tulle from the bodice using a seam ripper.

dress.13

For simple, lightweight fabrics all you need to do is add a simple elastic waistband by rolling the top hem and making a casing.

But since mine had multiple layers that would be too bulky for a rolled casing …

100_1012

… I decided to make a casing out of a left-over sheet and attach it to the top of the skirt.

dress.42

It was easy after that to open the casing, thread through some reclaimed elastic and stitch the waistband closed.

dress.43

Start to finish was less than 30 minutes.

And the end result?

100_1140

A cute summer skirt for my 5T girl with enough length on it to last her through next summer.

So go dig those outgrown dresses out of the donate pile and have a second look.

Outgrown Dress?

dress.44

It’s What Not To Toss this weekend.


Signature

metal stars

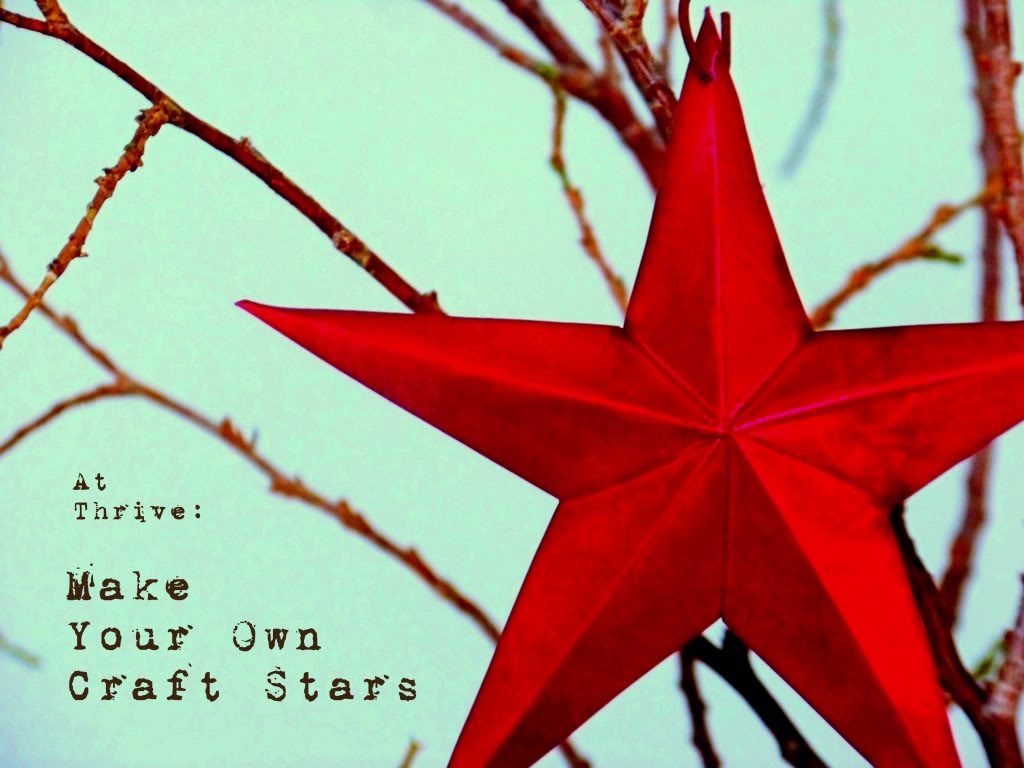
Anyone else in love with the metal stars all over craft stores, decor catalogs and blog land?

I have one—just one—in my house and have been pining for more, especially for holiday decorating.

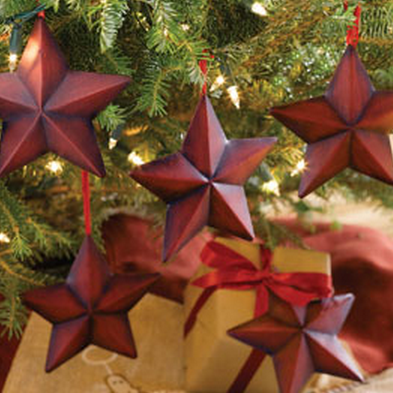
When I saw these on the At Home America website, I loved everything about them but the price:

Stars from At Home America

$3 each? Really?

Since spending money is a no-no in my house right now, there was only one thing to do:

Grab an old disposable baking pan and get to work.

And the result?

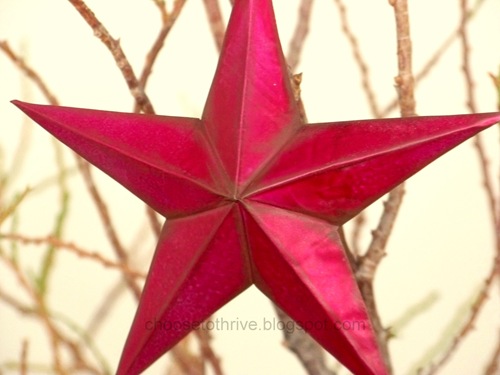
metal stars for ornaments

Adorable metal stars for ornaments, gift tags and decor straight from the recycling bin.

Easy, fast and FREE with no sharp edges or points.

Want to make your own?

For this project you’ll need:

star.29

… and …

star.53

… and …

star.54

As always, I hope you’ll Rock What Ya Got and make this project work for you using what you have on hand already.

********************************************************

Begin by removing any border from the pans and smoothing them out as much as possible.

star.1(This was as good as I could get my pans and they turned out fine.)

Print out a star to use as a template for cutting and tracing.  I found my image here.

Adhere your template with a small piece of double-stick tape …

star.3

… then trace along all the lines using a ball point pen and a ruler.  Yes, you need the ruler.

star.9

When you remove your template it should look like this:

star.34

Carefully cut around your star leaving an 1/8” border all the way around …

star.28

… tapering the border near the points …

… and snipping up to the tracing line on the inside points of the star.

Fold the star over and go over all of the trace lines with the lid of the pen to make the lines both easier to see and bend.

star.35

To finish the edges, place the ruler just below a trace line. Starting at tips and working towards the center, carefully lift up along the border …

star.25

… and fold it over the ruler lip.

star.30

Remove the ruler and press the border down first with your fingers …

star.2

… then smooth completely with the pen lid.

The shape of the star is a series of mountain and valley folds.

Starting from the center, fold the short lines in between the points downward to make valley creases.

star.40

To shape the points, push up from the back of the star along the center seam, working from the center out.

star.43

When you’re done, your star should look like this:

star.42

To make the ornament hole, gently twist a small eye screw in one of the points.

star.8

You can leave your stars plain …

star.39

…  or hit them with a coat of primer and spray paint for a smooth, seamless finish …

star.7

… or sponge on a coat or two of craft or house paint for rustic, weathered look …

star.50

… or rock out your favorite dollar store nail polish for a little bit of BLING.

star.4

My genius six-year-old actually came up with the nail polish idea.  She snuck off with one of the stars and returned a few minutes later with this little beauty:

star.37

Love, love, love all of the paint options!  Have fun picking your favorite!

**********************************************************

A few THRIVE tips to save you some headaches:

1. What if I don’t have any disposable baking sheets lying around? Will aluminum foil work?

Not really. See?

star.44

I tried several different thicknesses and it never was stiff enough to hold it’s shape well.  The star above was with eight layers which is about the most you can cut without the layers separating horribly.  You really do need the stiffer material.

2.  Is there a shape or pan size you recommend?

I used old cake pans like these to make my stars since it was all I had.

star

But, if you are going to buy pans to make this project, I’d recommend using a disposable oven liner if you can find it. You get the most bang for buck with that size and have minimal waste.

100_1730

The price is pretty cheap either way:

star.1

The dollar store carries pans like this, too. Just stay away from the deep-sided pans with heavy grooves in the bottom.

3. How big (or small) can you make these things?

The only real limit is the size of baking pan you can find–the oven liner pan will make a 12” x 12” star easily. On the small end, I wouldn’t go much smaller than 2-3” tall.  Any smaller is too much of a pain to work with.

I made two sets of ornaments for my tree.  Just for comparison, here they are next to a graham cracker box.  The scale was perfect.

star.38

4.  One last thing … print out your template 130-150% of what you want the finished size to be.  The folding and dimension will make your finished star shorter/smaller than the template.

*******************************************************

Wishing you and your family happy holiday decorating!

star.36

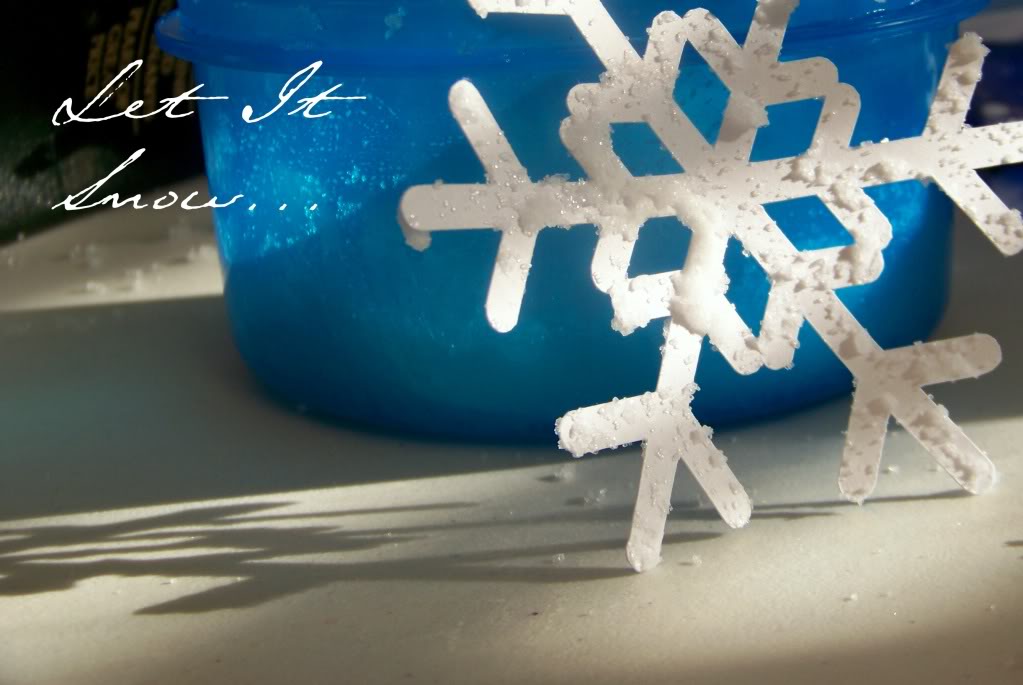
Happy Friday everyone! I’m so excited to guest blogging over at Ucreate with Kids, one of my favorite new blogs for fun projects to do with kiddos. Come stop by for a quick, easy and flat-out-free project to do with your kids on a lazy weekend or afternoon. Hope to see you there! Let It Snow!